Category: Expert Guides and Tips

Explore our expert guides and tips for power tools, home improvement, lawn and garden projects, and more. Get step-by-step instructions, valuable insights, and practical advice to tackle your DIY projects like a pro. Discover the best techniques, tools, and strategies to enhance your skills and achieve remarkable results.

  • Which Spark Plugs for 2004 Crown Victoria P71

    Which Spark Plugs for 2004 Crown Victoria P71

    The Ford Crown Victoria P71, also commonly known as the “Crown Vic,” is a venerable sedan that has earned its reputation primarily as a police and fleet vehicle. Introduced by Ford Motor Company, the Crown Victoria P71 embodies durability, reliability, and robustness. Known for its spacious interior, powerful V8 engine, and rear-wheel-drive layout, it has been the vehicle of choice for many law enforcement agencies across the United States. This model, the 2004 Crown Victoria P71, continues the legacy with enhancements in power and performance and is especially notable for its longevity, often surpassing hundreds of thousands of miles in service with minimal maintenance. Lets find out Which Spark Plugs for 2004 Crown Victoria P71.

    History and Significance of Ford Crown Victoria P71

    The Ford Crown Victoria P71 has a rich history and significance ingrained in American automotive culture. Introduced in the mid-1990s as a part of Ford’s Panther platform, it quickly became synonymous with law enforcement and taxi services, owing to its sturdy construction, powerful engine, and ease of maintenance. The “P71” designation refers to Ford’s police package, distinguished by its enhancements for heavy-duty use, including an improved suspension, cooling, and electrical system. 

    Over the years, the Crown Vic, especially the 2004 model, has gained a cult following among car enthusiasts and collectors. Its significance lies not just in its ubiquitous presence on American roads, but also in its portrayal in numerous films and television series, further cementing its iconic status. Despite ceasing production in 2011, the Crown Victoria P71 symbolizes American resilience, reliability, and functional design.

    Performance Specifications

    The 2004 Crown Victoria P71 is powered by a 4.6-liter V8 engine that delivers 250 horsepower and 297 lb-ft of torque. This robust engine is paired with a 4-speed automatic transmission that provides smooth and responsive gear changes. For a vehicle of its size, the Crown Vic P71 offers remarkable acceleration and power, reaching 0 to 60 mph in just 8.1 seconds. 

    The car’s fuel economy is relatively modest, with an EPA rating of 14 mpg in the city and 21 mpg on the highway. However, this is understandable considering its high-performance nature and the heavy-duty usage it’s designed for. The Crown Vic P71 is also renowned for its impressive handling capabilities, thanks to its rear-wheel-drive layout and sturdy suspension. Its braking system is robust and reliable, ensuring safety in high-speed pursuits or emergency situations. 

    Overall, the 2004 Crown Victoria P71 delivers a well-rounded performance package, making it a reliable choice for fleet and personal use. Despite its age, this vehicle still holds its own in terms of power, speed, and durability, a testament to its timeless design and engineering.

    Importance of Quality Spark Plugs

    Fuel Efficiency

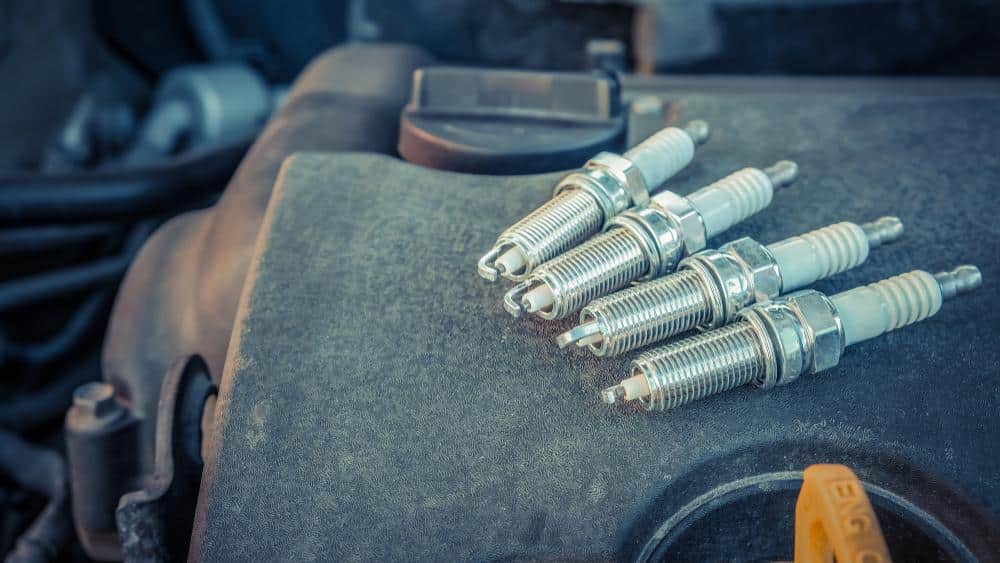
    The condition and quality of the spark plugs can significantly impact the fuel efficiency of the 2004 Crown Victoria P71. These small yet integral components of the vehicle’s ignition system are crucial in ensuring optimal fuel combustion. By generating a spark that ignites the air-fuel mixture in the engine’s combustion chamber, spark plugs facilitate the vehicle’s smooth operation.

    When these sparks are consistent and at the right timing, the engine runs more efficiently, enhancing fuel economy. Over time, however, spark plugs can wear down or accumulate deposits, leading to less efficient ignition and, consequently, reduced fuel efficiency. Regular inspection and timely replacement of spark plugs contribute to maintaining and, in some cases, improving the fuel efficiency of your 2004 Crown Victoria P71.

    Engine Longevity

    The longevity of the 2004 Crown Victoria P71’s engine is another aspect significantly influenced by the state of the spark plugs. A well-functioning spark plug ensures a clean and robust combustion process, lessening the overall strain on the engine. This extends the engine lifespan, allowing it to maintain optimal performance even over high mileage. Conversely, damaged or worn-out spark plugs can lead to problems such as misfires, hard starting, and engine surges or hesitations, which can result in serious engine damage over time. Therefore, regular spark plug maintenance is an essential preventative measure that can help prolong the life of your Crown Victoria P71’s high-performance engine.

    Top Brands for Crown Victoria P71 Spark Plugs

    When selecting spark plugs for your 2004 Crown Victoria P71, it’s crucial to choose a product that matches the quality and durability of your vehicle. Here are the top brands that offer high-quality spark plugs:

    1. Motorcraft: As Ford’s official parts brand, Motorcraft spark plugs are a reliable choice for your Crown Victoria P71. They are designed to meet Ford’s performance standards and are often the brand installed in the vehicle at the factory. 

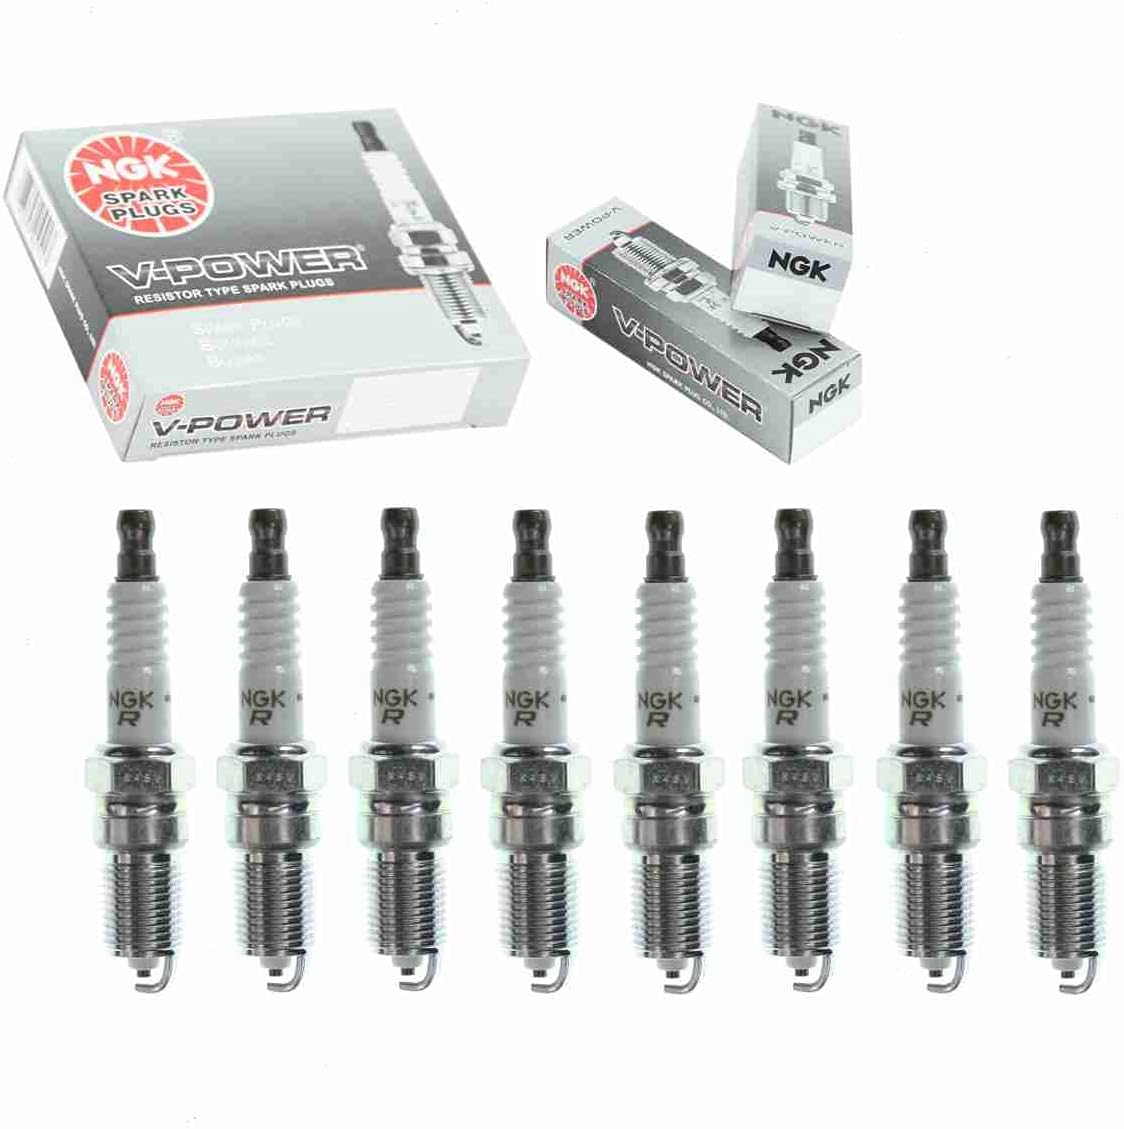
    2. NGK: Known for their superior quality and durability, NGK spark plugs are popular among car enthusiasts and professionals. They offer excellent heat dissipation and strong performance, ensuring optimal engine efficiency.

    3. Bosch: Offering an array of spark plug options, Bosch is recognized for its innovation and quality. Their spark plugs are designed to provide reliable sparking, enhancing fuel efficiency and engine performance.

    4. Denso: With a reputation for resilience and reliability, Denso spark plugs are an excellent choice for extending engine life and improving overall vehicle performance. They are designed to resist wear and tear, ensuring a longer service life.

    5. ACDelco: A trusted name in automotive parts, ACDelco offers high-quality spark plugs that provide reliable ignition and optimal fuel economy. They are engineered to withstand the rigors of high-performance engines like the one in your Crown Victoria P71.

    Remember, while these brands are renowned for their quality, choosing a spark plug that matches your vehicle’s specific requirements is essential for the best results. Refer to your vehicle’s owner manual or consult a professional mechanic when selecting new spark plugs.

    Don’t miss our comprehensive guide, “Best Spark Plugs for P71: Reviews, Guide,” to discover the top spark plugs for your P71. Check it out now!

    How to Install Spark Plugs in your Crown Victoria P71

    Tools Needed

    Before we begin installing spark plugs in your 2004 Crown Victoria P71, it is essential to ensure you have the necessary tools handy. Here’s the list of tools you will need:

    • Spark plug socket: This type of socket is designed to install and remove spark plugs without causing any damage.
    • Ratchet: You’ll need a ratchet to turn the spark plug socket.
    • Extension bars: These will help you reach the deep spark plugs within the engine compartment.
    • Spark plug gap tool: This tool is needed to check and adjust the new spark plugs’ gap per the vehicle’s specifications.
    • Torque wrench: This tool is optional but recommended for tightening the spark plugs to the correct torque specification.
    • Wire brush or spray-on plug cleaner: This helps clean the threads in the spark plug hole, if necessary.
    • Anti-seize compound: This is applied to the threads of the new spark plugs to prevent them from seizing in the cylinder head.
    • Dielectric grease: This is used to lubricate the inside of the spark plug wire boots to prevent sticking and corrosion.

    Remember, each vehicle may have slight variations in the tools required for spark plug replacement. Always refer to your vehicle’s service manual for the most accurate information.

    Step-by-Step Guide

    Follow the steps below to replace the spark plugs in your 2004 Crown Victoria P71:

    • Prepare the Vehicle: Start by ensuring the vehicle is turned off and cooled down to avoid burns from a hot engine. Open the hood and locate the spark plug wires. They are typically thick wires running from the ignition coil to the top of the engine.
    • Remove the Spark Plug Wire: Grasp the boot (the thicker part) of the first spark plug wire and gently twist it to loosen the seal. Pull the boot off the spark plug. Avoid pulling on the wire itself, as this can cause damage.
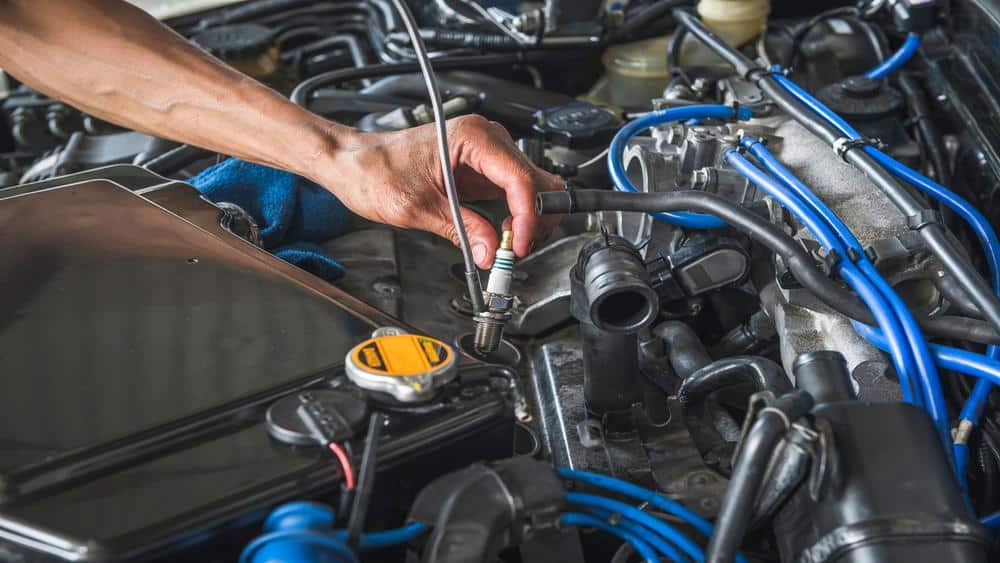
    • Remove the Old Spark Plug: Attach the spark plug socket to your ratchet. Use an extension bar if necessary. Insert the socket over the spark plug and turn the ratchet counterclockwise to loosen and remove the spark plug.
    • Prepare the New Spark Plug: Use the spark plug gap tool to adjust the gap on your new spark plug to the vehicle’s specifications. Apply a small amount of anti-seize compound to the threads of the new spark plug.
    • Install the New Spark Plug: Insert the new spark plug into the spark plug hole. Use the spark plug socket and ratchet (without the extension bar) to tighten it by hand. Once the spark plug is snug, use a torque wrench to tighten it to the correct torque specification.
    • Reattach the Spark Plug Wire: Apply a small amount of dielectric grease inside the boot of the spark plug wire. Push the boot onto the new spark plug until it clicks into place.
    • Repeat for Remaining Spark Plugs: Follow the same process to replace the remaining spark plugs. 
    • Final Check: Once all spark plugs are replaced, make a final check to ensure all wires are correctly attached, and all tools are removed from the engine area.
    • Test Drive: Start the vehicle and take a short test drive to ensure everything runs smoothly. Pay attention to the engine’s performance and note any irregularities. 

    Always remember to dispose of your old spark plugs responsibly and consider recycling them if this service is available in your area. Regular spark plug maintenance can significantly improve the performance and lifespan of your vehicle.

    Precautions

    When replacing spark plugs, it’s crucial to take certain safety precautions to protect yourself and your vehicle:

    • Avoid working on a hot engine: Always ensure your vehicle has had ample time to cool before starting the process. A hot engine can cause severe burns.
    • Properly gap your spark plugs: Incorrectly gapped spark plugs can lead to poor performance and potential engine damage. Always check and adjust the gap before installation.
    • Do not over-tighten spark plugs: Over-tightening can damage the spark plug or even the cylinder head. Utilize a torque wrench for accurate tightening.
    • Avoid cross-threading: Cross-threading occurs when a spark plug is not correctly aligned with the spark plug hole. If this happens, it can damage the threads in the cylinder head, leading to costly repairs.
    • Use anti-seize sparingly: While anti-seize prevents spark plugs from getting stuck in the cylinder head, too much can lead to over-tightening. A small amount on the threads is sufficient.
    • Don’t force the spark plug wires: When reattaching the spark plug wires, never force them on. If they do not easily slide onto the spark plug, an issue may need to be addressed.
    • Always wear safety glasses: Protect your eyes from potential debris by wearing safety glasses while operating under the hood. 

    Remember, if you need help performing this maintenance yourself, it’s always best to seek the help of a professional mechanic.

    Tips for a Smooth Process

    When replacing spark plugs, following these tips can help ensure a smooth and efficient process:

    • Organize Your Tools: Before you start, have all your tools within reach. This will help you stay organized and save time during the replacement process.
    • Clean Your Workspace: Ensure the engine and surrounding areas are clean. This will prevent debris from falling into the cylinder when removing the spark plug.
    • Work on One Plug At A Time: To avoid mixing up the spark plug wires, replace one at a time. This will also prevent debris from entering open spark plug holes.
    • Inspect Your Spark Plugs: Use this opportunity to inspect your old spark plugs. The condition of your old spark plugs can tell you a lot about the engine’s condition. For example, oil or soot on the spark plug can indicate a bigger issue that may need to be examined.
    • Remember the Order: Pay attention to the order in which the spark plug wires are attached. They need to be reattached in the same order.
    • Ask for Help if Needed: Feel free to consult a professional if you need clarification on any step in the process. It’s better to ask for help than to risk damaging your vehicle. 

    Following these tips can make the spark plug replacement process easier and more efficient. Always remember that safety is paramount when working on your vehicle.

    Conclusion & Recommendations

    Replacement of spark plugs is a common maintenance task that can significantly enhance the performance and longevity of your vehicle. Although the process may seem complex, with the right tools and a methodical approach, it can be undertaken by vehicle owners with a basic understanding of car mechanics. 

    However, it’s essential to remember that every vehicle is different, and the specifics of this task can vary based on your car’s make, model, and year. Always consult your vehicle’s owner’s manual for precise instructions and specifications.

    Feel free to seek professional assistance if you’re ever in doubt or uncomfortable performing this task. A professional mechanic can quickly and accurately complete this task, saving you from potential errors that could lead to more significant problems.

    In conclusion, regular maintenance, including spark plug replacement, is crucial for the overall health of your vehicle. Follow the tips and precautions above, stay organized, and never rush the process. Remember, patience and meticulousness will lead to the best results. Your vehicle and wallet will thank you in the long run.

  • Most Common Chainsaw Injuries: From Cuts to Caution

    Most Common Chainsaw Injuries: From Cuts to Caution

    Chainsaws are powerful tools for cutting wood and are widely used in various industries and activities. While chainsaws are efficient and effective, it’s crucial to prioritize safety when operating them. Chainsaw injuries can occur without proper precautions, leading to severe consequences and accidents.

    This article aims to shed light on the most common chainsaw injuries and provide valuable insights into preventing them. By understanding these risks and implementing safety measures, you can ensure a safer working environment and reduce the chances of accidents.

    Most Common Chainsaw Injuries

    1. Types of Chainsaw Injuries

    Chainsaw injuries can range from minor cuts to severe accidents with life-altering consequences. Understanding the types of injuries that can occur is essential for promoting safety awareness. The following are the most common chainsaw injuries:

    • Cuts and lacerations: Improper handling or contact with moving chains can result in deep cuts and lacerations on the body.
    • Amputations: Chainsaw accidents can lead to amputations of fingers, hands, or limbs, causing permanent disability.
    • Kickback injuries: Kickback injuries occur when the chainsaw’s moving chain suddenly jerks back towards the user, often resulting in facial or upper body injuries.
    • Eye injuries: Wood chips or debris can fly into the eyes, causing damage or blindness if appropriate eye protection is not worn.
    • Hearing damage: The loud noise produced by chainsaws can cause hearing loss or impairment if proper hearing protection is not used.

    2. The Importance of Chainsaw Safety

    Chainsaws, if mishandled, can pose significant risks to the operator. Safety should always be the top priority when using a chainsaw. Following safety precautions and guidelines can help prevent accidents and injuries. Let’s explore the most common chainsaw injuries and learn how to avoid them.

    3. Most Common Chainsaw Injuries

    Hand and Finger Injuries

    One of the most frequent chainsaw injuries involves cuts to the hands and fingers. When operating a chainsaw, wearing protective gloves is essential to minimize the risk of injury. Gloves provide a barrier between your hands and the chainsaw chain, reducing the chances of lacerations and abrasions.

    Cuts to Legs and Feet

    Cuts to the legs and feet are another common chainsaw injury, often due to slipping or kickback. These injuries can be severe and require immediate medical attention. To prevent such injuries, it’s crucial to maintain a firm grip on the chainsaw and wear protective gear like chainsaw chaps and boots. These safety measures provide added protection against accidental contact with the chainsaw chain.

    Head Injuries

    Head injuries are particularly serious and can even be fatal. When working above head level, wearing a protective helmet with a face shield or visor is essential. This safety equipment protects against potential injuries caused by chainsaw kickbacks or falling debris.

    Facial Injuries

    Similar to head injuries, facial injuries can occur due to chainsaw kickbacks. Always wear a face shield or visor with a safety helmet to protect your face from such injuries. These protective measures significantly reduce the risk of facial lacerations and other injuries.

    Falling from Heights

    Operating a chainsaw at heights increases the risk of falls, leading to severe injuries. To prevent falling accidents, using a chainsaw on the ground or on a stable platform is crucial. Avoid operating the chainsaw while standing on unstable surfaces or ladders to maintain a safe working environment.

    4. Causes of Chainsaw Injuries

    Understanding the causes of chainsaw injuries helps identify potential hazards and implement preventive measures. The following factors contribute to chainsaw accidents:

    • Lack of proper training and experience: Inadequate knowledge and skill in operating a chainsaw increase the risk of accidents.
    • Inadequate safety precautions: Neglecting to wear personal protective equipment (PPE), such as helmets, gloves, and goggles, leaves individuals vulnerable to injuries.
    • Fatigue and distraction: Operating a chainsaw while fatigued or distracted significantly impairs focus and reaction time, increasing the chances of accidents.
    • Equipment malfunctions: Chainsaws that are poorly maintained or have defective parts can malfunction, leading to unpredictable accidents.
    Safety

    5. Preventing Chainsaw Injuries

    Preventing chainsaw injuries requires a proactive approach to safety. By following these guidelines, users can minimize the risk of accidents:

    • Wearing appropriate protective gear: Always wear a chainsaw helmet, face shield, ear protection, gloves, and chainsaw chaps or leg protection.
    • Following safety guidelines and procedures: Adhere to the manufacturer’s instructions and safety guidelines for operating the chainsaw.
    • Regular equipment maintenance: Maintain the chainsaw by keeping the chain sharp, the fuel tank filled, and checking for any loose or damaged parts.
    • Getting proper training and certification: Attend chainsaw safety courses to gain the necessary skills and knowledge for safe operation.
    First Aid

    6. First Aid for Chainsaw Injuries

    In a chainsaw injury, immediate first aid can make a significant difference. Remember the following steps:

    • Immediate response and assessment: Assess the severity of the injury and ensure the immediate safety of the victim and those nearby.
    • Stopping bleeding and applying pressure: If there is bleeding, apply direct pressure to the wound using a clean cloth or bandage.
    • Treating amputations and severed limbs: Carefully preserve any amputated body parts and seek immediate medical attention.
    • Seeking medical attention: It is crucial to consult a medical professional to ensure proper treatment and prevent complications, even minor injuries.

    7. Rehabilitation and Recovery

    Recovering from chainsaw injuries involves not only physical healing but also emotional support. The following aspects are vital for rehabilitation:

    • Physical therapy and rehabilitation: Engage in exercises and therapy to regain strength and mobility.
    • Emotional support and counseling: Seek support from professionals or support groups to cope with the psychological impact of the injury.
    • Returning to work safely: Gradually reintegrate, taking necessary precautions and ensuring a safe work environment.
    • Preventing future injuries: Apply the lessons learned from the incident to prevent similar accidents.

    8. Safety Tips for Chainsaw Users

    To ensure safety while operating a chainsaw, keep these tips in mind:

    • Maintaining a secure grip: Hold the chainsaw firmly with both hands and maintain a stable stance.
    • Clearing the work area: Remove obstacles and ensure a clear workspace to minimize the risk of accidents.
    • Avoiding hazardous conditions: Do not operate a chainsaw in adverse weather conditions or on unstable surfaces.
    • Using proper cutting techniques: Use correct techniques and avoid cutting above shoulder height or with the chainsaw positioned above chest level.
    Operator

    9. Operator Caution and Awareness

    Operators should exercise caution and remain aware of their surroundings when using a chainsaw. Here are a few key points to keep in mind:

    • Always maintain a firm grip on the chainsaw handles and use an encircling grip for better control.
    • Avoid binding the chainsaw during cutting, as it can increase the risk of kickback.
    • Be cautious of the kickback zone in front of the guide bar’s nose. Do not position any part of your body in this zone.
    • Read the chainsaw instruction manual thoroughly before an operation to understand its features, safety mechanisms, and maintenance requirements.

    Discover the secrets of precision in chainsaw cutting! Enhance your skills and maximize efficiency by reading our article, “How to Cut Straight With a Chainsaw: Mastering Precision.” Unleash your potential today!

    10. Reading the Instruction Manual

    To operate a chainsaw safely, it is crucial to read and understand the instruction manual provided by the manufacturer. The manual contains essential information about the chainsaw’s operation, safety features, and maintenance guidelines. By familiarizing yourself with the manual, you can ensure proper usage and minimize the risk of accidents.

    Maintaining the Chainsaw

    11. Maintaining the Chainsaw

    Regular maintenance of the chainsaw is essential for safe operation. Some key maintenance tasks include:

    • Keeping the chain properly tensioned to prevent it from slipping or derailing during operation.
    • Maintaining a sharp chain by regularly sharpening or replacing it as needed. A dull chain can cause kickback and reduce cutting efficiency.
    • Lubricating the chainsaw’s bar and chain as the manufacturer recommends to ensure smooth operation.

    12. Clearing Debris and Working Environment

    Maintaining a clean working environment is crucial for safe chainsaw operation. Clearing debris from the cutting area reduces the risk of tripping or falling. Also, inspect the working area for hazards like loose branches, rocks, or uneven terrain. By preparing the working environment and removing potential obstacles, you can minimize the risk of accidents.

    13. FAQ (Frequently Asked Questions)

    What injury is caused by a chainsaw?

    Chainsaws can cause various injuries, including cuts, lacerations, and amputations. The chainsaw’s rotating chain and sharp teeth can easily penetrate the skin and underlying tissues, leading to deep wounds.

    Where are chainsaw injuries located?

    Chainsaw injuries are commonly in the hands, lower arms, and lower legs. These areas are more prone to contact with the chainsaw chain during operation.

    Which parts of the body suffer most injuries as a result of accidents during chainsaw use?

    The hand and fingers are the most commonly injured body parts when using a chainsaw. The legs and feet are also susceptible to injuries due to slips or kickbacks.

    How many chainsaw injuries are there?

    In the United States, over 30,000 chainsaw-related injuries are reported each year. These injuries can range from minor cuts to severe amputations and fatalities.

    How do you prevent chainsaw injuries?

    It is crucial to follow safety guidelines and precautions to prevent chainsaw injuries. Some preventive measures include:
    1. Wear appropriate protective gear, including chainsaw chaps, face visors, helmets, gloves, steel-capped boots, earmuffs, and safety glasses.
    2. Choose the right-sized chainsaw and operate it according to the manufacturer’s instructions.
    3. Maintain a safe working environment by keeping bystanders at a safe distance and checking for potential hazards like nails or power lines.
    4. Exercise caution when cutting “spring poles” or trees and branches caught in high winds.
    5. Obtain proper training in chainsaw operation and techniques.

    Where do most injuries occur?

    Most chainsaw injuries occur during tree removal or cutting activities. It’s crucial to be extra cautious in these situations, as the risk of accidents is higher.

    How do you treat a chainsaw injury?

    In case of a chainsaw injury, it is vital to seek immediate medical attention. If possible, apply pressure to control bleeding and keep the injured area elevated. Avoid removing embedded chainsaw parts and wait for medical professionals to assess and treat the injury appropriately.

    14. Conclusion

    In conclusion, most common chainsaw injuries, Chainsaw injuries can be severe and even life-threatening if proper safety measures are not followed. Operators can ensure a safer working environment by understanding the most common chainsaw injuries and implementing preventive measures. Remember to wear appropriate safety gear, maintain caution, and adhere to the manufacturer’s guidelines. By prioritizing safety, you can reduce the risk of chainsaw accidents and enjoy a safe and productive cutting experience.

  • What Are the Parts of a Screwdriver: 6 Part Breakdown

    What Are the Parts of a Screwdriver: 6 Part Breakdown

    This article will cover the topic of the parts of a screwdriver, exploring each part’s role and importance. It will introduce the screwdriver as a tool, highlighting its uses and prevalence in tasks such as woodworking. Then, we’ll delve into the various parts of a screwdriver, including the handle, shank, blade, tip, ferrule, and head. We’ll also highlight the different types of screwdriver heads and their applications. The article will conclude with a summary of the information discussed and the importance of choosing the right screwdriver for each task.

    What Are the Parts of a Screwdriver

    1. What Are the Parts of a Screwdriver

    Have you ever taken a moment to consider what your screwdriver is made up of? It’s a common tool that we often use without giving much thought to its complexity. But like every masterpiece, a screwdriver is a sum of its parts, each playing a crucial function.

    2. Introduction to the Screwdriver

    A screwdriver is a fundamental yet indispensable handheld tool used predominantly for inserting and removing screws. Its simple design and functionality make it an essential item in every toolkit for professional use, home DIY projects, or woodworking tasks.

    3. Uses of a Screwdriver

    From assembling furniture to fixing toys and electronic devices, the list of uses for a screwdriver is endless. It’s also invaluable in tasks that require precision and control, such as crafting and woodworking.

    Take your screwdriver skills to the next level! Discover how to use a screwdriver instead of a drill and master twisting and turning. Check out the article “Can You Use a Screwdriver Instead Of a Drill: Twist & Turn?” for expert tips. Elevate your DIY game now!

    The Anatomy of a Screwdriver

    4. What Are the Parts of a Screwdriver: Handle to Tip

    A typical screwdriver consists of several components, each serving a specific function.

    I. The Handle

    The handle is the screwdriver part you hold while using the tool. Its purpose is to provide a firm grip, ensuring control and comfort.

    Material of the Handle

    Handles are commonly made of plastic or wood, designed to provide a comfortable grip and resist slippage.

    II. The Shank

    The shank is the elongated part that connects the handle to the blade. Its length can vary, and it is usually crafted from hardened steel to withstand the force applied when using the tool[1].

    Variations in Shank

    There are screwdrivers with interchangeable shanks, offering versatility for different tasks[2].

    III. The Blade

    The blade is the shaped part at the end of the shank. It adds stability and torque when rotating screws.

    Role of the Blade

    The blade’s design can influence the screwdriver’s performance and the type of screws it can effectively drive.

    IV. The Tip

    The tip is the screwdriver part that fits into the screw head. It plays a critical role in securing the screw and preventing rounding of the screw head.

    Importance of the Tip

    The right size and shape of the tip are crucial for the efficient functioning of the screwdriver. An inappropriate tip can result in rounding off the screw head, making removing it difficult.

    V. The Ferrule

    The ferrule, usually made of metal, secures the shank, enhancing the tool’s durability.

    Importance of the Ferrule

    The ferrule strengthens the screwdriver. It secures the shank, keeping the handle and shank linked even under severe force. The shank transfers rotational force from the handle to the tip, making this necessary. A strong ferrule secures the shank, making the screwdriver effective.

    VI. The Head

    The head of a screwdriver refers to the specific design that fits into the corresponding screw or nut.

    Types of Heads

    Different types of screwdriver heads cater to different tasks. Common types include slotted and Phillips, but others like Frearson, square, Robertson, Torx, offset, and ratchet are also available for specific applications.

    What Are the Parts of a Screwdriver

    5. Choosing the Right Screwdriver

    Choosing the right screwdriver is vital to ensure efficient and quality work. Consider the size and type of screw head, the required torque, and the accessibility of the area where the screw is to be inserted or removed.

    Considerations when Selecting a Screwdriver

    Having a reliable screwdriver set can offer the versatility needed for various tasks. It’s always recommended to choose the tool that perfectly matches the task at hand.

    Discover the perfect screwdriver for your needs! Explore our article on the Best Screwdriver with Screw Holder: Reviews & Guide. Make sure to find the right tool for the job. Read now and choose wisely!

    6. FAQ (Frequently Asked Questions)

    How does a screwdriver work?

    A screwdriver applies torque to a screw, either driving it in or loosening it. The screwdriver’s tip is shaped to fit the recess in the head of a screw. Applying a twisting force to the screwdriver’s handle is transmitted down the shank and blade to the tip. This force is then used to turn the screw, with the grooves of the screw’s head preventing the tip from slipping out. Hence, a screwdriver converts your manual turning into a rotational motion to drive a screw into or out of a material.

    How was the screwdriver named?

    The term “screwdriver” is a compound of “screw” and “driver,” signifying its primary function of driving screws. In other languages, it has various translations. However, in many contexts, it is synonymous with the term “turnscrew,” another testament to its primary function3.

    What is a standard screwdriver?

    A standard screwdriver, or a flathead or slotted screwdriver, is one of the most common types. It has a flat blade tip that fits into the linear recess on the head of standard screws. The size of the blade varies, making it suitable for screws of different sizes.

    What are the 4 types of screwdrivers?

    The four common types of screwdrivers are a. Standard or Slotted Screwdriver: Designed with a flat blade for standard screws. b. Phillips Screwdriver: Features a cruciform shape that fits into the cross-shaped recess on Phillips screws. c. Robertson or Square Screwdriver: Comes with a square tip designed for screws with a square recess. d. Torx Screwdriver: A star-shaped tip that fits Torx screws, commonly used in electronics1.

    How big is a screwdriver?

    The size of a screwdriver is determined by the length of its shank and the size of its tip. Shank lengths can range from a few inches for precision tasks up to a foot or more for jobs that require a more extended reach. The tip size must match the screw’s head recess size for optimal performance. Screwdrivers come in various sizes to accommodate different screw sizes1.

    What is at 5 screwdriver?

    A “#5 screwdriver” typically refers to the size of the screwdriver’s tip. The specific dimensions and shape of a #5 screwdriver can vary depending on the type of screwdriver (standard, Phillips, etc.). For example, a #5 Phillips screwdriver has a tip size designed to fit the recess on a #5 Phillips screw. It’s crucial to use the appropriate screwdriver for the screw to prevent damage to the screw or the tool1.

    7. Conclusion

    In conclusion, what are the parts of a screwdriver, Screwdrivers are more than just simple tools. Their efficiency lies in the sum of their parts – the handle, shank, blade, tip, ferrule, and head. Understanding these components and their functions is vital to choosing the right screwdriver for your needs and performing tasks efficiently and effectively.

  • Can You Use Jigsaw to Cut Laminate Flooring: Jigsaw Magic

    Can You Use Jigsaw to Cut Laminate Flooring: Jigsaw Magic

    Yes, you can use a jigsaw to cut laminate flooring. It’s an effective tool known for its versatility. It is ideal for straight and uniquely-shaped cuts in your laminate flooring project. Let’s dive into whether can you use jigsaw to cut laminate flooring.

    Can You Use Jigsaw to Cut Laminate Flooring

    1. Introduction

    Getting a precise and clean cut on laminate flooring can be challenging, especially when you need to make intricate curved cuts. One tool that provides a solution to this problem is the jigsaw. This article will guide you on how to use a jigsaw to cut laminate flooring effectively and safely.

    2. Why Use a Jigsaw?

    Benefits of Using a Jigsaw

    Jigsaws are versatile and cost-effective, but they also excel in making straight and curved cuts. They allow for precision, affordability, and specialized blades that make cutting laminate easier.

    Comparing Jigsaw with Other Cutting Tools

    While other tools like circular saws may be helpful for high-speed cutting tasks, jigsaws offer versatility unmatched in dealing with intricate patterns and shapes.

    3. Can You Use Jigsaw to Cut Laminate Flooring?

    Choosing the Right Blade

    The key to an effective cut is selecting the right jigsaw blade. Blades designed specifically for cutting laminate, such as the Bosch T101BR, are usually the best choice.

    Using Your Jigsaw for Laminate Flooring

    4. Seamless Cuts: Using Your Jigsaw for Laminate Flooring

    Preparation

    First, mark your cut lines accurately on the laminate. Masking tape can offer additional protection and precision.

    Making Straight Cuts

    Ensure that the laminate board is secure with clamps. Allow the saw to reach full speed before beginning the cut. Then, complete the cut smoothly in one pass for the best results.

    Making Curved Cuts

    Using a paper template or a contour tool can guide the cuts effectively for curved cuts. And just as with straight cuts, complete the cut in one smooth pass.

    Finishing the Cut

    After cutting, carefully remove any leftover debris or dust from the laminate. And there you have it – a clean, precise cut!

    5. Safety Measures

    Remember, safety comes first! Use protective gear, including safety glasses and gloves, when operating the jigsaw. Also, ensure the laminate is securely clamped and supported on both sides during cutting.

    Discover the key to safe and efficient jigsaw operation! If you’re seeking comprehensive guidance on mastering the art of jigsaw safety, check out our article “How To Use A Jigsaw Safely: For Novice To Expert!” Expand your knowledge and stay protected.

    Right Blade

    6. Avoiding and Addressing Complications

    Chipping can often occur when cutting laminate flooring, especially if the proper precautions aren’t taken. Chipping not only ruins the aesthetic of the flooring but also may lead to additional problems, such as the laminate peeling off over time.

    1. Use the Right Blade: The key to reducing chipping lies in choosing the right blade. Use a blade specifically designed for cutting laminate flooring. These blades have fine teeth that result in smoother cuts, reducing the chance of chipping. As mentioned earlier, the Bosch T101BR is an excellent choice.
    2. Cut from the Back: Another technique to reduce chipping is to cut from the back of the laminate board. Since the top surface of the laminate is the finished surface you want to keep intact, cutting from the back means any chips will be on the underside, which is less visible.
    3. Use Masking Tape: Applying masking tape along the line where you intend to cut can provide extra protection against chipping. The tape helps keep the laminate surface intact as you cut.

    If, despite these precautions, you still notice some minor chipping, don’t panic. You can use a color-matched laminate repair kit to fill in small chips and make them less noticeable. These kits usually come with a putty or filler and a colorant that you can mix to match your laminate flooring.

    Adhering to these strategies can significantly reduce the risk of chipping and ensure a clean, smooth cut on your laminate flooring.

    7. FAQ (Frequently Asked Questions)

    What to Do When the Jigsaw Doesn’t Cut Straight

    If your jigsaw isn’t cutting straight, it could be due to outdated equipment or a damaged blade clamp. Inspect your tool and ensure it’s in good working order before proceeding.

    What is the best tool to cut laminate flooring?

    The best tool for cutting laminate flooring can depend on the specifics of your project. However, popular tools include table saws, circular saws, jigsaws, miter saws, and multi-tools, with table saws and circular saws often highly recommended for significant, straight cuts. For more unique or odd-shaped cuts, a jigsaw becomes particularly useful. The laminate floor cutter is also advised, offering clean cuts without sawdust or noise.

    Which jigsaw blade for laminate flooring?

    Choosing the right jigsaw blade is key to cutting laminate flooring effectively. A blade designed explicitly for laminate materials, such as the Bosch T101BR jigsaw blade, is highly recommended.

    How do you cut laminate with a jigsaw without chipping it?

    It’s suggested to cut from the back of the board to prevent chipping when cutting laminate flooring with a jigsaw. You can also apply masking tape along the cut line for extra protection. Using the right blade, such as a laminate-cutting blade, can reduce chipping.

    What is the best jigsaw tool for laminate flooring?

    The best jigsaw for cutting laminate flooring provides a blend of power, precision, and ease of use. The specific model would depend on individual preferences. However, key features include adjustable speed, ease of changing blades, and comfort during use. It’s important to note that using the right blade, such as the Bosch T101BR, can significantly enhance the performance of any jigsaw.

    Can you cut laminate flooring with a knife?

    Yes, without saws, a utility knife can cut laminate flooring. However, making straight cuts with a knife might be challenging, and caution is required. Using a knife might not provide the cleanest cut and is more suitable for smaller jobs.

    Can you cut laminate flooring with scissors?

    Cutting laminate flooring with scissors is not typically recommended. The hardness and thickness of laminate materials make it difficult for scissors to create clean and accurate cuts. It might also damage the scissors. Instead, it’s more advisable to use tools specifically designed for this purpose, such as saws or a laminate floor cutter.

    8. Conclusion

    In conclusion, can you use jigsaw to cut laminate flooring? Using a jigsaw to cut laminate flooring is possible and highly beneficial. Its versatility and affordability make it an excellent tool for DIY enthusiasts and professionals. With the right blade and cutting techniques, you can achieve precise and clean straight or curved cuts. Remember to take all necessary safety measures to ensure a smooth, injury-free experience. With practice and patience, you’ll be able to handle any laminate flooring project with ease and confidence! Happy DIY-ing!

  • When Not To Use an Impact Wrench: Avoid These 15 Situations

    When Not To Use an Impact Wrench: Avoid These 15 Situations

    An impact wrench is a powerful tool for installing and removing fasteners, offering speed and convenience. However, it’s important to understand its proper usage to avoid damage and ensure safety. Let’s explore when not to use an impact wrench.

    Introduction

    While impact wrenches are incredibly useful for many applications, there are instances where their use may need to be revised. Understanding these scenarios can help ensure optimal results and prevent damage. Let’s explore when it’s best to avoid using an impact wrench and consider alternative approaches.

    When Not To Use an Impact Wrench

    Situation 1: Tightening instead of loosening

    Impact wrenches are primarily designed for loosening stubborn fasteners rather than tightening them. Using an impact wrench for tightening can lead to overtightening, potentially damaging the fastener or its surroundings.

    Situation 2: Using an incompatible drill or socket bits

    Using drill or socket bits that are incompatible with the impact wrench can damage both the tool and the fastener. It is crucial to ensure that the bits used are specifically designed for use with impact wrenches.

    Situation 3: Cross-threading and potential damage

    Cross-threading occurs when the threads of the fastener and the receiving hole become misaligned during the fastening process. The high power of an impact wrench can exacerbate cross-threading, potentially causing irreversible damage. Care should be taken to align the threads properly before applying torque.

    wrong impact wrench

    Situation 4: Choosing the wrong impact wrench

    Using the right type or size of impact wrench for a specific application can lead to efficient or effective results. It is important to select the appropriate impact wrench that matches the requirements of the task at hand.

    Situation 5: Using a worn-out wrench or low-quality cleaner

    Using a worn-out impact wrench or applying low-quality cleaning agents can compromise the tool’s performance and lifespan. Regular maintenance and high-quality lubricants and cleaners are essential for optimal impact-wrench operation.

    Situation 6: Delicate Fasteners

    Certain fasteners, such as those in electronics or delicate machinery, require precise torque application. The high torque output of an impact wrench may lead to overtightening or damage. Instead, manual tools like screwdrivers or torque wrenches should be used to achieve the desired level of precision.

    Situation 7: Fragile Materials

    Working with fragile materials like glass or ceramics necessitates caution. The excessive force exerted by an impact wrench can easily crack or shatter these materials. Hand tools or specialized equipment designed for delicate applications are more appropriate in such cases.

    Situation 8: Risk of Over-Tightening

    An impact wrench’s powerful rotational force can easily overtighten fasteners, especially with no torque-limiting features. Components that require precise torque settings, such as engine parts or delicate machinery, should be tightened using torque wrenches or other calibrated tools to prevent damage.

    Situation 9: Limited Access Areas

    Tight spaces with restricted access can pose challenges for impact wrenches. When there isn’t enough room to maneuver or position the tool correctly, alternative tools like ratchets, wrenches, or manual screwdrivers are better suited for the task.

    Situation 10: Torque Specifications

    Some applications require specific torque values to ensure proper functioning and safety. When working with machinery or equipment with specific torque specifications, a torque wrench is crucial to achieve the desired torque setting accurately.

    Situation 11: Working with Small Fasteners

    Impact wrenches are generally designed for larger bolts and nuts. For small fasteners, such as those found in electronics or delicate assemblies, precision screwdrivers or hand tools are preferable to avoid overtightening or damaging the fasteners.

    Impact Wrenches

    Situation 12: Battery-Powered Applications

    When power supply access is limited or nonexistent, using an impact wrench powered by batteries may not be practical. Manual tools like hand wrenches or screwdrivers are reliable alternatives for such scenarios.

    Situation 13: Hand and Manual Tools

    A more hands-on approach is sometimes required, such as when working on artistic projects or intricate designs. Using hand tools exclusively allows for finer control, precision, and customization than impact wrenches cannot provide.

    Situation 14: Noise and Vibration Concerns

    Impact wrenches are known for their noise and vibration levels. Opting for quieter manual tools reduces disturbances in noise-sensitive environments or when working for prolonged periods. It minimizes the risk of long-term health issues associated with excessive vibration.

    Situation 15: Safety Considerations

    When working in hazardous environments or with sensitive components, the sudden jolt of an impact wrench can pose safety risks. Manual tools offer more controlled and safer operation in these situations, ensuring the protection of both the worker and the equipment.

    Discover more about Impact Wrench Safety in our article “Mastering Impact Wrench Safety: Essential Tips for Safe Operation.” Ensure safety and prevent accidents when using this powerful tool.

    FAQ (Frequently Asked Questions)

    When should you use an impact wrench? 

    An impact wrench is ideal for tasks that require high torque and fastener tightening or loosening’s, such as automotive repairs, construction, and heavy machinery.

    Is it bad to use an impact wrench on tires? 

    When used correctly, an impact wrench is not bad for tires. However, caution should be exercised to avoid over-tightening, which can damage the studs or lug nuts. It’s advisable to use a torque stick or a torque wrench to achieve the recommended torque specifications.

    When not to use an impact driver? 

    An impact driver is unsuitable for delicate or precision applications requiring control and finesse, such as working with fragile materials, small fasteners, or situations that demand specific torque settings. Manual tools like screwdrivers or torque wrenches should be used in such cases.

    Do impact wrenches damage bolts? 

    Impact wrenches do not inherently damage bolts. However, if used incorrectly or with excessive force, they can cause overtightening, leading to stripped threads, rounded bolts, or even bolt breakage. It’s essential to exercise caution and follow recommended torque specifications.

    What are the disadvantages of an impact driver? 

    While impact drivers offer speed and power, they have a few disadvantages. Impact drivers can be noisy, potentially causing discomfort or disturbances. Additionally, they may not provide the fine control or precision required for certain tasks. In situations where gentler handling or specific torque settings are necessary, alternative tools should be considered.

    Can I use an impact driver to drill concrete?

    Impact drivers are primarily designed for driving screws and bolts. While they can provide some drilling action, they are not recommended for drilling into hard materials like concrete. For drilling tasks in concrete, it is best to use a dedicated hammer drill or a rotary hammer drill specifically designed for such applications.

    Can an impact wrench remove rusted bolts?

    Yes, impact wrenches are powerful tools that can help remove rusted bolts. An impact wrench’s high torque output and hammering action can often break loose stubborn, rusted fasteners. However, it’s important to exercise caution and start with lower torque settings to avoid overtightening or damaging the bolt or surrounding components.

    Conclusion

    While impact wrenches are versatile and powerful tools, there are better options for some situations. Understanding when to avoid using an impact wrench can help prevent damage, maintain precision, and ensure safety. By considering the specific requirements of the task at hand, professionals can choose the appropriate tools and techniques to achieve optimal results.

  • Can You Use an Impact Driver as an Impact Wrench

    Can You Use an Impact Driver as an Impact Wrench

    The article will first introduce the topic, followed by detailed explanations of what impact drivers and impact wrenches are. It will then discuss the critical differences between the tools, including drive styles, torque levels, speed, size, and weight. Afterward, the piece will explore the main question, explaining whether an impact driver can serve as an impact wrench, highlighting both the potential benefits and risks. The article will answer can you use an impact driver as an impact wrench, differences between them, how to choose between the two tools and the importance of investing in quality tools. A conclusion will sum up the main points of the article. The article will end with a set of unique FAQs about the topic.

    Can You Use an Impact Driver as an Impact Wrench?

    No, you cannot optimally use an impact driver as an impact wrench. While an impact driver and an impact wrench might seem similar on the surface, they are designed for different purposes and functions. An impact driver, with its hexagonal drive shaft, is primarily built to drive screws and fasteners with high torque and speed. In contrast, an impact wrench featuring a square drive for sockets is used for heavy-duty tasks that require significantly high torque, such as working on cars or machinery.

    These tools also differ in terms of their speed and power. Impact drivers typically have higher rotational speeds and lower torque levels, making them ideal for tasks involving smaller screws. On the other hand, impact wrenches can generate higher torque, suitable for heavy-duty applications, but have lower rotational speeds.

    Moreover, the physical size and design of these tools vary. Impact drivers are generally smaller, more maneuverable, and suitable for tight spaces. Impact wrenches, however, are larger, more powerful, and designed for jobs that need more power.

    Attempting to use an impact driver as an impact wrench may lead to compatibility issues, potential damage to the tool and the fastener, and safety concerns. The tool might need to deliver the required torque for the job, leading to efficient or practical results. It could also harm the tool, mainly for tasks that exceed its designed capability.

    It is, therefore, crucial to use the right tool for the job, not only for efficiency and productivity but also for the safety and longevity of the tools. If you need to perform tasks typically accomplished by an impact wrench and only have an impact driver, it would be better to invest in an impact wrench to ensure you have the right tool for your requirements.

    Impact Wrenches

    Understanding Impact Drivers and Impact Wrenches

    What is an Impact Driver?

    An impact driver is a power tool that specializes in screw-driving tasks. These tasks include handling fasteners like Slotted, Phillips, square, and Torx. Light hex head fasteners can also be worked on using a socket adapter.

    What is an Impact Wrench?

    Contrarily, an impact wrench excels in fastening and loosening nuts, bolts, and timber screws. These tools come in different sizes and performance levels, including compact, mid-torque, and high-torque models.

    Differences Between Impact Drivers and Impact Wrenches

    Drive Styles

    Impact drivers utilize a 1/4-inch hex collet, while impact wrenches typically employ a square drive for socket attachment.

    Torque Levels

    Regarding power, impact wrenches generally provide more torque, with some models surpassing the power of compact impact drivers.

    Speed

    Impact drivers often exceed 2000 in-lbs of torque and reach 3600 RPM or more[^1^]. Conversely, cordless impact wrenches typically stay below 2000 RPM.

    Size and Weight

    Impact drivers are generally more compact and lighter. The size and weight of impact wrenches increase with higher power levels.

    How to Choose Between Impact Drivers and Impact Wrenches

    Selecting the right tool based on factors such as torque, power, size, and speed is crucial. Here is how to choose between impact drivers and impact wrenches:

    1. Consider the Purpose of the Tool: Impact drivers are designed for driving screws and fasteners, while impact wrenches are suited for fastening and loosening larger nuts, bolts, and thicker fasteners.
    2. Assess the Required Torque: Impact wrenches typically provide more torque, starting around 100 ft-lbs and exceeding 1000 ft-lbs, while impact drivers usually offer speeds up to 3600 RPM. Choose the tool that provides the torque necessary for your specific task.
    3. Check the Size and Weight: Impact drivers are more compact and lightweight, making them easy to handle for prolonged periods. Impact wrenches are larger and heavier, which might be a factor if portability or weight is a concern.
    4. Consider the Nature of the Job: For construction or carpentry tasks, an 18V/20V max impact driver is recommended, while for tasks like a transmission replacement, an 18V/20V max mid-torque 1/2-inch impact wrench is advised.
    5. Evaluate the Frequency of Use: Impact drivers are generally more versatile and suitable for regular DIY tasks and smaller projects, while impact wrenches are more specialized and often required by professional mechanics for heavy-duty jobs.
    6. Check the Power Source: If considering an impact wrench, think that pneumatic options require a reliable air compressor, and cordless models might have reduced torque output when powered by batteries.
    7. Brand Compatibility: If you already own power tools from a specific brand, consider sticking with the same brand for battery compatibility and cost savings.
    8. Price: Impact drivers have generally become more affordable and accessible compared to impact wrenches. Consider your budget when choosing between the two tools.
    9. Type of Drive: Impact drivers typically use a 1/4″ hex drive, whereas impact wrenches feature a 3/8″ square drive or more extensive.

    Remember, the right tool depends on your specific needs, the nature of the tasks you’ll be performing, and your personal preferences. Always consider the above points before making your decision.

    Discover a wealth of knowledge of impact wrenches! Dive into our other articles: “”Choosing the Right Impact Wrench.

    FAQ (Frequently Asked Questions)

    Is an impact wrench or impact driver better?

    Whether an impact wrench or impact driver is better depends on the task. Impact drivers excel at screw-driving tasks and are lighter and more compact, making them ideal for smaller screws and woodworking. Impact wrenches provide more torque, making them suitable for fastening and loosening larger nuts, bolts, and long fasteners.

    When not to use an impact wrench?

    An impact wrench shouldn’t be used for tasks requiring precise torque control, such as driving small screws or delicate woodworking tasks. It could be better when working in tight spaces due to its larger size.

    What is stronger impact wrench or impact driver?

    In terms of torque, impact wrenches are stronger than impact drivers. They provide more force, starting around 100 ft-lbs and going well over 1000 ft-lbs of torque, making them ideal for loosening and fastening large nuts and bolts.

    Can I use an impact driver for screws?

    Yes, impact drivers are specifically designed for driving screws. They are smaller tools with a 1/4″ hex drive, suitable for driving smaller screws and providing high power for driving long or stuck screws/bolts.

    Can I use an impact driver to remove lug nuts?

     While technically possible, impact drivers might struggle with this task due to their lower torque than impact wrenches. An impact wrench is typically more effective for tasks like removing lug nuts.

    Can I use an impact driver as a torque wrench?

    An impact driver is not designed to replace a torque wrench. A torque wrench allows precise control of the torque applied, which an impact driver doesn’t provide. Therefore, using an impact driver as a torque wrench is not recommended.

    Conclusion

    While it is technically possible to use an impact driver as an impact wrench, it is not recommended due to the risk of damage to screws or bolts over time. Choosing the right tool based on your needs will ensure optimal performance and safety.

  • Can A 3/8 Impact Wrench Remove Lug Nuts: Busting the Myth

    Can A 3/8 Impact Wrench Remove Lug Nuts: Busting the Myth

    The article will explore whether a 3/8″ impact wrench can remove lug nuts. It will start by providing a basic introduction to impact wrenches before diving into an overview of the 3/8″ impact wrench specifically. The article will then examine can a 3/8 impact wrench remove lug nuts and discuss the challenges it might face. It will also provide alternatives to a 3/8″ impact wrench, should the tool prove insufficient for specific tasks. Finally, the article will list some essential safety precautions when using an impact wrench before concluding and addressing frequently asked questions.

    Introduction to Impact Wrenches

    Impact wrenches have become essential tools in many workshops and for good reason. They provide high torque output with minimal user exertion, making them perfect for loosening stubborn bolts and nuts. But what about lug nuts? Specifically, can a 3/8″ impact wrench remove lug nuts? Let’s find out.

    Understanding the Capabilities of a 3/8″ Impact Wrench

    A 3/8″ impact wrench is handy for handling more minor tasks. These devices use the power of compressed air or electricity to provide a high torque level, making them an ideal choice for tightening and loosening nuts and bolts in various situations.

    Can A 3/8 Impact Wrench Remove Lug Nuts?

    Yes, a 3/8 impact wrench can remove lug nuts. However, there are specific considerations to keep in mind. A 3/8 impact wrench is a compact and lightweight tool that offers easy maneuverability, lower air consumption, reduced noise levels, and affordability. It is typically suitable for small cars with standard-sized wheels and well-maintained lug nuts.

    While a 3/8 impact wrench can efficiently remove lug nuts, its torque capabilities are relatively limited compared to a 1/2 inch impact wrench. This means it may need help with larger or more stubborn lug nuts, and it might take longer to remove tight nuts than a more powerful tool.

    Factors such as torque output, lug nut condition, and fastener size play a role in the effectiveness of a 3/8 impact wrench for lug nut removal. Rusty, corroded, or overtightened lug nuts may require a more powerful tool for successful removal. Choosing the right tool for the job and consulting professionals when unsure is crucial.

    In conclusion, while a 3/8 impact wrench can remove lug nuts, its efficiency may vary depending on the specific circumstances and the condition of the lug nuts. For heavy-duty vehicles or stubborn lug nuts, a more powerful tool such as a 1/2 inch impact or socket wrench may be more suitable.

    Choosing a 38 Impact Wrench

    Factors to Consider When Choosing a 3/8″ Impact Wrench

    When selecting a 3/8″ impact wrench, it’s crucial to consider factors such as torque output, size, weight, power source, torque adjustment, and brand reputation.

    Standard Car Lug Nuts

    Typically, a 3/8″ impact wrench can remove standard car lug nuts with relative ease. Most of these nuts require a torque level that falls within the range of what a 3/8″ impact wrench can produce. However, checking the torque requirements of the specific lug nuts you’re dealing with is always essential.

    Truck or SUV Lug Nuts

    Regarding larger vehicles like trucks or SUVs, the lug nuts can be more challenging to remove with a 3/8″ impact wrench due to the higher torque levels required. So, in some cases, it might be necessary to employ more powerful tools.

    Rusty or Corroded Lug Nuts

    Rusty or corroded lug nuts present an extra challenge for 3/8″ impact wrenches due to the additional resistance. If the rust or corrosion is severe, you might need a more powerful tool or some rust penetrant to help loosen the nut.

    Over-tightened and Cross-threaded Lug Nuts

    Over-tightened or cross-threaded lug nuts might also prove difficult for a 3/8″ impact wrench. Suppose the nuts are too tight or the threads are damaged. A giant impact wrench, a breaker bar, or even a specialist lug nut remover might be necessary.

    Challenges with a 3/8″ Impact Wrench

    While the 3/8″ impact wrench can be handy for many tasks, it does have its limitations. For instance, it might struggle with very tight or rusted nuts and bolts. In such cases, you might need to use a larger impact wrench or another tool to loosen the stubborn nuts before using the 3/8″ wrench.

    Alternatives to a 3/8" Impact Wrench

    Alternatives to a 3/8″ Impact Wrench

    Larger Impact Wrenches

    In scenarios where a 3/8″ impact wrench lacks the necessary torque, a 1/2″ impact wrench can be a suitable alternative. These tools provide more power, making them perfect for dealing with larger nuts and bolts or extremely tight ones.

    Breaker Bars, Socket Wrenches, and Other Tools

    If an impact wrench isn’t enough, other tools like breaker bars, socket wrenches, or dedicated lug nut removers can be used. Each tool has advantages; their use will depend on the specific situation and user’s preference.

    Safety Precautions

    Regardless of the tool you choose, taking safety precautions when removing lug nuts is vital. Always ensure you’re using the correct size socket, and be careful not to damage the wheel assembly. And remember, if you’re unsure, it’s always better to consult a professional.

    Are you interested in more power tools insights? Take advantage of our comprehensive article on the Best 1/2 Cordless Impact Wrench: Reviews, Guide. Discover top models, expert reviews, and tips to find your perfect match in impact wrenches!

    Frequently Asked Questions

    Can a 3/8″ impact wrench remove all types of lug nuts?

    No, a 3/8″ impact wrench may struggle with more significant, rusted, or over-tightened lug nuts.

    What alternatives can I use if a 3/8″ impact wrench is insufficient?

    If an inadequate 3/8″ impact wrench, alternatives include larger impact wrenches, breaker bars, socket wrenches, or dedicated lug nut removers.

    Is it safe to use a 3/8″ impact wrench to remove lug nuts?

    Yes, using a 3/8″ impact wrench to remove lug nuts is safe as long as you use the correct size socket and technique. Always ensure not to damage the wheel assembly.

    What are some factors to consider when choosing a 3/8″ impact wrench?

    Some factors to consider include torque output, size, weight, power source, torque adjustment, and brand reputation.

    What is the role of a torque wrench when using a 3/8″ impact wrench to remove lug nuts?

    A torque wrench can help you apply the correct amount of force needed to remove or install lug nuts. This can prevent over-tightening or under-tightening, which can cause damage.

    Conclusion

    In conclusion, can a 3/8 impact wrench remove lug nuts? We can say that, yes, a 3/8″ impact wrench can sometimes remove lug nuts. However, it might need help with more extensive, rusted, or over-tightened lug nuts. While it is a versatile and valuable tool, understanding its limitations is crucial. In some scenarios, turning to larger impact wrenches or other tools like breaker bars, socket wrenches, or dedicated lug nut removers may be necessary. Always consider the safety precautions required to avoid causing damage to the wheel assembly or injuring yourself.

  • What Size Air Compressor Do I Need For Impact Wrench

    What Size Air Compressor Do I Need For Impact Wrench

    Choosing the right size air compressor for an impact wrench can be a complex task. This comprehensive guide delves into what size air compressor do I need for impact wrench and the factors you need to consider, including airflow, CFM rating, tank capacity, air pressure, and the specific requirements based on the size of your impact wrench.

    1. Introduction to Impact Wrench and Air Compressor

    Understanding their functions and requirements is crucial to achieving optimal performance when working with tools. One such tool is the impact wrench, a versatile piece of machinery that uses compressed air, hydraulic, or electrical energy to release stored rotational energy quickly. This tool is a favorite in many industries due to its wide-ranging applications. The other critical part of this setup is the air compressor, which provides the power for the impact wrench to function effectively.

    How an Impact Wrench Works

    The impact wrench stores energy in a rotating mass and suddenly releases it to deliver a high-torque output. This mechanism makes it particularly useful for jobs that require considerable force, such as removing lug nuts from car wheels or assembling heavy machinery.

    The Role of an Air Compressor

    The air compressor, on the other hand, is the heart of the system. The device converts power into potential energy stored in pressurized air, which is then used to operate the impact wrench.

    Suppose you found this guide helpful and are looking for more insights into the world of Impact Wrench. In that case, we recommend checking out our article on the Best 1/2 Cordless Impact Wrench: Reviews, Guide and Best Air Impact Wrench for Changing Tires: Reviews. It’s packed with valuable information and reviews to help you make an informed choice for your next power tool purchase. Happy reading!

    Factors to Consider When Choosing an Air Compressor

    2. Factors to Consider When Choosing an Air Compressor for Your Impact Wrench

    Several factors need to be considered when selecting an air compressor for an impact wrench.

    Scale of the Project

    The scale of your project determines the size and power requirements of your impact wrench and, consequently, the air compressor. A larger, more demanding project may require a bigger, more powerful compressor.

    Use of Other Air Tools

    Suppose you intend to use other air tools alongside the impact wrench. In that case, you’ll need a compressor to provide enough power to run all your tools efficiently.

    Space and Portability Requirements

    The available space for storing the compressor and your portability needs are also critical factors. You may opt for a more compact and lightweight compressor if space is limited or the compressor needs to be moved around frequently.

    3. Understanding the Key Characteristics of Air Compressors

    Choosing a suitable air compressor requires an understanding of its fundamental characteristics.

    Airflow and CFM Rating

    The airflow, or the air a compressor can deliver, is measured in cubic feet per minute (CFM). The CFM rating required depends on the size of the impact wrench and can range anywhere from 2 to 16 CFM.

    Tank Capacity

    The air compressor’s tank capacity determines how much air it can hold and how long it can work before needing a refill. An impact wrench generally requires a minimum tank capacity of 6 gallons. However, larger wrenches may need 20 gallons or more.

    Air Pressure

    The air pressure, measured in pounds per square inch (PSI), is another critical factor. While a minimum of 90 PSI is necessary for operating an impact wrench, professionals often recommend 120 PSI or higher for optimal performance.

    4. Size of the Impact Wrench and its CFM Requirements

    Depending on the size of the impact wrench, the CFM requirement varies.

    Impact Wrench Sizes and Corresponding CFM

    For instance, a quarter-inch impact wrench would require an air compressor with a CFM rating of 1-1.5, while a 3/8-inch wrench would need a 3-3.5 CFM compressor. A half-inch wrench typically requires a compressor with a 3.5-5 CFM rating, while a one-inch wrench requires a 9-10 CFM rating.

    air compressor tank

    5. Tank Size and Air Pressure Considerations

    When choosing the tank size and air pressure, you must balance your requirements and cost.

    Recommended Tank Sizes for Different Wrench Sizes

    While a 6-gallon compressor can work for an impact wrench, it may require frequent refills, causing work delays. As such, a tank size of 20-30 gallons, offering 5-8 CFM, is often recommended for better performance.

    Ideal Air Pressure

    As previously mentioned, a minimum of 90 PSI is required for an impact wrench. However, a higher PSI of 120 or above is advisable for optimal performance.

    7. Frequently Asked Questions

    What is the CFM requirement for a 1/2 inch impact wrench?

    A 1/2-inch impact wrench typically requires an air compressor with a CFM rating of 3.5-5.

    What is the minimum tank size required for an impact wrench?

    An impact wrench generally requires a minimum tank size of 6 gallons.

    What is the recommended PSI for operating an impact wrench?

    While a minimum of 90 PSI is necessary for operating an impact wrench, professionals often recommend 120 PSI or higher for optimal performance.

    Can a 6-gallon compressor work for an impact wrench?

    Yes, a 6-gallon compressor can work for an impact wrench but may require frequent refills.

    What is the recommended tank size for better performance of an impact wrench?

    A tank size of 20-30 gallons is often recommended for better performance of an impact wrench.

    6. Conclusion

    Choosing the right size air compressor for your impact wrench involves carefully understanding your wrench’s requirements and the critical characteristics of air compressors. Factors such as the project scale, the use of other air tools, and storage and portability requirements should also be considered. By balancing these factors, you can select the best air compressor for your impact wrench, ensuring optimal project performance and efficiency.

  • Why Is My Chainsaw Cutting to the Left: Take the Right Path

    Why Is My Chainsaw Cutting to the Left: Take the Right Path

    Have you ever asked why is my chainsaw cutting to the left? Don’t worry; you’re not alone. This problem is not only frustrating, but it can also pose a danger during operation. But fret not! This article aims to shed some light on why this happens and how you can fix it. We’ll delve into the common causes, how to identify the issue, and the steps you can take to remedy this problem, ensuring a smoother and safer cutting experience.

    1. Understanding the Problem

    To combat the issue effectively, it’s vital to understand why a chainsaw might start cutting to the left. Various factors could contribute to this.

    I. Uneven Sharpening

    An unevenly sharpened chainsaw can disrupt its balance, favoring one direction over the other – in this case, to the left.

    II. Improper Chain Tension

    The tension of the chain is crucial to the tool’s operation. If the chain is too tight or loose, it could affect the alignment of the chainsaw, causing it to cut toward the left.

    III. Dull or Broken Cutting Teeth

    Dull or broken teeth on the chain can significantly impact your chainsaw’s cut direction. The chainsaw might veer off to the left if some teeth are worn out or damaged.

    IV. Imbalanced Top Plates and Angles

    If the top plates and cutting angles on your chainsaw aren’t balanced correctly, this can cause the chainsaw to lean and cut to one side.

    V. Incorrect Holding

    Sometimes, the issue might stem from the way you hold the chainsaw. An incorrect grip or angle can lead the chainsaw to cut to the left.

    dull chainsaw chain

    2. Identifying the Issue

    Knowing the potential causes of your chainsaw cutting to the left, the next step involves identifying the specific issue with your tool.

    I. Inspecting the Chainsaw

    A thorough inspection of your chainsaw is crucial. Check the chain’s tension and look for any dull or broken teeth. Also, make sure to inspect the top plates and the angles of the chain.

    II. The Significance of Chain Tension

    Proper chain tension is vital for the chainsaw to operate correctly. An overly tight or loose chain can lead to poor cutting performance and potentially hazardous situations.

    3. Fixes for Your Chainsaw’s Unwanted Direction

    Once you’ve identified the issue, the next step is to rectify it. Here’s how:

    I. Tools You’ll Need

    Having the right tools is critical for this task. You might need:

    • a file
    • file guide
    • file holder
    • wrench
    • screwdriver
    • safety gloves

    II. Sharpening the Chain Teeth

    Sharpening your chain teeth is essential for optimal chainsaw performance. Secure the chainsaw bar and adjust the chain tension. Position the file at an appropriate angle to the cutter and file until it achieves a shiny, silver color. Make sure to use the same number of strokes per tooth and maintain the factory default angle.

    III. Correcting the Chain Tension

    Adjusting the chain tension is another crucial step. Ensure it’s not too tight or too loose. Follow the manufacturer’s guidelines on chain bar attachment and adjustment.

    IV. Professional Services

    If you still need help or are uncomfortable making these adjustments yourself, consider seeking professional help. A professional can quickly identify and rectify any issues with your chainsaw.

    4. FAQ (Frequently Asked Questions)

    Q: What causes a chainsaw to cut to one side?

    A: There are several reasons why a chainsaw might cut to one side. These include uneven sharpening, improper chain tension, a dull chain on one side, uneven edges of the bar, or a bent bar. Accidentally hitting dirt or rocks can wear down one side of the chain, while manual sharpening can result in a crooked cut.

    QI: How do you fix a chainsaw that won’t cut straight?

    AI: To fix a chainsaw that’s not cutting straight, you must identify and rectify the underlying issue. If the problem is uneven sharpening, use a file with a guide and apply equal pressure to sharpen both sides evenly. If your bar is bent, it can be straightened or replaced. For uneven cutting teeth, ensure equal size and proper filing angles. Constantly adjust chain tension correctly and maintain a clean work environment to prevent future issues.

    QII: Why is my chainsaw not cutting in the middle of the bar?

    AII: If your chainsaw isn’t cutting in the middle of the bar, it could be due to uneven wear of the bar or the chain. Regularly flipping the chainsaw bar can help to balance the wear and avoid this problem. Also, maintaining a clean chainsaw, especially cleaning the bar groove and oil hole with a gauge tool, can improve its performance.

    QIII: How do you align a chainsaw?

    AIII: Aligning a chainsaw involves ensuring the correct chain tension, the proper sharpening of chain teeth, and balancing the wear of the bar. If the chain is uneven, sharpen it with a file until it becomes even. To avoid uneven wear on the bar, flip the chainsaw bar each time you refuel. It’s also crucial to clean the bar groove and oil hole for optimal alignment.

    QIV: How tight should the chainsaw blade be?

    AIV: The tension of a chainsaw blade should be such that it doesn’t sag from the underside of the bar but can be turned by hand without binding. Over-tightening can lead to excessive wear and potential breakage. At the same time, a loose chain can quickly come off the bar during operation. Always refer to your chainsaw’s user manual for specific instructions on chain tension.

    5. Conclusion

    A chainsaw cutting to the left can be a frustrating problem, but with a bit of know-how and the right tools, you can address it yourself. By understanding the potential causes, correctly identifying the issue, and applying the proper fixes, you can return your chainsaw to performing at its best. If you need more clarification, feel free to seek professional help. Your safety and the longevity of your chainsaw are paramount. Happy sewing!

  • Can You Use a Screwdriver Instead Of a Drill: Twist & Turn?

    Can You Use a Screwdriver Instead Of a Drill: Twist & Turn?

    In this article, we will explore the topic can you use a screwdriver instead of a drill? We will examine the differences between a screwdriver and a drill, situations where a screwdriver is preferred, advantages and limitations of using a screwdriver instead of a drill, alternatives to drills, and provide a conclusion summarizing the key points. Additionally, we will address common questions related to using a screwdriver instead of a drill in the FAQ section.

    1. Introduction

    Before delving into the details, it is essential to understand the definition of a screwdriver and a drill. We will also clarify the purpose of this article.

    I. Definition of a Screwdriver and a Drill

    A screwdriver is a manual tool designed for driving screws into various materials. It typically consists of a handle, shaft, and a tip matching the screw’s head type.

    A drill, on the other hand, is a power tool used for drilling holes and driving screws. It utilizes a motor to provide rotational force and is available in both corded and cordless versions.

    II. Purpose of the Article

    The purpose of this article is to explore the possibility of using a screwdriver as an alternative to a drill in certain situations. We will discuss the differences between these tools, situations where a screwdriver is preferred, the advantages and limitations of using a screwdriver instead of a drill, alternative options to drills, and provide recommendations for different scenarios.

    2. Differences between a Screwdriver and a Drill

    To understand the suitability of using a screwdriver instead of a drill, it is crucial to examine the key differences between these tools. The following aspects will be explored:

    I. Power Source

    A significant distinction between screwdrivers and drills is the power source. Screwdrivers are often manual tools, requiring human effort to drive screws. On the other hand, drills can be powered by electricity or batteries, offering motorized assistance.

    Efficiency

    Drills are generally more efficient than screwdrivers when it comes to driving screws quickly and drilling holes. They provide higher speeds and power to complete tasks faster.

    Versatility

    While screwdrivers are primarily designed for driving screws, drills offer greater versatility. They can be used for drilling holes of various sizes and materials, as well as driving screws.

    3. Situations Where a Screwdriver is Preferred

    There are specific situations where using a screwdriver may be preferred over a drill. These include:

    I. Precision Work

    Screwdrivers provide better control, reducing the risk of stripping screw heads. They are ideal for precision work where accuracy is paramount, such as assembling furniture or fixing small appliances.

    II. Working in Tight Spaces

    Screwdrivers, especially manual and electric ones, are typically smaller and more manageable than drills, making them a better choice for working in tight spaces or confined areas.

    III. Working with Delicate or Pre-Tapped Holes

    Screwdrivers minimize the risk of marring materials or causing damage due to their lower force than drills. They are therefore preferred when working with delicate materials or pre-tapped holes to prevent unwanted damage.

    IV. In Contaminated or Sterile Environments

    Screwdrivers are easier to clean and sanitize than drills, making them suitable for use in environments that require cleanliness, such as specific laboratory or medical work.

    V. During Power Outages or Emergencies

    As screwdrivers don’t require electricity, they can be used during power outages, emergencies, or locations without power access.

    VI. When Using Regular Slot Screws

    When a screw head has a regular slot, using a manual screwdriver can prevent skipping or stripping the screw head.

    VII. Light-duty Tasks

    Electric screwdrivers are more suitable for light-duty tasks such as minor repairs or DIY projects. They are easier to use and are more likely to be owned by homeowners who do occasional maintenance.

    In conclusion, while drills offer speed and power for larger tasks, there are many situations where a screwdriver is the preferred tool, especially when precision, control, and portability are essential.

    4. Advantages of Using a Screwdriver Instead of a Drill

    While drills offer greater power and versatility, there are advantages to using a screwdriver instead of a drill in certain circumstances. These advantages include:

    I. Lack of Nearby Power Outlets

    In situations where power outlets are not readily available, a manual screwdriver or a cordless screwdriver can be used without the need for an electrical power source.

    II. Heavy Objects

    Screwdrivers are lighter and more portable than drills, making them preferable when working with heavy objects or in situations that require extended use.

    III. Need for Precision

    Screwdrivers provide better control and precision, making them suitable for tasks that require delicacy and careful handling.

    IV. Tight Spaces

    The compact size of screwdrivers allows for easy access and operation in confined spaces where larger drills may not fit.

    5. Limitations of Using a Screwdriver Instead of a Drill

    While screwdrivers have their advantages, there are limitations to consider when using them instead of drills. These limitations include:

    I. Power and Torque

    Screwdrivers, especially manual ones, have limited power and torque compared to drills. They may struggle with demanding tasks or dense materials.

    II. Limited Functions

    Screwdrivers are primarily designed for driving screws and have limited functionality beyond that. They may not be suitable for tasks requiring drilling holes or working with certain materials.

    III. Material Compatibility

    Certain materials, such as metal or hardwood, may require the power and speed of a drill to achieve efficient results. Screwdrivers may struggle with these materials.

    6. Alternatives to Drills

    If a drill is not available or not the preferred option, there are alternative tools that can serve similar purposes. These alternatives include:

    I. Hand-Held Power Drills

    Hand-held power drills offer a more compact and lightweight option compared to larger drill models. They provide similar functionality and can be useful in various tasks.

    II. Electric Screwdrivers

    Electric screwdrivers combine the convenience of a cordless tool with the power of a motor. They are specifically designed for driving screws and can be a suitable alternative to both manual screwdrivers and drills.

    III. Hammers and Nails

    For tasks that do not require drilling or driving screws, traditional hammers and nails can be an effective alternative.

    IV. Hot Glue Guns

    Hot glue guns can be used for certain applications where adhesion is required. They are particularly useful for crafts, DIY projects, and temporary fixes.

    Discover the full potential of your cordless drill! If you want to unlock its hidden versatility as a screwdriver, check out our comprehensive guide on how to use cordless drill as screwdriver. Don’t miss the opportunity to maximize your tool’s capabilities—read the article now!

    FAQs (Frequently Asked Questions)

    I. Can a screwdriver replace a drill for heavy-duty tasks?

    No, a screwdriver cannot effectively replace a drill for heavy-duty tasks. Screwdrivers are designed for lighter tasks such as driving screws into various materials, while drills provide more power and torque needed for heavy-duty drilling and fastening tasks. Using a screwdriver for heavy-duty tasks may lead to inefficiency and potential damage to the tool or workpiece.

    II. Can I use a screwdriver to drill holes in walls?

    It is not recommended to use a screwdriver to drill holes in walls. Screwdrivers are not designed for drilling tasks and lack the necessary power and speed to effectively drill into walls. For drilling holes in walls, it is best to use a drill with an appropriate drill bit specifically designed for masonry or wood, depending on the wall material.

    III. Are there any safety precautions when using a screwdriver instead of a drill?

    When using a screwdriver instead of a drill, it is important to consider the limitations of the tool and take appropriate safety precautions. Some safety precautions include:

    • Ensure the screwdriver is suitable for the task and compatible with the screw type and size.
    • Apply proper hand placement and grip to maintain control while driving screws.
    • Use caution to avoid stripping the screws or damaging the workpiece.
    • Be mindful of your surroundings and avoid placing excessive pressure on the screwdriver to prevent slips or injuries.
    • Follow general safety guidelines, such as wearing appropriate personal protective equipment (PPE) like safety glasses or gloves, depending on the task at hand.

    7. Conclusion

    In conclusion, screwdrivers and drills serve different purposes and offer unique advantages. Screwdrivers are preferred in situations that require control, reduced risk of stripping screws, and precision work in tight spaces. They are suitable for scenarios where power outlets are limited, working with heavy objects, or when precise handling is necessary. However, screwdrivers have limitations in terms of power, torque, and material compatibility. In such cases, drills provide greater efficiency and versatility. When selecting between screwdrivers and drills, it is essential to consider the specific requirements of the task at hand.