Category: Expert Guides and Tips

Explore our expert guides and tips for power tools, home improvement, lawn and garden projects, and more. Get step-by-step instructions, valuable insights, and practical advice to tackle your DIY projects like a pro. Discover the best techniques, tools, and strategies to enhance your skills and achieve remarkable results.

  • What Are the Hazards of Drilling Machine: Danger Alert!

    What Are the Hazards of Drilling Machine: Danger Alert!

    Drilling machines are powerful tools used in various industries and construction sites to create holes in wood, metal, or concrete. While these machines offer efficiency and convenience, it’s important to be aware of the hazards they pose. In this article, we will explore what are the hazards of drilling machine and the potential dangers of drilling machines and discuss safety measures to mitigate these risks.

    What Are the Hazards of Drilling Machine

    1. Understanding the Hazards of Drilling Machines

    Drilling machines are versatile tools used in various applications, including woodworking, metalworking, construction, and manufacturing. They are designed to create holes with precision and speed. However, drilling machines can expose workers to hazards if proper safety precautions are not followed.

    2. Potential Hazards of Hazards of Drilling Machine

    I. Noise and Vibration

    Drilling machines generate high noise and vibrations during operation, leading to hearing loss and musculoskeletal disorders.

    II. Eye and Face Injuries

    Particles, metal shavings, or debris can be ejected from the drilling process, posing a risk of eye and face injuries. Workers must wear appropriate eye protection, such as safety glasses or face shields, to prevent such injuries.

    III. Inhalation of Dust and Fumes

    Fine dust particles or hazardous fumes may be released when drilling into concrete or metal. Inhalation of these contaminants can cause respiratory issues and long-term health problems. Adequate ventilation and respiratory protection, such as masks or respirators, are essential.

    IV. Flying Debris

    The drilling process can generate flying debris, including metal fragments or wood chips. These projectiles can cause serious injuries if they come into contact with unprotected body parts. Appropriate personal protective equipment (PPE) prevents such hazards.

    V. Entanglement and Caught-in Hazards

    Loose clothing, jewelry, or long hair can become entangled in the moving parts of a drilling machine, leading to severe injuries. It is important to secure loose items and tie back long hair before operating the equipment.

    VI. Electrical Hazards

    Drilling machines are powered by electricity, and if not properly grounded or maintained, they can pose electrical shock and electrocution hazards. Regular inspections and adherence to electrical safety guidelines are necessary to minimize these risks.

    VII. Fire and Explosion Risks

    Heat or sparks may be generated when drilling into certain materials, potentially igniting flammable substances or explosive atmospheres. Following proper safety procedures and identifying potential fire or explosion hazards in the working environment is crucial.

    VIII. Ergonomic Hazards

    Extended drilling periods can lead to ergonomic hazards, such as muscle strains or repetitive stress injuries. Using ergonomic workstations and taking regular breaks to stretch and rest can help reduce the risk of such injuries.

    IX. Chemical Exposure

    In some drilling applications, workers may come into contact with chemicals or hazardous substances. Proper handling, storage, and use of these materials are essential to prevent chemical exposures and associated health risks.

    X. Risk of Falls

    Working at heights or on unstable surfaces while operating a drilling machine increases the risk of falls. Using appropriate fall protection equipment and ensuring a stable work platform is vital for preventing fall-related injuries.

    Drilling

    3. Safety Measures for Working with Drilling Machines

    To ensure a safe working environment when using drilling machines, it is essential to implement the following safety measures:

    I. Personal Protective Equipment (PPE)

    Workers should wear appropriate PPE, including safety glasses, face shields, hearing protection, gloves, and respiratory protection, based on the specific hazards in the drilling operation.

    II. Training and Education

    Proper training should be provided to all workers operating drilling machines. This training should cover safe work practices, hazard identification, emergency procedures, and the appropriate use of equipment and PPE.

    III. Machine Guarding

    Drilling machines should have appropriate machine guards to prevent contact with moving parts. Guards should be regularly inspected and maintained to ensure their effectiveness.

    IV. Proper Ventilation

    Where drilling generates dust, fumes, or vapors, proper ventilation systems should be in place to remove airborne contaminants from the work area.

    V. Regular Maintenance and Inspections

    Drilling machines should undergo regular maintenance and inspections to identify potential safety issues. Defective or damaged equipment should be immediately repaired or replaced.

    VI. Safe Work Practices

    Establishing safe work practices, such as securing loose clothing and hair, maintaining a clean and organized work area, and using proper lifting techniques, can significantly reduce the risk of accidents.

    4. FAQs(Frequently Asked Questions)

    QI. Do all drilling machines produce the same noise and vibration level?

    No, the noise and vibration levels can vary depending on the type and size of the drilling machine. However, it is important to use suitable hearing protection and follow ergonomic practices regardless of the machine used.

    QII. Can drilling machines cause long-term health issues from inhaling dust and fumes?

    Yes, inhaling dust and fumes generated during drilling can lead to respiratory problems and long-term health issues. Adequate ventilation and respiratory protection are essential to minimize these risks.

    QIII. What type of machine guarding is necessary for drilling machines?

    Drilling machines should be equipped with guards that prevent contact with moving parts. This includes ensuring the chuck guard covers the rotating drill bit and that belts and pulleys are properly guarded.

    QIV. How often should drilling machines be inspected for safety purposes?

    Drilling machines should undergo regular inspections as part of a preventive maintenance program. The frequency of assessments may vary depending on factors such as machine usage, manufacturer recommendations, and specific workplace requirements.

    QV. Are there any specific regulations regarding the safe use of drilling machines?

    Yes, occupational health and safety regulations provide guidelines for the safe use of drilling machines. These regulations may vary depending on the country or region. Employers should familiarize themselves with the relevant regulations and ensure compliance in their workplace.

    5. Conclusion

    Drilling machines are indispensable tools in many industries. However, they come with inherent hazards threatening workers’ safety and health. By understanding these hazards and implementing appropriate safety measures, employers and workers can create a safer working environment and minimize the potential for accidents and injuries.

  • Air Impact Wrench Accessories: Boost Your Productivity

    Air Impact Wrench Accessories: Boost Your Productivity

    Air impact wrenches are powerful tools in various industries, including automotive repair, construction, and manufacturing. These tools rely on a steady supply of compressed air to deliver high torque output, making them ideal for loosening and tightening stubborn fasteners. While the impact wrench is the primary tool, accessories enhance its functionality and expand its capabilities.

    Air Impact Wrench Accessories

    1. Best Air Impact Wrench Accessories

    I. Impact Sockets: Enhancing Power and Efficiency

    Impact sockets are designed to withstand the high torque air impact wrenches generate. They are made from durable materials such as chrome molybdenum steel, which can handle extreme forces without breaking or shattering. Impact sockets also feature a thicker wall than regular sockets, allowing them to absorb the sudden impact and prevent damage to both the socket and the fastener.

    II. Socket Sets: Versatility for Various Applications

    Socket sets are collections of impact sockets in various sizes and types. These sets provide versatility by offering a range of socket sizes to accommodate different fastener dimensions. With a socket set, users can easily switch between sockets to match the specific requirements of each task, eliminating the need for multiple individual sockets.

    III. Extension Bars: Reach Difficult Areas with Ease

    Extension bars are invaluable accessories for reaching fasteners in tight or hard-to-reach spaces. These bars attach to the square drive of the air impact wrench and extend its reach, allowing users to access bolts and nuts in confined areas. Extension bars come in different lengths, providing flexibility and adaptability to work environments.

    IV. Swivel Joints: Flexible Maneuverability

    Swivel joints, also known as universal joints, enable the air-impact wrench to rotate and pivot without restriction. These accessories are particularly useful when working on angles or when the fastener is not easily accessible. Swivel joints prevent the wrench from binding up, providing smooth and efficient operation even in challenging positions.

    V. Air Hose and Fittings: Connecting the Tool to Power

    Air impact wrenches rely on a steady supply of compressed air to function properly. Therefore, having a reliable air hose and fittings is essential. The air hose should be durable, flexible, and capable of delivering sufficient airflow to the wrench. High-quality fittings ensure a secure and airtight connection between the hose and the tool, preventing air leaks and maximizing efficiency.

    VI. Filter-Regulator-Lubricator (FRL) Units: Optimal Tool Performance

    FRL units, including air impact wrenches, are essential components in any pneumatic system. These units consist of a filter, regulator, and lubricator, each serving a specific purpose. The filter removes contaminants from the compressed air, ensuring clean airflow to the tool. The regulator controls the air pressure, allowing users to adjust it according to the task. The lubricator introduces a fine mist of oil into the air stream, lubricating the internal components of the wrench and promoting smooth operation.

    VII. Impact Wrench Oil: Ensuring Longevity and Smooth Operation

    Proper lubrication is vital for an air impact wrench’s longevity and optimal performance. Impact wrench oil is specially formulated to withstand the high temperatures and pressures these tools generate. Regularly applying the recommended oil helps reduce friction, prevent wear and tear, and maintain the smooth operation of the wrench.

    VIII. Protective Gear: Safety First

    Working with air impact wrenches involves the risk of flying debris, loud noise, and potential hand-arm vibration. Therefore, it is essential to prioritize safety by wearing appropriate protective gear. Safety glasses or goggles protect the eyes from debris while hearing protection helps prevent hearing damage due to prolonged exposure to high noise levels. Additionally, gloves provide a better grip on the tool and help absorb vibrations, reducing the risk of hand-arm vibration syndrome.

    IX. Storage Solutions: Keeping Accessories Organized

    Proper storage of air impact wrench accessories is crucial to maintain efficiency and prevent loss or damage. Investing in a tool chest, toolbox, or wall-mounted storage system allows users to keep their accessories organized, easily accessible, and protected from dust and moisture. Proper storage also helps extend the lifespan of the accessories by preventing unnecessary wear and tear.

    2. Maintenance and Care Tips for Air Impact Wrench Accessories

    Regular maintenance is essential to ensure the longevity and optimal performance of air impact wrench accessories. Here are some general care tips:

    • Clean the accessories after each use to remove dirt, debris, and contaminants.
    • Inspect impact sockets and extension bars for any signs of wear or damage. Replace them if necessary.
    • Check air hoses and fittings for leaks or damage. Replace any faulty components.
    • Lubricate the air impact wrench according to the manufacturer’s recommendations.
    • Store the accessories in a clean and dry environment, away from excessive heat or moisture.
    • Follow the manufacturer’s instructions for any specific maintenance procedures.

    3. Choosing the Right Accessories for Your Needs

    When selecting air impact wrench accessories, it is important to consider the specific requirements of your tasks. Factors to consider include the type of fasteners you work with, the environments you operate in, and the frequency of tool use. Investing in high-quality accessories from reputable brands ensures durability, performance, and compatibility with your air impact wrench.

    4. Frequently Asked Questions (FAQ)

    Q1: Can I use regular sockets with an air impact wrench?

    A1: Regular sockets are not designed to withstand the high torque air impact wrenches generate. Using impact sockets specifically designed for these tools is recommended to prevent damage to the socket and the fastener.

    Q2: What size of impact sockets do I need?

    A2: The size of impact sockets depends on the fasteners you will work with. It is advisable to have a set of impact sockets in various sizes to cover a wide range of applications.

    Q3: Can I use an air impact wrench for automotive repairs?

    A3: Yes, air impact wrenches are commonly used in automotive repairs for tasks such as loosening and tightening lug nuts, removing bolts, and more. They provide high torque output and make these tasks much faster and easier.

    Q4: How often should I lubricate my air impact wrench?

    A4: The frequency of lubrication depends on the manufacturer’s recommendations and the intensity of use. As a general guideline, it is advisable to lubricate the tool after every few hours of use or as recommended by the manufacturer.

    Q5: Can I use air impact wrenches for delicate tasks?

    A5: Air impact wrenches are powerful tools designed for heavy-duty applications. They may not be suitable for delicate tasks that require precise control or low torque. It is important to assess the specific requirements of the task and choose the appropriate tool accordingly.

    5. Conclusion

    Air impact wrench accessories significantly enhance these powerful tools’ functionality, efficiency, and versatility. From impact sockets and socket sets to extension bars, swivel joints, and air hoses, each accessory specifically expands the capabilities of the air impact wrench. By choosing the right accessories and properly maintaining them, users can easily tackle a wide range of tasks and maximize the performance of their air impact wrenches.

    6. You may also like these posts!

  • Maintenance Tips for Air Impact Wrench: Longevity Secrets!

    Maintenance Tips for Air Impact Wrench: Longevity Secrets!

    Air impact wrenches are powerful tools commonly used in automotive and mechanical work. To ensure optimal performance and longevity, proper maintenance and care are crucial. This article outlines essential maintenance tips for air impact wrenches, focusing on effective lubrication techniques and impact mechanism maintenance.

    Maintenance Tips For Air Impact Wrench

    1. Lubrication for Cordless Impact Wrenches

    Cordless impact wrenches require regular lubrication to prevent damage and premature wear. Although they may seem maintenance-free, greasing the moving parts is necessary for their smooth operation. To lubricate your cordless impact wrench, follow these steps:

    • Disassemble the impact wrench to access the moving parts easily.
    • Apply multi-purpose grease to the anvil, ball bearing, planetary gears, main gears, and inside the hammer case.
    • Lubricate the motor shaft using a lubricating spray and the same grease used for the other parts.

    2. Lubrication for Pneumatic Impact Wrenches

    Pneumatic impact wrenches have separate mechanisms, the air motor and impact mechanism, which require individual lubrication.

    3. Air Motor Lubrication

    To lubricate the air motor of a pneumatic impact wrench, you have two options:

    • Install an inline lubricator in your compressor and fill it with air tool oil. This ensures continuous lubrication of the air motor.
    • Manually lubricate the tool through the air inlet by adding 10-15 drops of air tool oil. Run the tool for a few seconds to distribute the oil throughout the motor.

    4. Impact Mechanism Lubrication Techniques

    Proper lubrication of the impact mechanism ensures minimal friction between the anvil and hammer, contributing to the tool’s efficient operation and longevity.

    I. Flush-mount grease fitting method

    Use a grease gun in an Air Care Kit to lubricate the impact mechanism through the flush-mount grease fitting.

    II. Manual lubrication method

    Remove the hammer case and manually grease the impact mechanism per the instructions in the manufacturer’s video guide.

    5. Recommended Lubricants and Quantities

    To ensure proper lubrication for your air impact wrench, use the following recommended lubricants:

    I. Air Care Kit (105-LBK1)

    Suitable for most 3/8″ to 3/4″ drive impacts. Air Care Kit (105-LBK1) includes a 4-ounce bottle of air tool oil, a 4-ounce tube of grease (105 greases), and a grease gun for lubrication through the fitting.

    II. Air tool oil

    Use Air Tool Oil, applying 10-15 drops in the air inlet before each use and for storage to prevent corrosion.

    III. Grease

    Depending on the tool, use 105-4T (4-ounce tube) or 105-1LB (1-pound can) of grease for impact mechanism lubrication.

    6. Maintenance Frequency and Best Practices

    To ensure optimal performance and longevity of your air impact wrench, follow these maintenance guidelines:

    • Lubricate the air motor and impact mechanism before each use for cordless and pneumatic impact wrenches.
    • For prolonged use without an inline lubricator, reapply oil to cordless impact wrenches after every few hours of use.
    • Perform impact mechanism lubrication for pneumatic impact wrenches after every 48 hours of actual tool run-time.
    • Consult the Product Information Manual specific to your tool for recommended lubricants and quantities.

    7. Improving Durability through Lubrication

    Inadequate lubrication is a common cause of reduced durability and premature tool failure. Regular maintenance, including proper lubrication, significantly improves the durability and longevity of your impact wrench. Keeping the oil and grease levels topped up ensures excellent performance and productivity throughout the tool’s lifetime.

    8. Frequently Asked Questions (FAQs)

    QI: How often should I lubricate my air impact wrench? 

    A: It is recommended to lubricate the air motor before each use and the impact mechanism every 48 hours of actual tool run-time.

    QII: What lubricant should I use for my cordless impact wrench? 

    A: Apply IR #10 Air Tool Oil to the air inlet of your cordless impact wrench.

    QIII: Can I use any type of grease for the impact mechanism of my pneumatic impact wrench? 

    A: Refer to the Product Information Manual for your specific pneumatic impact wrench to determine the suitable grease type and quantity.

    QIV: Is it necessary to disassemble my cordless impact wrench for lubrication? 

    A: Disassembling your cordless impact wrench is generally optional. Apply multi-purpose grease to the accessible moving parts as instructed.

    QV: Can I use WD-40 as a substitute for air tool oil? 

    A: It is recommended to use the specified air tool oil (IR #10 Air Tool Oil) for lubricating your impact wrench, as it is specifically designed for this purpose and provides optimal lubrication.

    9. Conclusion

    Maintenance is crucial for maximizing the performance and lifespan of air impact wrenches. Following the tips and guidelines, users can effectively lubricate their cordless and pneumatic impact wrenches, ensuring smooth operation, extended durability, and optimal functionality. Regular lubrication of the air motor and impact mechanism, as well as using recommended lubricants, will help prevent damage, excessive wear, and premature tool failure. Remember to consult your tool’s specific Product Information Manual to ensure accurate lubrication practices.

    10. You may also like these posts!

  • Impact Wrench Safety Tips: Mastering Impact Wrench Safety

    Impact Wrench Safety Tips: Mastering Impact Wrench Safety

    Impact wrenches are powerful tools widely used in the automotive and construction industries. While they can make tasks faster and more efficient, they can also be dangerous if not used properly. This article will discuss the essential impact wrench safety tips that every user should follow to prevent accidents and injuries.

    1. Introduction

    Impact wrenches, also known as impact guns or air guns, are pneumatic tools that use compressed air to generate high torque output. They are commonly used in industries requiring high-speed assembly and heavy machinery disassembly, such as automotive repair and construction. While these tools can greatly improve productivity, they can also cause accidents and injuries if not used properly. This article provides safety tips and guidelines to help users prevent accidents and injuries when using impact wrenches.

    2. Understanding Impact Wrenches

    Impact wrenches use a combination of rotating mass and impact force to apply torque to a fastener. They are available in various sizes and types, including pneumatic, electric, and cordless. Pneumatic impact wrenches are the most common type, as they are powerful, durable, and relatively inexpensive.

    3. Common Hazards and Risks

    Before using an impact wrench, it’s important to understand the common hazards and risks associated with this tool. Some of the common hazards include:

    • Pinch Points

    Pinch points occur when the operator’s hands, fingers, or body parts are caught between moving parts of the tool, such as the rotating socket or the anvil. Pinch points can cause serious injuries, such as fractures, cuts, and amputations.

    • Flying Objects

    When an impact wrench is in use, it can cause fasteners, nuts, bolts, or other objects to fly off at high speeds. These flying objects can cause serious injuries to the operator or other nearby people.

    • Electrical Hazards

    Electric impact wrenches can pose electrical hazards if not used properly. The risk of electrical shock can increase if the tool is used in wet or damp conditions or if the power cord is damaged.

    4. Safety Precautions

    To prevent accidents and injuries when using an impact wrench, it’s essential to follow these safety precautions:

    • Wear Appropriate PPE

    Wearing appropriate personal protective equipment (PPE) is crucial for impact wrench safety. Safety glasses, gloves, and ear protection can prevent injuries to your eyes, hands, and ears. Additional PPE may be necessary depending on the specific job and workplace hazards. Proper training, tool maintenance, and safe work practices are also important for preventing accidents and injuries.

    • Inspect Your Tools Before Use

    Before using an impact wrench:

    1. Inspect it for any signs of damage or wear.
    2. Check the air hoses, electrical cords, and connections for frays, cracks, or other defects.
    3. Ensure the tool is properly lubricated and all components securely fastened.
    • Use the Right Socket and Accessories

    Use the appropriate socket and accessories for the job. Using the wrong size or type of socket can cause damage to the tool or the workpiece. Always use sockets and accessories rated for the maximum torque output of your impact wrench.

    • Secure the Workpiece

    Secure the workpiece in a vice or clamp before using the impact wrench. This will prevent it from moving or shifting during operation, reducing the risk of accidents or injuries.

    • Keep Your Hands and Body Away from Moving Parts

    Keep your hands, fingers, and body parts away from the moving parts of the impact wrench. This includes the rotating socket, anvil, and trigger. Always use two hands to operate the tool, and maintain a secure grip to prevent the tool from slipping or bouncing.

    • Follow the Manufacturer’s Instructions

    Always follow the manufacturer’s instructions when using an impact wrench. This includes operating procedures, maintenance instructions, and safety guidelines. Failure to follow these instructions can result in accidents or injuries.

    Safe Operating Practices

    5. Safe Operating Practices

    In addition to the safety precautions mentioned above, it’s also important to follow safe operating practices when using an impact wrench:

    • Use Two Hands

    Always use two hands to operate the impact wrench. This will provide better control and stability, reducing the risk of accidents or injuries.

    • Maintain a Secure Grip

    Maintain a secure grip on the impact wrench at all times. This will prevent it from slipping or bouncing during use, reducing the risk of accidents or injuries.

    • Never Use Extension Cords as a Substitute for Proper Wiring

    Never use extension cords as a substitute for proper wiring. Extension cords can cause voltage drops, damaging the motor or reducing the tool’s performance. Always use the proper wiring and grounding for your impact wrench.

    • Never Exceed the Tool’s Rated Capacity

    Never exceed the tool’s rated capacity. Exceeding the maximum torque output can cause damage to the tool or the workpiece. It can also lead to accidents or injuries.

    • Never Alter or Modify the Tool

    Never alter or modify the impact wrench. This can cause damage to the tool, reduce its performance, or increase the risk of accidents or injuries.

    • Stop the Tool Immediately if Something Goes Wrong

    If something goes wrong during use, such as the tool jamming or the socket becoming stuck, stop the tool immediately. This will prevent further damage and reduce the risk of accidents or injuries.

    6. Tool Maintenance and Storage

    To ensure the safe and efficient use of an impact wrench, it’s important to perform regular maintenance and proper storage:

    • Regular Cleaning and Inspection

    Regularly clean and inspect your impact wrench for any signs of damage or wear. Check the air hoses, electrical cords, and connections for frays, cracks, or other defects. Ensure the tool is properly lubricated and all components securely fastened.

    • Proper Lubrication

    Proper lubrication is essential for the proper functioning of an impact wrench. Use the recommended lubricant for your tool, and follow the manufacturer’s instructions for lubrication frequency and amount.

    • Safe Storage Practices

    When not in use, store your impact wrench in a clean, dry, and secure location. Keep it out of reach of children and pets, and ensure it is not exposed to extreme temperatures or humidity.

    7. FAQs

    • Can impact wrenches be used for automotive repair?

    Yes, impact wrenches are commonly used in automotive repair to change tires and remove bolts.

    • Can impact wrenches cause injuries?

    Yes, impact wrenches can cause injuries if used improperly or if safety precautions are not followed.

    • Are there different types of impact wrenches?

    There are electric, pneumatic, and cordless impact wrenches, each with advantages and disadvantages.

    • Do I need to wear protective gear when using an impact wrench?

    It is recommended to wear protective gear such as safety glasses, gloves, and ear protection when using an impact wrench.

    • Can impact wrenches be used for tightening bolts?

    Yes, impact wrenches are commonly used for tightening bolts. However, ensuring the tool is set to the appropriate torque level is important to prevent over-tightening and damage to the workpiece.

    8. Conclusion

    In conclusion, impact wrenches are powerful tools that greatly improve productivity in various industries. However, they also pose certain safety risks that must be taken seriously. Following the safety tips and practices outlined in this article can reduce the risk of accidents and injuries while using an impact wrench.

    Inspect your tools before use, use the right socket and accessories, secure the workpiece, keep your hands and body away from moving parts, and follow the manufacturer’s instructions. Additionally, use two hands, maintain a secure grip, never use extension cords as a substitute for proper wiring, never exceed the tool’s rated capacity, never alter or modify the tool, and stop immediately if something goes wrong.

    Regular cleaning and inspection, proper lubrication, and safe storage practices are also important for safely and efficiently using an impact wrench. Following these tips and practices ensures that your impact wrench remains a valuable tool that helps you get the job done safely and effectively.

    You may also like this posts!

  • The Benefits of Using an Impact Wrenches: Beyond The Basics

    The Benefits of Using an Impact Wrenches: Beyond The Basics

    The right tool can make all the difference in completing a job efficiently and effectively. In recent years, the impact wrench has risen in popularity as a powerful tool that can save time and reduce the risk of injury in the automotive and construction industries. This article will explore The Benefits of Using an Impact Wrenches, their advantages, and disadvantages, how they compare to other tools, their applications, and tips for using and maintaining them.

    Whether you’re a professional mechanic or a DIY enthusiast, having the right tools is essential for getting the job done right. The impact wrench has become a go-to tool for those in industries that require heavy-duty fastenings, such as automotive repair and construction. In this article, we will examine the features and benefits of impact wrenches and provide practical advice for selecting and using them effectively.

    1: What is an Impact Wrench?

    An impact wrench is a power tool designed to deliver high torque output without much physical effort from the user. It is commonly used for tightening and loosening nuts and bolts in automotive repair, construction, and other industrial applications.

    • The Basics of an Impact Wrench:

    An impact wrench works by converting the rotational motion of its motor into a series of rapid, powerful impacts. This allows the tool to generate significant torque that can quickly and easily loosen or tighten fasteners.

    • Types of Impact Wrenches:

    There are three main types of impact wrenches: corded electric, cordless electric, and pneumatic. Corded electric impact wrenches are typically more powerful and reliable than cordless models but require a nearby power source. On the other hand, cordless electric impact wrenches offer greater portability and convenience but may have less torque output and shorter battery life. Pneumatic impact wrenches are powered by compressed air and are commonly used in professional automotive and industrial settings.

    • How Impact Wrenches Work:

    An impact wrench uses a hammer and anvil mechanism to generate high torque output. The hammer is attached to a rotating shaft inside the tool and strikes the anvil connected to the output shaft. As the hammer strikes the anvil, it creates a sudden burst of torque that can easily overcome resistance from a fastener. This process repeats rapidly, allowing the tool to tighten or loosen a nut or bolt quickly.

    2: Advantages of Using an Impact Wrench

    An impact wrench is a versatile and powerful tool with several advantages over traditional wrenches. Here are some of the key advantages of using an impact wrench:

    • Increased Efficiency and Productivity:

    One of the main advantages of an impact wrench is that it can significantly increase your efficiency and productivity. Because it delivers high torque output with minimal effort, it allows you to tighten or loosen nuts and bolts quickly. This can save you time and effort, especially when working on large or complex projects.

    • Reduced Risk of Injury:

    Using an impact wrench can also reduce the risk of injury. With a traditional wrench, you may need significant physical force to loosen or tighten a fastener, which can strain your muscles and joints. An impact wrench, on the other hand, does most of the work for you, reducing the risk of strain or injury.

    • Consistent and Precise Torque:

    Another advantage of an impact wrench is that it can provide consistent and precise torque output. This can be especially important when working on sensitive or delicate materials, as it allows you to apply just the right amount of force without damaging the material.

    • Versatility and Compatibility:

    Finally, impact wrenches are versatile and compatible with many fasteners and applications. They can be used for automotive repair, construction, industrial maintenance, and more. Additionally, many impact wrenches come with interchangeable sockets, allowing you to use them with various fastener sizes and types.

    An impact wrench can help you work more efficiently, reduce the risk of injury, apply precise and consistent torque, and tackle various applications.

    3: Impact Wrenches vs Other Tools

    When it comes to tightening and loosening nuts and bolts, several types of wrenches are available. Here’s how impact wrenches compare to some other popular types of wrenches:

    • Impact Wrenches vs. Manual Wrenches:

    Manual wrenches, such as adjustable and box-end wrenches, rely on physical force to tighten or loosen fasteners. While they are simple and easy to use, they require significant physical effort and may not be suitable for larger or more complex projects. In contrast, impact wrenches use a motorized mechanism to deliver high torque output, making them much faster and more efficient than manual wrenches.

    • Impact Wrenches vs. Pneumatic Wrenches:

    Pneumatic wrenches, also known as air wrenches, are powered by compressed air and are commonly used in industrial and automotive settings. They are similar to impact wrenches in that they use a hammer and anvil mechanism to generate torque but require an air compressor to operate. While pneumatic wrenches can be more powerful than electric or cordless impact wrenches, they are also heavier and less portable.

    • Impact Wrenches vs. Electric Wrenches:

    Electric wrenches, such as corded and cordless models, use a motor to generate torque. They are similar to impact wrenches in that they are fast and efficient but may not be as powerful as pneumatic wrenches. Corded electric wrenches are more reliable and consistent in their torque output, but they are also less portable than cordless models.

    • Pros and Cons of Each Type of Wrench:

    Manual wrenches are simple and easy to use but require significant physical effort and may not be suitable for larger projects. Pneumatic wrenches are powerful and efficient but require an air compressor and can be heavy and less portable. Electric wrenches are fast and efficient but may not be as powerful as pneumatic wrenches and may have limited battery life for cordless models. Impact wrenches offer high torque output, increased efficiency and productivity, reduced risk of injury, consistent and precise torque, and versatility and compatibility with a wide range of applications. However, they may be more expensive than manual wrenches and require a power source or compressed air.

    In conclusion, while each type of wrench has pros and cons, impact wrenches offer a powerful and efficient solution for tasks that involve tightening or loosening nuts and bolts.

    4: Applications of Impact Wrenches

    Impact wrenches are versatile tools used in various applications across different industries. Here are some common applications of impact wrenches:

    • Automotive Repair and Maintenance:

    One of the most common uses of impact wrenches is in automotive repair and maintenance. They are used to quickly and easily tighten or loosen nuts and bolts on engines, tires, and other vehicle parts. Impact wrenches can also be used in tire shops to quickly and efficiently change vehicle tires.

    • Construction and Woodworking:

    Impact wrenches are also used in construction and woodworking. They are useful for tightening bolts on scaffolding, steel structures, and concrete forms. In woodworking, impact wrenches can tighten screws and bolts on furniture, cabinets, and other wooden structures.

    • Industrial and Manufacturing:

    Impact wrenches are commonly used in industrial and manufacturing settings. They can be used to assemble and disassemble heavy machinery and tighten bolts and screws on conveyor belts and other equipment. They are also used to assemble products in factories and assembly lines.

    • Mining and Drilling:

    In mining and drilling, impact wrenches are used to assemble and disassemble equipment for drilling and extraction. They can also tighten bolts and nuts on drilling rigs, excavators, and other heavy equipment used in the mining industry.

    Overall, impact wrenches are versatile tools in many industries and applications. They offer a fast and efficient way to tighten or loosen nuts and bolts, saving time and increasing productivity in various industries.

    How to Use an Impact Wrench

    5: How to Use an Impact Wrench

    Using an impact wrench can be a fast and efficient way to tighten or loosen nuts and bolts. Here are some steps and safety precautions to keep in mind when using an impact wrench:

    • Safety Precautions:

    1. Wear appropriate safety gear, such as eye and ear protection.
    2. Ensure that the work area is well-lit and free from clutter.
    3. Ensure the impact wrench and the sockets or adapters you use are compatible and in good condition.
    4. Never use an impact wrench on a fastener that is damaged or corroded.
    5. Be sure to follow the manufacturer’s instructions and warnings.
    • Step-by-Step Instructions for Using an Impact Wrench:

    1. Choose the appropriate socket or adapter for the fastener to tighten or loosen.
    2. Insert the socket or adapter onto the anvil of the impact wrench.
    3. Set the direction switch on the impact wrench to either tighten or loosen.
    4. Place the socket or adapter onto the fastener and apply pressure to seat it properly.
    5. Squeeze the trigger on the impact wrench to start it.
    6. Allow the impact wrench to do the work for you – do not apply excessive force or try to force the fastener to turn.
    7. Squeezing the trigger until the fastener is tightened or loosened to the desired torque.
    • Tips and Tricks for Getting the Most Out of Your Impact Wrench:

    1. Use a torque wrench to ensure that you apply the correct torque to the fastener.
    2. Ensure the impact wrench is fully charged or has enough air pressure before use.
    3. Use the appropriate size and type of socket or adapter for the fastener you are working with.
    4. Lubricate the fastener and the socket or adapter with a light oil or grease to reduce friction and make turning easier.
    5. Store the impact wrench and accessories in a dry, clean area to prevent corrosion and damage.

    By following these steps and safety precautions and incorporating these tips and tricks, you can use your impact wrench effectively and safely for various applications.

    6: Maintenance and Care for Your Impact Wrench

    Proper maintenance and care for your impact wrench can help extend its lifespan and keep it functioning at its best. Here are some tips for cleaning, lubricating, and storing your impact wrench:

    • Cleaning and Lubrication:

    1. After each use, wipe down the impact wrench with a clean cloth to remove debris or dirt.
    2. Use a mild solvent or degreaser to clean the exterior of the impact wrench and its accessories.
    3. Lubricate the moving parts of the impact wrench with a few drops of oil or lubricant before storing it.
    4. Clean the air intake and filter regularly to prevent dust and debris from entering the motor.
    • Battery Maintenance:

    1. If your impact wrench has a rechargeable battery, follow the manufacturer’s instructions for charging and discharging the battery.
    2. Store the battery in a cool and dry place, away from direct sunlight and heat sources.
    3. If the battery is not used for an extended period, store it with a partial charge.
    • Storage and Transportation:

    1. Store your impact wrench and accessories in a dry, clean area to prevent corrosion and damage.
    2. If you are transporting the impact wrench, use a carrying case or protective bag to prevent it from being damaged.
    3. If you are transporting the impact wrench by air, check with the airline for any restrictions on lithium-ion batteries.

    By following these maintenance and care tips, you can help ensure that your impact wrench stays in good condition and functions properly for many years.

    7: Impact Wrench Accessories and Attachments

    Several accessories and attachments are available for impact wrenches that can help increase their versatility and effectiveness. Here are some common ones:

    • Socket Sets and Adapters:

    1. Socket sets and adapters are essential accessories for impact wrenches, as they allow you to attach the impact wrench to different-sized nuts and bolts.
    2. Impact wrench socket sets and adapters are designed to withstand the high torque and force generated by impact wrenches, whereas regular sockets and adapters may not hold up.
    • Impact Sockets vs. Regular Sockets:

    1. Impact sockets are specifically designed to be used with impact wrenches, as they are made from higher-grade steel and have a thicker wall to withstand the high torque and force generated by impact wrenches.
    2. Regular sockets are not designed to handle the high torque and force of impact wrenches and can crack or shatter if used with an impact wrench.
    • Extensions and Swivel Joints:

    1. Extensions and swivel joints are useful attachments for impact wrenches, allowing you to access nuts and bolts in hard-to-reach places.
    2. However, be careful not to use extensions that are too long, as this can decrease the torque the impact wrench can generate.
    • Specialty Attachments:

    1. Several specialty attachments are available for impact wrenches, such as drill chucks and sanding discs, which can help expand the capabilities of the impact wrench beyond just tightening or loosening nuts and bolts.
    2. However, be sure to use attachments compatible with your specific impact wrench model and follow the manufacturer’s instructions.

    By using the appropriate accessories and attachments for your impact wrench, you can increase its versatility and effectiveness for various applications.

    Also Read: Best Impact Wrench Accessories: Upgrade Your Toolbox

    8: Impact Wrench Efficiency and Productivity Tips

    1. Time-saving techniques such as using the appropriate socket size, pre-loosening nuts and bolts with a manual wrench, and using impact sockets instead of regular sockets can help increase the efficiency and productivity of impact wrenches.
    2. Preventing wear and tear by properly maintaining and caring for your impact wrench, using the appropriate accessories and attachments, and not exceeding the recommended torque limits can help extend the lifespan of your impact wrench.
    3. Increasing torque and speed using a more powerful impact wrench or increasing the air pressure can help speed up the tightening or loosening process. Be cautious and follow the manufacturer’s instructions to avoid damage or injury.

    9: Impact Wrench Future Trends and Developments:

    1. Advances in impact wrench technology, such as improved battery life and power, more lightweight and ergonomic designs, and increased precision and accuracy, are likely to continue.
    2. Future applications and industries for impact wrenches may include the aerospace and defense industries, where precision and speed are crucial, as well as in the renewable energy sector, such as wind turbine maintenance and assembly.
    3. The impact of technology on impact wrenches may include integrating smart technology and sensors to monitor and optimize performance, as well as using augmented reality and virtual reality for training and maintenance purposes.

    10: Impact Wrench FAQs

    • What is the difference between an impact wrench and an impact driver?

    An impact wrench is a tool for heavy-duty fastening applications, typically used in automotive, construction, and industrial settings. In contrast, an impact driver is a smaller tool primarily used for driving screws and fasteners into wood or other materials.

    • Can I use an impact wrench to loosen lug nuts?

    Yes, impact wrenches are commonly used to loosen and tighten lug nuts on cars, trucks, and other vehicles.

    • How do I know what size socket to use with my impact wrench?

    The size of the socket to use with your impact wrench will depend on the size of the nut or bolt you are working with. You can use a socket size chart or refer to the manufacturer’s instructions for the appropriate socket size.

    • How long does an impact wrench battery last?

    The battery life of an impact wrench will depend on several factors, including the size and power of the wrench, the type and quality of the battery, and how frequently the wrench is used. Generally, a high-quality battery can last anywhere from 30 minutes to several hours on a single charge. Still, it’s always best to refer to the manufacturer’s specifications for the specific model of impact wrench you are using.

    11: Conclusion

    Impact wrenches are powerful tools that increase efficiency, productivity, and safety in various industries and applications. By providing consistent and precise torque, impact wrenches can help reduce the risk of injury and improve the quality of work. With various types and accessories, impact wrenches offer versatility and compatibility with different tasks and materials.

    When using an impact wrench, following safety precautions, properly maintaining and caring for the tool, and using the appropriate accessories and attachments are important. By doing so, you can extend the lifespan of the wrench and get the most out of its capabilities.

    Regarding future trends and developments, impact wrenches will likely continue advancing in technology, precision, and applications. As industries evolve and new materials and tasks emerge, impact wrenches must adapt to meet the changing demands.

    Overall, impact wrenches are a valuable tool for those in the automotive, construction, industrial, and mining industries and can greatly improve efficiency and productivity. Consider adding an impact wrench if you need a tool that provides consistent and precise torque.

    You may also like these posts!

  • Maintaining Shade Sails: Keep Cool and Carry On!

    Maintaining Shade Sails: Keep Cool and Carry On!

    Shade sails are a popular outdoor shade structure that provides various benefits, including protection from the sun and UV rays, added aesthetic appeal, and improved comfort for outdoor spaces. However, to continue to enjoy these benefits, it is essential to maintain shade sails properly. This guide will cover the different aspects of maintaining shade sails, including inspection, cleaning, repairing, maintaining hardware and support structures, and seasonal and professional maintenance. By following these guidelines, you can extend the lifespan of your shade sail and ensure it continues to provide adequate protection from the sun’s rays.

    Regular maintenance can help detect and address issues early, preventing costly repairs or replacements. Additionally, maintaining your shade sail can improve its appearance and effectiveness, ensuring it continues to provide an excellent and comfortable outdoor space for years to come.

    Whether you are a homeowner or a business owner with shade sails installed on your property, this guide will provide the necessary information and recommendations to maintain your shade sails properly. By doing so, you can continue to enjoy the benefits they provide while protecting your investment and ensuring their longevity.

    1: Introduction

    In this guide, we will discuss the importance of maintaining shade sails. But first, let’s define what shade sails are and why they are essential.

    What are shade sails?

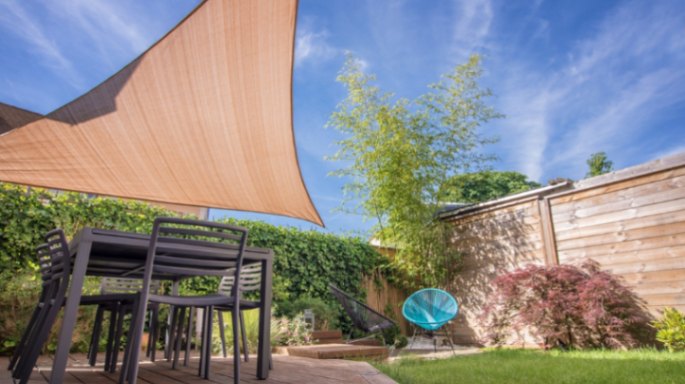
    Shade sails are a type of outdoor shade structure made of high-quality, durable fabric stretched between posts or other support structures. They are designed to provide shade and protection from the sun’s harmful UV rays.

    Why are shade sails important?

    Shade sails are vital because they offer a range of benefits for outdoor spaces. They can provide shade and coolness, making outdoor areas more comfortable and enjoyable. They can also protect people and outdoor furniture from the damaging effects of the sun’s rays, including fading and deterioration. Additionally, shade sails can add aesthetic appeal to outdoor spaces, with various colors and designs available.

    Benefits of maintaining shade sails

    However, to continue to enjoy the benefits of shade sails, it is essential to maintain them properly. Regular maintenance can extend the lifespan of shade sails and ensure they provide adequate sun protection. The following sections will discuss the different aspects of maintaining shade sails, including inspection, cleaning, repairing, maintaining hardware and support structures, and seasonal and professional maintenance.

    2: Understanding Shade Sails

    Shade sails are becoming increasingly popular as a practical and stylish solution for providing shade in outdoor spaces. A shade sail is a canopy of durable fabric stretched over a specific area to create shade. In this article, we will explore the different aspects of shade sails, including the materials used in making them, the different types of shade sails, and the designs available.

    Materials used in making shade sails:

    Shade sails are made of different materials, but the most common ones are high-density polyethylene (HDPE) and polyester. HDPE is a synthetic material that is strong, durable, and resistant to UV rays. It is also breathable, which allows air to circulate freely, creating a comfortable environment under the shade sail. On the other hand, polyester is a synthetic fabric that is strong, durable, and resistant to UV rays. It is not as breathable as HDPE, but it offers a higher level of waterproofing.

    Different types of shade sails:

    Different shade sails are available, including triangles, squares, and rectangles. Triangle shade sails are the most common and come in different sizes, making them ideal for small or large spaces. Square shade sails are also famous and are ideal for providing shade in square or rectangular spaces. Rectangular shade sails are the least common but are still helpful in providing shade in long and narrow spaces.

    Shade sail designs:

    Shade sails are available in different designs to suit different needs and preferences. The most common design is a single shade sail stretched over a specific area. Multiple shade sails can also cover larger spaces or create unique designs. Additionally, some shade sails come with additional features, such as a waterproof coating, which allows them to provide shade and protect against rain at the same time.

    In conclusion, shade sails are a practical and stylish solution for providing shade in outdoor spaces. They are made of different materials, including HDPE and polyester, and come in different types and designs to suit different needs and preferences. When choosing a shade sail, it is crucial to consider the size, shape, and location of the area to be shaded, as well as the materials used in making the shade sail.

    3: Inspecting Shade Sails

    Regular inspection of shade sails is essential to ensure that they remain safe, functional, and aesthetically pleasing. This section will discuss the importance of regular inspection, how often to inspect, and what to look for during inspection.

    Importance of regular inspection:

    Regular inspection of shade sails is essential to identify any potential problems before they become significant. Regular inspection can help prevent accidents, such as collapses, by identifying areas that may be weakened or damaged. Inspections can also identify areas that may require repair or replacement, which can help extend the shade sail’s life.

    How often to inspect:

    Shade sails should be inspected regularly, at least once a year. In areas with harsh weather conditions, more frequent inspections may be necessary. Inspecting shade sails after any significant weather event, such as a storm or heavy snowfall, is also essential.

    What to look for during an inspection:

    During an inspection, it is vital to check for any signs of wear and tear, such as frayed edges or holes in the fabric. The attachment points, such as the posts or anchor points, should also be checked for signs of damage or wear. It is essential to check that the shade sail is taut and not sagging, as this can indicate that it is not correctly attached or that the fabric has stretched. Additionally, any signs of mold or mildew should be addressed, as this can compromise the integrity of the fabric.

    In conclusion, regular inspection of shade sails is essential to ensure their safety, functionality, and longevity. Inspections should be done at least once a year, with more frequent inspections in areas with harsh weather conditions. During inspections, it is important to check for signs of wear and tear, damage to attachment points, and proper fabric tension. Regularly inspecting shade sails can identify and address potential problems before they become major.

    4: Cleaning Shade Sails

    Shade sails provide the valuable function of providing shade. However, they can accumulate dirt, dust, and other debris over time. Proper cleaning is essential to maintain their appearance and prolong their lifespan. In this section, we will discuss the importance of cleaning shade sails, best practices for cleaning shade sails, different cleaning methods, and what to avoid when cleaning shade sails.

    Importance of cleaning shade sails:

    Regular cleaning of shade sails is essential for maintaining their appearance and functionality. Accumulated dirt and debris can cause the fabric to degrade over time, leading to weakened areas that can ultimately compromise the structure of the sail. Regular cleaning can also help prevent mold or mildew growth, which can harm health.

    Best practices for cleaning shade sails:

    The best way to clean a shade sail is to use mild detergent, water, and a soft brush. The sail should be scrubbed gently with the brush, taking care not to apply too much pressure, as this can damage the fabric. It is essential to rinse the sail thoroughly with clean water after washing to remove any remaining soap residue. The sail should be left to dry completely before being re-tensioned.

    Different cleaning methods:

    There are several different methods for cleaning shade sails, including pressure washing and steam cleaning. Pressure washing is an effective method for removing dirt and debris. However, it can also damage the fabric if too much pressure is applied. Steam cleaning is another effective method to remove dirt and kill mold and mildew. However, it should only be used on sails made of materials that can withstand high temperatures.

    What to avoid when cleaning shade sails:

    Avoiding harsh chemicals or abrasive materials, such as bleach or a hard-bristled brush, when cleaning a shade sail. These can damage the fabric and compromise its structural integrity. It is also essential to avoid using a high-pressure washer, as this can damage the fabric and cause the seams to come apart.

    In conclusion, regular cleaning of shade sails is essential for maintaining their appearance and functionality. The best way to clean a shade sail is to use mild detergent, water, and a soft brush while avoiding harsh chemicals or abrasive materials. Different cleaning methods, such as pressure washing and steam cleaning, can be used. However, caution should be taken to avoid damaging the fabric. By following these guidelines, shade sails can be cleaned effectively and safely, prolonging their lifespan and maintaining their functionality.

    5: Repairing Shade Sails

    Shade sails are an excellent way to provide shade and protection from the elements. However, they can become damaged over time due to wear and tear or weather-related events. This section will discuss everyday shade sail damages, how to fix shade sail damages, tools needed for repairing shade sails, and when to replace shade sails.

    Common shade sail damages:

    Some common shade sail damages include tears, holes, and frayed edges. Damage to the attachment points, such as the posts or anchor points, can also occur due to excessive stress or weather-related events. Additionally, the fabric may become stretched or loose over time, which can cause sagging or an uneven appearance.

    How to fix shade sail damages:

    Minor tears or holes in the fabric can be repaired using a patch made from the same material as the sail. A strong adhesive or sewing machine should secure the patch to the damaged area. Frayed edges can be trimmed using sharp scissors, and the area can be reinforced with fabric tape or hemming. For attachment point damages, the damaged hardware can be replaced or reinforced using additional hardware.

    Tools needed for repairing shade sails:

    Tools needed for repairing shade sails include a sewing machine, sharp scissors, fabric or hemming tape, a strong adhesive, replacement hardware, and patch material made from the same material as the sail.

    When to replace shade sails:

    If a shade sail has extensive damage that cannot be repaired or has reached the end of its lifespan, it may need to be replaced. Signs that a shade sail may need to be replaced include excessive stretching, significant fading or discoloration, and damage that compromises the integrity of the sail.

    In conclusion, shade sails can damage over time due to wear and tear or weather-related events. Common damages include tears, holes, and frayed edges. These can be repaired using a patch made from the same material as the sail, fabric tape, hemming tape, or replacement hardware. If a shade sail has extensive damage or has reached the end of its lifespan, it may need to be replaced. By regularly inspecting and maintaining shade sails, damages can be addressed promptly, prolonging their lifespan and maintaining their functionality.

    6: Maintaining Shade Sail Hardware

    Shade sails require more than just an excellent fabric to function correctly. The hardware, including the poles, brackets, turnbuckles, and other fittings, also play a vital role in keeping the sails securely in place. Proper hardware maintenance is essential to ensure the longevity of the shade sail structure. This section will discuss the importance of maintaining hardware, how to clean and lubricate hardware, and how to inspect and repair hardware.

    Importance of maintaining hardware:

    The hardware used in shade sail installation is exposed to the elements and can become corroded or rusted over time. This can compromise the integrity of the structure and ultimately lead to failure. Regular maintenance of the hardware, including cleaning and lubricating, can prevent corrosion and rust, prolonging the structure’s lifespan.

    Cleaning and lubricating hardware:

    Hardware should be regularly cleaned with a mild soap solution and a soft brush. Rinse thoroughly with water and dry completely before applying lubricant. A silicone-based lubricant can be applied to metal surfaces to prevent corrosion and rust. It is essential not to use petroleum-based lubricants, which can damage the hardware and degrade the fabric.

    How to inspect and repair hardware:

    Regular hardware inspections ensure all components are secure and functioning correctly. Signs of damage, including cracks, rust, or loose fittings, should be addressed promptly to prevent further damage or failure. Hardware should be replaced if it is damaged beyond repair or malfunctioning correctly. Repairs to the hardware should be made using replacement parts or hardware of the same size and strength.

    In conclusion, maintaining shade sail hardware is essential to ensure the longevity and functionality of the structure. Regular cleaning and lubrication can prevent corrosion and rust. In contrast, regular inspections can identify damaged or loose fittings that must be repaired or replaced. By following these guidelines, shade sails can function correctly and provide shade and protection for many years.

    7: Maintaining the Support Structure

    In addition to maintaining the shade sail and hardware, inspecting and maintaining the support structure is essential. This includes the poles, beams, and other components holding the shade sail. In this section, we will discuss how to inspect and maintain the support structure, check for rust and corrosion, clean and repaint, and repair structural damage.

    Inspecting and maintaining support structure:

    Regularly inspect the support structure to ensure it is secure and functioning correctly. Signs of damage or wear, including cracks, dents, or bent components, should be addressed promptly to prevent further damage or failure. The support structure should be inspected at least once a year or more frequently if exposed to extreme weather conditions.

    Checking for rust and corrosion:

    The support structure is often exposed to the elements and can become corroded or rusted over time. This can compromise the integrity of the structure and ultimately lead to failure. Regular inspections for rust and corrosion should be conducted, and any damaged areas should be addressed promptly. Rust and corrosion can be removed using a wire brush or sandpaper. The affected area can be treated with a rust converter to prevent further corrosion.

    Cleaning and repainting:

    The support structure should be cleaned regularly with a mild soap solution and a soft brush. Rinse thoroughly with water and dry completely before repainting. Repainting the support structure can prevent rust and corrosion and prolong the structure’s lifespan. A high-quality exterior paint designed for metal surfaces should be used.

    Repairing structural damage:

    Suppose the support structure has structural damage, such as cracks or bent components. In that case, it should be repaired promptly to prevent further damage or failure. A professional should make repairs that may involve replacing damaged components or reinforcing the structure with additional supports.

    In conclusion, maintaining the support structure of the shade sail is essential to ensure the longevity and functionality of the structure. Regular inspections, checking for rust and corrosion, cleaning and repainting, and repairing structural damage are all important aspects of maintaining the support structure. By following these guidelines, shade sails can provide shade and protection for many years.

    8: Seasonal Maintenance

    Seasonal maintenance is an essential aspect of maintaining shade sails. Different seasons bring different weather conditions, and it is essential to adjust maintenance tasks accordingly. This section will discuss each season’s maintenance tasks, preparing for harsh weather conditions and winterizing shade sails.

    Maintenance tasks for each season:

    Spring: In the spring, inspecting the shade sail and support structure for any damage that may have occurred over the winter months is essential. Clean the shade sail and hardware, and check for rust or corrosion. Prune any nearby trees or foliage that may interfere with the shade sail.

    Summer: During the summer, it is essential to regularly inspect the shade sail for any signs of wear or damage. Clean the shade sail and hardware regularly and secure the support structure. Adjust the tension of the sail if necessary, as high winds can cause the sail to stretch and sag.

    Fall:

    1. In the fall, inspect the shade sail and support structure for any damage that may have occurred during the summer.
    2. Clean the shade sail and hardware, and check for rust or corrosion.
    3. Remove any debris accumulated on the sail or in the support structure.

    Winter: During the winter, removing the shade sail and storing it in a dry, cool place is essential. Inspect the support structure for damage or wear, and clean and lubricate the hardware. Protect the support structure from harsh weather conditions, such as heavy snow or ice, by covering it with a tarp or other protective material.

    Preparing for harsh weather conditions:

    Harsh weather conditions, such as high winds or heavy rain, can damage shade sails and support structures. Before harsh weather conditions occur, inspect the shade sail and support structure for any damage or wear. Adjust the tension of the sail if necessary and secure the support structure with additional stakes or braces.

    Winterizing shade sails:

    During the winter months, removing the shade sail and storing it in a dry, cool place is essential. This will prevent the fabric from becoming damaged by harsh winter conditions, such as snow or ice. The support structure should be protected with a tarp or other protective material to prevent snow or ice buildup damage.

    In conclusion, seasonal maintenance is essential to ensure the longevity and functionality of shade sails. By adjusting maintenance tasks according to the season, preparing for harsh weather conditions, and winterizing shade sails, shade sails can provide shade and protection for many years.

    9: Professional Maintenance

    While it is possible to maintain shade sails on your own, hiring a professional for maintenance services may be necessary. This section will discuss when to hire a professional, what to expect from professional maintenance services, and how to choose a professional maintenance service.

    When to hire a professional:

    There are several instances where hiring a professional for maintenance services may be necessary. Suppose the shade sail or support structure is damaged beyond repair. In that case, a professional may be needed to replace or repair the damaged parts. Suppose you feel uncomfortable inspecting or repairing the shade sail or support structure. In that case, it may be best to hire a professional.

    What to expect from professional maintenance services:

    Professional maintenance services typically include

    • thoroughly inspecting the shade sail and support structure,
    • cleaning and lubricating hardware,
    • repairing any damage,
    • adjusting tension, and
    • winterizing the shade sail if necessary.

    They may also advise on adequately maintaining the shade sail and support structure to prevent future damage.

    Choosing a professional maintenance service:

    When choosing a professional maintenance service, it is essential to research and choose a reputable company with experience in maintaining shade sails. Look for reviews and testimonials from previous customers, and make sure the company is licensed and insured. Ask for a detailed estimate of the services they will provide and the cost. It may also be helpful to ask for references and to speak with previous customers to gauge their satisfaction with the services provided.

    In conclusion, while it is possible to maintain shade sails independently, hiring a professional for maintenance services may be necessary for specific situations. Knowing when to hire a professional, what to expect from their services, and how to choose a reputable company can ensure that your shade sails are correctly maintained and will provide shade and protection for many years.

    10: Frequently Asked Questions

    • Q: How often should I clean my shade sail?

    A: It is recommended to clean your shade sail at least once a year, but it may need to be cleaned more frequently if exposed to heavy rainfall or debris.

    • Q: Can I use a pressure washer to clean my shade sail?

    A: It is not recommended to use a pressure washer as it may damage the fabric. Instead, use a soft-bristled brush and mild detergent to clean the shade sail gently.

    • Q: How can I prevent mold and mildew from growing on my shade sail?

    A: To prevent mold and mildew, ensure the shade sail is appropriately tensioned and adequate ventilation. You can also use a mold and mildew inhibitor during the cleaning process.

    • Q: What should I do if my shade sail is sagging?

    A: Check the tension of the shade sail and adjust the tension as needed. If the tension is correct, but the shade sail is still sagging, it may be necessary to replace it.

    • Q: Can I repair a small tear in my shade sail myself?

    A: A small tear can be repaired with a fabric patch and adhesive. However, larger tears or damage to the support structure may require professional repair or replacement.

    • Q: How can I extend the life of my shade sail?

    A: Regular maintenance, including cleaning, inspection, and repairs as needed, can help extend the life of your shade sail. Proper tensioning and protection from harsh weather conditions can also help prolong its lifespan.

    • Q: When should I replace my shade sail?

    A: Shade sails should be replaced if they are damaged beyond repair or have reached the end of their lifespan, typically around 10 years.

    Conclusion

    In conclusion, maintaining your shade sail ensures longevity and effectiveness. Regular maintenance tasks, including cleaning, inspection, repair, and maintenance of hardware and support structures, are essential to keep your shade sail in good condition. It is also important to prepare for seasonal changes and harsh weather conditions.

    Key takeaways from this guide include:

    • Understanding the materials used to make shade sails, the different types of shade sails, and shade sail designs.
    • Regular inspection is vital to detect and address any issues early on.
    • Proper cleaning practices, including avoiding harsh chemicals and pressure washing, can help extend the lifespan of your shade sail.
    • Repairing shade sails can be done with a fabric patch and adhesive for small tears. However, larger damage or structural issues may require professional repair or replacement.
    • Maintaining the hardware and support structure is essential to ensure the stability and effectiveness of your shade sail.
    • Seasonal maintenance tasks and winterizing your shade sail can help protect it from harsh weather conditions.
    • Hiring a professional maintenance service can be beneficial for more complex issues or for those who do not have the necessary expertise.

    Regular maintenance is essential to ensure your shade sail remains in good condition and continues to provide adequate protection from the sun. By following the tips and recommendations outlined in this guide, you can extend the lifespan of your shade sail and enjoy its benefits for years to come.

  • DIY Installation of Garage Door Opener with Camera

    DIY Installation of Garage Door Opener with Camera

    Installing a garage door opener with a camera is an excellent way to increase the security of your home. With this technology, you can monitor who enters and exits your garage and remotely control the garage door’s opening and closing. Installing a garage door opener with a camera may seem daunting initially. However, it is a DIY project that can be accomplished with the right tools and instructions. This article will discuss DIY Installation of Garage Door Opener with Camera. Here will discuss installing a Chamberlain B6753T Smart Garage Door Opener with a camera.

    How to Install a Garage Door Opener with Camera: A Step-by-Step Guide

    Step 1: Gather tools and equipment

    Before beginning the installation process, you should gather the necessary tools and equipment. The Chamberlain B6753T Smart Garage Door Opener has a comprehensive installation manual with a list of required tools. The list of tools generally includes a drill, screwdrivers, pliers, and a ladder.

    Step 2: Assemble the Opener

    The first step in installing the Chamberlain B6753T Smart Garage Door Opener is to assemble the opener. This process typically involves attaching the rail to the motor and installing the drive chain. You should follow the instructions provided in the installation manual carefully.

    Step 3: Install the Opener

    The next step is to install the opener onto the ceiling of your garage. You will need to use a ladder to reach the ceiling, so ensure you have a stable ladder that is tall enough to reach the installation area. You must also attach the opener to the ceiling with the appropriate screws.

    Step 4: Install the Sensors

    The Chamberlain B6753T Smart Garage Door Opener has safety sensors that prevent the garage door from closing if an object is detected in the door’s path. These sensors should be installed on either side of the garage door, near the bottom. Make sure the sensors are properly aligned and connected to the opener.

    Step 5: Install the Camera

    The final step is to install the camera. The Chamberlain B6753T Smart Garage Door Opener has a camera that can be attached to the opener or mounted separately. Follow the instructions in the installation manual to attach the camera to the opener or mount it separately.

    FAQs

    Is hiring a professional to install a Chamberlain B6753T Smart Garage Door Opener with a camera necessary?

    No, hiring a professional to install a Chamberlain B6753T Smart Garage Door Opener with a camera is unnecessary. The installation process is relatively easy and can be completed as a DIY project.

    Can the Chamberlain B6753T Smart Garage Door Opener be used with any garage door?

    The Chamberlain B6753T Smart Garage Door Opener can be used with most standard garage doors up to 7 feet high.

    How does the camera on the Chamberlain B6753T Smart Garage Door Opener work?

    The camera on the Chamberlain B6753T Smart Garage Door Opener provides live video streaming to your smartphone, allowing you to monitor your garage remotely.

    Can multiple users control the Chamberlain B6753T Smart Garage Door Opener?

    Yes, multiple smartphone users can control the Chamberlain B6753T Smart Garage Door Opener using the myQ app.

    Does the Chamberlain B6753T Smart Garage Door Opener come with a warranty?

    Yes, the Chamberlain B6753T Smart Garage Door Opener comes with a limited lifetime warranty on the motor and a 5-year warranty on the parts.

    Conclusion

    Installing a Chamberlain B6753T Smart Garage Door Opener with a camera is a relatively easy DIY project that can enhance the security of your home. You can complete the installation process in a few hours by following the instructions in the installation manual. The Chamberlain B6753T Smart Garage Door Opener is a reliable and user-friendly device that provides homeowners peace of mind and convenience.


  • The Science of Ice Auger Designs: Understanding the Design

    The Science of Ice Auger Designs: Understanding the Design

    Ice fishing is a popular winter sport that requires specialized tools and equipment, including ice augers. These devices are used to drill holes in the ice to allow anglers to fish through the ice. Several different types of ice augers are available on the market today, each with its unique design and set of advantages and disadvantages. This article will explore the science of ice auger designs and examine the different factors in creating an effective and efficient ice auger.

    Introduction

    Ice fishing is a popular winter activity enjoyed by anglers all over the world. It requires specialized equipment, including an ice auger used to drill holes in the ice. Several types of ice augers are available, each with its unique set of advantages and disadvantages. In this article, we will examine the science behind ice auger designs and the factors that go into creating an effective and efficient ice auger.

    The History of Ice Augers

    The first ice augers were simple hand tools used to drill holes in the ice manually. These early designs could have been more efficient and time-consuming, requiring much physical effort. Over time, ice augers have become more efficient and effective, with various designs and mechanisms being developed.

    Types of Ice Augers

    Several types of ice augers are available, each with its unique set of advantages and disadvantages. These include manual ice augers, gas-powered ice augers, and electric ice augers.

    Manual Ice Augers

    Manual ice augers are the most basic type of ice auger and require the most physical effort. They are typically lightweight and portable, making them popular for anglers traveling to remote locations to fish.

    Gas-Powered Ice Augers

    Gas-powered ice augers are designed for anglers who must drill multiple holes quickly and efficiently. They are typically more powerful than manual ice augers and can easily drill through thicker ice.

    Electric Ice Augers

    Electric ice augers are the most convenient and easy-to-use type of ice auger. They are powered by rechargeable batteries, making them an excellent choice for anglers who don’t want to deal with the hassle of gas-powered engines.

    Ice Auger Design

    Torque and Power

    Torque and power are the two most important factors when designing an ice auger. Torque is the rotational force that is applied to the cutting blade to make it rotate. Power is the rate at which work is done, or energy is transferred. In an ice auger, power is the amount of work done in a given time.

    The ice auger’s cutting blade must be designed to efficiently transfer the rotational force to the ice to achieve maximum torque and power. This requires a sharp, durable blade that can easily penetrate the ice without bending or breaking.

    Blade Shape and Size

    The shape and size of the cutting blade are also critical to the performance of an ice auger. The blade must be designed to create a clean and precise hole in the ice. The shape of the blade should be optimized for the type of ice being drilled. For example, blades designed for thick, hard ice require a different shape than blades designed for thin, soft ice.

    The size of the blade also plays a crucial role in the performance of the ice auger. A larger blade can drill a hole faster but also requires more torque and power to rotate. A smaller blade requires less torque and power but will take longer to drill a hole.

    Weight and Balance

    The weight and balance of an ice auger also play an important role in its performance. A well-balanced ice auger will be easier to use and require less effort to drill a hole. The weight of the auger should be distributed evenly along the shaft to ensure that the user can maintain control while drilling.

    The weight of an ice auger is also important because it affects the torque and power required to rotate the cutting blade. A heavier auger requires more torque and power to rotate, which can be tiring for the user. A lighter auger requires less torque and power but may not be as durable as a heavier one.

    Handle Design

    The design of the handle is another important factor to consider when designing an ice auger. The handle must be comfortable to grip and allow the user to maintain control while drilling. The handle should be designed to distribute the weight of the auger evenly and reduce fatigue.

    The handle of a hand auger is typically a T-shaped design that allows the user to apply torque to the blade. Power augers usually have a pistol grip handle that is easier to grip and control.

    FAQs

    • What is an ice auger?

    An ice auger is a tool used to drill holes in the ice for ice fishing.

    • What are the different types of ice augers?

    There are three main types of ice augers: manual, gas-powered, and electric.

    • What factors should I consider when choosing an ice auger?

    When choosing an ice auger, you should consider factors such as blade type, auger diameter, power source, weight and balance, safety features, durability, and ease of maintenance.

    • How do I maintain my ice auger?

    Regularly clean and lubricate the blades, engine, and other parts to maintain your ice auger. It would be best to store it in a dry and safe place when unused.

    • Can I use an ice auger for other purposes besides ice fishing?

    While ice augers are primarily designed for ice fishing, they can also be used for other purposes, such as drilling holes in wood or other materials. However, using an ice auger for anything other than its intended purpose may void its warranty and be dangerous.

    Conclusion

    Ice augers are an essential tool for any ice angler, and several different types are available on the market today. By understanding the science behind ice auger designs, anglers can choose the best ice auger for their needs and preferences. When designing an ice auger, factors such as blade type, auger diameter, power source, and weight and balance must be considered to create an efficient and effective tool.

    It’s important to note that different ice fishing situations may require different ice auger designs. For example, an angler who needs to drill a few holes quickly may prefer a gas-powered auger. In contrast, an angler who wants a quieter and more environmentally friendly option may choose an electric auger.

    In addition to the factors mentioned above, there are other features to consider when choosing an ice auger, such as safety mechanisms, durability, and ease of maintenance. By selecting an ice auger with the right features and design, anglers can improve their chances of a successful and enjoyable ice fishing experience.

    You may also like these posts!


  • 10 Tips for Using Ice Augers: Drilling for Success

    10 Tips for Using Ice Augers: Drilling for Success

    Ice fishing is a popular winter activity for many anglers, but drilling holes through thick ice can be challenging. This is where ice augers come in handy. An ice auger is a tool used to bore holes through the ice, allowing you to fish in areas that would otherwise be inaccessible. Here are 10 tips for using ice augers to help you get the most out of your ice auger.

    Hole-in-One: 10 Expert Tips for Ice Auger Use

    1. Understanding Ice Augers

    Before you start using your ice auger, it is essential to understand the different types available. There are three main types of ice augers: manual, gas-powered, and electric. Manual ice augers are powered by hand, gas-powered augers use a small engine, and electric augers use a battery. Each type has advantages and disadvantages, and you need to choose the best option.

    2. Choosing the Right Ice Auger

    When choosing an ice auger, there are several factors to consider. The first is the size of the hole you want to drill. If you plan to fish for small fish like crappie or bluegill, a 6-inch auger will suffice. However, you will need a larger auger if you target larger fish like walleye or pike. Other factors to consider include the type of ice you will be drilling through, the frequency of use, and your budget.

    3. Dressing for the Conditions

    Ice fishing is a cold-weather sport, and it is essential to dress appropriately. Dressing in layers is crucial to staying warm, and you should wear insulated boots and gloves to keep your feet and hands warm. A warm hat and a neck gaiter are also essential to help retain body heat.

    4. Clearing Snow from the Ice

    Before you start drilling, it is essential to clear any snow from the ice. Snow can insulate the ice, making it thicker and more challenging to drill through. Use a shovel or snow blower to clear a path for your auger.

    5. Preparing the Ice for Drilling

    Once the snow is cleared, you must prepare the ice for drilling. Use an ice chisel or spud bar to break up any thin or uneven areas of the ice. This will help ensure that your auger will cut through the ice smoothly.

    6. Starting the Ice Auger

    Before starting your ice auger, it is essential to read the manufacturer’s instructions carefully. This will ensure that you start the auger safely and correctly. For gas-powered augers, ensure you have enough fuel and the spark plug is in good condition. For electric augers, make sure that the battery is fully charged.

    7. Drilling Techniques

    When drilling with your ice auger, it is essential to maintain a steady, even pressure. Avoid applying too much force or letting the auger spin out of control. As you drill, periodically clear the ice shavings from the hole to prevent clogging.

    8. Maintenance and Care

    Proper maintenance and care will help ensure your ice auger lasts many seasons. After each use, clean the auger thoroughly and inspect it for any damage. Sharpen the blades regularly and lubricate the moving parts to prevent rust and corrosion.

    9. Storing Your Ice Auger

    When storing your ice auger, protecting it from moisture and dust is essential. Store it in a dry, cool place, and ensure it is properly lubricated to prevent rust and corrosion. For gas-powered augers, drain the fuel before storing it to prevent clogs in the carburetor.

    10. Safety Precautions

    Ice fishing can be a dangerous activity, and it is essential to take proper safety precautions. Always fish with a partner, and never venture onto the ice alone. Wear a personal flotation device (PFD) and carry ice picks in case of an emergency. Be aware of the ice conditions and avoid areas with thin ice.

    FAQs

    • Can I use a manual ice auger for larger fish?

    Yes, but it will take longer to drill through the ice.

    • How do I sharpen the blades on my ice auger?

    You can use a file or sharpening stone to sharpen the blades.

    • Can I use my gas-powered ice auger indoors?

    No, gas-powered augers should only be used outdoors due to the risk of carbon monoxide poisoning.

    • How do I clear the ice shavings from the hole?

    You can use a slotted spoon or ice skimmer to remove the shavings.

    • How thick should the ice be for ice fishing?

    The ice should be at least 4 inches thick for safe ice fishing.

    Conclusion

    Ice fishing is a great way to enjoy the winter months. Using an ice auger can make the experience more enjoyable. By following these ten tips, you can ensure that you get the most out of your ice auger while staying safe and comfortable on the ice.

    You may also like these posts!

  • Best Tips for Ice Fishing: Reeling in Success

    Best Tips for Ice Fishing: Reeling in Success

    Ice fishing is a popular winter sport, and it can be a fun way to spend a cold day on the lake. However, it’s more challenging than just dropping a line through a hole in the ice. To have a successful and safe ice fishing trip, you should know a few things. In this article, we’ll cover the best tips for ice fishing, from choosing the right gear to staying safe.

    What is Ice Fishing?

    Ice fishing is the act of fishing through a hole in the ice. Ice fishing is a popular winter activity; many people enjoy it to spend a day outdoors in the winter months. Ice fishing can be done on various bodies of water, including lakes, rivers, and ponds.

    Choosing the Right Gear

    Choosing the right gear is essential to a successful ice fishing trip. Here are a few things to consider when selecting your gear:

    Fishing Rods and Reels

    When it comes to ice fishing rods and reels, you’ll want to choose a combination designed for the task. Ice fishing rods are generally shorter and stiffer than traditional fishing rods. They often have a sensitive tip to detect bites. Reels should be designed for ice fishing, as they need to handle cold temperatures.

    Fishing Line

    Choosing the right fishing line is also important. Monofilament is a popular choice for ice fishing because it’s easy to handle and doesn’t freeze as quickly as other types of line. However, a braided line is also an option, as it’s stronger and more durable.

    Ice Augers

    An ice auger is a tool used to drill holes in the ice. There are a few different types of ice augers, including hand and power augers. Hand augers are less expensive and quieter, but they require more physical effort to use. Power augers are faster and easier to use but can be more expensive.

    Ice Shelters

    An ice shelter is a structure that protects from the wind and cold while ice fishing. There are a few types of ice shelters, including portable and permanent ones. Portable shelters are easier to move around but are often less sturdy than permanent ones.

    Finding the Right Spot

    Finding the right spot to ice fish is important. Here are a few things to consider:

    Understanding the Water

    Understanding the water you’re fishing in is important. Fish species prefer different types of water, and knowing where to find them can increase your chances of catching fish. You can use a fish finder to locate fish in the water.

    Checking Ice Conditions

    Before you start ice fishing, you must check the ice conditions. The ice should be at least 4 inches thick to support one person and at least 7 inches thick to support a small group of people. It would be best to look for signs of weak ice, such as cracks or discoloration.

    Techniques for Ice Fishing

    There are a few different techniques you can use when ice fishing:

    Jigging

    Jigging is a popular ice fishing technique where you use a lure that mimics the movement of baitfish. To jig, you’ll need to drop your lure to the bottom of the lake and then raise it up and down to attract fish. You can vary the speed and depth of your jigging to find the most effective technique.

    Tip-Ups

    Tip-ups are another popular ice fishing technique. A tip-up is a device that signals when a fish has taken the bait. The device is set up over a hole in the ice, and when a fish takes the bait, the flag on the tip-up is triggered, letting you know that it’s time to reel in your catch.

    Bobbers

    Bobbers are a simple but effective ice-fishing technique. To use a bobber, you’ll need to attach a baited hook to the line and then attach the bobber to the line at the desired depth. When a fish takes the bait, the bobber will move, letting you know it’s time to reel in your catch.

    Staying Safe on the Ice

    Safety should always be your top priority when ice fishing. Here are a few things to keep in mind:

    Ice Thickness and Safety

    Make sure to check the ice thickness before heading out onto the ice. The ice should be at least 4 inches thick to support one person and at least 7 inches thick to support a small group of people. You should also check for weak spots in the ice, such as cracks or discoloration.

    Dressing for the Weather

    Dressing appropriately for the weather is important when ice fishing. You’ll want to dress in layers, starting with a base layer of moisture-wicking fabric, a warm insulating layer, and a waterproof outer layer. Make sure to wear warm socks, gloves, and a hat.

    Bringing the Right Equipment

    Make sure to bring the right equipment with you when ice fishing. This includes a first aid kit, a compass or GPS, a cell phone or radio, and an ice chisel or spud bar to test the ice thickness.

    FAQs

    Q1. Do I need a fishing license to ice fish?

    You’ll need a fishing license to ice fish in most areas. Check with your local fishing and wildlife agency for more information.

    Q2. What kind of fish can I catch when ice fishing?

    The types of fish you can catch when ice fishing varies depending on the body of water you’re fishing in. Some common species include perch, bluegill, crappie, and walleye.

    Q3. Can I ice fish without an ice shelter?

    You can ice fish without an ice shelter, but it can be uncomfortable in cold or windy conditions.

    Q4. How do I keep my fishing line from freezing?

    One way to keep your fishing line from freezing is to apply a line lubricant to the line before fishing. Also, dip your line in warm water periodically to help prevent freezing.

    Q5. What do I do if I fall through the ice while ice fishing?

    Suppose you fall through the ice while ice fishing. Stay calm and get yourself out of the water as quickly as possible. If you can’t get out alone, call for help or use a rope or other device to protect yourself.

    Conclusion

    Ice fishing can be a fun and rewarding winter activity. However, it’s important to approach it safely and with the right gear. By following these tips, you’ll be on your way to a successful and safe ice fishing trip.

    You may also like these posts!