Category: Expert Guides and Tips

Explore our expert guides and tips for power tools, home improvement, lawn and garden projects, and more. Get step-by-step instructions, valuable insights, and practical advice to tackle your DIY projects like a pro. Discover the best techniques, tools, and strategies to enhance your skills and achieve remarkable results.

  • The Importance of Wet Saw Blade: Water Works Wonders

    The Importance of Wet Saw Blade: Water Works Wonders

    Cutting hard materials can be daunting, but with the right tool, it can be done with ease and precision. Wet saw blades are essential for anyone working with stone, tile, and concrete. They offer several benefits over dry saw blades, including reduced heat buildup, clean and precise cuts, extended blade life, and dust suppression. This article will explore the importance of wet saw blades, the different types available, how to choose the right one, and how to use and maintain them properly.

    What is a Wet Saw Blade?

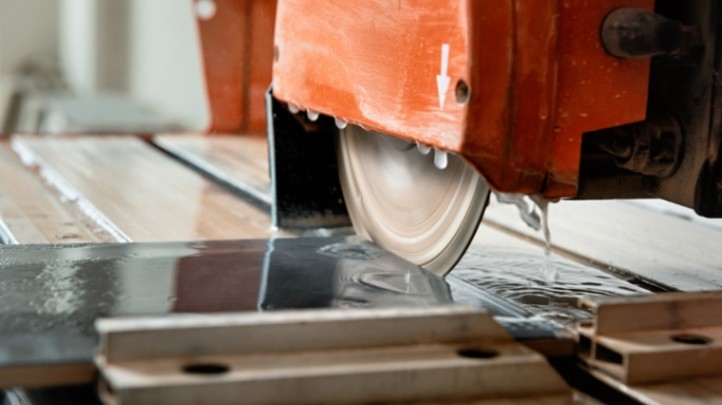
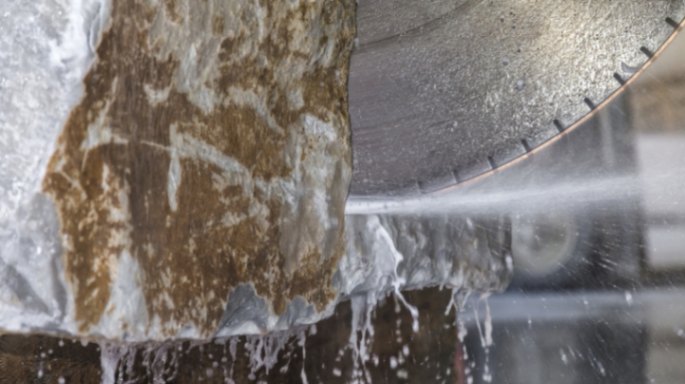
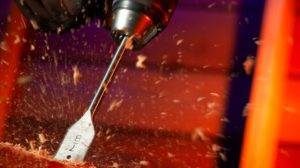
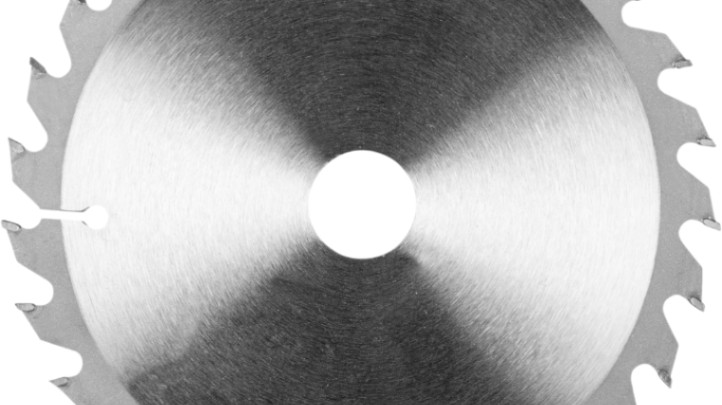
    A wet saw blade is explicitly designed for cutting hard materials like stone, tile, and concrete. They are called “wet” saw blades because they use water to cool the blade and reduce heat buildup during the cutting process. The water also helps to suppress dust and debris, making the cutting process cleaner and more efficient.

    Benefits of Wet Saw Blade

    There are several benefits to using a wet saw blade for cutting hard materials. Some of these benefits include:

    Reduced Heat Buildup

    The water used in wet saws helps cool the blade during cutting, reducing heat buildup. This is important because excessive heat can cause the blade to warp or even break, resulting in a dangerous situation for the operator.

    Clean and Precise Cuts

    Wet saw blades are designed to produce clean and precise cuts. The water used in the cutting process helps to keep the blade cool and lubricated, allowing it to cut smoothly and accurately. This is important when working with materials that require precise cuts, such as tile or stone.

    Extended Blade Life

    Because the water used in wet saws helps reduce heat buildup and lubricate the blade, it can extend the blade’s life. This can save you money in the long run by reducing the need to replace blades frequently.

    Dust Suppression

    Wet saw blades help to suppress dust and debris during the cutting process. This is important for several reasons, including improved visibility for the operator and better air quality in the workspace.

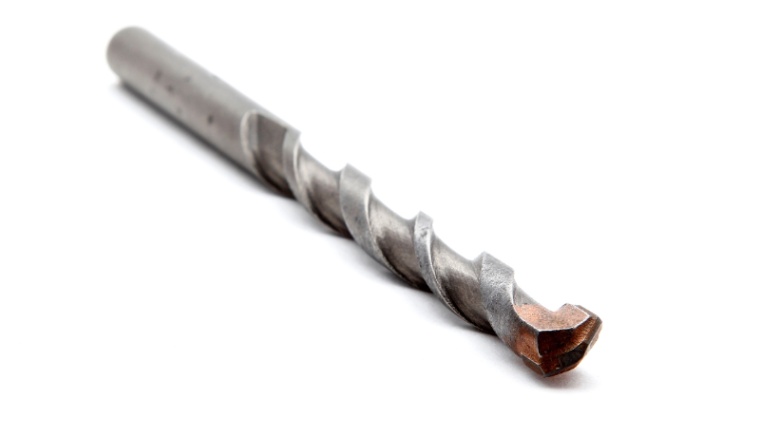
    Types of Wet Saw Blades

    Several types of wet saw blades are available, each designed for specific cutting applications. Some of the most common types include:

    Continuous Rim Blades

    Continuous rim blades are designed for cutting materials like ceramic tile and marble. They have a continuous edge, which provides a smooth and clean cut.

    Turbo Rim Blades

    Turbo rim blades are designed for cutting more rigid materials like granite and concrete.

    Segmented Rim Blades

    Segmented rim blades are designed for cutting through rigid materials like concrete, brick, and pavers. They have segmented edges that allow for more aggressive cutting.

    Plated Blades

    Plated blades are designed to cut through glass and other fragile materials. They have a layer of diamond particles on the blade’s edge, allowing for clean and precise cuts without damaging the material.

    Factors to Consider When Choosing a Wet Saw Blade

    Choosing the suitable wet saw blade is vital for achieving clean and precise cuts while extending the blade’s life. Here are some factors to consider when choosing a wet saw blade:

    Material Being Cut

    Different materials require different types of blades. For example, a continuous rim blade is ideal for cutting ceramic tile and marble, while a segmented rim blade is better suited for cutting through concrete and brick.

    Blade Size and Arbor Size

    Make sure to choose a blade size compatible with your wet saw, and also consider the arbor size to ensure a proper fit.

    Blade Quality

    Investing in a high-quality blade can save you money in the long run by extending the life of the blade and producing cleaner, more precise cuts.

    Water Flow and Capacity

    Ensure your wet saw provides adequate water flow and capacity to keep the blade cool and lubricated during the cutting process.

    How to Use a Wet Saw Blade

    Using a wet saw blade is a simple process but requires proper technique and safety precautions. Here are the steps to follow:

    • Set up your wet saw according to the manufacturer’s instructions.
    • Ensure the blade is securely attached and properly aligned with the cut material.
    • Turn on the water flow to ensure adequate cooling and lubrication of the blade.
    • Turn on the saw and slowly guide the material through the blade, applying steady pressure and keeping your hands and fingers away from the blade.
    • Turn off the saw and water flow when the cut is complete.
    • Maintenance and Care for Wet Saw Blades

    Maintenance and Care for Wet Saw Blades

    Proper maintenance and care for your wet saw blade can extend its life and ensure clean and precise cuts. Here are some tips to follow:

    • Clean the blade after each use to remove any debris or buildup.
    • Check the blade regularly for signs of wear or damage, and replace it if necessary.
    • Store the blade in a dry, protected area to prevent rust or corrosion.
    • Use a blade guard or cover when not in use to prevent damage.
    • Common Mistakes to Avoid When Using Wet Saw Blades

    Common Mistakes to Avoid When Using Wet Saw Blades

    Here are some common mistakes to avoid when using a wet saw blade:

    • Using the wrong blade for the material being cut.
    • Applying too much pressure can cause the blade to warp or break.
    • Not using enough water can cause excessive heat buildup and damage the blade.
    • Please properly align the material with the blade, which can result in uneven cuts.

    FAQs

    • How do I choose the right wet saw blade for my project?

    Choosing the proper wet saw blade depends on the type of material you will be cutting. Different materials require different blades, so selecting a blade specifically designed for the material you will be working with is essential. Consider factors like blade size, quality, water flow, and capacity when choosing.

    • Can I use a wet saw blade for cutting other materials besides stone?

    While wet saw blades are primarily designed to cut hard materials like stone, tile, and concrete, they can also be used to cut other materials like wood and metal. However, it is essential to choose a blade specifically designed for the material you will be cutting and use proper technique and safety precautions.

    • How often should I clean my wet saw blade?

    It is recommended to clean your wet saw blade after each use to remove any debris or buildup that may affect the blade’s performance. You can use a brush or a specialized cleaning solution to remove any buildup and ensure the blade is clean and debris-free.

    • Can I sharpen a wet saw blade?

    Sharpening a wet saw blade is generally not recommended, as the diamond particles on the blade’s edge are designed to wear down over time and expose new particles for cutting. However, some specialized sharpening tools are available for specific wet saw blades.

    • Can a wet saw blade be used on a dry saw?

    While wet saw blades are specifically designed for wet saws, some models may also be used with dry saws. However, following the manufacturer’s instructions and safety precautions is essential when using a wet saw blade with a dry saw. The lack of water cooling and lubrication may affect the blade’s performance and increase the risk of injury.

    Conclusion

    Wet saw blades are essential for anyone working with hard materials like stone, tile, and concrete. They offer several benefits over dry saw blades, including reduced heat buildup, clean and precise cuts, extended blade life, and dust suppression. When choosing a wet saw blade, it is crucial to consider factors like the material being cut, blade size and quality, and water flow and capacity. By following proper techniques and safety precautions, and properly maintaining and caring for your blade, you can achieve clean and precise cuts while extending the life of your blade.


  • Wet Saw Safety: Protecting Yourself While Using a Wet Saw

    Wet Saw Safety: Protecting Yourself While Using a Wet Saw

    Are you planning to work with a wet saw? Wet saws are powerful tools that make cutting tiles, bricks, and stones a breeze. However, like any power tool, wet saws can be dangerous if not used properly. This article will discuss essential wet saw safety tips.

    Introduction

    Before we delve into the specifics, let’s discuss why wet saw safety is crucial. Wet saws have sharp blades that can easily injure you if you’re not careful. They also produce a lot of water and debris that can cause slips, trips, and falls. Following these safety tips can prevent accidents and ensure a successful project.

    Know Your Wet Saw

    The first step to staying safe while using a wet saw is to familiarize yourself with its features and functions. Read the manual carefully and understand how the saw operates. Ensure that all the parts are correctly assembled before use. If you have any doubts, don’t hesitate to ask for help.

    Wear Protective Gear

    Protective gear is a must when working with a wet saw. Always wear eye protection, such as safety goggles or a face shield, to protect your eyes from debris and water. Additionally, wear ear protection to protect your hearing from the saw’s loud noise. Wear gloves to protect your hands from the blade, and wear non-slip shoes to prevent slips and falls.

    Secure Your Workspace

    A wet saw generates a lot of water and debris, so securing your workspace is essential. Ensure that your work area is well-lit, clean, and dry. Use a rubber mat or a towel to absorb the water so it doesn’t make the floor slippery. Clear any obstacles from your work area to prevent trips and falls.

    Position Yourself Correctly

    When using a wet saw, it’s crucial to position yourself correctly. Stand to the side of the saw, not in front of it. This way, if the blade breaks or comes loose, it won’t hit you. Also, position the saw on a stable surface so it doesn’t wobble or vibrate.

    Keep Your Hands Away from the Blade

    One essential wet saw safety tip is to keep your hands away from the blade. Don’t try to hold or stop the blade with your hand, even if it’s not moving. Use the saw’s features, such as the blade guard, to protect yourself. Don’t wear loose clothing or jewelry that could get caught in the blade.

    Take Breaks and Stay Hydrated

    Working with a wet saw can be tiring, especially if you’re working on a large project. Take breaks to rest your eyes, hands, and mind. Drink plenty of water to stay hydrated, especially when working in a hot environment.

    Clean Up After Use

    After using a wet saw, cleaning up your workspace correctly is crucial. Please turn off the saw and unplug it from the power source. Remove any debris and dispose of it properly. Clean the saw and its parts with a damp cloth and dry them thoroughly. Store the saw in a dry, safe place.

    FAQs

    • How often should I replace my wet saw blade?

    It depends on how often you use the saw and the materials you cut. Generally, a wet saw blade can last for several projects, but inspecting it before each use is essential. If you notice any chips, cracks, or signs of wear, replace the blade immediately.

    • Can I use a wet saw without water?

    It would be best to use a wet saw with water. The water helps to cool the blade and prevent it from overheating. It also helps reduce dust and debris, which can harm your health.

    • Can I wear flip-flops while using a wet saw?

    No, you should always wear non-slip shoes when using a wet saw. Flip-flops or sandals can easily slip off your feet and expose you to the blade and debris. Wear closed-toe shoes with a non-slip sole for maximum safety.

    • What should I do if the blade breaks while using the saw?

    If the blade breaks or comes loose while using the saw, turn off the saw immediately and unplug it from the power source. Please don’t touch the blade with your hands, and wait for it to stop moving before inspecting the saw. Replace the blade if necessary.

    • Can I use a wet saw indoors?

    You can use a wet saw indoors, but ensuring proper ventilation is essential. The saw produces much water and debris, creating a wet and slippery environment. Open windows and use fans to circulate the air and reduce humidity.

    Conclusion

    Using a wet saw can be a rewarding experience, but it’s essential to prioritize safety to avoid injuries. Familiarize yourself with your wet saw, wear protective gear, secure your workspace, position yourself correctly, keep your hands away from the blade, take breaks, stay hydrated, and clean up after use. Following these tips can ensure a successful project and protect yourself from harm.

    You may also like these posts!

  • Tips for Cutting Rock with a Wet Saw: Rock Your Next Project

    Tips for Cutting Rock with a Wet Saw: Rock Your Next Project

    Cutting rocks can be daunting, but with the right tools and techniques, it can be an enjoyable and rewarding experience. One of the most efficient tools for cutting rocks is a wet saw. This article will discuss tips for cutting rock with a wet saw, including selecting the right blade, setting up the saw, and cutting techniques.

    Introduction

    Cutting rocks with a wet saw can be a challenging but rewarding task. Wet saws are specially designed to cut through various materials, including rocks, tiles, and bricks. Unlike dry saws, wet saws use water to lubricate the blade, which reduces friction and heat and helps extend the blade’s life.

    This article will share tips and techniques for cutting rocks with a wet saw that will help you achieve the best results possible.

    Wet Saw Wonders: How to Cut Rocks Like a Pro

    Understanding the Wet Saw

    A wet saw is a powerful tool that uses a diamond blade to cut through hard materials like rocks, tiles, and bricks. It has a reservoir that supplies water to the blade to keep it cool and lubricated during the cutting process. The water also helps to reduce dust and debris, making it easier to see the cutting line.

    Wet saws are available in various sizes and shapes, ranging from small handheld models to large stationary machines. They are commonly used in construction for cutting tiles, pavers, and other materials.

    Selecting the Right Blade

    Choosing the right blade is crucial for cutting rocks with a wet saw. The type of blade you choose will depend on the rock you’re cutting and the thickness of the material. Diamond blades are the most commonly used blades for cutting rocks, as they are durable and can withstand the rigors of the cutting process.

    When selecting a diamond blade, consider the size of the blade, the number of diamonds on the blade, and the blade’s thickness. A larger blade with more diamonds will typically cut faster, but it may also generate more heat, which can cause the blade to wear out faster.

    Setting Up the Wet Saw

    Proper setup of the wet saw is essential to ensure the cutting process goes smoothly. Start by assembling the saw according to the manufacturer’s instructions. Next, fill the water reservoir with clean water, making sure to keep the water level above the blade at all times.

    Adjust the blade’s depth so it extends slightly below the cut material. This will help reduce the blade’s overheating risk and ensure a smooth, clean cut. Finally, adjust the saw’s guide to the desired cutting width.

    Safety Precautions

    When cutting rocks with a wet saw, taking safety precautions is essential. Always wear protective gear, including safety glasses, earplugs, and gloves. Avoid wearing loose clothing or jewelry that could get caught in the saw.

    Keep your hands and fingers away from the blade at all times. Only use the saw on a stable surface and make sure the saw is securely fastened to the workbench or stand.

    Cutting Techniques

    When cutting rocks with a wet saw, it’s important to use the correct technique to achieve the best results. Begin by marking the cutting line on the rock using a pencil or marker. Start the saw and slowly guide the blade along the cutting line, using steady, even pressure.

    Avoid pushing too hard on the saw, which can cause the blade to overheat and wear out faster. Instead, let the saw consistently do the work and guide it along the cutting line. If the blade starts slowing down or binding, stop the saw and check the blade for debris or wear.

    For thicker rocks, it may be necessary to make several passes to achieve a clean cut. Start with a shallow cut and gradually increase the depth with each pass. Be sure to keep the blade lubricated with water at all times.

    Cleaning and Maintenance

    After each use, cleaning and maintaining the wet saw is important to ensure its longevity and effectiveness. Start by emptying the water reservoir and wiping the saw with a clean, damp cloth. Remove any debris or dust from the blade and inspect it for wear.

    If the blade is worn or damaged, replace it with a new one. Also, check the saw’s motor and other parts for signs of wear or damage, and lubricate them as needed.

    Troubleshooting Common Problems

    Suppose you encounter problems while cutting rocks with a wet saw. In that case, it’s essential to troubleshoot the issue to prevent further damage or injury. Common problems include blade overheating, binding, or breaking.

    If the blade overheats, stop the saw and let it cool down before continuing. Check the blade for debris or wear, and ensure it’s properly lubricated with water. If the blade continues to overheat, it may need to be replaced.

    If the blade binds or breaks, stop the saw immediately and inspect the blade for debris or wear. Replace the blade if necessary, and use the correct blade for cutting the material.

    Tips and Tricks

    • Use a diamond blade with a high diamond concentration for cutting hard rocks like granite or quartz.
    • Wet the rock before cutting to reduce dust and debris and help the blade cool down faster.
    • Use a straight edge or guide to ensure a straight and even cut.
    • Always wear protective gear and follow safety precautions when using a wet saw.

    FAQs

    • Can you cut any type of rock with a wet saw?

    Wet saws are suitable for cutting most rocks, including granite, marble, and sandstone. However, some rocks may be too hard or thick to cut with a wet saw.

    • How often should I replace the blade on my wet saw?

    The blade replacement frequency will depend on the frequency of use and the type of rock being cut. As a general rule, replace the blade every 500 to 1000 cuts.

    • Can I use a wet saw to cut curved shapes in rocks?

    Wet saws are designed for straight cuts, but some models come with adjustable blades that can be angled for curved cuts. However, cutting curved shapes in rocks may require a different tool or technique.

    • How do I prevent the saw blade from overheating?

    To prevent the saw blade from overheating, make sure to keep it lubricated with water at all times. Avoid pushing too hard on the saw, and let it do the work consistently.

    • What is the best way to clean a wet saw?

    To clean a wet saw, empty the water reservoir and wipe down the saw with a clean, damp cloth. Remove debris or dust from the blade, and inspect it for wear. Also, check the saw’s motor and other parts for signs of wear or damage, and lubricate them as needed. It’s important to regularly clean and maintain the wet saw to ensure its longevity and effectiveness.

    • Can I use a dry saw to cut rocks?

    Dry saws are not recommended for cutting rocks as they can produce a lot of dust and debris, harming the operator and the environment. Wet saws are designed to keep the blade cool and reduce dust and debris while cutting rocks.

    • What is the best way to achieve a clean cut with a wet saw?

    To achieve a clean cut with a wet saw, select the right blade for the type of rock being cut, set up the saw correctly, and use the proper cutting techniques. Keep the blade lubricated with water, and guide the saw along the cutting line consistently.

    • What is the maximum thickness of rock that can be cut with a wet saw?

    The maximum thickness of rock that can be cut with a wet saw will depend on the blade size and the motor’s power. Wet saws can cut rocks up to 4 inches thick, but some models can cut thicker rocks with specialized blades.

    • Can I use a wet saw to cut other materials besides rocks?

    Wet saws can cut materials besides rocks, including tiles, bricks, and concrete. However, different types of blades may be required for each material.

    How do I select the right wet saw for my needs?

    • When selecting a wet saw, consider the type and thickness of the material being cut, the size of the blade and motor, and any additional features such as adjustable blades or water pumps. It’s important to choose a saw that is suited to your specific needs and preferences.

    Conclusion

    Cutting rocks with a wet saw can be rewarding and enjoyable with the right tools and techniques. By selecting the right blade, setting up the saw correctly, and using the proper cutting techniques, you can achieve clean and precise cuts every time. Remember to follow safety precautions, regularly clean and maintain the saw, and troubleshoot any problems.

    You may also like these posts!

  • Spark Plug Repair Tips: Keeping Your Engine Running Smoothly

    Spark Plug Repair Tips: Keeping Your Engine Running Smoothly

    If you’re experiencing engine problems such as misfires or rough idling, faulty spark plugs may be to blame. Ignoring these issues can lead to decreased performance, reduced fuel efficiency, and even engine damage over time. However, with a little knowledge and the right tools, you can easily repair or replace your spark plugs to keep your vehicle running smoothly. In this article, we’ll provide you with essential spark plug repair tips to help ensure your vehicle’s ignition system operates at its best.

    Introduction: Understanding Spark Plugs

    Before we dive into the repair process, let’s first understand what spark plugs are and why they’re essential. Spark plugs are small components that screw into the top of your engine’s cylinders. They’re responsible for igniting the fuel in your machine, which creates the combustion necessary to power your vehicle.

    Over time, spark plugs can become worn, fouled, or damaged, which can cause various problems. Some signs of faulty spark plugs include:

    • Rough idling or stalling
    • Reduced acceleration or power
    • Increased fuel consumption
    • Engine misfires or backfires
    • Illuminated check engine light

    If you notice any of these symptoms, it’s likely time to inspect and repair or replace your spark plugs.

    Step-by-Step Guide to Spark Plug Repair

    Now that we understand the importance of spark plugs let’s dive into the repair process. Follow these simple steps to inspect and repair or replace your spark plugs:

    Step 1: Gather Your Tools

    Before you begin, you’ll need a few essential tools:

    • Spark plug socket wrench
    • Spark plug gap gauge
    • Ratchet or breaker bar
    • Torque wrench (optional)

    Step 2: Locate Your Spark Plugs

    The location of your spark plugs can vary depending on your vehicle’s make and model. In most cases, they’ll be located on the top of your engine and accessible from under the hood.

    Step 3: Remove the Old Spark Plugs

    Remove the old spark plugs using your spark socket wrench one at a time. Be sure to keep them in order so you can inspect them later. You can use a breaker bar or ratchet for added leverage if they’re challenging to remove.

    Step 4: Inspect the Old Spark Plugs

    Before discarding the old spark plugs, please look closely at them. You’ll want to replace them if they are worn, fouled, or damaged. Use your spark plug gap gauge to measure the gap between the electrodes. You’ll need to adjust or replace the plug if it’s too wide or too narrow.

    Step 5: Install the New Spark Plugs

    Install the new spark plugs one at a time using your spark plug socket wrench. Be sure to tighten them to the manufacturer’s specifications. If you have a torque wrench, you can use it to ensure the proper torque.

    Step 6: Test Your Engine

    Once you’ve installed the new spark plugs, start your engine and listen for any unusual sounds or vibrations. If everything sounds and feels normal, you’re good to go!

    Tips for Maintaining Your Spark Plugs

    Now that you know how to repair or replace your spark plugs, let’s discuss some tips for maintaining them:

    • Check your spark plugs regularly and replace them as needed.
    • Use the correct type of spark plug for your vehicle.
    • Check the gap between the electrodes and adjust as needed.
    • Avoid over-tightening or under-tightening your spark plugs.
    • Consider upgrading to high-performance spark plugs for improved performance and efficiency.

    Frequently Asked Questions

    • How often should I replace my spark plugs?

    It’s generally recommended to replace your spark plugs every 30,000 to 100,000 miles, depending on the manufacturer’s recommendations and your driving habits.

    • Can I clean my old spark plugs instead of replacing them?

    It’s possible to clean and reuse old spark plugs, but it’s not recommended. Once a spark plug becomes fouled or worn, replacing it with a new one is best.

    • What happens if I don’t replace my faulty spark plugs?

    Ignoring faulty spark plugs can lead to decreased performance, reduced fuel efficiency, and even engine damage over time.

    • Are all spark plugs the same?

    No, many different types of spark plugs are available, each designed for specific applications and engine types.

    • Can I replace my spark plugs or take my vehicle to a mechanic?

    If you have basic mechanical knowledge and the right tools, you can easily replace your spark plugs. However, if you’re uncomfortable working on your vehicle, it’s always best to take it to a qualified mechanic.

    Conclusion

    In conclusion, spark plugs are a crucial component of your vehicle’s ignition system, responsible for igniting the fuel-air mixture in your engine. By following the spark plug repair tips outlined in this article, you can ensure your spark plugs operate at their best and help keep your vehicle running smoothly. Regular maintenance, including spark plug replacement, can help prevent engine damage and maintain your car performing at its best. If you’re uncomfortable working on your vehicle, it’s always best to take it to a qualified mechanic.

    Consider your vehicle’s owner’s manual or a professional mechanic for specific advice and recommendations regarding your spark plugs. With proper care and attention, your spark plugs can help keep your vehicle running smoothly and efficiently for years.

    You may also like these posts!

    Best Spark Plug For 2 Stroke Engines: Reviews, Guide

  • Spark Plug Maintenance Tips: Take Control of Your Engine’s

    Spark Plug Maintenance Tips: Take Control of Your Engine’s

    When it comes to maintaining your car, spark plug maintenance is one of the most critical aspects of the job. Spark plugs play a crucial role in the proper functioning of your engine, and their good care can increase your car’s performance and longevity. This article will review some essential spark plug maintenance tips to keep your vehicle running smoothly.

    Understanding the Role of Spark Plugs

    Before we delve into spark plug maintenance tips, it is essential to understand the role of spark plugs in your car. Spark plugs ignite the air/fuel mixture in your car’s engine, creating the power that propels your vehicle forward. Without spark plugs, your engine would not start, and your car would be inoperable.

    Signs of Worn-Out Spark Plugs

    To ensure that your spark plugs are in good condition, you must know the signs of worn-out ones. Some of the most common symptoms include:

    • Difficulty starting your car
    • Rough idle
    • Poor acceleration
    • Misfires or backfires
    • Decreased fuel economy

    If you notice any of these signs, it is crucial to have your spark plugs checked immediately to prevent further damage to your engine.

    Tips for Maintaining Spark Plugs

    To keep your spark plugs in good condition, here are some essential maintenance tips to follow:

    1. Check Your Spark Plugs Regularly

    One of the most critical things you can do for spark plug maintenance is to check them regularly. It is recommended to check your spark plugs every 30,000 miles or as advised by your car manufacturer. You can visually inspect your spark plugs or have a professional mechanic check them.

    2. Replace Worn Out Spark Plugs

    If your spark plugs are worn out or damaged, you must replace them immediately. Worn-out spark plugs can cause engine misfires, decreased fuel economy, and other problems. Always replace your spark plugs with the manufacturer-recommended ones to ensure optimal performance.

    3. Use High-Quality Spark Plugs

    Investing in high-quality spark plugs is essential for maintaining your engine’s performance. Low-quality spark plugs can cause problems with your machine, such as misfires or backfires. Always use spark plugs recommended by your car manufacturer or a trusted mechanic.

    4. Keep Your Spark Plugs Clean

    Over time, spark plugs can accumulate dirt and debris, affecting their performance. Keeping your spark plugs clean is crucial for their proper functioning. You can clean your spark plugs using a wire brush or a specialized cleaner.

    5. Check Your Ignition System

    Your ignition system plays a crucial role in the proper functioning of your spark plugs. A malfunctioning ignition system can cause problems with your spark plugs, such as misfires or failure to start. Make sure to have your ignition system checked regularly by a professional mechanic.

    FAQs

    • Can dirty spark plugs affect my engine’s performance?

    Yes, over time, spark plugs can accumulate dirt and debris, affecting their performance and causing problems with your engine.

    • How do I know if my spark plugs are worn out?
    • Some common signs of worn-out spark plugs include difficulty starting your car, rough idle, poor acceleration, misfires or backfires, and decreased fuel economy.
    • What should I do if I notice any of these signs?

    If you see any of these signs, a professional mechanic must check your spark plugs immediately to prevent further damage to your engine.

    Conclusion

    Maintaining your spark plugs is essential for adequately functioning your car’s engine. These simple maintenance tips ensure that your spark plugs are in good condition and your vehicle runs smoothly. Regularly checking your spark plugs, replacing worn-out ones, using high-quality spark plugs, keeping them clean, and checking your ignition system are all crucial for spark plug maintenance.

    You may also like these posts!

    Best Spark Plug For 2 Stroke Engines: Reviews, Guide

  • Troubleshooting Spark Plug Problems and Solutions

    Troubleshooting Spark Plug Problems and Solutions

    Spark plugs are a crucial component of your car’s engine, but they can sometimes malfunction. In this article, we’ll explore Troubleshooting Spark Plug Problems and Solutions.

    Spark plugs are the components of a car engine that ignite the air and fuel mixture, producing the power that drives the vehicle. Spark plugs create a spark between two electrodes, igniting the fuel in the engine. However, spark plugs can develop problems that affect their ability to create a spark, resulting in various issues that can impact the engine’s performance.

    Understanding Spark Plugs

    Before we delve into the common problems that spark plugs can develop, we must understand how spark plugs work. A spark plug is a small, threaded metal cylinder screwed into the engine block. The top of the cylinder contains two electrodes separated by a small gap. When the engine runs, a high-voltage current is sent to the spark plug via the spark plug wire. This current jumps the gap between the electrodes, creating a spark that ignites the fuel in the engine.

    Symptoms of a Faulty Spark Plug

    A faulty spark plug can cause various symptoms impacting the engine’s performance. Some of the common symptoms of a defective spark plug include the following:

    • Rough idling: When the engine is idling, it may feel rough or shaky.
    • Reduced power: The engine may lack power or feel sluggish when accelerating.
    • Misfires: The engine may misfire or sputter, especially under load.
    • Increased fuel consumption: A faulty spark plug can cause the engine to burn more fuel than usual.
    • Check engine light: A faulty spark plug can sometimes trigger the check engine light.

    Common Spark Plug Problems

    There are several common spark plug problems that car owners can face. Let’s look closely at some of these problems and their causes.

    Fouled Spark Plugs

    Fouled spark plugs are one of the most common spark plug problems. When a spark plug becomes fouled, something is interfering with the spark plug’s ability to create a spark. Common causes of fouled spark plugs include oil or fuel deposits on the spark plug, a clogged air filter, or a rich fuel mixture.

    Misfiring Spark Plugs

    Misfiring spark plugs can cause the engine to run poorly, and several factors can cause them. Sometimes, a misfiring spark plug can result from a fouled spark plug. Other causes of misfiring spark plugs include:

    • A faulty spark plug wire.
    • A malfunctioning ignition coil.
    • A problem with the fuel injection system.

    Overheating Spark Plugs

    Spark plugs can also overheat, which can cause them to fail. Several factors, including a lean fuel mixture, a malfunctioning cooling system, or a clogged air filter, can cause overheating. Overheating can cause the spark plug to become deformed, interfering with its ability to create a spark.

    Worn Out Spark Plugs

    Like any other car engine component, spark plugs can wear out over time. Worn-out spark plugs can cause many problems, including misfires, reduced power, and increased fuel consumption. Spark plugs can become worn out due to normal wear and tear or prolonged use without maintenance.

    Broken Spark Plugs

    In some cases, spark plugs can break or become damaged, which can cause a range of problems. Broken spark plugs can cause misfires, reduced power, and increased fuel consumption. They can also cause damage to the engine if the fractured pieces enter the combustion chamber. Broken spark plugs can be caused by over-tightening, overheating, or impact damage.

    How to Troubleshoot Spark Plug Problems

    If you’re experiencing problems with your spark plugs, there are several steps you can take to troubleshoot the issue.

    Inspect the Spark Plugs

    The first step in troubleshooting spark plug problems is to inspect the plugs themselves. Remove each spark plug and check it for signs of wear, fouling, or damage.

    Check the Spark Plug Wires

    If the spark plugs appear in good condition, the next step is to check the spark plug wires. Ensure that the cables are securely connected to the spark plugs and the ignition coil, and inspect them for signs of wear or damage.

    Use a Spark Plug Tester

    If you’re still experiencing problems after inspecting the spark plugs and wires, you can use a spark plug tester to determine if the spark plugs are functioning correctly. A spark plug tester can help you determine if the spark plugs create a vital enough spark to ignite the fuel in the engine.

    Solutions to Spark Plug Problems

    Once you’ve identified the problem with your spark plugs, there are several solutions you can try.

    Clean the Spark Plugs

    If the spark plugs are fouled but still in good condition, you can try cleaning them. Use a wire brush or a spark plug cleaner to remove any deposits from the spark plug, and then reinstall the plug.

    Replace the Spark Plugs

    If the spark plugs are worn out, damaged, or otherwise faulty, you should replace them. Make sure to use the correct type of spark plug for your engine, and follow the manufacturer’s instructions for installation.

    Replace the Spark Plug Wires

    If the spark plug wires are worn out or damaged, you should replace them. Make sure to use the correct type of wire for your engine, and follow the manufacturer’s instructions for installation.

    FAQs

    • How often should I replace my spark plugs?

    The recommended interval for replacing spark plugs varies depending on the make and model of your vehicle and the type of spark plug used. Generally, most manufacturers recommend replacing spark plugs every 30,000 to 100,000 miles or every 2 to 7 years. However, it’s always best to consult your owner’s manual or a trusted mechanic for your vehicle’s recommended interval.

    • Can a faulty spark plug cause my car to fail an emissions test?

    A faulty spark plug can cause your car to fail an emissions test. If a spark plug isn’t functioning correctly, it can cause incomplete combustion and increase emissions. This can lead to your car failing an emissions test and reduced fuel efficiency and power.

    • Can I clean my spark plugs with a regular wire brush?

    While cleaning spark plugs with a regular wire brush is possible, it’s not recommended. A standard wire brush may damage the delicate electrode on the spark plug, interfering with its ability to create a spark. Instead, it’s best to use a specialized spark plug cleaner or a soft wire brush designed for this purpose.

    • Can I use any spark plug in my engine?

    No, you cannot use any spark plug in your engine. Different engines require different spark plugs designed to fit specific specifications and perform particular functions. Using the correct spark plug type can lead to better performance, reduced fuel efficiency, and even engine damage. Always consult your owner’s manual or a trusted mechanic to determine your engine’s correct spark plug type.

    • What should I do if my engine is still misfiring after replacing the spark plugs?

    If your engine is still misfiring after replacing the spark plugs, other issues may need to be addressed. Some common causes of engine misfires include faulty ignition coils, clogged fuel injectors, or problems with the engine’s sensors. It’s best to have your vehicle inspected by a trusted mechanic to determine the root cause of the issue and address it appropriately.

    Conclusion

    Spark plug problems can cause various issues with your car’s engine, but by understanding the common problems and solutions, you can troubleshoot and fix these issues quickly and easily. Remember to inspect your spark plugs regularly and follow the manufacturer’s recommendations for maintenance and replacement.

    You may also like these posts!

    Best Spark Plug For 2 Stroke Engines: Reviews, Guide

  • Choosing the Right Drill for Stump Removal At Home

    Choosing the Right Drill for Stump Removal At Home

    When it comes to removing a stump from your yard can be a laborious task. However, choosing the right drill can make the job much easier. With so many different types of drills on the market, it can be challenging to determine which one is best suited for the task. This article will provide an in-depth guide on choosing the right drill for stump removal at home.

    Understanding the Different Types of Drills

    Before choosing a drill for stump removal, it’s important to understand the different types of drills available on the market. Here are a few of the most common types of drills:

    Cordless Drills

    Cordless drills are battery-powered, making them easy to use without needing to plug them in. They are also lightweight, making them easy to maneuver. Cordless drills are perfect for smaller stumps or those who prefer a more portable option.

    Hammer Drills

    Hammer drills are a more powerful option for removing larger stumps. They work by pounding the bit in and out of the stump, making it easier to break up the roots.

    Rotary Hammers

    Rotary hammers are similar to hammer drills but are even more powerful. They use a piston mechanism to produce more force, making them ideal for larger stumps and tougher materials.

    Auger Drills

    Auger drills are specifically designed for digging and can be useful for removing stumps with deep roots. They have a spiral bit that digs into the ground, making them a useful tool for stump removal.

    Factors to Consider When Choosing a Drill for Stump Removal

    When choosing a drill for stump removal, several factors must be considered. Here are some of the most important:

    Size of the Stump

    The stump’s size will play a significant role in determining the type of drill you need. Smaller stumps can be easily removed with a cordless drill. In comparison, larger stumps require a more powerful option, like a hammer or rotary hammer drill.

    Depth of the Roots

    If the stump has deep roots, an auger drill may be necessary to reach them. If the roots are shallow, a less powerful drill may suffice.

    Personal Experience

    Your experience with drills will also play a role in determining the type of drill you should use. A cordless drill may be the best option if you are a novice. However, if you have experience with more powerful drills, you may prefer a hammer or rotary hammer drill.

    Budget

    Drills can range significantly in price, so it’s essential to consider your budget before purchasing. Cordless drills are less expensive, while rotary hammer drills can be much more costly.

    Tips for Using a Drill for Stump Removal

    Here are some tips to help you use your drill effectively for stump removal:

    Wear Protective Gear

    Always wear eye protection, gloves, and sturdy shoes when using a drill for stump removal. This will protect you from flying debris and prevent injuries.

    Use the Right Drill Bit

    Make sure you use the right drill bit for the job. The wrong bit can damage your drill or make the job more difficult than it needs to be.

    Drill at an Angle

    When drilling into the stump, drilling at an angle is essential to avoid damaging the drill bit or the drill itself.

    Take Breaks

    Removing a stump can be a time-consuming task, so make sure to take breaks and rest as needed. This will help you avoid burnout and prevent injuries.

    FAQs

    • Can I use a regular drill for stump removal?

    While a regular drill may work for smaller stumps, it’s not recommended for larger or deep-rooted stumps. A more powerful drill like a hammer or rotary hammer drill may be necessary for those tasks.

    • Do I need to hire a professional to remove a stump?

    While removing a stump yourself with the right tools and precautions is possible, hiring a professional may be best if you need clarification or are uncomfortable with the task.

    • What type of bit should I use for stump removal?

    For most stump removal tasks, a spade or paddle bit is recommended. For tougher stumps, a carbide-tipped bit may be necessary.

    • How much does a drill for stump removal cost?

    Drills can range significantly in price, from less than $100 for a basic cordless drill to several hundred dollars for a high-end rotary hammer drill.

    • Is it safe to remove a stump on my own?

    Removing a stump can be dangerous, so it’s important to prioritize safety and take all necessary precautions. If you need more clarification or are uncomfortable with the task, it may be best to hire a professional.

    Conclusion

    Choosing the right drill for stump removal can make the task much easier and more efficient. Whether you opt for a cordless drill, hammer drill, rotary hammer, or auger drill, it’s essential to consider factors such as the size of the stump, the depth of the roots, personal experience, and budget. When using a drill for stump removal, it’s important to wear protective gear, use the right drill bit, drill at an angle, and take breaks as needed.

    Removing a stump can be dangerous, so always proceed with caution and prioritize safety. You can make stump removal a manageable and satisfying DIY project with the right drill and precautions.

    You may also like these posts!

  • Tips for Safe Stump Removal At Home: Tips from the Pros

    Tips for Safe Stump Removal At Home: Tips from the Pros

    If you have a tree stump in your backyard, it can be an eyesore and a tripping hazard. Removing a stump can be difficult, and it is important to do it safely to avoid injury or damage to your property. This article will provide tips for safe stump removal at home.

    What is stump removal?

    Stump removal is the process of removing a tree stump from the ground. This involves digging around the stump, cutting the roots, and pulling the stump out of the ground. Stump removal is a time-consuming process and requires proper tools and equipment.

    Why should you remove a stump?

    You should remove a tree stump from your backyard for several reasons. Stumps can be a tripping hazard, especially if you have children or elderly people. They can also attract insects and pests, which can damage your property. Stumps can also be an obstacle when mowing your lawn or landscaping your yard.

    Types of stumps

    There are two types of stumps: hardwood stumps and softwood stumps. Hardwood stumps are more difficult to remove than softwood stumps because they have larger and deeper root systems.

    Tools and equipment required for stump removal

    The tools and equipment required for stump removal include a chainsaw, a shovel, a pickaxe, a pry bar, a stump grinder, and safety gear such as gloves, goggles, and a helmet.

    Safety precautions before starting the stump removal process

    Before starting the stump removal process, it is important to take some safety precautions. Ensure you have the right tools and equipment and wear appropriate safety gear. Check the area around the stump for underground utility lines, such as gas or water, and mark them to avoid damaging them while digging.

    Steps for removing a stump safely

    1. Cut the stump as close to the ground as possible using a chainsaw.
    2. Use a shovel to dig around the stump, exposing the roots.
    3. Use a pickaxe to loosen the soil around the roots.
    4. Use a pry bar to lift the stump and loosen the roots.
    5. Repeat steps 2-4 until the stump is loose enough to remove from the ground.
    6. Use a stump grinder to grind the remaining roots and wood chips.

    Disposing of the removed stump

    Once you have removed the stump, you can dispose of it in several ways. You can either use it as firewood or chop it into smaller pieces and use it as mulch for your garden. Alternatively, you can hire a professional service to dispose of it.

    Common mistakes to avoid while removing a stump

    Some common mistakes to avoid while removing a stump include:

    • not wearing appropriate safety gear
    • not checking for underground utility lines
    • not using the right tools and equipment

    Tips for successful stump removal

    Some tips for successful stump removal include using the right tools and equipment, taking appropriate safety precautions, and being patient.

    Things to Consider Before Stump Removal At Home

    Before removing a stump from your backyard, there are a few things you should consider to ensure the process is safe and efficient:

    • Size of the stump: The size will determine the tools and equipment needed for removal. Smaller stumps may be removed with a shovel, while larger stumps may require a stump grinder.
    • Location of the stump: The location of the stump is important to consider to ensure it is safe to remove. The stump may require extra precautions to prevent damage if it is located near a building or structure.
    • Surrounding landscape: The surrounding landscape should be considered to ensure the removal process does not damage other plants, trees, or structures.
    • Safety precautions: Before beginning the removal process, it is important to take appropriate safety precautions, such as wearing protective gear, using the right tools and equipment, and ensuring the area is clear of any obstacles or hazards.
    • Regulations: Check with your local government to ensure that no regulations or permits are required for stump removal in your area.

    Considering these factors, you can ensure a safe and efficient stump removal process.

    FAQs

    • How long does it take to remove a stump?

    It depends on the size and type of stump and the tools and equipment used. Removing a stump can take anywhere from a few hours to a few days.

    • Can I remove a stump by myself?

    You can remove a stump by yourself, but taking appropriate safety precautions and using the right tools and equipment is important.

    • Can I use chemicals to remove a stump?

    Yes, some chemicals can help break down the stump, but they can be harmful to the environment and should be used with caution.

    • Do I need a permit to remove a stump?

    It depends on your local regulations. Check with your local government to see if a permit is required before removing a stump.

    • Can I hire a professional service to remove the stump?

    Yes, you can hire a professional stump removal service to remove the stump for you. This is often the safest and most efficient option, especially for larger stumps.

    Conclusion

    Removing a stump from your backyard can be a difficult task. However, it is important to do it safely to avoid injury or damage to your property. Following the tips and precautions outlined in this article, you can safely and successfully remove a stump from your backyard.

    You may also like these posts!

  • Importance of Speed and Feed in Drilling: Cutting Edge

    Importance of Speed and Feed in Drilling: Cutting Edge

    Regarding drilling, speed, and feed are two critical factors that can make or break the efficiency and quality of the process. While many factors can affect drilling performance, the right combination of speed and feed is essential to achieve optimal results. This article will explore the importance of speed and feed in drilling and how they can be optimized to enhance efficiency and quality.

    Understanding Speed and Feed in Drilling

    Speed and feed refer to the two main parameters that determine the performance of a drilling operation. Speed is the rate at which the drill bit rotates, measured in revolutions per minute (RPM). On the other hand, feed is the rate at which the drill bit advances into the material being drilled, measured in inches per minute (IPM).

    The right combination of speed and feed depends on several factors, including the material being drilled, the type of drill bit, the desired hole size, and the drilling equipment’s capabilities. Using the right speed and feed can result in better hole quality, premature drill bit wear, and increased drilling time and costs.

    The Importance of Optimizing Speed and Feed

    Optimizing speed and feed is crucial for achieving efficient and high-quality drilling results. The right combination of speed and feed can help reduce drilling time, extend tool life, and improve the overall quality of the drilled hole.

    Improving Efficiency

    Optimizing speed and feed can help reduce drilling time, which is critical in many industries. For instance, in the manufacturing industry, reducing drilling time can increase production output and reduce costs. In the construction industry, drilling efficiency can help speed up the construction process and minimize downtime.

    Extending Tool Life

    Using the right speed and feed can also help extend the life of the drill bit. When the drill bit is subjected to excessive heat or pressure due to incorrect speed or feed, it can lead to premature wear and tear. This can result in frequent tool replacements, which can be costly and time-consuming.

    Enhancing Hole Quality

    Optimizing speed and feed can also improve the overall quality of the drilled hole. Using the correct speed and feed can help prevent burrs, chips, and other imperfections that can compromise the hole’s integrity. Additionally, the right combination of speed and feed can help ensure the hole is drilled to the desired size and depth.

    The Power of Precision Why Speed and Feed Matter in Drilling

    The Power of Precision: Why Speed and Feed Matter in Drilling

    Several factors can affect the optimal speed and feed for a drilling operation. Understanding these factors is critical to achieving the best possible results. Some of the primary factors that affect speed and feed include:

    Material being drilled

    Different materials have varying hardness and composition, which affects the optimal speed and feed. More complex materials like metals require lower speeds and higher feed to achieve optimal results. Softer materials like wood or plastic require higher speed and lower feed.

    Drill bit type

    Different drill bits have varying properties, such as the number of flutes, point angle, and coating. Each of these properties affects the optimal speed and feed for the drill bit. For instance, a drill bit with more flutes requires a lower speed and higher feed to achieve optimal results.

    Desired hole size and depth

    The desired hole size and depth also affect the optimal speed and feed. Deeper holes require lower speed and higher feed to prevent drill bit wear and tear. Additionally, smaller holes require higher speed and lower feed to prevent drill bit breakage.

    Drilling equipment capabilities

    The drilling equipment’s capabilities, such as the spindle speed and motor power, also affect the optimal speed and feed. It’s crucial to ensure that the equipment’s capabilities match the desired drilling parameters to achieve optimal results.

    Tips for Optimizing Speed and Feed

    Optimizing speed and feed for drilling can be challenging, especially for those new to the process. Here are some tips to help you achieve the best possible results:

    Start with the manufacturer’s recommendations

    The drill bit manufacturer often provides guidelines for their products’ optimal speed and feed. These recommendations are based on the drill bit’s design, material, and other factors. The manufacturer’s recommendations are a good starting point for optimizing speed and feed.

    Adjust for material hardness and composition

    As mentioned earlier, different materials require different speeds and feeds. When drilling a new material, adjusting the speed and feed to match its hardness and composition is essential. You can start with the manufacturer’s recommendations and adjust them based on the drilled material.

    Use the right drill bit for the job

    Using the right drill bit is critical to achieving optimal results. Different drill bit types are designed for different materials and hole sizes. Using the right drill bit can lead to better hole quality, premature wear, and other issues.

    Monitor drill bit wear

    The optimal speed and feed may change as the drill bit wears down. Monitoring the drill bit’s wear and adjusting the speed and feed accordingly is crucial. Using a worn-out drill bit can result in poor hole quality and increased drilling time and costs.

    Test and adjust

    Optimizing speed and feed requires trial and error. It’s essential to test different speed combinations and feed and adjust them until you achieve the desired results. Testing can help you find the optimal speed and feed for your drilling operation.

    FAQ

    • What is the difference between speed and feed in drilling?

    Speed refers to how fast the drill bit rotates, measured in revolutions per minute (RPM). On the other hand, feed refers to how fast the drill bit moves into the material being drilled, measured in inches per minute (IPM). Both speed and feed are critical factors in drilling that affect the efficiency and quality of the process.

    • How do I determine the optimal speed and feed for drilling?

    The optimal speed and feed for drilling depend on various factors, such as the material being drilled, the drill bit type, and the hole size. It’s essential to start with the manufacturer’s recommendations and adjust them based on the material’s hardness and composition. You can also conduct tests to determine your specific drilling operation’s optimal speed and feed.

    • What happens if I use the wrong speed and feed for drilling?

    Using the wrong speed and feed can lead to several issues, such as poor hole quality, premature drill bit wear, increased drilling time, and higher costs. Optimizing speed and feed to achieve the best possible results and avoid these issues is crucial.

    • How often should I adjust the speed and feed for the drill bit?

    You should monitor the drill bit’s wear and adjust the speed and feed accordingly. The optimal speed and feed may change as the drill bit wears down. Adjusting the speed and feed periodically to maintain optimal drilling results is essential.

    • Can I use the same speed and feed for different materials?

    No, different materials require different speeds and feed. More rigid materials require slower speed and feed, while softer materials require faster speed and feed. Adjusting the speed and feed to match the drilled material is essential to achieve optimal drilling results.

    Conclusion

    In conclusion, speed and feed are critical factors in drilling that can affect the efficiency and quality of the process. Optimizing speed and feed can reduce drilling time, extend tool life, and improve the overall quality of the drilled hole. By understanding the factors that affect speed and feed and following the tips for optimizing them, you can achieve optimal drilling results and save time and costs.

    You may also like these posts!

  • Advantages of Using Cobalt Drill Bits: The Key to Success

    Advantages of Using Cobalt Drill Bits: The Key to Success

    Drilling holes in a metal can be a challenging task. Manufacturers have created drill bits specifically designed for drilling into the metal to make this job more manageable. Among these drill bits are cobalt drill bits, which offer several advantages over other drill bits. This article will explore the advantages of using cobalt drill bits and how they can help make your metalworking projects more successful.

    Introduction to Cobalt Drill Bits

    Cobalt drill bits are made from a steel alloy that contains cobalt. Cobalt is added to the steel to increase its hardness and make it more heat-resistant. These properties make cobalt drill bits ideal for drilling through rigid materials such as stainless steel and other high-strength alloys.

    Cobalt Drill Bits: The Ultimate Metalworking Solution

    Durability

    Cobalt drill bits are known for their durability. They can withstand high temperatures and are less likely to break or dull than other drill bits. This makes them ideal for use in industrial settings where drilling through rigid materials is common.

    Precision

    Cobalt drill bits are also known for their precision. They can drill through hard materials without slipping or wandering, allowing for more accurate drilling. This is especially important when working on projects that require precise holes.

    Speed

    Cobalt drill bits can drill through rigid materials faster than other drill bits. This saves time and increases efficiency, making them a popular choice among metalworkers.

    Versatility

    Cobalt drill bits can be used on various materials, including stainless steel, cast iron, and other high-strength alloys. This versatility makes them a valuable tool in any metalworking toolbox.

    Cost-effective

    Although cobalt drill bits may cost more than others, they are more cost-effective in the long run. Their durability and precision mean they will last longer and require less frequent replacements.

    Reduced Heat Build-up

    Cobalt drill bits are designed to reduce heat build-up during the drilling process. This is achieved using a unique flute design and adding cobalt to the steel alloy. This makes them ideal for drilling through rigid materials like stainless steel that generate much heat.

    Longer Lifespan

    Due to their increased durability, precision, and reduced heat build-up, cobalt drill bits have a longer lifespan than others. This means they will need to be replaced less frequently, saving you money in the long run.

    How to Choose the Right Cobalt Drill Bit

    When choosing a cobalt drill bit, remember a few things.

    • First, consider the type of material you will be drilling. Different materials require different types of drill bits. You want to ensure you choose a cobalt drill bit designed for the material you will be working with.
    • Second, consider the size of the hole you need to drill. Cobalt drill bits come in various sizes, so make sure you choose one that is appropriate for the size of the hole you need.
    • Finally, consider the length of the drill bit. If drilling through a deep hole, you will need a more extended drill bit to reach the bottom of the hole.

    FAQs

    • Are cobalt drill bits more expensive than other types of drill bits?

    Cobalt drill bits are generally more expensive than others due to their increased durability and precision.

    • Can cobalt drill bits be used on wood or plastic?

    While cobalt drill bits can technically be used on wood or plastic, they are specifically designed for drilling through tough metals. They may need to work better on softer materials.

    • How do I sharpen a cobalt drill bit?

    Cobalt drill bits can be sharpened using a specialized grinding wheel. Following the manufacturer’s instructions and using the appropriate safety gear when sharpening drill bits.

    • Can cobalt drill bits be used with a hand drill?

    Yes, cobalt drill bits can be used with a hand drill. However, ensuring the drill is powerful enough to handle the more rigid materials that cobalt drill bits are designed for is essential.

    • How is a cobalt drill bit right for my project?

    A cobalt drill bit is likely the best choice if you need to drill through tough metals such as stainless steel or high-strength alloys. However, a different type of drill bit may be more appropriate if you are working with softer materials or need to drill larger holes.

    Conclusion

    In conclusion, cobalt drill bits offer several advantages over other drill bits. They are durable, precise, versatile, and cost-effective, making them a valuable tool for any metalworking project. When choosing a cobalt drill bit, make sure that you consider the type of material you will be drilling, the size of the hole you need to drill, and the length of the drill bit. Considering these considerations, you can choose the right cobalt drill bit for your project and achieve the best results possible.

    You may also like these posts!