Category: Expert Guides and Tips

Explore our expert guides and tips for power tools, home improvement, lawn and garden projects, and more. Get step-by-step instructions, valuable insights, and practical advice to tackle your DIY projects like a pro. Discover the best techniques, tools, and strategies to enhance your skills and achieve remarkable results.

  • Tips for Drilling Cast Iron: Here’s How to Do It Like a Pro

    Tips for Drilling Cast Iron: Here’s How to Do It Like a Pro

    Drilling through cast iron can be challenging, especially if you need the right tools and techniques. Cast iron is a dense and brittle material that can easily break, crack, or become overheated during drilling. However, with the right approach and some simple tips, you can quickly drill through cast iron like a pro. In this article, we’ll share some valuable tips for drilling cast iron that can help you achieve success in drilling cast iron.

    Understanding Cast Iron

    Before we dive into the tips, it’s essential to understand a bit about cast iron. Cast iron is a strong and durable material commonly used to manufacture pipes, valves, cookware, and other industrial applications. Cast iron is made by melting iron and adding alloying elements such as carbon, silicon, and manganese. The resulting material is poured into a mold and cooled, creating a strong and rigid structure.

    Get the Job Done Right: 7 Tips for Drilling Cast Iron

    Tip 1: Choose the Right Drill Bit

    The first and most important tip for drilling cast iron is to choose the right drill bit. High-speed steel (HSS) drill bit is the best option for drilling cast iron. HSS drill bits are made from a combination of carbon steel and other alloys, which make them strong and durable. They also have a high resistance to heat, which is essential when drilling through cast iron.

    Tip 2: Use Lubrication

    Lubrication is another crucial factor when drilling cast iron. Without proper lubrication, the drill bit can overheat and cause the material to crack or break. To avoid this, use a high-quality lubricant such as cutting oil or drilling fluid. Apply the lubricant to the drill bit and the surface of the cast iron before drilling. This will help to reduce friction and keep the temperature under control.

    Tip 3: Use a Slow Speed

    When drilling cast iron, it’s essential to use a slow speed. High-speed drilling can cause the material to become overheated, leading to cracking or breaking. Use a slow speed and apply gentle pressure to the drill bit. This will help to reduce the heat and prevent damage to the material.

    Tip 4: Use the Right Technique

    The technique used for drilling cast iron is also essential. To avoid damaging the material, start drilling with a small pilot hole. Once the pilot hole is established, gradually increase the size of the drill bit until the desired diameter is reached. Always apply gentle pressure and avoid forcing the drill bit into the material. This can cause the material to crack or break.

    Tip 5: Use a Backing Plate

    A backing plate can also be helpful when drilling through cast iron. A backing plate is a piece of metal placed behind the drilled material. This helps to provide support and prevent the material from cracking or breaking. To use a backing plate, place it behind the cast iron and drill through both the material and the backing plate.

    Tip 6: Cool the Material

    Cooling the material is another essential tip for drilling cast iron. To prevent overheating, use a coolant spray or a stream of water to cool the material as you drill. This will help to reduce the heat and prevent damage to the material.

    Tip 7: Wear Protective Gear

    Finally, it’s essential to wear protective gear when drilling cast iron. The drilling process can create metal shavings and other debris that can be dangerous if they get into your eyes or skin. Always wear safety glasses, gloves, and other protective gear when drilling through cast iron.

    FAQ

    • What type of drill bit should I use for drilling cast iron?

    It would be best to use high-speed steel (HSS) drill bit to drill cast iron.

    • Can I use water as a lubricant for drilling cast iron?

    Yes, you can use a stream of water as a coolant to cool down the material while drilling.

    • Can I use a hammer drill for drilling cast iron?

    It’s not recommended to use a hammer drill for drilling cast iron, as the high speed and impact of the hammer can cause the material to crack or break.

    • How do I prevent the drill bit from slipping on the surface of the cast iron?

    To prevent the drill bit from slipping, use a center punch to create a small indentation on the surface of the cast iron before drilling.

    • Can I use a carbide drill bit for drilling cast iron?

    Carbide drill bits are not recommended for drilling cast iron, as they can be too brittle and break easily.

    Conclusion

    Drilling through cast iron can be daunting, but with the right tools and techniques, it can be done successfully. Remember to choose the right drill bit, use lubrication, drill

    slowly, use the proper technique, use a backing plate, cool the material, and wear protective gear. By following these tips, you can ensure a successful drilling experience without damaging the cast iron.

    You may also like these posts!

  • Safety Tips for Using a Glass Cutters: From Novice to Pro

    Safety Tips for Using a Glass Cutters: From Novice to Pro

    Glass cutters are essential tools for anyone working with glass. They can be used to create beautiful art pieces, fix broken glass, or even cut glass for industrial purposes. However, using a glass cutter can be dangerous if proper safety precautions are not taken. This article will provide some essential safety tips for using a glass cutters.

    Master the Art of Glass Cutting with These Safety Tips

    Glass cutters can be used to cut glass safely and precisely. They are designed to create a small scratch on the surface of the glass, which can then be used as a guide for breaking the glass along the desired line. However, if the glass cutter is not used correctly, it can result in injury or damage to the glass. Therefore, taking some safety precautions when using a glass cutter is essential.

    Wear Safety Gear

    Before using a glass cutter, wearing the proper safety gear is essential. Wear protective gloves, eye goggles, and long sleeves to avoid cuts and scratches. Consider wearing a respirator mask to avoid inhaling any glass particles that may be released during cutting.

    Choose the Right Glass Cutter

    Many types of glass cutters are available in the market, and choosing the right one for the job is essential. For example, some glass cutters are designed for thin glass, while others are designed for thicker glass. Choose a glass cutter appropriate for the type of glass you are cutting.

    Check Your Glass Before Cutting

    Before cutting your glass, inspecting it thoroughly for any cracks, chips, or other damage is essential. If the glass is damaged, it may break unexpectedly during the cutting process, which can be dangerous.

    Use a Straight Edge

    When using a glass cutter, it is essential to use a straight edge as a guide. This will help you make a precise cut and avoid jagged edges. You can use a ruler, a piece of wood, or any other straight object as a guide.

    Apply Enough Pressure

    When using a glass cutter, it is important to apply enough pressure to create a scratch on the surface of the glass. However, do not apply too much pressure, which can cause the glass to break unexpectedly. Apply just enough pressure to create a visible scratch.

    Use the Right Technique

    Using the proper technique to cut glass safely and precisely is essential. Hold the glass cutter at a 45-degree angle and make a single, firm stroke along the straight edge. Do not try to cut the glass in one pass, as this can cause the glass to break unexpectedly.

    Keep Your Work Area Clean

    When working with a glass cutter, keeping your work area clean and free of clutter is essential. This will help you avoid accidents and have enough space to work safely.

    Store Your Glass Cutter Safely

    When you are not using your glass cutter, it is essential to store it safely. Please keep it in a secure location, away from children and pets, and ensure that the blade is covered to avoid accidental cuts.

    FAQs

    • How do I choose the suitable glass cutter for my project?

    Choose a glass cutter appropriate for the type of glass you are cutting. Consider the thickness of the glass, the shape of the piece you want to cut, and your level of experience.

    • What kind of safety gear should I wear when using a glass cutter?

    You should wear protective gloves, eye goggles, and long sleeves to avoid cuts and scratches. Consider wearing a respirator mask to avoid inhaling any glass particles.

    • Can I cut glass without a straight edge?

    While cutting glass without a straight edge is possible, it is not recommended. Using a straight edge as a guide will help you make a precise cut and avoid jagged edges.

    • What should I do if I accidentally break a piece of glass while cutting it?

    If you break a piece of glass while cutting it, stop immediately and dispose of the broken glass safely. Refrain from attempting to pick up the broken pieces with your bare hands.

    • Can I reuse a glass cutter blade?

    Reusing a glass cutter blade is generally not recommended, as it may become dull and less effective over time. Replace the blade as needed for optimal performance.

    Continuation

    Glass cutting is an art that requires practice and patience. By following the safety tips outlined in this article, you can confidently reduce the risk of injury and create beautiful pieces of art.

    Remember always to wear the appropriate safety gear, choose the suitable glass cutter for the job, inspect your glass for damage, use a straight edge as a guide, apply enough pressure, use the correct technique, keep your work area clean, and store your glass cutter safely when not in use.

    If you are new to glass cutting, taking a class or seeking guidance from an experienced glass cutter before starting any project is always a good idea. With the right tools, techniques, and safety precautions, you can enjoy the art of glass cutting safely and confidently.

    You may also like these posts!

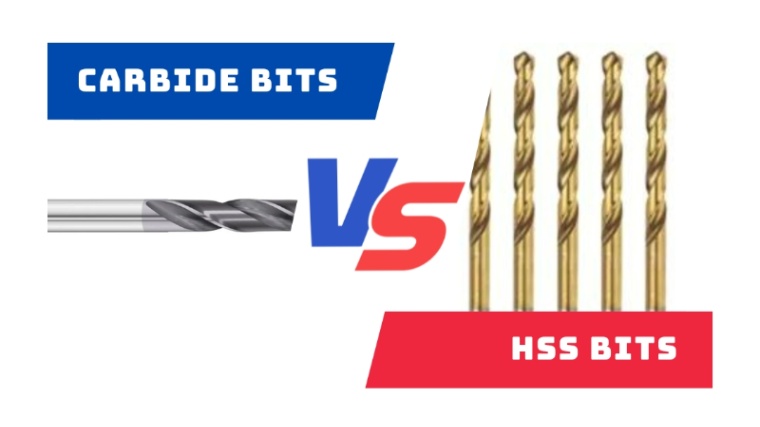
  • Carbide Vs HSS Drill Bits: Drill Bit Showdown

    Carbide Vs HSS Drill Bits: Drill Bit Showdown

    Choosing the correct type of bit is crucial if you’re looking for the perfect drill bit for your DIY project, construction job, or other purposes. Two of the most popular types of drill bits on the market are carbide and HSS (High-Speed Steel) bits. But how do you know which one to use? In this article, we’ll discuss the differences between carbide and HSS bits, their advantages and disadvantages, and when to use each one.

    Harder, Better, Faster, Stronger: Carbide or HSS Drill Bits?

    Carbide Bits

    Let’s start with carbide bits.

    Definition of Carbide Bits

    Carbide or cemented carbide bits are made from tungsten carbide and cobalt powder. The mixture is compressed and sintered at high temperatures to create a tough and durable material.

    Advantages of Carbide Bits

    Carbide bits offer several advantages over HSS bits.

    • Durability and Hardness: Carbide bits are tough and durable, making them ideal for challenging drilling tasks. They can drill through hard materials such as metal, masonry, and ceramic quickly and precisely.
    • Wear Resistance: Carbide bits have excellent wear resistance, which means they can maintain their sharpness and precision for longer than HSS bits.
    • High Heat Resistance: Carbide bits can withstand high temperatures without losing their hardness and durability, making them ideal for drilling tasks that involve high heat.

    Applications of Carbide Bits

    Carbide bits are commonly used for the following drilling tasks:

    • Metalworking: Carbide bits are ideal for drilling through tough metals such as steel, stainless steel, and cast iron.
    • Masonry Work: Carbide bits are also useful for drilling through rigid materials such as concrete, brick, and stone.
    • Woodworking: Carbide bits can be used for woodworking tasks that involve drilling through hardwoods and other rigid materials.
    • Glass and Ceramic Drilling: Carbide bits can also be used for drilling through the glass and ceramic materials.

    Disadvantages of Carbide Bits

    Despite their many advantages, carbide bits have their drawbacks. Here are some of the disadvantages of using carbide bits:

    • Brittle Nature: Carbide bits are pretty crispy, which means they can easily break or chip if they encounter too much force or are dropped.
    • Cost: Carbide bits are generally more expensive than HSS bits, which can deter those on a budget.

    HSS Bits

    HSS stands for High-Speed Steel, and these bits are made from a particular type of steel designed to withstand high temperatures and friction. Here are some of the advantages and disadvantages of using HSS bits:

    Definition of HSS Bits

    HSS bits are made from high-carbon steel that contains tungsten, chromium, vanadium, and other metals. They are designed to withstand high temperatures and are known for their versatility and affordability.

    Advantages of HSS Bits

    • Flexibility: HSS bits are pretty flexible, which means they can be bent and shaped to fit different angles and shapes.
    • Versatility: HSS bits can be used on various materials, including metal, wood, and plastic.
    • Affordability: HSS bits are generally more affordable than carbide bits, which makes them a good choice for those on a budget.

    Applications of HSS Bits

    HSS bits are used in a variety of applications, including:

    • Woodworking: HSS bits are often used in woodworking projects, as they can drill clean holes in wood without chipping or splintering.
    • Metalworking: HSS bits are also commonly used, as they can cut through metal without dulling or losing their edge.
    • Plastic Drilling: HSS bits are well-suited for drilling holes in plastic, as they can easily cut through the material without melting it.
    • Soft Materials: HSS bits can also be used on smooth materials, such as rubber or foam, without damaging or tearing the material.

    Disadvantages of HSS Bits

    • Lower Hardness and Durability: HSS bits are not as hard or durable as carbide bits, which means they can become dull or damaged more quickly.
    • Lower Wear Resistance: HSS bits are not as wear-resistant as carbide bits, so they may need to be replaced more often.

    Differences between Carbide and HSS Bits

    The main difference between carbide and HSS bits is their composition. Carbide bits are made from a combination of tungsten carbide and cobalt, while HSS bits are made from high-carbon steel with added alloys. This difference in composition affects their performance, durability, and cost.

    Carbide vs. HSS Bits: Which One to Use When?

    When choosing between carbide and HSS bits, there are several factors to consider:

    • Material to be drilled: Carbide bits are best for drilling hard materials, such as metal or ceramic, while HSS bits are better suited for softer materials, such as wood or plastic.
    • The precision of the hole: If you need to drill a precise hole, such as for a bolt or screw, carbide bits are the best choice. HSS bits are better suited for general drilling applications.
    • Budget: Carbide bits are more expensive than HSS bits, so if you are on a tight budget, HSS bits may be the better choice.

    How to Use Carbide and HSS Bits?

    When using carbide and HSS bits, following proper safety measures and guidelines is essential. Here are some tips for using each type of bit:

    Safety measures

    Always wear safety glasses and gloves when drilling with either type of bit. Use proper ventilation when drilling materials that may produce dust or fumes.

    Carbide bits should be used at a slow speed with light pressure, as excessive force can cause the bit to break or chip. They should also be used with a cooling agent, such as oil or water, to prevent overheating.

    Proper use of HSS bits

    HSS bits can be used at a higher speed than carbide bits but still require adequate lubrication to prevent overheating and damage.

    Maintenance and Sharpening

    Proper maintenance and sharpening of drill bits are essential to ensure their longevity and performance. Both carbide and HSS bits require different maintenance and sharpening procedures.

    How to Maintain and Sharpen Carbide Bits

    Carbide bits are tough and durable but can be brittle and prone to chipping. Maintaining carbide bits is essential to keep them clean and dry. After use, remove any debris or buildup on the bit with a brush and wipe it down with a dry cloth.

    To sharpen carbide bits, a diamond grinding wheel should be used. Carbide bits require more specialized equipment and expertise to sharpen properly than HSS bits. For this reason, replacing carbide bits when they become dull is often more cost-effective than attempting to sharpen them.

    How to Maintain and Sharpen HSS Bits

    HSS bits are more flexible than carbide bits, which makes them less prone to breaking. However, they are also softer and can become dull more quickly. To maintain HSS bits, they should be kept clean and dry after use, similar to carbide bits.

    To sharpen HSS bits, a bench grinder or file can be used. HSS bits are more accessible than carbide bits and can be sharpened with standard equipment.

    Differences Between Carbide and HSS Bits Maintenance

    The main difference between the maintenance of carbide and HSS bits is that carbide bits require more specialized equipment and expertise to sharpen correctly. Additionally, carbide bits should be kept clean and dry to avoid chipping. In contrast, HSS bits are more forgiving and can tolerate more abuse.

    Buying Guide

    When buying drill bits, there are a few things to keep in mind to ensure you get the right type and size for your needs. Here are some tips for buying carbide bits and HSS bits:

    Tips for buying carbide bits:

    • Look for high-quality carbide bits made from solid carbide rather than coated.
    • Consider the type of material you will be drilling and choose a carbide bit with the appropriate geometry and flute design.
    • Check the bit’s diameter and shank size to ensure compatibility with your drill.

    Tips for buying HSS bits:

    • Look for HSS bits made from high-quality materials that will last longer.
    • Consider the type of material you will be drilling and choose an HSS bit with the appropriate coating and flute design.
    • Check the bit’s diameter and shank size to ensure compatibility with your drill.

    How to choose the right type and size of bits:

    • Consider the material you will be drilling and the hole size you must create.
    • Determine the type of drill you will be using and ensure the bit you choose is compatible.
    • Check the manufacturer’s recommendations for the material you will be drilling and choose a bit with the appropriate geometry and coating.

    Frequently Asked Questions

    What is the difference between carbide and HSS?

    Carbide is a complex and brittle material made from tungsten carbide and cobalt. HSS is a type of steel made from a combination of high carbon and other alloying metals. Carbide bits are more durable and heat-resistant, while HSS bits are more flexible and affordable.

    Which one is better for metalworking?

    Carbide bits are generally better for metalworking because they are more durable and heat-resistant, which makes them more effective at drilling through hard metals like stainless steel.

    Can I use carbide bits on wood?

    Yes, carbide bits can be used on wood, but they are not always the best choice because they can be too complex and brittle, which can cause them to break or chip.

    Can I use HSS bits on the glass?

    HSS bits can be used on glass, but they are not the best choice because they are not as hard or wear-resistant as carbide bits, which can cause them to dull quickly and break.

    How long do carbide and HSS bits last?

    The lifespan of a carbide or HSS bit depends on several factors, including the material being drilled, the size of the hole being drilled, and the quality of the bit. Generally, carbide bits last longer than HSS bits because they are more durable and heat-resistant.

    Conclusion

    Choosing the correct type of drill bit is essential for getting the job done efficiently and effectively. While carbide and HSS bits have advantages and disadvantages, understanding the differences can help you make an informed decision based on your needs.

    Remember to consider factors like the material being drilled, the precision of the hole, and your budget when choosing between carbide and HSS bits. And always follow safety measures when using and maintaining your drill bits to ensure longevity and safety.

    You may also like these posts!
  • 10 Tips for Drilling Hard Metals: Expert Tips and Techniques

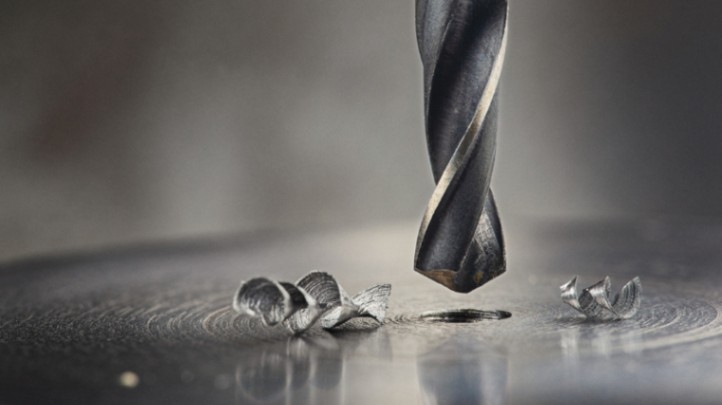
    10 Tips for Drilling Hard Metals: Expert Tips and Techniques

    Drilling hard metals can be a challenging task. However, it can be done effectively and efficiently with the proper techniques and tools. This article will provide 10 tips for drilling hard metals to help you achieve the desired results.

    10 Tips For Drilling Hard Metals

    The Art of Drilling: Mastering Hard Metals Like a Pro

    1. Choose the Right Drill Bit

    The first step in drilling hard metals is to choose the right drill bit. Hard metals like stainless steel, titanium, and tungsten require special drill bits to withstand extreme temperatures and pressures in the drilling process. Carbide, cobalt, and diamond-coated drill bits are the best options for drilling hard metals.

    2. Use a High-Speed Drill

    A high-speed drill can help you achieve faster and more accurate results when drilling hard metals. A high-speed drill is designed to spin more quickly than a standard drill, which can help reduce the heat generated during the drilling process.

    3. Apply Lubrication

    Applying lubrication to the drill bit and the drilled surface can help reduce friction and heat during the drilling process. This can help prevent the drill bit from becoming dull or overheating, leading to damage or breakage.

    4. Cool the Drill Bit

    Cooling the drill bit with water or oil can also help to reduce heat and friction during the drilling process. This can help to prevent the drill bit from becoming too hot, which can cause it to become dull or break.

    5. Use a Slow and Steady Approach

    When drilling hard metals, it is essential to use a slow and steady approach. Drilling too quickly can cause the drill bit to become too hot and dull while drilling too slowly can cause the metal to become too hot and deform.

    6. Start with a Pilot Hole

    Starting with a pilot hole can help to guide the drill bit and prevent it from slipping or wandering during the drilling process. A pilot hole can also help reduce the force required to drill through the metal, which can help prevent the drill bit from becoming too hot or breaking.

    7. Keep the Drill Bit Straight

    Keeping the drill bit straight can prevent it from damaging or breaking during drilling. A drill guide or clamp can help keep the drill bit in the correct position and prevent it from wandering or slipping.

    8. Use the Right Pressure

    Applying too much pressure when drilling hard metals can cause the drill bit to become too hot and break while applying too little pressure can cause the drill bit to become dull and ineffective. Using the correct pressure can help ensure that the drilling process is efficient and effective.

    9. Check the Depth

    Checking the depth of the hole being drilled can help to ensure that the drill bit is not drilling too deeply or not deeply enough. This can help to prevent damage to the drill bit or the metal being drilled.

    10.Clean the Drill Bit

    Cleaning the drill bit after each use can help to prevent it from becoming dull or damaged. Using a wire brush or a cleaning solution can help to remove any debris or buildup from the drill bit, which can help to keep it in good condition and extend its lifespan.

    Frequently asked questions

    What is the best drill bit for drilling hard metals?

    A carbide or cobalt drill bit is the best drill bit for drilling hard metals. These types of drill bits are made of high-speed steel and are designed to withstand the high temperatures and pressures of drilling hard metals.

    How can I prevent my drill bit from overheating?

    To prevent your drill bit from overheating, you can use lubrication and cooling methods such as applying cutting fluid, water, or oil to the drilled surface. Additionally, you can drill slowly and steadily, use the right pressure, and choose a drill bit that is suitable for the type of metal you are drilling.

    How can I drill straight and prevent the drill bit from wandering or slipping?

    To drill straight and prevent the drill bit from wandering or slipping, you can use a drill guide or clamp to keep the drill bit in the correct position. You can also start with a pilot hole to guide the drill bit and reduce the risk of slipping or wandering.

    How can I know if I’m drilling deep enough or too deep?

    You can use a depth gauge or stop collar to ensure that you are drilling deep enough or not too deep. A depth gauge is a tool that measures the depth of a hole, while a stop collar is a ring that attaches to the drill bit and prevents it from drilling too deep.

    How can I prolong the lifespan of my drill bit?

    To prolong the lifespan of your drill bit, you can clean it after each use using a wire brush or cleaning solution to remove any debris or buildup. You can also store your drill bits in a dry, cool place to prevent rust or corrosion. Additionally, you can choose a high-quality drill bit suitable for the type of metal you are drilling and use it carefully and precisely.

    Conclusion

    In conclusion, drilling hard metals requires carefully considering the tools and techniques. You can achieve the desired results efficiently and effectively by following these 10 tips for drilling hard metals. Remember to choose the right drill bit, use a high-speed drill, apply lubrication and cooling, use a slow and steady approach, start with a pilot hole, keep the drill bit straight, use the right pressure, check the depth, and clean the drill bit after each use. With these tips, you can become an expert in drilling hard metals.

    You may also like these posts!
  • The Benefits of Pop up Sprinklers: Green and Gorgeous

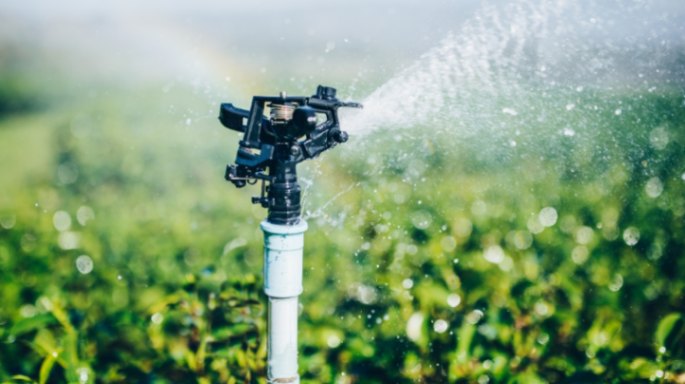
    The Benefits of Pop up Sprinklers: Green and Gorgeous

    If you’re looking for a way to keep your lawn looking lush and green, pop-up sprinklers may be just what you need. Pop-up sprinklers are a type of irrigation system that can help keep your lawn watered efficiently and effectively. In this article, we’ll discuss the benefits of pop up sprinklers and how they can help you maintain a beautiful lawn.

    What Are Pop-Up Sprinklers?

    Pop-up sprinklers are an irrigation system installed underground and “pop-up” when it’s time to water your lawn. When not in use, they are hidden underground, making them a discreet and convenient choice for homeowners who want their sprinkler system to stay intact from the beauty of their landscaping.

    Lawn Love: Why Pop-Up Sprinklers are Better for Your Grass

    Efficiency

    One of the most significant benefits of pop-up sprinklers is their efficiency. These sprinklers are designed to deliver water to your lawn to maximize water usage while minimizing waste. Pop-up sprinklers distribute water in a uniform pattern, which ensures that every inch of your lawn is watered evenly. This can help prevent over-watering in some areas and under-watering in others, leading to uneven growth and brown patches.

    Convenience

    Another advantage of pop-up sprinklers is their convenience. Unlike other types of sprinklers, pop-up sprinklers are installed underground and only pop up when it’s time to water your lawn. This means you don’t have to worry about tripping over sprinkler heads or moving them around your lawn. Pop-up sprinklers can also be programmed to water your lawn at specific times, which means you don’t have to worry about remembering to water your lawn on your own.

    Cost-Effective

    Pop-up sprinklers can also be a cost-effective choice for homeowners. While they may have a higher upfront cost than other sprinklers, they can help you save money on your water bill over time. By watering your lawn more efficiently, pop-up sprinklers can help you reduce your overall water usage and lower your monthly water bill.

    Better for Your Lawn

    Finally, pop-up sprinklers can be better for your lawn than other sprinklers. Because they distribute water more evenly, pop-up sprinklers can help prevent over-watering and under-watering, leading to healthier, more vibrant grass. Additionally, pop-up sprinklers are less likely to cause damage to your lawn than other types of sprinklers, such as impact sprinklers, which can create divots in your lawn over time.

    How Pop up Sprinklers can help you maintain a beautiful lawn

    How Pop up Sprinklers can help you maintain a beautiful lawn?

    Pop-up sprinklers can help you maintain a beautiful lawn in several ways:

    • Uniform Watering: Pop-up sprinklers distribute water in a uniform pattern, which ensures that every inch of your lawn is watered evenly. This prevents over-watering in some areas and under-watering in others, resulting in healthier and more uniform growth.
    • Customizable Settings: Pop-up sprinklers can be customized to suit your lawn’s specific needs. You can adjust the sprinkler heads to spray water in different directions, change the water pressure, and even set the system to water your lawn at specific times of the day or night.
    • Water Conservation: Pop-up sprinklers are designed to be highly efficient, which means they use less water than other sprinklers. By watering your lawn more efficiently, you can reduce your overall water usage and lower your monthly water bill.
    • Low Maintenance: Once installed, pop-up sprinklers require very little maintenance. They are designed to be durable and long-lasting, so you can enjoy a beautiful lawn without spending a lot of time maintaining your sprinkler system.
    • Healthier Lawn: By providing your lawn with the proper water, pop-up sprinklers can help keep your grass healthy and green. This can also help prevent the growth of weeds, as a healthy lawn is less susceptible to weed growth.

    Overall, pop-up sprinklers can help you maintain a beautiful lawn by providing your grass with the right amount of water in the right places and at the correct times. Using a pop-up sprinkler system saves time, money, and water while enjoying a lush, green lawn.

    FAQ

    • Are pop-up sprinklers more efficient than other types of sprinklers?

    Yes, pop-up sprinklers are designed to deliver water to your lawn to maximize water usage while minimizing waste. They distribute water in a uniform pattern, which ensures that every inch of your lawn is watered evenly, preventing over-watering in some areas and under-watering in others.

    • How do pop-up sprinklers save me money?

    While pop-up sprinklers may have a higher upfront cost than others, they can help you save money on your water bill over time. By watering your lawn more efficiently, pop-up sprinklers can help you reduce your overall water usage and lower your monthly water bill.

    • Do pop-up sprinklers require a lot of maintenance?

    Pop-up sprinklers require very little maintenance once they are installed. However, it is recommended that a professional irrigation specialist check your system annually to ensure it is functioning correctly.

    • Can pop-up sprinklers be installed on any type of lawn?

    Pop-up sprinklers can be installed on almost any type of lawn. However, it is essential to work with a professional irrigation specialist to determine the best sprinkler system for your lawn and landscaping needs.

    • Are pop-up sprinklers environmentally friendly?

    Yes, pop-up sprinklers are environmentally friendly because they help conserve water by watering your lawn more efficiently. By reducing your overall water usage, pop-up sprinklers can help you reduce your environmental impact and conserve this valuable resource.

    Conclusion

    In conclusion, pop-up sprinklers offer a range of benefits that make them a smart choice for homeowners who want to keep their lawns looking healthy and beautiful. From efficiency and convenience to cost-effectiveness and the ability to promote healthy grass growth, pop-up sprinklers are an excellent investment for any homeowner. If you’re interested in installing a pop-up sprinkler system on your property, be sure to work with a reputable irrigation specialist to ensure that your system is installed correctly and functions as intended.

    You may also like these posts!
  • Sprinkler Maintenance Tips and Tricks: Sprinkler System SOS

    Sprinkler Maintenance Tips and Tricks: Sprinkler System SOS

    Suppose you’re a homeowner or a business owner. In that case, taking care of your sprinkler system is essential to ensure it works properly and lasts a long time. Regular sprinkler system maintenance can help you avoid costly repairs and keep your lawn and landscape healthy and beautiful. This article will provide valuable sprinkler maintenance tips and tricks to keep your sprinkler system running smoothly.

    Introduction

    A sprinkler system is a valuable investment that helps keep your lawn and landscape green and healthy. However, like any other mechanical system, it requires regular proper maintenance. Regular maintenance can help you avoid costly repairs, prevent water waste, and keep your lawn and landscape healthy.

    Why Sprinkler Maintenance is Important

    Regular maintenance of your sprinkler system is crucial to keep it functioning correctly. Sprinkler systems are subject to wear and tear from exposure to the elements and everyday use. Over time, this wear and tear can cause the sprinkler system to become less efficient, resulting in wasted water and higher water bills. Neglecting your sprinkler system can also lead to costly repairs and replacements.

    Common Sprinkler Problems and Solutions

    There are several common sprinkler problems that you may encounter, including clogged sprinkler heads, damaged pipes, and broken sprinkler heads. Some solutions to these problems include cleaning or replacing the sprinkler head, repairing or replacing damaged pipes, and replacing broken sprinkler heads. Addressing these issues as soon as possible is essential to prevent further damage to your sprinkler system.

    Sprinkler Maintenance Checklist

    To ensure that your sprinkler system is functioning correctly, performing regular maintenance tasks is essential. Here’s a checklist of some important tasks to complete:

    • Inspect your sprinkler heads for damage or clogs
    • Check for leaks in the pipes or valves
    • Clean or replace clogged sprinkler heads
    • Adjust the sprinkler heads to ensure proper coverage
    • Replace broken sprinkler heads
    • Test the sprinkler system for proper function

    Regularly performing these tasks can help you avoid costly repairs and ensure your sprinkler system is functioning correctly.

    How to Test Your Sprinkler System

    Testing your sprinkler system is an essential part of regular maintenance. To test your sprinkler system, follow these steps:

    • Turn off the water supply to your sprinkler system.
    • Attach a pressure gauge to a sprinkler head.
    • Turn on the water supply and note the pressure reading on the indicator.
    • Compare the pressure reading to the manufacturer’s specifications for your sprinkler system.
    • Test each sprinkler head to ensure proper coverage and function.
    • How to Fix a Leaking Sprinkler Head

    How to Fix a Leaking Sprinkler Head

    Leaking sprinkler heads can save water and lead to higher water bills. To fix a leaking sprinkler head, follow these steps:

    • Turn off the water supply to your sprinkler system.
    • Remove the sprinkler head from the riser.
    • Clean the threads on the riser and the sprinkler head.
    • Apply Teflon tape to the lines on the riser.
    • Reattach the sprinkler head to the riser and tighten it.
    • Turn on the water supply and check for leaks.
    • If the sprinkler head still leaks, replace it with a new one.
    • How to Adjust Sprinkler Heads

    How to Adjust Sprinkler Heads

    Adjusting your sprinkler heads is an essential part of maintaining your sprinkler system. To adjust your sprinkler heads, follow these steps:

    • Turn on the water supply to your sprinkler system.
    • Observe the spray pattern of each sprinkler head.
    • Use a screwdriver to adjust the arc of the sprinkler head.
    • Adjust the distance of the spray by turning the radius screw.
    • Check each sprinkler head for proper coverage and function.
    • How to Replace a Sprinkler Head

    How to Replace a Sprinkler Head

    If a sprinkler head is damaged beyond repair, it must be replaced. To replace a sprinkler head, follow these steps:

    • Turn off the water supply to your sprinkler system.
    • Remove the damaged sprinkler head from the riser.
    • Clean the threads on the riser and the new sprinkler head.
    • Apply Teflon tape to the lines on the riser.
    • Attach the new sprinkler head to the riser and tighten it.
    • Turn on the water supply and check for proper function.
    • How to Winterize Your Sprinkler System

    How to Winterize Your Sprinkler System

    Winterizing your sprinkler system is an essential part of maintaining your system. To winterize your sprinkler system, follow these steps:

    • Turn off the water supply to your sprinkler system.
    • Open the drain valves on the system and let the water drain out.
    • Remove the backflow preventer and store it in a dry, warm location.
    • Disconnect and store any above-ground sprinkler heads.
    • Insulate any above-ground pipes to protect them from freezing temperatures.
    • Conclusion

    Maintaining your sprinkler system is crucial to maintain it properly and avoid costly repairs. By following these tips and tricks, you can keep your sprinkler system running smoothly and keep your lawn and landscape healthy and beautiful.

    FAQs

    • How often should I perform maintenance on my sprinkler system?

    It’s recommended to perform maintenance on your sprinkler system at least once a year.

    • Can I perform maintenance on my sprinkler system myself?

    Yes, many maintenance tasks can be performed by homeowners. However, it’s recommended to hire a professional for more complex repairs.

    • How can I prevent my sprinkler heads from clogging?

    Regularly cleaning your sprinkler heads and using a filter can help prevent clogging.

    • How can I tell if my sprinkler system is functioning correctly?

    Testing your sprinkler system regularly and checking for leaks or damaged sprinkler heads can help you determine if your system is functioning correctly.

    • Why is winterizing my sprinkler system important?

    Winterizing your sprinkler system can prevent freezing and damage to the pipes and valves, which can be costly.

    Conclusion

    Maintaining your sprinkler system is crucial to maintain it properly and avoid costly repairs. By following these tips and tricks, you can keep your sprinkler system running smoothly and keep your lawn and landscape healthy and beautiful.

    You may also like these posts!
  • Installing Sprinklers: Revitalize Your Lawn

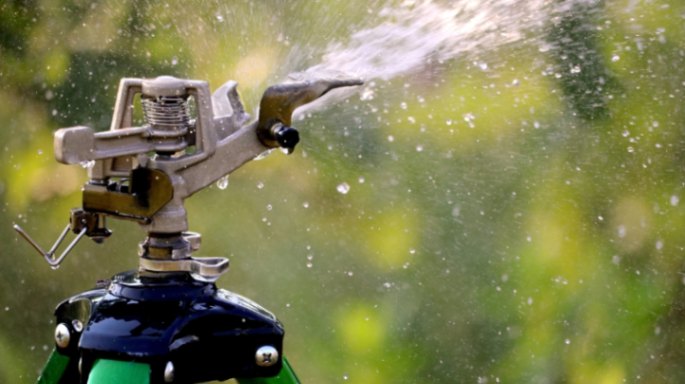
    Installing Sprinklers: Revitalize Your Lawn

    If you want to maintain a healthy and lush lawn, installing a sprinkler system is necessary. A well-designed sprinkler system can save time and money while ensuring your lawn and garden get good water. In this article, we’ll take you through the basics of installing a sprinkler system, from designing your system to troubleshooting common problems.

    Installing Sprinklers A Guide for Homeowners

    Installing Sprinklers: A Guide for Homeowners

    Designing Your System

    Before you start installing your sprinkler system, you’ll need to design it. The first step is to measure your lawn and garden to determine the total area that needs to be watered. You can use a measuring tape or an online tool to do this.

    Next, you’ll need to determine your water supply’s water pressure and flow rate. This will help you determine how many sprinkler heads you can install and how far apart they need.

    Once you have this information, you can start designing your system. Several types of sprinkler heads exist, including rotary heads, spray heads, and impact heads. Each type has its strengths and weaknesses, so choosing the right type for your lawn and garden is important.

    Installing Your System

    Once you’ve designed your system, it’s time to start installing it. The first step is to mark out where your sprinkler heads will go. You can do this by using flags or spray paint.

    Next, you’ll need to dig trenches for your pipes. The depth of the trenches will depend on your climate and the type of soil you have. In general, trenches should be at least 6 inches deep.

    After you’ve dug your trenches, it’s time to install the pipes. You can use PVC pipes or flexible tubing, depending on your preference. Make sure to use the right type of glue or clamps to connect your pipes.

    Once your pipes are installed, it’s time to install your sprinkler heads. Make sure to follow the manufacturer’s instructions carefully. You’ll need to adjust the height and angle of each head to ensure proper coverage.

    Troubleshooting Common Problems

    Even a well-designed sprinkler system can run into problems. Here are some common issues you may encounter and how to troubleshoot them:

    • Low water pressure: This can be caused by a clogged filter or a problem with your water supply. Check your filter and make sure your water pressure is high enough.
    • Uneven coverage: This can be caused by improperly adjusted sprinkler heads. Make sure to adjust the height and angle of each head to ensure proper coverage.
    • Leaks: Leaks can be caused by damaged pipes or fittings. Inspect your system for leaks and replace any damaged components.

    • Do I need a permit to install a sprinkler system?

    It depends on where you live. Some cities and towns require permits for sprinkler system installation. Check with your local government to find out if you need a permit.

    • How much does it cost to install a sprinkler system?

    The cost of installing a sprinkler system can vary widely depending on the size of your lawn, the type of system you choose, and the complexity of the installation. Generally, you can expect to pay anywhere from $1,500 to $5,000 for a new system.

    • How long does it take to install a sprinkler system?

    The time it takes to install a sprinkler system will depend on the size of your lawn and the complexity of the installation. Generally, the installation process should take a few days to a few weeks.

    How often should I water my lawn with a sprinkler system?

    It depends on several factors, such as the climate in your area, the type of grass you have, and the time of year. Most lawns must be watered about once a week, but this can vary.

    • Can I install a sprinkler system myself?

    While it is possible to install a sprinkler system yourself, it can be a complex and time-consuming process. Hiring a professional is generally recommended to ensure your system is installed correctly and functions properly.

    In summary, installing a sprinkler system can be a great way to maintain a healthy and vibrant lawn and garden. Following the steps outlined in this article, you can design and install a sprinkler system that meets your needs and saves you time and money in the long run. Remember to troubleshoot common problems and hire a professional if you need clarification on the installation process.

    Conclusion

    Installing a sprinkler system can be a great investment for any homeowner. Following the steps outlined in this article, you can design and install a sprinkler system that will keep your lawn and garden healthy and vibrant for years.

    You may also like these posts!
  • Top 10 Drilling Techniques for Hardened Steel

    Top 10 Drilling Techniques for Hardened Steel

    When it comes to drilling hardened steel, you need the right technique to achieve success. The process can be challenging, but you can achieve the desired results with the right equipment and knowledge. This article will discuss the top 10 drilling techniques for hardened steel that will help you get the job done quickly and efficiently.

    Introduction to Drilling Hardened Steel

    Drilling hardened steel is a challenging task that requires specialized equipment and techniques. Hardened steel is a type of steel that has undergone a heat treatment process, making it more rigid and more durable than regular steel. It’s commonly used to manufacture tools, machine parts, and engine components. However, drilling through hardened steel can be difficult, as the material is more resistant to drilling.

    What is Hardened Steel?

    Hardened steel is a high-carbon steel that has been heat-treated to increase its hardness and strength. It’s commonly used in applications that require resistance to wear and abrasions, such as cutting tools, bearings, and gears. Hardened steel is also more difficult to machine and drill than regular steel, which makes it challenging to work with.

    Mastering Hardened Steel: Top 10 Drilling Techniques for Hardened Steel

    Use High-Speed Steel (HSS) Drill Bits

    High-speed steel drill bits are the most commonly used for drilling hardened steel. These drill bits are made from high-speed steel, a tool that can withstand high temperatures and resist wear and tear. They are available in various sizes and can be used for drilling different types of metal, including hardened steel.

    Use Cobalt Drill Bits

    Cobalt drill bits are another popular option for drilling hardened steel. These drill bits are made from cobalt steel, a high-performance alloy that can withstand high temperatures and resist wear and tear. Cobalt drill bits are more expensive than HSS but offer better performance and longer life.

    Use Carbide Drill Bits

    Carbide drill bits are an excellent option for drilling through hardened steel, designed to cut through hard materials. These drill bits are made from tungsten carbide. This complex and brittle material can withstand high temperatures and wear and tear. Carbide drill bits are more expensive than HSS and cobalt but offer superior performance and longer life.

    Use a Drill Press

    A drill press is a machine that can drill through hardened steel. It’s a stationary tool that holds the workpiece in place and allows you to drill precisely and accurately. Drill presses are available in different sizes and can be used to drill various materials.

    Use a Carbide-Tipped Hole Saw

    A carbide-tipped hole saw is a specialized tool that can be used to drill through hardened steel. It’s designed to cut through hard materials and produces clean and precise holes. Carbide-tipped hole saws are available in different sizes and can be used to drill various materials.

    Use a Center Punch

    A center punch is a tool that can make a small indentation on the material’s surface, which helps to guide the drill bit and prevent it from wandering. This is especially important when drilling through hardened steel, as the material is more resistant to drilling.

    Use Cutting Oil

    Cutting oil is a lubricant that can reduce friction and heat when drilling through hardened steel. It also helps extend the drill bit’s life and improve performance. Cutting oil should be applied to the surface of the material before drilling.

    Use a Slow Speed

    Drilling through hardened steel requires a slow speed to prevent the drill bit from overheating and losing its cutting edge. Using a slow speed will also help improve the hole’s accuracy and quality. The recommended rate for drilling through hardened steel is 400 to 500 RPM.

    Use a Coolant System

    A coolant system is a device that can cool the drill bit and workpiece during drilling. It helps to reduce heat buildup and prevent the drill bit from overheating and losing its cutting edge. A coolant system can be a simple spray bottle or a more advanced strategy that uses a pump to circulate coolant.

    Use Proper Technique

    Proper technique is essential when drilling through hardened steel. The drill bit should be held perpendicular to the workpiece and in constant contact with the surface. The pressure should be applied evenly, and the speed should be slow and steady. It’s also essential to use a steady hand and avoid jerky movements.

    Conclusion

    Drilling through hardened steel can be challenging, but you can achieve the desired results with the proper technique and equipment. High-speed steel drill bits, cobalt drill bits, and carbide drill bits are all good options for drilling through hardened steel. A drill press, carbide-tipped hole saw, center punch, cutting oil, slow speed, coolant system, and proper technique are all essential for drilling through hardened steel.

    FAQs

    • Why is drilling through hardened steel difficult?

    Drilling through hardened steel is difficult because the material is more resistant to drilling and requires specialized equipment and techniques.

    • What are the best drill bits for drilling through hardened steel?

    The best drill bits for drilling through hardened steel are high-speed steel drill bits, cobalt drill bits, and carbide drill bits.

    • What is a coolant system, and why is it essential when drilling through hardened steel?

    A coolant system is a device that can cool the drill bit and workpiece during drilling. It helps to reduce heat buildup and prevent the drill bit from overheating and losing its cutting edge.

    • What is the recommended speed for drilling through hardened steel?

    The recommended speed for drilling through hardened steel is 400 to 500 RPM.

    When drilling through hardened steel, the proper technique involves

    • holding the drill bit perpendicular to the workpiece,
    • applying pressure evenly,
    • using a slow and steady speed, and
    • avoiding jerky movements.

    You may also like these posts!
    Best Drill Bit For Drilling Hardened Steel: Reviews

  • Maintaining Drill Bit Quality for Hardened Steel

    Maintaining Drill Bit Quality for Hardened Steel

    Drilling hardened steel is a difficult task that requires specialized equipment and techniques. The hardness and toughness of the material make it challenging to drill through without damaging the drill bit or producing poor-quality holes. However, with proper maintenance of the drill bit, you can increase its lifespan and ensure the quality of the holes drilled through hardened steel.

    This article will discuss the techniques and tips for maintaining drill bit quality when drilling through hardened steel.

    Achieving Perfect Results: Maintaining Drill Bit Quality When Drilling Hardened Steel

    Choose the right drill bit

    Selecting the correct drill bit is the first and most crucial step in ensuring the quality of holes drilled through hardened steel. Using a low-quality or incorrect drill bit can lead to premature wear and breakage.

    The recommended drill bit for drilling hardened steel is a cobalt drill bit. These drill bits are made of a high-speed steel alloy with added cobalt content, which increases their hardness, strength, and heat resistance. They also have a thicker web and a shorter flute length, which reduces the possibility of the drill bit bending or breaking.

    Use lubrication

    Lubrication is essential when drilling through hardened steel. It reduces friction, which generates heat that can damage the drill bit and the material being drilled. Lubrication also helps to flush out chips and debris from the hole, reducing the possibility of clogging and binding.

    Several lubricants are available when drilling through hardened steel, including cutting, mineral, and synthetic oil. Cutting oil is the most commonly used lubricant for drilling hardened steel. It has a high viscosity and provides excellent lubrication and cooling. Mineral oil is less viscous and less expensive than cutting oil, while synthetic oil is more expensive but provides better lubrication and cooling.

    Control the drilling speed.

    The drilling speed also affects the quality of the holes drilled through hardened steel. The drill bit’s rotational speed determines how fast it cuts through the material. A slow drilling speed can cause excessive heat buildup, leading to premature wear and damage to the drill bit. On the other hand, a fast drilling speed can cause the drill bit to become dull quickly.

    The recommended drilling speed for drilling through hardened steel is between 500 and 1000 RPM. However, the optimal speed depends on several factors, including the diameter of the drill bit, the material being drilled, and the lubricant used. Adjusting the drilling speed accordingly is essential to ensure the best quality holes.

    Maintain proper pressure and feed rate

    Maintaining the correct pressure and feed rate when drilling through hardened steel is also crucial to the quality of the holes drilled. Applying too much pressure can cause the drill bit to break, while too little pressure can result in poor-quality holes.

    The recommended pressure for drilling through hardened steel is between 60 and 80 pounds per square inch (psi). The feed rate is when the drill bit penetrates the material being drilled. A slow feed rate can cause the drill bit to rub against the material, leading to excessive heat buildup and dulling of the drill bit. A fast feed rate can cause the drill bit to break or produce poor-quality holes.

    The recommended feed rate for drilling through hardened steel is between 0.001 and 0.003 inches per revolution (ipr). However, the optimal feed rate depends on several factors, including the diameter of the drill bit, the material being drilled, and the lubricant used.

    Inspect and sharpen the drill bit regularly

    Regular inspection and sharpening of the drill bit are essential to maintaining its quality and extending its lifespan. The drill bit should be inspected after each use for signs of wear, such as dullness, chipping, or cracking. A dull or damaged drill bit can produce poor-quality holes or even break while in use.

    Sharpening the drill bit involves regrinding the cutting edge to restore its sharpness. A drill bit can be sharpened using a bench grinder or specialized tool. It is essential to maintain the correct angle and shape of the cutting edge when sharpening the drill bit.

    Sharpening the drill bit after every 10 to 15 holes drilled through hardened steel is recommended. However, the frequency of sharpening depends on several factors, including the hardness of the material being drilled, the quality of the drill bit, and the drilling conditions.

    Store the drill bit properly.

    Proper drill bit storage is essential to prevent damage and maintain its quality. The drill bit should be stored in a dry and cool place, away from moisture and extreme temperatures. It should also be stored separately from other tools and materials to prevent damage from contact.

    The drill bit should be stored in a protective case or holder to prevent it from becoming dull or damaged. The case or holder should be labeled with the drill bit size and type for easy identification.

    Conclusion

    Drilling through hardened steel requires specialized equipment and techniques to ensure the quality of the holes drilled and the lifespan of the drill bit. By choosing the right drill bit, using lubrication, controlling the drilling speed, maintaining proper pressure and feed rate, inspecting and sharpening the drill bit regularly, and storing it correctly, you can preserve the quality of the drill bit and produce high-quality holes in hardened steel.

    It is important to note that drilling through hardened steel can be a hazardous process, and proper safety precautions should be taken, including using personal protective equipment, such as eye protection and gloves.

    You may also like these posts!
    Best Drill Bit For Drilling Hardened Steel: Reviews

  • Importance of Water Storage for Camping Hydration

    Importance of Water Storage for Camping Hydration

    As a camper, having access to clean and safe drinking water is crucial for your well-being. It’s no secret that water is a fundamental human need, and when you’re out in the wilderness, there’s no easy way to obtain it. This is why water storage for camping hydration is essential. In this article, we’ll discuss the importance of water storage for camping hydration and explore different ways to store and treat water while on a camping trip.

    Why Water Storage is Important for Camping Hydration

    When camping, you’re exposed to various environmental factors that can lead to dehydration, such as hot weather, high altitude, and physical activity. In such scenarios, staying hydrated is crucial to avoid heat exhaustion, heatstroke, and other heat-related illnesses. Additionally, having a reliable water storage system allows you to carry sufficient water to sustain you during your camping trip without worrying about finding a water source whenever you need a drink.

    Understanding Your Water Needs

    Before we delve into the different water storage options, it’s essential to understand your water needs. An adult needs at least 2 liters of water daily to stay hydrated. However, this number can increase depending on physical activity, climate, and altitude. When camping, it’s best to assume that you’ll need more water than usual to account for these factors.

    Water Storage Options for Camping

    There are several ways to store and treat water while camping. Here are some of the most popular options:

    Water Bottles and Hydration Packs

    Water bottles and hydration packs are convenient and portable for carrying water while camping. Water bottles are typically made of plastic or stainless steel and come in various sizes and shapes. Hydration packs, on the other hand, are backpacks with a built-in water bladder that allows you to drink water through a hose without stopping and taking out a water bottle. Both options are great for short camping trips with readily available water sources.

    Water Containers

    Water containers are more significant and sturdier than water bottles, making them ideal for long camping trips where you need more water. They come in various sizes and shapes and are made of plastic, aluminum, and stainless steel. Some water containers come with a spigot, making it easy to dispense water for cooking and washing.

    Water Filters and Purifiers

    Water filters and purifiers are essential for treating water from natural sources such as lakes, rivers, and streams. Water filters remove impurities such as dirt, sediment, and bacteria, while water purifiers also remove viruses and parasites. Water filters and purifiers range from portable trim options to larger gravity-fed systems.

    UV Water Purifiers

    UV water purifiers use ultraviolet light to kill bacteria, viruses, and parasites in water. They are lightweight and portable, ideal for backpacking and other outdoor activities. However, they require batteries or a power source to operate and can only treat small amounts of water at a time.

    Tips for Storing and Treating Water While Camping

    Here are some tips to help you store and treat water while camping:

    • Always carry more water than you think you’ll need.
    • Treat all water from natural sources before drinking it.
    • Store water in a cool, dark place to prevent algae growth.
    • Use a water filter or purifier to treat water from natural sources.
    • Clean your water storage containers regularly to prevent bacteria growth.
    • Label your water containers with the date and time of filling to keep track of freshness.

    FAQs

    • Can I drink water straight from a natural source while camping?

    No, drinking water straight from a natural source is not recommended while camping. Natural sources such as rivers, streams, and lakes can contain bacteria, parasites, and other harmful substances that can cause illness. Always treat natural water sources with a filter or purifier before drinking.

    • What should I do if I run out of water while camping?

    Run out of water while camping. It would be best to immediately start looking for a water source to replenish your supply. If you cannot find a natural water source, consider melting snow or ice (if available) or seeking help from nearby campsites or hiking trails.

    • How often should I clean my water storage containers?

    It’s recommended to clean your water storage containers after every camping trip. Use warm, soapy water and a bottle brush to clean the container thoroughly, then rinse with clean water and let dry before storing.

    • Can I store water in a metal container?

    Yes, you can store water in a metal container, but make sure the container is food-grade and free of rust or other contaminants. Metal containers can also retain heat, so storing them in a cool, shaded area is best.

    • How can I ensure my water stays fresh while camping?

    Labeling your water containers with the date and time of filling can help you keep track of freshness. Additionally, storing water in a cool, dark place and using a water filter or purifier can help prevent bacteria growth and ensure your water stays fresh for longer.

    Conclusion

    Water storage for camping hydration is essential for the health and safety of campers. Whether you’re embarking on a short day hike or an extended camping trip, having access to clean and safe drinking water is crucial. By understanding your water needs and choosing the proper water storage and treatment options, you can ensure that you stay hydrated and healthy during your outdoor adventures.

    Remember, dehydration can lead to serious health complications. The last thing you want is to cut your camping trip short because of a preventable illness. So, invest in a reliable water storage system, and always prioritize staying hydrated while exploring the great outdoors.

    You may also like these posts!
    Best 5 Gallon Water Jug For Camping: Reviews, Guide