Category: Expert Guides and Tips

Explore our expert guides and tips for power tools, home improvement, lawn and garden projects, and more. Get step-by-step instructions, valuable insights, and practical advice to tackle your DIY projects like a pro. Discover the best techniques, tools, and strategies to enhance your skills and achieve remarkable results.

  • 10 Tips for Camping Hydration: Sip, Sip, Hooray!

    10 Tips for Camping Hydration: Sip, Sip, Hooray!

    Camping is a fun and exciting way to explore the outdoors, but it can also be physically demanding. Hiking, setting up tents, and cooking over an open fire can all take a toll on your body. To stay healthy and energized during your camping trip, it’s essential to stay hydrated. In this article, we’ll provide ten tips for camping hydration to help you make the most of your outdoor adventure.

    Hydrate or Hike: 10 Tips for Camping Hydration on Your Next Camping Adventure

    1. Bring Enough Water

    One of the most important aspects of camping hydration is making sure you have enough water. The amount of water you need will depend on several factors, such as your age, weight, and activity level. As a general rule, you should aim to drink at least 2 liters of water per day while camping.

    2. Pack a water filter

    If you’re camping in a remote area, you may not have access to clean drinking water. In this case, a water filter can be a lifesaver. There are several types of water filters available, including pump filters, gravity filters, and straw filters. Choose one that best fits your needs and make sure to bring it along on your camping trip.

    3. Consider electrolyte drinks

    When you sweat, you lose not only water but also electrolytes such as sodium and potassium. To replenish these essential minerals, consider packing some electrolyte drinks, such as sports drinks or electrolyte tablets. These can help prevent dehydration and keep you feeling energized throughout the day.

    4. Pack hydrating foods

    In addition to drinking water, you can also get hydration from the foods you eat. Fruits and vegetables, in particular, are high in water content and can help keep you hydrated. Some good options to consider include watermelon, cucumber, and celery.

    5. Limit alcohol and caffeine intake

    While it may be tempting to enjoy a cold beer or a cup of coffee around the campfire, it’s important to remember that alcohol and caffeine are both diuretics, meaning they can increase urine production and lead to dehydration. To stay hydrated, it’s best to limit your intake of these beverages or avoid them altogether.

    6. Set reminders to drink water

    When you’re out exploring the wilderness, it can be easy to forget to drink enough water. Set your phone or watch to remind you to drink water at regular times during the day to avoid getting dehydrated.

    7. Drink Before You’re Thirsty

    Thirst is not always an accurate indicator of hydration status. By the time you feel thirsty, you may already be dehydrated. To avoid this, make a habit of drinking water before you feel thirsty, especially during hot or strenuous activities.

    8. Use a Hydration Pack

    It can be hard to carry a water bottle, especially when you are hiking or doing other physical activities. A hydration pack, which consists of a backpack with a built-in water bladder and tube, can make it easier to stay hydrated on the go.

    9. Monitor your urine color

    Your urine color can be a good indicator of your hydration status. Ideally, your urine should be a pale yellow color. If it’s dark yellow or amber, you may be dehydrated and need to drink more water.

    10. Drink Before Bedtime

    Dehydration can disrupt your sleep and leave you feeling groggy in the morning. To avoid this, make sure to drink plenty of water before bedtime. This will help keep you hydrated throughout the night and ensure you wake up feeling refreshed.

    FAQs

    • How much water should I bring for a weekend camping trip?

    As a general rule, you should aim to drink at least 2 liters of water per day while camping. If you’re going on a weekend camping trip, pack at least 4 liters of water per person.

    • Can I drink river or lake water without a filter?

    It’s not recommended to drink river or lake water without a filter, as it may contain harmful bacteria and parasites that can make you sick. Always use a water filter or purification tablets before drinking.

    • Are sports drinks a good option for hydration?

    Yes, sports drinks can be a good option for hydration, especially if you’re engaging in strenuous activities. They contain electrolytes that can help replenish the minerals lost through sweat.

    • How do I know if I’m dehydrated?

    Thirst is not always a reliable indicator of dehydration. Other signs of dehydration include dark yellow urine, a dry mouth, fatigue, and headaches.

    • Can I rely on hydrating foods alone for my water needs?

    While hydrating foods like fruits and vegetables can help with hydration, it’s not recommended to rely on them alone for your water needs. Drinking water and electrolyte drinks are still the best way to stay hydrated.

    Conclusion

    In conclusion, staying hydrated is essential for a safe and enjoyable camping experience. By following these ten tips, you can ensure that you have enough water and electrolytes to keep you energized and healthy during your camping trip. Remember to pack enough water, bring a water filter, consider electrolyte drinks, and choose hydrating foods. Additionally, be mindful of your alcohol and caffeine intake; set reminders to drink water; drink before you feel thirsty; and use a hydration pack for convenience. Lastly, monitor your urine color and drink water before bedtime to ensure a good night’s sleep.

    You may also like these posts!

    Best 5 Gallon Water Jug For Camping: Reviews, Guide

  • Tips for Earbud Maintenance for Noise Cancellation

    Tips for Earbud Maintenance for Noise Cancellation

    Earbuds have become essential to our daily lives, whether listening to music, making phone calls, or watching videos. Earbuds with noise-cancellation technology have become increasingly popular but require proper maintenance to ensure their longevity and performance. This article will discuss some tips for earbud maintenance for noise cancellation.

    Understanding Noise Cancellation

    Before we dive into maintenance tips, it’s essential to understand how noise cancellation works. Noise cancellation technology blocks external noise by creating sound waves that cancel out incoming sound waves. This creates a quiet environment, allowing you to focus on your audio without distractions.

    Tips for Earbud Maintenance

    Clean Your Earbuds Regularly

    Clean Your Earbuds Regularly Cleaning your earbuds is essential to maintain their performance. Earwax, dust, and dirt can accumulate on the earbuds, affecting their sound quality and noise cancellation capabilities. Use a soft, dry cloth to clean the earbuds regularly. For stubborn dirt or earwax buildup, use a cotton swab dipped in rubbing alcohol to clean the earbuds gently.

    Store Your Earbuds Properly

    Store Your Earbuds Properly Storing your earbuds properly can prevent damage to the cords and earbuds. You are keeping them in a case or pouch when not in use is essential. Avoid wrapping the cords tightly around your earbuds, damaging the cords, and affecting the sound quality.

    Be Gentle with Your Earbuds

    Be Gentle with Your Earbuds Earbuds are delicate and can be easily damaged. Avoid yanking or pulling on the cords, as this can damage and affect the sound quality. Removing your earbuds, gently pull them out by holding the earpiece, not the cord.

    Keep Your Earbuds Dry

    Keep Your Earbuds Dry Water can damage the internal components of your earbuds, affecting their performance. Avoid using your earbuds in the rain or while swimming. If your earbuds get wet, dry them thoroughly before using them again.

    Replace Ear Tips Regularly

    Replace Ear Tips Regularly Ear tips can become worn out over time, affecting their fit and noise cancellation capabilities. Replace your ear tips regularly, depending on how frequently you use your earbuds.

    Avoid Extreme Temperatures

    Avoid Extreme Temperatures Extreme temperatures can damage the internal components of your earbuds. Avoid leaving your earbuds in a hot car or exposing them to extreme cold.

    Turn Off Noise Cancellation When Not in Use

    Turn Off Noise Cancellation When Not in Use Turning off noise cancellation when not in use can save battery life and prolong the lifespan of your earbuds.

    Conclusion

    Proper maintenance of your earbuds is crucial for their longevity and performance. Regular cleaning, proper storage, and gentle handling can go a long way in maintaining your earbuds. By following these tips, you can ensure that your earbuds with noise-cancellation technology continue to deliver high-quality sound and an uninterrupted listening experience.

    FAQs

    • How often should I clean my earbuds?

    It’s best to clean your earbuds once a week to prevent the accumulation of dirt, dust, and earwax.

    • Can I use soap and water to clean my earbuds?

    No, water can damage the internal components of your earbuds. Use a soft, dry cloth to clean the earbuds or a cotton swab dipped in rubbing alcohol for stubborn dirt or earwax buildup.

    • How do I know when to replace my ear tips?

    If your ear tips are worn out, cracked, or no longer fit properly, it’s time to replace them.

    • Can I use my earbuds in the rain?

    No,

    It is generally not recommended to use earbuds in the rain as they are not designed to be waterproof or water-resistant. Water can damage the delicate electronic components inside the earbuds and cause them to malfunction or stop working altogether. If you must use earbuds in wet conditions, it is best to look for earbuds that are specifically designed to be waterproof.

    You may also like these posts!


  • Safety Strap Maintenance Tips and Tricks: Don’t Skip These

    Safety Strap Maintenance Tips and Tricks: Don’t Skip These

    If you use safety straps, then it’s essential to keep them in good condition to ensure your safety. Like any other gear, safety straps require regular maintenance to work correctly. Neglecting them can cause them to fail when you need them the most, which could result in injuries or worse. In this article, we will discuss some safety strap maintenance tips and tricks that you can use to keep your safety straps in excellent condition.

    Why is safety strap maintenance essential?

    Safety straps keep you safe during dangerous activities like rock climbing, skydiving, or construction work. They are responsible for holding your weight and keeping you from falling to the ground. However, they can become damaged over time, primarily if improperly maintained. Failing to maintain your safety straps can lead to the following:

    • Weakened or damaged straps
    • Damaged buckles and hardware
    • Frayed or cut webbing
    • Inadequate shock absorption
    • Failure to deploy correctly during a fall

    These issues can compromise the effectiveness of your safety straps and increase your risk of injury or death. Therefore, it’s essential to take safety strap maintenance seriously.

    How often should you maintain your safety straps?

    The frequency of safety strap maintenance depends on several factors, including:

    • How often do you use them
    • The conditions you use them in
    • The type of safety straps you have

    Generally, you should inspect your safety straps before each use and clean them regularly. However, you should also follow the manufacturer’s instructions for maintenance and replacement.

    Safety Strap Maintenance Tips and Tricks

    Inspect Your Safety Straps Regularly

    Before each use, you should inspect your safety straps for signs of wear and tear. Look for cuts, abrasions, or frayed webbing. Check the buckles and hardware for signs of damage or corrosion. If you notice any damage, wait to use the safety straps until they have been repaired or replaced.

    Clean Your Safety Straps After Use

    After using your safety straps:

    • Clean them thoroughly to remove dirt, sweat, or other debris that could damage the webbing.
    • Use mild soap and warm water to clean the straps, then hang them to dry.
    • Avoid using bleach or harsh detergents, as they can weaken the webbing.
    • Store Your Safety Straps Properly

    When not in use, store your safety straps in a cool, dry place away from direct sunlight. Avoid storing them in damp or humid areas, as this can cause mold or mildew to grow on the webbing. You can also use a gear bag or backpack to keep them organized and protected.

    Replace Your Safety Straps When Necessary

    Over time, safety straps can become worn out or damaged, compromising their effectiveness. Replacing your safety straps when they show signs of wear and tear is essential. Follow the manufacturer’s instructions for returning your safety straps, and don’t use them beyond their recommended lifespan.

    Check the Elasticity of Your Shock Absorber

    If your safety straps have a shock absorber, check the elasticity regularly. Over time, the elasticity can weaken, reducing the shock absorption capability of your safety straps. Replace the shock absorber if necessary.

    Use Your Safety Straps Correctly

    Proper use of safety straps is critical to their effectiveness. Always follow the manufacturer’s instructions and use the safety straps as intended. Don’t modify them in any way, and ensure they are correctly adjusted to your body size and weight.

    Don’t Overexpose Your Safety Straps to Sunlight

    Prolonged exposure to sunlight can damage the webbing and reduce its strength. Avoid leaving your safety straps in direct sunlight for extended periods, especially if they are nylon or polyester. Cover them with a tarp or other protective material if you must go outside.

    Use a Carabiner to Connect Your Safety Straps

    When connecting your safety straps to an anchor point, use a carabiner instead of tying a knot. A carabiner provides a more secure and reliable connection, and it’s easier to inspect for damage.

    Keep Your Safety Straps Away from Chemicals

    Chemicals like bleach, gasoline, and insect repellent can damage the webbing and reduce its strength. Keep your safety straps away from these substances, and don’t use them if they have been exposed.

    Seek Professional Help for Repairs

    If your safety straps are damaged, don’t attempt to repair them yourself. Seek professional help from a certified repair technician or contact the manufacturer.

    Conclusion

    Safety strap maintenance is essential for your safety and those around you. Regular inspection, cleaning, and replacement can ensure that your safety straps work correctly when needed. Remember to follow the manufacturer’s instructions for maintenance and replacement and seek professional help if your safety straps are damaged.

    FAQs

    • How often should I replace my safety straps?

    The replacement frequency depends on the manufacturer’s recommendations and the frequency of use. Generally, safety straps should be replaced every few years or if they show signs of wear and tear.

    • Can I wash my safety straps in a washing machine?

    Washing safety straps in a washing machine is not recommended, as the agitation can damage the webbing. Instead, hand washes them with mild soap and warm water.

    • Should I store my safety straps in a gear bag or backpack?

    Storing your safety straps in a gear bag or backpack can help protect them from damage and keep them organized. Just make sure to store them in a cool, dry place.

    • How can I tell if my shock absorber needs to be replaced?

    If your safety straps have a shock absorber, check the elasticity regularly. If the elasticity is reduced, replacing the shock absorber is time.

    • Can I use my safety straps for activities other than their intended use?

    No, it’s essential to use your safety straps as intended by the manufacturer. Using them for activities other than their intended use can compromise their effectiveness and increase your risk of injury.

    You may also like these posts!


  • Safety Straps Installation Guidelines: From A to Z

    Safety Straps Installation Guidelines: From A to Z

    As we all know, safety is a top priority in all aspects of life. When it comes to securing your belongings, safety straps are an excellent option. They are easy to install, and they provide a superior level of security. However, improper installation can damage your belongings or even cause injury. This article will cover the proper installation guidelines for safety straps, ensuring you can safely secure your belongings with peace of mind.

    What are Safety Straps?

    Before we delve into the installation guidelines, let’s first understand what safety straps are. Safety straps are durable and made from high-quality materials like nylon, polyester, or webbing. They are designed to secure objects in place, preventing them from falling or shifting during transport or storage. Safety straps come in different sizes, lengths, and strengths, making them versatile and suitable for various applications.

    Importance of Safety Straps

    Whether you are transporting or storing items, using safety straps is essential. Not only do they provide an excellent level of security, but they also prevent damage to your belongings. Safety straps also ensure you comply with regulations and standards, preventing accidents and legal issues.

    Types of Safety Straps

    Safety straps come in different types, each designed for specific purposes. The most common types of safety straps include:

    Ratchet Straps

    Ratchet straps are the most commonly used safety straps. Their ratcheting mechanism allows easy tightening, making them ideal for securing heavy objects like furniture, appliances, and vehicles.


    Cam Straps

    Cam straps are similar to ratchet straps but use a cam buckle instead of a ratcheting mechanism. They are perfect for securing lighter items like boxes, bicycles, and kayaks.

    Tie-Down Straps

    Tie-down straps are versatile and can secure almost anything, including oversized items like boats, motorcycles, and machinery. They have a high weight capacity and come in various lengths.

    Safety Straps Installation Guidelines

    Now that we understand the importance and types of safety straps, let’s look at the installation guidelines.

    Step 1: Identify the Object to be Secured

    Before installing safety straps, identify the object you want to secure. This will help you determine the type of safety strap and where to anchor it.

    Step 2: Choose the Right Safety Strap

    Choosing the right safety strap is crucial. Consider the weight and size of the object, the distance to be traveled, and the environment. This will help you select the appropriate type, strength, and length of the safety strap.

    Step 3: Anchor the Safety Strap

    Anchor the safety strap to a secure point on the object or vehicle. Ensure the anchor point is strong enough to hold the thing’s weight.

    Step 4: Thread the Safety Strap

    Thread the safety strap through the anchor point, ensuring it is not twisted or tangled.

    Step 5: Tighten the Safety Strap

    Tighten the safety strap by pulling the loose end, ensuring the object is secure and doesn’t move during transport or storage.

    Step 6: Check the Security

    Check the security of the safety strap before transporting or storing the object. Ensure that the safety strap is tight and the thing doesn’t move.

    Conclusion

    In conclusion, safety straps are essential for securing your belongings during transport or storage. However, improper installation can result in damage or injury. Following the installation guidelines outlined above, you can ensure your belongings are safe and secure. Remember to choose the appropriate safety strap for the job, anchor it to a certain point, thread it correctly, and tighten it adequately. 

    With proper installation, you can have peace of mind knowing that your belongings are secure and won’t move or fall during transport or storage. Remember to always comply with regulations and standards and seek professional advice if in doubt.

    FAQs

    Here are some common questions about safety strap installation:

    • Are safety straps necessary for transporting or storing items?

    Safety straps are essential for securing items and preventing damage or injury.

    • Can any safety strap be used for any object?

    No, choosing the appropriate safety strap for the object is essential based on its weight, size, and distance to be traveled.

    • Can safety straps be reused?

    Yes, safety straps can be reused, but it’s essential to inspect them before each use and replace any damaged straps.

    • What if I can install safety straps correctly?

    If you need help installing safety straps correctly, seek professional advice or refer to the manufacturer’s instructions.

    • Are safety straps only used for transport and storage?

    No, safety straps can be used for other purposes, such as securing items in place during construction or renovation projects.

    In conclusion, safety straps are an excellent option for securing your belongings during transport or storage. By following the proper installation guidelines and choosing the appropriate safety strap, you can have peace of mind knowing that your belongings are safe and secure. Remember to always comply with regulations and standards and seek professional advice if in doubt.

    You may also like these posts!

  • Self Centering Drill Bits vs. Regular Drill Bits

    Self Centering Drill Bits vs. Regular Drill Bits

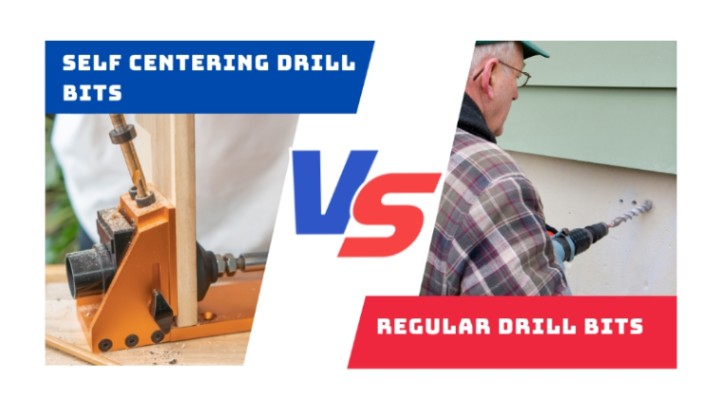
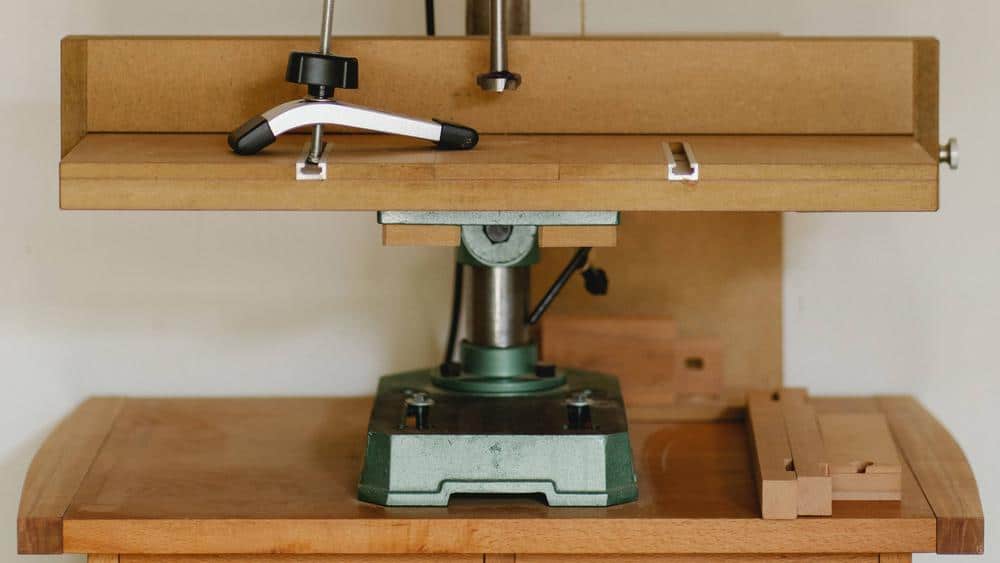
    Drilling is a crucial part of many DIY projects and professional construction jobs. Having the right tools for the job can make all the difference in the project’s outcome. When it comes to drilling, various types of drill bits are available on the market. Two of the most common types are self-centering drill bits and regular drill bits. Understanding the differences between these two types of drill bits is essential to determine which is best suited for a particular project.

    This article will explore the working mechanism, advantages, and disadvantages of self-centering and regular drill bits. We will also discuss when to use each type of drill bit and how to choose the right one for a specific project. We will also compare these two types of drill bits based on various factors and help you decide which is better for your drilling needs.

    What Are Self-Centering Drill Bits?

    If you are into woodworking or metalworking, you would know the importance of having the right tools for the job. One such tool that is essential for these activities is a drill bit. There are various types of drill bits available in the market. However, in this article, we will focus on self-centering drill bits.

    Definition of Self-Centering Drill Bits

    A self-centering drill bit is a type of drill bit that has a spring-loaded guide attached to the tip. This guide helps the bit stay in the hole’s center while drilling. Self-centering drill bits come in various sizes and can be used for drilling holes in wood, metal, and plastic.

    Types of Self-Centering Drill Bits

    There are mainly two self-centering drill bits: brad point bits and Vix bits.

    Brad Point Bits

    Brad-point bits, also known as doweling bits, are designed with a pointed tip surrounded by two sharp edges. These bits are used for drilling holes in wood and are excellent for creating precise and clean holes. The pointed tip helps to guide the bit, preventing it from wandering and creating off-center holes.

    Vix Bits

    Vix bits are designed with a spring-loaded guide that ensures the bit stays in the center of the hole while drilling. These bits are primarily used for drilling holes in metal and can drill through sheet metal, aluminum, and brass. The spring-loaded guide helps to prevent the bit from slipping or wandering, ensuring precise and accurate holes.

    Advantages of Using Self-Centering Drill Bits

    Using self-centering drill bits has several advantages. Some of them are:

    Accurate and Precise Holes

    Self-centering drill bits are designed to stay in the center of the hole while drilling. This feature ensures that the holes are accurate and precise, which is essential when working with wood or metal.

    Reduced Risk of Bit Wandering

    Bit wandering occurs when the drill bit moves off-center while drilling, which can cause damage to the material being drilled. Self-centering drill bits have a guide that helps to keep the bit in the center of the hole, reducing the risk of bit wandering.

    Faster and Easier Drilling

    Self-centering drill bits are designed to drill faster and easier than traditional ones. With the guide helping to keep the bit in the center of the hole, there is less resistance, which makes drilling faster and less strenuous.

    Versatility

    Self-centering drill bits can be used to drill various materials such as wood, metal, and plastic, making them versatile tools in any workshop or garage.

    Cost-Effective

    Although self-centering drill bits may be slightly more expensive than traditional ones, their accuracy and precision can help save time and money in the long run.

    In conclusion, self-centering drill bits are helpful for anyone working with wood, metal, or plastic. They offer accuracy, precision, and versatility, making them an essential tool in any workshop or garage.

    What Are Regular Drill Bits?

    Drill bits are essential tools in woodworking, metalworking, and construction. Various types of drill bits are available in the market, each with its unique purpose. In this article, we will focus on regular drill bits.

    Definition of Regular Drill Bits

    Regular drill bits are the most commonly used drill bits in the market. These bits are designed with a spiral-shaped flute that helps to remove debris from the hole while drilling. Regular drill bits come in various sizes and can be used to drill holes in wood, metal, plastic, and other materials.

    Types of Regular Drill Bits

    There are mainly two types of regular drill bits: twist drill bits and spade bits.

    Twist Drill Bits

    Twist drill bits are the most common type of regular drill bits. These bits are designed with a twisted flute that helps to remove debris from the hole while drilling. Twist drill bits can be used to drill various materials such as wood, metal, and plastic.

    Spade Bits

    Spade bits, also known as paddle bits, are designed with a flat, paddle-shaped tip that helps quickly create large holes. These bits are commonly used to drill holes in wood and can create holes with diameters up to two inches.

    Advantages of Using Regular Drill Bits

    Using regular drill bits has several advantages. Some of them are:

    Versatility

    Regular drill bits are versatile and can be used to drill holes in various materials such as wood, metal, and plastic.

    Cost-Effective

    Regular drill bits are cost-effective and readily available in the market.

    Speed

    Regular drill bits are designed to drill quickly, making them ideal for large-scale projects.

    Ease of Use

    Regular drill bits are easy to use, making them suitable for novice and experienced users.

    In conclusion, regular drill bits are a versatile and cost-effective tool for anyone working with wood, metal, or plastic. They offer speed and ease of use and can be used for various projects, making them an essential tool in any workshop or garage.

    How Do Self-Centering Drill Bits Work?

    Self-centering drill bits are innovative tools designed to make drilling easier, faster, and more accurate. These bits are becoming increasingly popular among woodworkers, metalworkers, and DIY enthusiasts. Here will discuss the working mechanism of self-centering drill bits and compare them with regular drill bits.

    Explanation of the Working Mechanism of Self-Centering Drill Bits

    Self-centering drill bits are designed with a spring-loaded guide that helps to keep the bit centered and aligned with the material being drilled. The guide is located at the bit’s tip and consists of two or more jaws that retract as the bit enters the material. Once the bit is in place, the jaws expand and hold the bit in the center of the hole, ensuring accurate drilling.

    Self-centering drill bits are handy when drilling pilot holes for screws, hinges, or dowels. The guide ensures that the pilot hole is precisely centered, making it easier to insert the fastener and ensuring a secure and tight fit.

    Comparison of the Working Mechanism of Self-Centering Drill Bits with Regular Drill Bits

    Regular drill bits do not have a guide and rely on the user to keep the bit centered and aligned with the material being drilled. This can be challenging, especially when drilling smaller holes or using hand-held drills. Regular drill bits can easily wander off-center, resulting in inaccurate holes.

    On the other hand, self-centering drill bits eliminate the need for the user to keep the bit centered and aligned. The guide ensures the bit stays centered, resulting in precise and accurate holes every time. This makes them ideal for beginners, DIY enthusiasts, and professionals who want to achieve accurate results quickly and easily.

    In conclusion, self-centering drill bits are innovative tools that make drilling faster, easier, and more accurate. They use a spring-loaded guide to keep the bit centered and aligned with the drilled material. Self-centering drill bits offer better accuracy and precision than regular drill bits, making them an ideal choice for anyone looking to achieve accurate results quickly and easily.

    How Do Regular Drill Bits Work?

    Regular drill bits are among the most commonly used tools in woodworking, metalworking, and DIY projects. They are designed to cut through various materials, including wood, metal, plastic, and masonry. Here, we will discuss the working mechanism of regular drill bits and compare them with self-centering drill bits.

    Explanation of the Working Mechanism of Regular Drill Bits

    Regular drill bits are made of high-speed steel, cobalt, or carbide and come in various sizes and shapes. The bit has a spiral-shaped flute that helps to remove the material as the bit rotates. The tip of the bit is designed to cut into the material and create a hole.

    When drilling with a regular drill bit, the user must keep the bit centered and aligned with the drilled material. This can be challenging, especially when drilling smaller holes or using hand-held drills. If the bit wanders off-center, the hole will be inaccurate and unsuitable for its intended use.

    Comparison of the Working Mechanism of Regular Drill Bits with Self-Centering Drill Bits

    Regular drill bits rely on the user to keep the bit centered and aligned with the drilled material. This can be challenging, especially for beginners or when drilling smaller holes. Self-centering drill bits eliminate the need for the user to keep the bit centered and aligned by using a spring-loaded guide that keeps the bit in the center of the hole.

    Regular drill bits are less accurate than self-centering drill bits and may require more skill and experience. However, regular drill bits are more versatile. They can drill a broader range of materials and hole sizes.

    In summary, regular drill bits use a spiral-shaped flute to remove the material as the bit rotates. The user must keep the bit centered and aligned with the drilled material. Regular drill bits are less accurate but more versatile than self-centering drill bits.

    Pros and Cons of Self-Centering Drill Bits

    Self-centering drill bits have become increasingly popular in recent years due to their ease of use and accuracy. These bits are designed to eliminate the need for the user to keep the bit centered and aligned with the material being drilled. This article will discuss the advantages and disadvantages of using self-centering drill bits and compare them with regular drill bits.

    Advantages of Using Self-Centering Drill Bits

    1. Increased accuracy: Self-centering drill bits are more accurate than regular drill bits because they eliminate the need for the user to keep the bit centered and aligned with the material being drilled.
    2. Faster drilling: With self-centering drill bits, the user can drill holes more quickly because they do not need to adjust the bit’s position constantly.
    3. Reduced risk of damage: Self-centering drill bits reduce the risk of damaging the drilled material because they are less likely to wander off-center.
    4. Suitable for beginners: Self-centering drill bits are easy to use and require less skill and experience than regular drill bits, making them ideal for beginners.

    Disadvantages of Using Self-Centering Drill Bits

    1. Limited sizes: Self-centering drill bits are available in a limited range of sizes, making them less versatile than regular drill bits.
    2. Higher cost: Self-centering drill bits are more expensive than regular drill bits.
    3. Reduced control: Self-centering drill bits provide less control than regular drill bits because the user needs to adjust the bit’s position.

    Comparison of Self-Centering Drill Bits with Regular Drill Bits

    Compared to regular drill bits, self-centering drill bits offer several advantages, such as increased accuracy, faster drilling, and reduced risk of damage. However, they also have disadvantages, such as a limited range of sizes, higher cost, and reduced control.

    Regular drill bits are more versatile and can be used to drill a broader range of materials and hole sizes. They require more skill and experience to use effectively but offer more control over the drilling process.

    In summary, self-centering drill bits offer several advantages over regular drill bits, such as increased accuracy and faster drilling. However, they also have disadvantages, such as a limited range of sizes and reduced control. When choosing between self-centering drill bits and regular drill bits, it is essential to consider the project’s specific needs.

    Pros and Cons of Regular Drill Bits

    Regular drill bits have been a staple tool in every toolbox for decades. They come in different sizes and shapes, but all work on the same principle. This section will discuss the advantages and disadvantages of using regular drill bits and compare them with self-centering drill bits.

    Advantages of using regular drill bits

    1. Versatility: Regular drill bits can be used for various applications, including drilling through wood, metal, plastic, and other materials.
    2. Affordability: Regular drill bits are less expensive than self-centering drill bits, making them a more accessible option for DIY enthusiasts and homeowners.
    3. Availability: Regular drill bits are widely available in hardware stores and online, making them easy to purchase and replace.

    Disadvantages of using regular drill bits

    1. Lack of accuracy: Regular drill bits require a steady hand and much practice to achieve a precise hole. They do not have a self-centering mechanism, making it easy for the bit to wander off-center.
    2. Risk of damage: Regular drill bits can easily damage the material if the user lacks experience.
    3. Time-consuming: Achieving accurate holes with regular drill bits takes time and patience. The user must mark the drilling spot accurately and drill slowly to avoid damaging the material.

    Comparison of regular drill bits with self-centering drill bits

    Regular drill bits are an excellent option for those on a budget and those who don’t require precise holes. However, for those who need more accurate holes or lack the necessary experience, self-centering drill bits are a better choice. Compared to regular drill bits, self-centering drill bits have the following advantages:

    1. Precision: Self-centering drill bits are designed to keep the bit centered and aligned, resulting in a more precise hole.
    2. Ease of use: Self-centering drill bits are designed to be easy to use and require less experience and skill to achieve accurate results.
    3. Time-saving: Self-centering drill bits are faster than regular drill bits, as they eliminate the need to mark the drilling spot and drill slowly.

    Disadvantages of using self-centering drill bits

    1. Limited sizes: Self-centering drill bits are not available in as many sizes as regular drill bits, limiting their versatility.
    2. Cost: Self-centering drill bits are more expensive than regular drill bits, making them less accessible to those on a tight budget.
    3. Fragility: Self-centering drill bits are more fragile than regular ones and can easily break if dropped or mishandled.

    In conclusion, regular drill bits are an excellent option for those on a budget and those who don’t require precise holes. Self-centering drill bits are a better choice for those who need more accurate holes or lack the necessary experience. Choosing between regular and self-centering drill bits depends on the user’s needs and budget.

    When to Use Self-Centering Drill Bits

    Self-centering drill bits are the best option when drilling holes into materials that require precision and accuracy. These materials include metals, plastics, and wood. Here are some situations where self-centering drill bits are the best option:

    1. When drilling angled or slanted holes: Self-centering drill bits are excellent for drilling angled or slanted holes in materials. The drill bits automatically adjust to the angle of the material and create a precise and accurate hole.
    2. When working with thin or fragile materials: Thin or fragile materials, such as glass or acrylic, require delicate handling when drilling. Self-centering drill bits can provide a stable and centered drilling point, reducing the likelihood of material breakage or damage.
    3. When working with uneven or curved surfaces: Uneven or curved surfaces can make achieving a centered drilling point challenging. Self-centering drill bits adjust to the surface, creating a precise hole every time.

    Materials requiring self-centering drill bits include circuit boards, metal sheets, and PVC pipes.

    In summary, self-centering drill bits are ideal for precision drilling tasks where accuracy is critical and materials require delicate handling. They are handy for drilling angled or slanted holes, working with thin or fragile materials, and drilling on uneven or curved surfaces.

    When to Use Regular Drill Bits

    Regular drill bits are versatile tools that can be used for various drilling tasks. Here are some situations where regular drill bits are the best option:

    1. When drilling large holes: Regular drill bits are more efficient than self-centering drill bits when drilling large holes. They have a larger cutting surface, allowing for faster drilling and a more significant hole size.
    2. When working with soft materials: Soft materials such as wood or plaster do not require the precision of a self-centering drill bit. Regular drill bits are the best option for these materials as they can quickly create holes without damaging them.
    3. When working with low-budget projects: Regular drill bits are cheaper than self-centering drill bits, making them the better option for low-budget projects.

    Materials requiring regular drill bits include wood, drywall, and soft plastics.

    In summary, regular drill bits are a versatile option that can be used for various drilling tasks. They are ideal for drilling large holes, working with soft materials, and doing low-budget projects. Regular drill bits are cost-effective and widely available, making them a practical choice for many DIY and construction projects.

    Self Centering Drill Bits vs. Regular Drill Bits: Which One Is Better?

    When choosing the right drill bit for your project, it’s essential to consider the advantages and disadvantages of both self-centering drill bits and regular drill bits. Here’s a comparison of the two types of drill bits to help you determine which is better for your needs.

    Comparison of Self Centering Drill Bits and Regular Drill Bits

    Self-centering drill bits are designed to center themselves automatically on a surface, eliminating manual alignment. This feature makes them ideal for drilling accurate holes in wood, plastic, and metal materials. On the other hand, regular drill bits require manual alignment, which can be time-consuming and may result in imprecise holes.

    In terms of speed, self-centering drill bits are faster and more efficient than regular drill bits. They require less force to drill through materials, which reduces the risk of breaking or dulling the bit. On the other hand, regular drill bits require more force to drill through materials, which can result in slower progress and more wear and tear on the bit.

    Regarding versatility, regular drill bits are more versatile than self-centering drill bits. Regular bits come in a wide range of sizes and shapes, making them suitable for drilling various hole sizes and shapes. Self-centering drill bits, however, are limited in size and shape options.

    Factors to Consider When Determining the Best Drill Bit for a Specific Project

    When deciding between self-centering drill bits and regular drill bits, there are several factors to consider:

    • Material: Consider the type of material you will be drilling into. Self-centering drill bits are ideal for softer wood, plastic, and thin metal sheets. Regular drill bits are better suited for drilling into more complex materials like concrete, masonry, and thicker metal sheets.
    • Hole size and shape: Consider the size and shape of the hole you need to drill. Regular drill bits come in a broader range of sizes and shapes, which makes them more versatile for drilling different hole sizes and shapes. Self-centering drill bits are more limited in their size and shape options.
    • Precision: Self-centering drill bits may be better if you require precise and accurate holes, as they eliminate manual alignment. Regular drill bits require manual alignment, which can result in imprecise holes.
    • Speed: If you need to drill holes quickly and efficiently, self-centering drill bits are the better option as they require less force and are faster and more efficient than regular drill bits.

    Final Verdict on Which One Is Better

    In conclusion, the choice between self-centering and regular drill bits depends on the specific project requirements. Self-centering drill bits are ideal for softer materials and when precision is required. They are also faster and more efficient than regular drill bits. Regular drill bits, on the other hand, are more versatile and better suited for drilling into more rigid materials.

    Both drill bits in your toolkit are recommended, as they each have unique advantages and disadvantages. This will ensure that you have the right tool for the job, no matter what project you’re working on.

    Conclusion

    In conclusion, drill bits are an essential tool in any drilling project. Whether for personal use or professional applications, selecting the correct type of drill bit can significantly impact the project’s outcome. This article provided an in-depth look at self-centering and regular drill bits, including their definitions, types, advantages, and disadvantages.

    Self-centering drill bits offer many benefits, including improved accuracy, reduced slipping, and quicker drilling times. On the other hand, regular drill bits are more versatile and are suitable for a broader range of materials. Ultimately, the choice between self-centering and regular drill bits will depend on the specific project and the drilled materials.

    When choosing a drill bit, it’s essential to consider factors such as the material being drilled, the type of drill being used, the size and shape of the hole, and the required accuracy. It’s also essential to ensure the drill bit is compatible with the drill being used.

    In conclusion, both self-centering and regular drill bits have advantages and disadvantages. Choosing the best drill bit for a specific project requires careful consideration of the materials, the drilling needs, and the desired outcome. Any drilling project can be completed accurately and efficiently with the right drill bit and proper technique.

    You may also like these posts!

  • Understanding Short Circuit in Vehicles

    Understanding Short Circuit in Vehicles

    When it comes to the electrical system in your vehicle, short circuits are one of the most common and potentially dangerous issues you may encounter. A short circuit occurs when electrical current flows along an unintended path, which can damage your vehicle’s electrical components or even start a fire. That’s why it’s crucial to understand what a short circuit is and how to prevent and fix it.

    This article will provide a comprehensive guide to vehicle short circuits. We’ll cover the definition of a short circuit and how it differs from an open circuit. We’ll also discuss the types of short circuits, their causes, their symptoms, and how to fix them. Furthermore, we’ll provide safety precautions and the tools to handle short circuits effectively. By the end of this article, you’ll have a thorough understanding of short circuits in vehicles and be able to prevent and fix them if necessary.

    What is a Short Circuit?

    A short circuit, including in vehicles, is a common problem in any electrical system. It can cause various problems, from blown fuses to electrical fires. In this article, we’ll explain what a short circuit is, how it differs from an open circuit, and the different types of short circuits. We’ll also discuss the causes of short circuits in vehicles and provide some tips on preventing them.

    Definition of a Short Circuit

    A short circuit occurs when an electrical circuit is bypassed or interrupted, causing current to flow through an unintended path. This can happen when a conductor touches another conductor or comes into contact with the ground. In a short circuit, current flows through the path of least resistance, which can cause a large amount of current to flow through a small area. This can lead to overheating, damage to the components of the circuit, or even a fire.

    How it differs from an open circuit

    An open circuit is the opposite of a short circuit. Instead of bypassing or interrupting a path, there is no path for the current to flow through. A broken wire can cause this. A switch turned off, or a failed component. In an open circuit, no current flows, which means that no power is supplied to the circuit.

    Types of short circuits

    There are three main types of short circuits: hard, soft, and intermittent.

    Hard short circuit

    A complex short circuit is the most common type of short circuit. It occurs when two conductors come into contact with each other directly, bypassing the load or component. This causes the current to flow through the path of least resistance, resulting in a large amount of current flowing through a small area. Hard short circuits can cause damage to the components of the circuit and can even start a fire.

    Soft short circuit

    A soft short circuit is a partial short circuit. It occurs when the resistance between the two conductors is lower than it should be but not low enough to cause a complete bypass of the load or component. Soft short circuits can cause the circuit to malfunction or the component to overheat.

    Intermittent short circuit

    An intermittent short circuit is a short circuit that occurs at irregular intervals. A loose wire, a damaged connector, or a corroded connection can cause it. Intermittent short circuits can be difficult to diagnose because they only happen sometimes.

    Causes of short circuits in vehicles

    Short circuits can occur in any electrical system, including vehicles. Some of the most common causes of short circuits in vehicles include the following:

    Worn or damaged wires

    Worn or damaged wires can cause short circuits in vehicles. Over time, wires can become corroded, which can cause them to break down and lose their insulation. This can lead to a short circuit.

    Faulty components

    Faulty components can also cause short circuits in vehicles. This can include anything from a malfunctioning alternator to a faulty starter motor. When a component fails, it can cause a short circuit.

    Water damage

    Water can cause short circuits in vehicles, especially if it gets into the electrical system. This can happen if a window is left open during a rainstorm or the vehicle is driven through deep water.

    Incorrectly installed aftermarket components

    Aftermarket components can be a great way to upgrade your vehicle’s electrical system. However, they can also cause short circuits if they are installed incorrectly. If you need to get more familiar with electrical systems, having a professional install any aftermarket components is best.

    Symptoms of a Short Circuit in a Vehicle

    Short circuits in vehicles can cause various problems, from minor electrical malfunctions to serious safety hazards. It’s important to be aware of the warning signs of a short circuit in your vehicle, so you can take action to prevent further damage or potential accidents. In this section, we’ll discuss some common symptoms of a short circuit in a vehicle and some diagnostic tools that can be used to identify a short circuit.

    Warning signs of a short circuit

    Several warning signs may indicate a short circuit in your vehicle. These include:

    • Fuses blowing frequently: If you notice that your vehicle’s fuses are frequently blowing, this could be a sign of a short circuit. Fuses protect electrical components from being damaged by too much current. If a short circuit occurs, it can cause the current to exceed the fuse’s rating, which will cause the fuse to blow.
    • Smoke or burning smell: A short circuit can cause electrical components to overheat, producing smoke or a burning smell. Suppose you notice smoke or a burning smell coming from your vehicle’s electrical system. In that case, you should immediately stop the vehicle and have it inspected by a professional.
    • Electrical components not working: A short circuit can cause electrical components in your vehicle to stop working. This can include anything from the radio to the headlights. Suppose you notice that a component has stopped working. In that case, it’s important to have it inspected by a professional to determine the cause.

    Common electrical problems that can indicate a short circuit

    Several common electrical problems can indicate a short circuit in a vehicle. These include:

    • Dead battery: A short circuit can drain the battery, causing it to die. This could signify a short circuit if you have to jump-start your vehicle frequently.
    • Dim or flickering headlights: A short circuit can cause the headlights to dim or flicker. This is often a sign of a problem with the alternator or voltage regulator.
    • Blown fuses: As mentioned earlier, blown fuses can signify a short circuit in a vehicle.

    Diagnostic tools to identify a short circuit

    Several diagnostic tools can be used to identify a short circuit in a vehicle. These include:

    • Multimeter: A multimeter is a tool that can measure voltage, current, and resistance. It can be used to test various electrical components and circuits in a vehicle to identify the source of the short circuit.
    • Circuit tester: A circuit tester is a tool that can test individual circuits in a vehicle. It can help identify whether a circuit is functioning properly or if there is a short circuit.
    • Wiring diagram: A wiring diagram is a map of the electrical system in a vehicle. It can be used to identify the location of specific components and circuits, which can help identify a short circuit.

    In conclusion, short circuits in vehicles can be dangerous and cause various problems. It’s important to be aware of the short circuit’s warning signs and have your vehicle inspected by a professional if you suspect there is a problem. Additionally, using diagnostic tools can help identify the source of a short circuit, which can help prevent further damage and ensure your and your passengers’ safety.

    Understanding the Electrical System in Vehicles

    Modern vehicles are complex machines that rely on various electrical components to function properly. In this section, we’ll provide an overview of the electrical system in a vehicle, discuss the different components that make up the system, and explain how a short circuit can affect the electrical system.

    Overview of the electrical system in a vehicle

    The electrical system in a vehicle is responsible for providing power to various components, such as the starter, lights, radio, and other electrical devices. It is also responsible for recharging the battery and regulating the voltage and current to prevent damage to the electrical components.

    The electrical system in a vehicle consists of three main parts: the battery, the alternator, and the starter. The battery provides electrical power to the vehicle’s electrical system and starts the engine. The alternator generates electrical power and recharges the battery while the engine runs. The starter is responsible for starting the engine by turning the crankshaft.

    Components of the electrical system

    The electrical system in a vehicle consists of a variety of components, including:

    • Battery: As mentioned earlier, the battery is responsible for providing power to the electrical system and starting the engine.
    • Alternator: The alternator generates electrical power and recharges the battery while the engine runs.
    • Starter: The starter starts the engine by turning the crankshaft.
    • Wiring: The wiring in a vehicle carries electrical current to various components.
    • Fuses: Fuses protect electrical components from damage by limiting the current that flows through them.
    • Relays: Relays are switches that are used to control electrical circuits.
    • Sensors: Sensors are used to monitor various systems in the vehicle, such as the engine temperature, and send signals to the vehicle’s computer.

    How a short circuit can affect the electrical system

    A short circuit occurs when electrical current flows through a path with little or no resistance, causing the current to increase beyond safe levels. A short circuit can occur when a wire or electrical component comes into contact with another wire or component that it shouldn’t be in contact with or when a wire is damaged, and the insulation is compromised.

    When a short circuit occurs in a vehicle, it can cause a variety of problems. It can damage electrical components, cause fuses to blow, drain the battery, and even start a fire. A short circuit can also cause the alternator to work harder to provide enough power to the electrical system, which can cause the alternator to fail prematurely.

    In conclusion, the electrical system in a vehicle is complex. It consists of several components that work together to power various electrical devices. A short circuit can cause serious damage to the electrical system and should be addressed immediately. Understanding the electrical system and its components can help you identify and prevent potential problems, ensuring the safety and reliability of your vehicle.

    Common Causes of Short Circuits in Vehicles

    A short circuit in a vehicle can be caused by a variety of factors, from faulty wiring to the use of incorrect fuses. This section will discuss some of the most common causes of vehicle short circuits.

    Faulty wiring and connections

    Faulty wiring and connections are among the most common causes of vehicle short circuits. The wiring can become damaged over time due to wear and tear, or it can be damaged during installation or repair. This can cause the insulation to wear away, exposing the bare wires and making them more susceptible to short circuits. Loose or corroded connections can also cause short circuits by creating a gap in the circuit that allows electrical current to flow through unintended paths.

    Corrosion and wear and tear

    Corrosion and wear and tear can cause short circuits in a vehicle’s electrical system. Corrosion can occur when moisture gets into the wiring and connectors, causing them to rust and break down over time. Similarly, wear and tear on the electrical components can cause them to degrade and fail, increasing the risk of a short circuit.

    Overloading the electrical system

    Overloading the electrical system is another common cause of short circuits in vehicles. This can occur when too many electrical devices are used simultaneously, such as using multiple chargers, audio systems, and other electrical devices simultaneously. Overloading the electrical system can cause the wiring and components to overheat and fail, resulting in a short circuit.

    Use of incorrect fuses

    The use of incorrect fuses can also cause short circuits in a vehicle. Fuses are designed to protect the electrical components by limiting the current flow through the circuit. If a fuse is too small for its protecting circuit, it can blow and cause a short circuit. Similarly, suppose a fuse is too large. In that case, it may not blow when it should, leading to overheating and damage to the electrical components.

    In conclusion, short circuits in vehicles can be caused by various factors, including faulty wiring, corrosion and wear and tear, overloading the electrical system, and using incorrect fuses. It is important to regularly inspect and maintain the electrical system to prevent these issues from occurring and to address any problems immediately to ensure the safety and reliability of the vehicle.

    Prevention of Short Circuits in Vehicles

    Short circuits in vehicles can lead to serious problems, from minor electrical issues to major damage and even accidents. Fortunately, several steps can be taken to prevent short circuits from occurring in the first place.

    Regular maintenance and inspections

    Regular maintenance and inspections are essential for preventing short circuits in vehicles. This includes checking the electrical system for signs of wear and tear, corrosion, and damage and replacing any damaged or faulty components as needed. Keeping the electrical system clean and dry is also important to prevent moisture and other contaminants from causing problems.

    Proper installation and wiring

    Proper installation and wiring are also critical for preventing short circuits in vehicles. This includes ensuring all electrical components are installed correctly and securely, with no loose or dangling wires. It is also important to use high-quality wiring and connectors designed for the specific application and follow the manufacturer’s guidelines for wiring and installation.

    Use of appropriate fuses

    Using appropriate fuses is another important step in preventing short circuits in vehicles. Fuses are designed to protect the electrical system by limiting the current flow through the circuit. It is important to use fuses that are the correct size and rating for the specific application, as using incorrect fuses can lead to short circuits and other problems.

    Avoiding overloading the electrical system

    Finally, avoiding overloading the electrical system prevents vehicle short circuits. This includes using electrical devices and accessories designed for the specific application that does not exceed the electrical system’s capacity. It is also important to avoid using multiple devices simultaneously that may overload the system and cause a short circuit.

    In conclusion, preventing short circuits in vehicles requires regular maintenance and inspections, proper installation and wiring, appropriate fuses, and avoiding overloading the electrical system. By taking these steps, vehicle owners can help ensure the safety and reliability of their vehicles, as well as avoid costly repairs and potential accidents.

    How to Fix a Short Circuit in a Vehicle

    When a short circuit is detected in a vehicle, it is important to take immediate action to prevent further damage and ensure the vehicle’s and its occupants’ safety. Here are the steps to take and common methods of fixing a short circuit in a vehicle.

    Steps to take when a short circuit is detected

    Suppose a short circuit is suspected in a vehicle. The first step is to turn off the ignition and disconnect the battery to prevent electrical fires or further damage. The next step is to locate the source of the short circuit, which can be done using a multimeter or other diagnostic tools. Once the source is located, the damaged component should be replaced or repaired.

    Common methods of fixing a short circuit

    There are several common methods of fixing a short circuit in a vehicle, depending on the specific cause and location of the short circuit. These include:

    • Repairing damaged wiring or connectors: If the short circuit is caused by damaged wiring or connectors, the damaged component can often be repaired by replacing the damaged section or connector.
    • Replacing blown fuses: If a blown fuse causes a short circuit, the fuse should be replaced with a new one with the correct size and rating.
    • Fixing corroded connections: If corroded connections cause a short circuit, the corroded connections should be cleaned and treated with a rust inhibitor to prevent further corrosion.
    • Checking and replacing faulty components: If the short circuit is caused by a faulty component, such as a sensor or switch, the faulty component should be checked and replaced if necessary.

    When to seek professional help

    While vehicle owners themselves can fix many short circuits, there are times when it is best to seek professional help. For example, if the short circuit is caused by complex wiring or electronic components, or if the vehicle owner is not familiar with the electrical system, it is best to seek the help of a professional mechanic or electrician who has the knowledge and tools to diagnose and fix the problem safely and effectively.

    In conclusion, fixing a short circuit in a vehicle requires immediate action, including disconnecting the battery and locating the source of the problem. Common methods of fixing a short circuit include

    • repairing damaged wiring or connectors,
    • replacing blown fuses,
    • fixing corroded connections, and
    • Checking and replacing faulty components.

    If in doubt, it is always best to seek a professional’s help to ensure the vehicle’s safety and reliability.

    Safety Precautions When Dealing with Short Circuits

    Dealing with short circuits in vehicles can be dangerous. Taking proper safety precautions to prevent electrical fires or injury is important. Here are some safety tips to remember when dealing with short circuits.

    Safety equipment to use

    Wearing appropriate safety equipment, including gloves, safety glasses, and insulated tools, is important when working with electrical components. This will protect you from electrical shock and prevent injury.

    Proper handling of electrical components

    When handling electrical components, it is important to use caution and follow proper handling procedures. Always turn off the ignition and disconnect the battery before working on any electrical components. Use insulated tools to avoid accidental electrical shock.

    Safety tips when working on a short circuit

    When working on a short circuit, it is important to take the following safety tips into account:

    • Work in a well-ventilated area to avoid inhaling fumes or gases that may be released during the repair process.
    • Avoid using metallic objects or jewellery, which can conduct electricity and increase the risk of electrical shock.
    • Keep flammable materials away from the work area to prevent electrical fires.
    • Avoid touching any metal components, such as the chassis or engine, which may be connected to the electrical system.
    • Never touch the battery terminals or any electrical components with wet hands or when standing on a wet surface.
    • Only attempt to repair complex electrical problems if you have the knowledge and experience to do so safely.

    In conclusion, vehicle short circuits require proper safety precautions to prevent electrical shock or fire. Always wear appropriate safety equipment, use caution when handling electrical components, and follow safety tips when working on a short circuit. If in doubt, it is always best to seek the help of a professional to ensure your safety and the safety of your vehicle.

    Tools Needed to Fix a Short Circuit

    Fixing a short circuit in a vehicle requires the right tools and knowledge. Here are the tools needed to diagnose and fix a short circuit.

    Basic electrical tools

    Some basic electrical tools that are needed to fix a short circuit in a vehicle include:

    • Multimeter: This tool measures an electrical circuit’s voltage, current, and resistance. It is useful in diagnosing short circuits and identifying faulty electrical components.
    • Wire strippers: Used to strip insulation from electrical wires.
    • Electrical tape: Used to insulate and protect electrical connections.
    • Wire crimpers: Used to crimp electrical connectors onto wires.
    • Screwdrivers: Used to remove and install electrical components.

    Specialized tools for diagnosing and fixing short circuits

    Some specialized tools that are used to diagnose and fix short circuits include:

    • Short circuit detector: This tool detects short circuits in electrical circuits. It works by sending a current through the circuit and measuring the resistance. If the resistance is low, it indicates a short circuit.
    • Circuit tracer: This tool is used to identify and trace the path of electrical circuits. It is useful in diagnosing short circuits and identifying faulty electrical components.
    • Oscilloscope: This tool measures and analyses electrical signals in a circuit. It is useful in diagnosing complex electrical problems.

    How to use these tools effectively

    Using these tools effectively requires knowledge and experience. Following the manufacturer’s instructions and safety precautions when using these tools is important. Here are some tips for using these tools effectively:

    • Read the instruction manual carefully before using any tool.
    • Use appropriate safety equipment, such as gloves and safety glasses.
    • Always turn off the ignition and disconnect the battery before working on any electrical components.
    • Test each electrical component individually to determine if it is faulty.
    • Use the appropriate tool for the job.
    • Work slowly and carefully to avoid damaging the electrical system.

    In conclusion, fixing a short circuit in a vehicle requires the right tools and knowledge. Basic electrical tools, specialized tools for diagnosing and fixing short circuits, and knowledge of how to use these tools effectively are essential for a successful repair. If in doubt, it is always best to seek the help of a professional to ensure your safety and the safety of your vehicle.

    Conclusion

    In conclusion, understanding short circuits in vehicles is crucial to ensure the safety and reliability of the electrical system. A short circuit can cause severe damage to the vehicle’s components and even result in a fire if not addressed promptly. Therefore, knowing the causes, symptoms, and methods of preventing and fixing short circuits in vehicles is essential.

    Throughout this article, we have covered various aspects of vehicle short circuits, including their definition, types, causes, prevention, and fixing methods. We also discussed safety precautions and the tools required to work on short circuits.

    In summary, a short circuit is a situation where an electrical circuit has low resistance, causing a high current flow that can damage the circuit components and even cause a fire. Faulty wiring and connections, corrosion, and overloading are common causes of short circuits. Preventing short circuits requires regular maintenance, proper installation, and the use of appropriate fuses.

    When a short circuit is detected, it is essential to take safety precautions and use specialized tools to diagnose and fix the issue. In some cases, seeking professional help may be necessary.

    In conclusion, it is crucial to be knowledgeable about short circuits in vehicles to ensure their safety and reliability. By taking proper preventive measures and addressing short circuits promptly, we can avoid potential damage and ensure the smooth operation of our vehicles.

    You may also like these posts!

  • DIY Drill Press Stand: Craftsmanship Elevated!

    DIY Drill Press Stand: Craftsmanship Elevated!

    Welcome to this comprehensive guide on building your own DIY drill press stand. This article will explore the benefits of having a drill press stand, discuss different design options, and provide step-by-step instructions to help you create a functional and sturdy stand for your workshop. Whether a woodworking enthusiast or a DIY hobbyist, a drill press stand offers stability, versatility, and improved accuracy for your drilling projects.

    To start, we’ll outline the various sections of this article, covering topics such as the benefits of a drill press stand, choosing the right design, necessary materials and tools, construction steps, finishing options, safety considerations, and more. So let’s dive in and begin constructing your DIY drill press stand!

    DIY Drill Press Stand Crafting Your Own Drill Press Stand

    1. Introduction

    A drill press stand is a device that holds and stabilizes a handheld drill, converting it into a makeshift drill press. On the other hand, a drill press table is an accessory that attaches to a drill press, providing a larger work surface and more versatile clamping options for woodworking and metalworking tasks.

    A drill press stand is a dedicated platform for your drill press, providing stability and precision during drilling operations. Elevating the drill press to a comfortable height reduces strain on your back and allows for better control and accuracy. Moreover, a well-designed stand offers storage solutions, such as shelves and drawers, to keep your tools and accessories organized, enhancing your overall workflow and productivity in the workshop.

    Are the drill press stand and drill press table the same thing?

    No, a drill press stand and a table are not the same. A drill press stand is a device that holds and stabilizes a handheld drill, converting it into a makeshift drill press. On the other hand, a drill press table is an accessory that attaches to a drill press, providing a larger work surface and more versatile clamping options for woodworking and metalworking tasks.

    2. Benefits of a Drill Press Stand

    Using a drill press stand offers several advantages for both professional woodworkers and DIY enthusiasts:

    • Enhanced Stability: The stand provides a solid and secure base for your drill press, minimizing vibrations and ensuring precise drilling.
    • Improved Accuracy: With the drill press securely mounted, you can achieve consistent and accurate drilling depth, angles, and hole alignments.
    • Convenience and Comfort: Elevating the drill press to an ergonomic working height reduces strain on your back, allowing you to work comfortably for extended periods.
    • Versatility: A well-designed stand offers adjustable features and other work surfaces, enabling you to handle various drilling tasks and work with different materials.
    • Storage Solutions: Many drill press stands incorporate shelves, drawers, or compartments to store drill bits, clamps, and other accessories, keeping your workspace organized and efficient.
    Tools

    3. Choosing the Right Design for Your Needs

    When selecting a design for your DIY drill press stand, consider the following factors:

    • Available Space: Measure your workshop area to determine the dimensions and ensure the stand fits comfortably without hindering movement.
    • Intended Use: Assess your specific drilling needs, including the size of the workpieces, the required drilling depth, and any special features you might require.
    • Budget: Consider your budget constraints and choose a design that provides functionality without compromising quality or safety.
    1. Materials and Tools Required

    Before you start building, gather the following materials and tools:

    Materials:

    • Plywood sheets
    • 2×4 lumber
    • Wood screws
    • Drawer slides (if adding drawers)
    • Caster wheels (for mobility, optional)
    • Paint or stain (for finishing, optional)

    Tools:

    • Circular saw or table saw
    • Drill/driver
    • Pocket hole jig
    • Clamps
    • Measuring tape
    • Screwdriver
    • Sandpaper
    • Paintbrush or roller

    Ensure you have all the necessary materials and tools ready before construction. This ensures a smooth building process and minimizes any delays or interruptions.

    4. Step-by-Step Construction Guide

    Now let’s go through the construction process step by step, guiding you to build your own DIY drill press stand:

    Building the Frame

    Start by constructing the frame of the drill press stand using 2×4 lumber. Cut the lumber to the required lengths according to your chosen design. Assemble the pieces using wood screws, creating a sturdy and stable base for your drill press.

    Adding Shelves and Storage Drawers

    Add shelves and storage drawers to the frame if your design includes shelves and storage drawers. Measure and cut plywood sheets to create the shelves, ensuring they fit securely within the frame. Attach the shelves using wood screws or utilize drawer slides for easy access and smooth operation of the drawers.

    Creating the Back Panel

    To provide stability and support, add a back panel to the stand. Cut a piece of plywood to the appropriate size and attach it to the back of the frame using screws. This panel will prevent the stand from wobbling and enhance overall rigidity.

    5. Installing Caster Wheels for Mobility

    To enhance the mobility of your DIY drill press stand, consider installing caster wheels. Caster wheels allow you to move the stand quickly within your workshop, making it more convenient to position the drill press wherever needed. Here’s a step-by-step guide to installing caster wheels:

    1. Select the Right Caster Wheels: When choosing caster wheels, choose sturdy, durable, and suitable for your workshop floor. Consider the weight capacity of the wheels and ensure they can support the combined weight of the stand and the drill press. Also, choose wheels that swivel and have a locking mechanism to provide mobility and stability when required.
    2. Prepare the Stand: Before installing the caster wheels, ensure the stand is stable, and all the components are securely fastened together. This will prevent any wobbling or instability when the wheels are attached.
    3. Mark the Wheel Positions: Decide where to place the caster wheels on the bottom of the stand. Typically, it’s best to have one caster wheel in each corner for optimal balance and maneuverability. Mark the positions using a pencil or marker.
    4. Attach the Caster Wheels: Using appropriate screws or bolts, attach the caster wheels to the marked positions on the bottom of the stand. Ensure the wheels are securely fastened to avoid wobbling or detachment during movement.
    5. Test the Mobility: Once all the caster wheels are installed, test the mobility of the drill press stand by gently pushing it in different directions. Ensure the wheels rotate smoothly and the stand moves without difficulty or resistance.
    6. Lock the Wheels: If your caster wheels have a locking mechanism, engage the locks to prevent the stand from unintentionally moving while operating the drill press. This adds an extra layer of safety and stability to your setup.

    With the caster wheels installed, you can quickly move your DIY drill press stand within your workshop, allowing for greater flexibility and convenience when working on different projects.

    6. Finishing and Customization Options

    After completing the construction of your DIY drill press stand, you can apply finishes and customize them according to your preferences. Here are some finishing and customization options you can consider:

    1. Paint or Stain: Apply a coat of paint or stain to protect the wood and enhance the appearance of your drill press stand. Choose a finish that matches your workshop’s aesthetic or personal preference.
    2. Sealing: If using plywood or other unfinished materials, consider sealing the surfaces to protect them from moisture, dust, and wear. Clear varnish or sealant can provide added durability and longevity.
    3. Additional Storage: Customize your drill press stand by incorporating different storage solutions. You can add drawers, shelves, or compartments to keep your drill bits, clamps, and other accessories organized and easily accessible.
    4. Accessory Mounting: Depending on your needs, you can attach accessory mounts, such as magnetic tool holders or power strip brackets, to the sides or back of the stand. This allows you to store and access frequently used tools and equipment conveniently.
    5. Personalization: Add your touch to the drill press stand by incorporating decorative elements or modifications that align with your style or branding. This can include adding decals and logos or even customizing the shape or design of certain parts.

    Remember to prioritize functionality and safety when customizing your drill press stand. Ensure that any modifications or additions do not compromise the stand’s stability, structural integrity, or safe operation.

    Safety Considerations

    7. Safety Considerations

    While building and using your DIY drill press stand, it’s crucial to prioritize safety. Here are some important safety considerations to keep in mind:

    1. Stability: Ensure that the stand is stable and securely fastened together. Use appropriate fasteners and regularly check for any loose or wobbly parts.
    2. Weight Capacity: Be mindful of the weight capacity of your drill press stand. Do not overload it with excessive weight or place heavy objects on unstable surfaces.
    3. Secure the Drill Press: When mounting the drill press onto the stand, follow the manufacturer’s instructions and use the appropriate fasteners to secure it firmly. This will prevent any movement or shifting during operation.
    4. Proper Wiring: If your drill press requires electrical power, ensure the wiring is installed correctly and follows electrical safety guidelines. Use grounded outlets and avoid running cords across walkways or where they may become tripping hazards.
    5. Personal Protective Equipment (PPE): Always wear appropriate PPE, such as safety goggles and ear protection, when operating the drill press. Follow all safety guidelines provided by the manufacturer.
    6. Work Area Safety: Keep your work area clean and organized, removing trip hazards or clutter. Maintain a clear space around the drill press for safe movement and operation.

    Remember, safety should always be a top priority. By following these safety considerations, you can minimize the risk of accidents or injuries while using your DIY drill press stand.

    8. Conclusion

    In conclusion, building your own DIY drill press stand provides a practical, cost-effective solution for enhancing your woodworking projects. By following the step-by-step instructions, choosing the right design, and considering customization options, you can create a versatile and functional stand that suits your needs.

    Installing caster wheels adds mobility and convenience, allowing you to quickly position the drill press wherever needed in your workshop. Additionally, finishing and customization options allow you to personalize the stand and make it more aesthetically pleasing.

    Remember to prioritize safety throughout the construction and use of your drill press stand. You can create a reliable and safe setup for all your drilling operations with proper stability, secure fastening, and adherence to safety guidelines.

    Now that you have all the necessary information and guidance, it’s time to put your DIY skills to work and enjoy the benefits of your DIY drill press stand!

    You May Also Like This Post!

  • Tips for Using a Drill Press: Master the Drill Press

    Tips for Using a Drill Press: Master the Drill Press

    A drill press is a powerful tool for drilling holes in various materials such as wood, metal, and plastic. It consists of a base, column, table, and spindle that rotates the drill bit. Using a drill press correctly is essential for achieving accurate and precise drilling results. Failure to use it properly can damage the workpiece, the drill bit, or even injure the user. In this article, we’ll provide some tips for using a drill press safely and effectively.

    Safety Tips For Using A Drill Press

    When it comes to using power tools such as a drill press, safety should always be a top priority. Here are some essential safety tips to keep in mind when using a drill press:

    • Importance of Safety: A drill press is a powerful tool that can cause serious injury if improperly used. It is essential to always read the manufacturer’s instructions before operating the drill press and to follow all safety guidelines.
    • Safety Gear: Always wear appropriate safety gear when using a drill press. This includes eye protection, hearing protection, and gloves. Loose clothing or jewelry should be avoided, and long hair should be tied back.
    • Proper Setup: Before using the drill press, ensure the work area is clean and free of any obstacles. The drill press should be securely mounted on a stable surface, and the workpiece should be clamped down to prevent it from moving during drilling.
    • Safe Handling: When using the drill press, keep your hands and fingers away from moving parts. Always use the appropriate feed rate and cutting speed for drilled material. If the drill bit becomes stuck, turn off the drill press and remove the bit carefully with pliers or a wrench.

    Following these safety tips can help prevent accidents and ensure a safe and successful drilling experience.

    Types of Drill Presses

    Drill presses are essential tools for drilling holes into various materials, and they come in different types. Here are the three main types of drill presses:

    Benchtop Drill Presses

    These compact drill presses can fit on a workbench or table. They are ideal for small to medium-sized projects and are commonly used in home workshops or small businesses. Benchtop drill presses usually have a swing of 8-12 inches and a maximum drilling depth of 2-3 inches.

    Floor-standing Drill Presses

    These are larger and more powerful drill presses that stand on the floor. They are suitable for heavy-duty drilling tasks and have a swing of up to 20 inches with a maximum drilling depth of up to 4 inches. Floor-standing drill presses are commonly used in industrial settings such as machine shops and manufacturing plants.

    Magnetic Drill Presses

    Also known as mag drills, these are specialized drill presses that use magnets to attach to metal surfaces. They are commonly used in construction and metal fabrication industries where drilling is required on large metal surfaces. Magnetic drill presses are portable and versatile, making them ideal for on-site work.

    In conclusion, choosing the right type of drill press depends on the project requirements and the drilled materials. Benchtop drill presses are ideal for small to medium-sized projects. In contrast, floor-standing drill presses are suitable for heavy-duty drilling tasks. Magnetic drill presses are specialized tools ideal for drilling on large metal surfaces.

    Understanding the Parts of a Drill Press

    A drill press is a machine tool for drilling holes in wood, metal, and plastics. It consists of several components that work together to provide precise and accurate drilling. Here are the four main parts of a drill press:

    • The Base: This is the drill press’s foundation, providing stability and support for the entire machine. The base is usually made of cast iron or steel. It is designed to withstand the weight and vibrations of the drill press during operation.
    • The Column: This vertical post supports the entire drill press assembly. It is mounted on the base and extends upward to hold the other parts of the drill press. The column is usually made of steel or cast iron. It is designed to be rigid and robust to ensure accurate drilling.
    • The Table: The flat surface where the workpiece is placed during drilling. The table is attached to the column and can be adjusted up and down or tilted to accommodate different drilling angles. The table may also have slots or holes to attach clamps or vises to hold the workpiece securely.
    • The Spindle is the rotating part of the drill press that holds the drill bit: The spindle is mounted on the top of the column and can be raised or lowered using a handle or lever. The spindle also has a chuck that holds the drill bit, allowing it to be changed quickly and easily.

    Other parts of a drill press include the motor, which powers the spindle, and the depth stop, which controls the depth of the drilled hole. By understanding the different parts of a drill press, you can use the machine more effectively and achieve accurate and precise drilling results.

    Choosing the Right Drill Bit

    Several types of drill bits are available for drilling different materials, and choosing the right one is crucial for achieving accurate and clean holes. Here are some common types of drill bits:

    • Twist Drill Bits: These are the most common drill bits for drilling into wood, plastic, and metal.
    • Masonry Drill Bits: These are designed for drilling into hard materials such as concrete, brick, and stone.
    • Spade Bits: These are flat, paddle-shaped drill bits ideal for drilling large holes in wood.
    • Forstner Bits: These are used for drilling flat-bottomed holes in wood and are ideal for making furniture joints.

    When selecting a drill bit, consider the needed drilled material and the hole size. Using the right size drill bit is essential to ensure accuracy and prevent damage to the workpiece.

    Setting Up the Drill Press

    To ensure accurate and safe drilling, it’s important to set up your drill press properly. Here are some steps for setting up your drill press:

    • Check the belt tension to ensure it’s properly tightened.
    • Set the drill depth by adjusting the depth stop or setting the quill travel.
    • Adjust the table height to the appropriate level for the workpiece.

    Using the Drill Press

    Using a drill press is relatively straightforward. To use the drill press:

    • Securely clamp the workpiece to the table.
    • Adjust the spindle speed to match the material being drilled.
    • Lower the spindle onto the workpiece and start drilling.
    • For angled holes, adjust the table tilt accordingly.
    • Use the appropriate drill bit to adjust the depth stop or quill travel for countersinking or counterboring.

    Maintaining Your Drill Press

    Proper maintenance is essential for keeping your drill press in good working condition. Here are some tips for maintaining your drill press:

    • Clean the drill press regularly to remove dust and debris.
    • Lubricate the moving parts with oil or grease to prevent wear and tear.
    • Check for wear and damage, such as a dull drill bit or a cracked belt, and replace them as needed.

    Following these tips, you can keep your drill press in good condition and achieve accurate and safe drilling results.

    Troubleshooting Your Drill Press

    Drill presses are reliable machines, but they can occasionally encounter problems. Here are some common issues and how to troubleshoot them:

    • Drill Bit Breakage: This can happen if the drill bit is too dull or too much pressure is applied during drilling. Use a sharp drill bit to prevent breakage and apply light, steady pressure.
    • Spindle Runout: This is when the spindle wobbles or moves off-center, causing inaccurate holes. To fix this, check that the spindle is clean and properly lubricated. If the problem persists, the spindle may need to be replaced.
    • Motor Problems: If the motor won’t start or runs poorly, check the power supply and correct the belt tension. If the problem persists, the motor may need to be repaired or replaced.

    Tips for Specific Projects

    Different projects require different techniques and tools to achieve the best results. Here are some tips for specific types of projects:

    • Woodworking Projects: When drilling into wood, use a sharp twist drill bit and avoid applying too much pressure. Place a scrap piece of wood underneath before drilling to prevent a tear-out on the backside of the workpiece.
    • Metalworking Projects: Use a drill bit specifically designed for metal and apply cutting fluid to lubricate the bit and prevent overheating. Slow down the drill speed to avoid overheating and ensure accuracy.
    • DIY Projects: Always wear appropriate safety gear and follow manufacturer instructions when working on DIY projects. Use the proper drill bit for drilled material and take breaks to prevent fatigue.

    Following these tips can achieve accurate and successful results on various projects.

    Frequently Asked Questions

    1. What is the best type of drill press for my needs?

    The best kind of drill press depends on the projects you will be working on. For small to medium-sized projects, a benchtop drill press is sufficient. For heavy-duty drilling tasks, a floor-standing drill press is recommended. A magnetic drill press is ideal if you need to drill into metal surfaces.

    1. What kind of bits should I use in my drill press?

    The type of drill bit you should use depends on the material being drilled. Twist drill bits are suitable for wood, plastic, and metal. Masonry bits are designed for drilling into hard materials such as concrete, brick, and stone. Spade bits are ideal for drilling large holes in wood, and Forstner bits are used for drilling flat-bottomed holes.

    1. Can I use a drill press for tapping?

    Yes, a drill press can tap holes with the appropriate tapping attachment. The tapping attachment securely holds the tap and helps ensure accuracy and precision.

    1. What maintenance does a drill press require?

    A drill press requires regular cleaning to remove dust and debris. Lubricate the moving parts with oil or grease to prevent wear and tear. Check for wear and damage, such as a dull drill bit or a cracked belt, and replace them as needed.

    1. Can I use a drill press to drill through glass?

    No, a drill press is unsuitable for drilling through glass. Glass requires a specialized diamond-tipped drill bit and must be drilled slowly with constant water cooling to prevent cracking or shattering.

    Conclusion

    In conclusion, using a drill press correctly is essential for achieving accurate and safe drilling results. Choosing the correct type of drill press and drill bit for the job is crucial, as properly setting up the machine and using appropriate safety gear.

    Always apply light, steady pressure when using a drill press, and avoid forcing the drill bit into the material. Take breaks as needed to prevent fatigue and check for signs of wear or damage on the machine and drill bits.

    To maintain your drill press, regularly clean and lubricate the machine and replace worn or damaged parts.

    By following these tips and using a drill press safely and effectively, you can achieve accurate and successful drilling results on various projects while ensuring your safety and those around you.