Water stains on ceilings are a common problem that many homeowners face. Not only are they unsightly, but they can also be a sign of a larger issue, such as a roof leak or plumbing leak. It’s important to address water stains promptly to prevent further damage to the ceiling and potential health hazards such as mold growth. While painting over the stain may seem like a quick fix, it’s not always the best solution, as it will likely reappear. This article will discuss How To Remove Water Stains From Ceiling Without Painting the causes and types of water stains, how to identify them, and five effective methods for removing them. We will also cover how to clean and restore the ceiling, alternative solutions, tips for prevention, common mistakes to avoid, and answer some frequently asked questions.

1. Understanding Water Stains on Ceiling
Water stains on the ceiling can be a sign of a larger issue and can lead to more serious problems if left untreated. If you notice water stains on your ceiling, it is essential to understand the causes, and types, and how to identify types of water stains.
2. Causes of water stains
Water stains on the ceiling can be caused by various factors, including:
I. Leaking roof
A leaking roof can cause water to seep into your home, leading to water stains on the ceiling. If left untreated, a leaking roof can also cause damage to the walls and floors.
II. Plumbing issues
Plumbing problems, such as leaking pipes or a malfunctioning water heater, can cause water to seep through the ceiling, leading to water stains.
III. Condensation
Condensation can occur when warm and moist air comes into contact with a cool surface, such as the ceiling. This can cause water droplets to form and eventually lead to water stains.
IV. Poor ventilation
Poor ventilation can cause moisture to build up in the home, leading to water stains on the ceiling. This is particularly common in bathrooms and kitchens, where steam and humidity accumulate.
3. Types of water stains
Water stains on the ceiling can appear in various colors and textures, indicating the type of damage that has occurred.
Yellow stains
Yellow stains on the ceiling are typically caused by water sitting for an extended period. This can be caused by a leaking roof or a plumbing issue that has been left untreated.
Brown stains
Brown stains on the ceiling are typically caused by water sitting for a shorter period. A recent leak or condensation can cause this.
Black stains
Black stains on the ceiling are typically caused by mold or mildew growth. This serious issue should be addressed immediately as it can cause health problems and further damage to your home.
How to identify the type of water stain
Identifying the type of water stain on your ceiling is essential in determining the cause and how to fix the issue.
I. Location
The location of the water stain can indicate the source of the problem. For example, if the water stain is near a vent, it could be caused by poor ventilation. If it is near a plumbing fixture, it could be caused by a plumbing issue.
II. Texture
The texture of the water stain can also indicate the type of damage that has occurred. If the stain is soft to the touch, it is likely caused by water sitting for an extended period. It is likely caused by a recent leak if it is hard and crusty.
III. Color
The color of the water stain can also indicate the type of damage that has occurred. Yellow stains indicate the water has been sitting long, while brown stains indicate a recent leak. Black stains indicate mold or mildew growth.
IV . Smell
The smell of the water stain can also indicate the type of damage that has occurred. A musty or earthy smell indicates mold or mildew growth, while a sewage-like smell can indicate a plumbing issue.
3. How to prevent water stains on the ceiling
Preventing water stains on the ceiling requires regular maintenance and vigilance. Here are some tips to prevent water stains:
- Regularly inspect your roof for any signs of damage or leaks
- Fix any plumbing issues as soon as possible
- Ensure proper ventilation in your home, particularly in high-moisture areas like the bathroom and kitchen
- Install a dehumidifier in areas with high humidity
- Regularly clean gutters and downspouts to prevent water from accumulating on the roof
I. Preparation
Preparation is key when it comes to removing water stains from your ceiling. Here are some tools and materials you will need for the task:
II. Tools
- Ladder: A stable ladder that can safely reach the ceiling is necessary to inspect and remove the water stain.
- Protective gear: Wear gloves, goggles, and a mask to protect yourself from any potential hazards during removal.
- Scraper: A scraper or putty knife can help remove loose debris or paint from the ceiling.
- Sandpaper: Sandpaper can smooth any rough or uneven spots on the ceiling.
- Paintbrush: A paintbrush is necessary to repaint the ceiling after removing the water stain.
- Bucket: A bucket is useful for collecting debris or water during removal.
III. Materials
- Bleach: A mixture of bleach and water can clean the affected area and kill mold or mildew.
- Paint: If you plan to repaint the ceiling, choose a moisture-resistant paint that matches the color of the existing paint.
- Sealant: If a leak causes a water stain, a sealant can seal the area and prevent further damage.
IV. Safety Precautions
- Turn off the electricity: If the water stain is located near any electrical fixtures, make sure to turn off the electricity before beginning the removal process.
- Use a stable ladder: Use a sturdy ladder that can safely reach the ceiling. Make sure to have someone hold the ladder’s base for extra stability.
- Wear protective gear: Wear gloves, goggles, and a mask to protect yourself from any potential hazards during removal.
- Avoid direct contact with the water stain: Water stains can contain harmful bacteria or fungi, so avoid direct contact with the affected area.
You can safely and effectively remove water stains from your ceiling by taking the proper safety precautions and having the necessary tools and materials.
4. Don’t Let Water Stains Ruin Your Home’s Aesthetic: Here’s What to Do
Removing water stains from your ceiling can be daunting, but it can be done with the right tools and methods. One effective method is using bleach. Here are step-by-step instructions on how to use bleach to remove water stains from your ceiling:
1. Using Bleach
Step I: Prepare the area
Before you start, cover the floor and any furniture below the area you will be working on with a tarp or drop cloth. This will protect them from any debris or bleach that may fall.
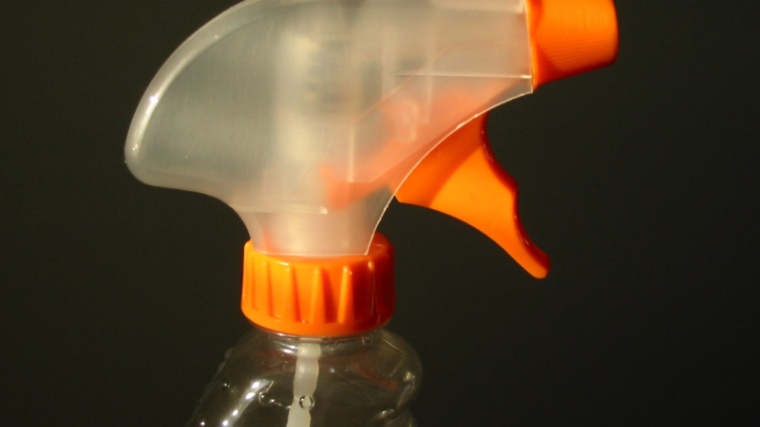
Step II: Mix the solution
Mix a solution of bleach and water in a spray bottle or bucket. The ideal ratio is 1 part bleach to 3 parts water.
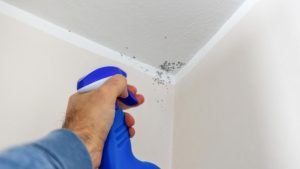
Step III: Apply the solution
Spray or apply the solution to the water stain and the surrounding area. Use a sponge or cloth to spread the solution evenly and let it sit for 15-20 minutes.
Step IV: Rinse the area
After the solution has sat, use a clean sponge or cloth to rinse the area with clean water. Be sure to remove all traces of the bleach solution.
Step V: Let it dry
Allow the area to air dry completely before inspecting the stain. You may need to repeat the process if the stain is still visible.
Step VI: Safety Precautions
- Wear protective gear such as gloves, goggles, and a mask to avoid contact with the bleach solution.
- Make sure the area is well-ventilated to avoid inhaling any fumes.
- Keep the bleach solution away from any electrical fixtures or appliances.
- Do not mix bleach with other cleaning agents; it can create toxic fumes.
By following these step-by-step instructions and taking the necessary safety precautions, you can effectively remove water stains from your ceiling using bleach.
2. Using Vinegar
You can use vinegar if you prefer a more natural and non-toxic solution for removing water stains from your ceiling. Here are step-by-step instructions on how to use vinegar to remove water stains from your ceiling:
Step I: Prepare the area
Like with the bleach method, you need to protect the floor and any furniture below the area you will be working on with a tarp or drop cloth.
Step II: Mix the solution
Mix a solution of white vinegar and water in a spray bottle or bucket. The ideal ratio is 1 part vinegar to 1 part water.
Step III: Apply the solution
Spray or apply the solution to the water stain and the surrounding area. Use a sponge or cloth to spread the solution evenly and let it sit for 15-20 minutes.
Step IV: Rinse the area
After the solution has sat, use a clean sponge or cloth to rinse the area with clean water. Be sure to remove all traces of the vinegar solution.
Step V: Let it dry
Allow the area to air dry completely before inspecting the stain. You may need to repeat the process if the stain is still visible.
Step VI: Safety Precautions
- Wear protective gear such as gloves and goggles to avoid contact with the vinegar solution.
- Make sure the area is well-ventilated to avoid inhaling any fumes.
- Test the solution on a small inconspicuous area first to ensure it does not damage the ceiling material.
- Do not use vinegar on marble, granite, or other natural stone surfaces.
By following these step-by-step instructions and taking the necessary safety precautions, you can effectively remove water stains from your ceiling using vinegar.
3. Using Baking Soda
Another effective and natural way to remove water stains from your ceiling is using baking soda. Here are step-by-step instructions on how to use baking soda to remove water stains:
Step I: Prepare the area
As with the previous methods, you must protect the floor and any furniture below the area you will work on with a tarp or drop cloth.
Step II: Mix the solution
Mix a solution of baking soda and water to form a paste. The ideal ratio is 3 parts baking soda to 1 part water.
Step III: Apply the paste
Using a putty knife or a spoon, apply the paste to the water stain and spread it evenly. Let it sit for 10-15 minutes.
Step IV: Wipe the area
After the paste has had time to sit, use a damp sponge or cloth to clean the area. Be sure to remove all traces of the baking soda paste.
Step 5: Let it dry
Allow the area to air dry completely before inspecting the stain. You may need to repeat the process if the stain is still visible.
Step VI: Safety Precautions
- Wear protective gear such as gloves and goggles to avoid contact with the baking soda paste.
- Make sure the area is well-ventilated to avoid inhaling any dust or fumes.
- Test the paste on a small inconspicuous area first to ensure it does not damage the ceiling material.
- Do not use baking soda on delicate or polished surfaces like marble or chrome.
By following these step-by-step instructions and taking the necessary safety precautions, you can effectively remove water stains from your ceiling using baking soda.
4. Using Hydrogen Peroxide
Hydrogen peroxide is a powerful oxidizing agent that can remove water stains from your ceiling. Here are step-by-step instructions on how to use hydrogen peroxide to remove water stains:
Step I: Prepare the area
As with the previous methods, you must protect the floor and any furniture below the area you will work on with a tarp or drop cloth.
Step II: Mix the solution
Mix a solution of equal parts hydrogen peroxide and water in a spray bottle.
Step III: Apply the solution
Spray the solution directly onto the water stain and let it sit for 10-15 minutes.
Step IV: Wipe the area
After the solution has had time to sit, use a damp sponge or cloth to clean the area. Be sure to remove all traces of the solution.
Step V: Let it dry
Allow the area to air dry completely before inspecting the stain. You may need to repeat the process if the stain is still visible.
Step VI: Safety Precautions
- Wear protective gear such as gloves and goggles to avoid contact with the hydrogen peroxide solution.
- Make sure the area is well-ventilated to avoid inhaling any fumes.
- Test the solution on a small inconspicuous area first to ensure it does not damage the ceiling material.
- Do not use hydrogen peroxide on delicate or colored surfaces, as it can cause discoloration.
Following these step-by-step instructions and taking the necessary safety precautions, you can effectively remove water stains from your ceiling using hydrogen peroxide.
5. Using Stain-blocking Primer
If the water stains on your ceiling are particularly stubborn or have been there long, consider using a stain-blocking primer to cover them up. Here are step-by-step instructions on how to use stain-blocking primer:
Step I: Prepare the area
As always, you must protect the floor and any furniture below the area you work on with a tarp or drop cloth.
Step II: Clean the area
Before applying the primer, clean the area with warm water and mild detergent. Rinse the area with clean water and allow it to dry completely.
Step III: Apply the primer
Applying the stain-blocking primer to the water-stained area using a paintbrush or roller. Follow the manufacturer’s instructions for the best results.
Step IV: Allow to dry
Allow the primer to dry completely according to the manufacturer’s instructions. This usually takes 24 hours.
Step V: Apply paint
After the primer has dried, you can apply a coat of paint to match the ceiling or to give the area a new look.
Step VI: Safety Precautions
- Wear protective gear such as gloves and goggles when handling the primer and paint.
- Make sure the area is well-ventilated to avoid inhaling any fumes.
- Follow the manufacturer’s instructions for proper application and safety precautions.
- Do not use the primer or paint near an open flame or source of heat.
Following these step-by-step instructions and taking the necessary safety precautions, you can effectively cover up water stains on your ceiling with stain-blocking primer.
5. Cleaning and Restoring the Ceiling
Now that you have removed the water stains from your ceiling, it’s time to clean and restore it to its former glory. Here are some tips on cleaning and restoring your ceiling after stain removal, repairing any water damage, and maintaining a stain-free ceiling.
6. Cleaning the Ceiling after Stain Removal
Once you have successfully removed the water stains from your ceiling, you need to thoroughly clean it to get rid of any remaining dirt or debris. Here’s how to clean your ceiling after stain removal:
- Mix a solution of warm water and mild detergent.
- Dip a clean sponge or cloth into the solution and wring out the excess water.
- Gently scrub the ceiling in a circular motion, not damaging the surface.
- Rinse the area with clean water and allow it to dry completely.
7. Repairing Water Damage on the Ceiling
Suppose the water stains on your ceiling have caused damage, such as peeling or sagging. In that case, you must repair the damage before restoring the ceiling. Here’s how to repair water damage on your ceiling:
- Cut away any damaged or sagging drywall using a utility knife.
- Replace the damaged drywall with a new piece and secure it with screws.
- Apply joint compound to the seams and let it dry.
- Sand the area smoothly and apply a second coat of joint compound if needed.
- Once the joint compound is dry, sand it smooth and prime the area before painting.
8. Tips for Maintaining a Stain-free Ceiling
To prevent water stains from reappearing on your ceiling, here are some tips for maintaining a stain-free ceiling:
- Fix any leaks immediately to prevent water from entering your home.
- Keep your home well-ventilated to prevent moisture buildup.
- Insulate your attic to prevent heat loss, which can lead to condensation and water stains.
- Regularly inspect your roof for any signs of damage or wear and tear.
- Clean your gutters and downspouts regularly to prevent clogs and water damage.
Following these tips for cleaning, repairing, and maintaining a stain-free ceiling can keep your home looking beautiful and protect it from water damage.
9. Alternative Solutions to Removing Water Stains from Ceilings
While the methods mentioned earlier are effective ways to remove water stains from your ceiling, there are alternative solutions that you should consider if the stains are particularly stubborn or if you’re looking for a quick fix. Here are two alternative solutions for hiding or covering up water stains on your ceiling:
I. Hiding the Stain with a False Ceiling
A false ceiling, also known as a drop ceiling, is a secondary ceiling installed below your existing ceiling. It’s typically made up of a grid of metal tracks and tiles or panels that can be easily removed for access to pipes and wiring. If you cannot remove the water stain from your ceiling or if the damage is extensive, a false ceiling can be a great solution.
To install a false ceiling, you’ll need to:
- Measure the dimensions of your room and purchase the necessary materials, including the metal tracks, tiles or panels, and any necessary tools.
- Install the metal tracks in a grid pattern, leaving a small gap between the tracks and the existing ceiling.
- Insert the tiles or panels into the grid, ensuring they fit securely.
A false ceiling can give your room a modern and updated look while hiding any water stains or damage on your existing ceiling.
II. Covering the Stain with a Decorative Element
Another option for hiding water stains on your ceiling is to cover them with a decorative element, such as a ceiling medallion, wallpaper, or paint. This solution is best if the water stains are small and isolated and if you want a more cost-effective and decorative solution.
To cover up the stain with a decorative element, you’ll need to:
- Choose the decorative element you want to use and purchase the necessary materials.
- Clean the area around the stain to remove any dirt or debris.
- Apply the decorative element to the ceiling, completely covering the stain.
Covering the stain with a decorative element allows you to add a unique and stylish touch to your room while hiding any unsightly water stains on your ceiling.
While these alternative solutions won’t remove the water stains from your ceiling, they can effectively hide them and give your room a fresh and updated look.
10. Preventing Water Stains from Ceiling
Water stains on your ceiling can be unsightly and frustrating, but the good news is that they can often be prevented with a little effort. Here are some tips to help prevent water stains on your ceiling:
- Identify and fix the source of the water leak: One of the most important steps in preventing water stains on your ceiling is to identify and fix the source of the water leak. This could be a leaking roof, a broken pipe, or condensation from your air conditioning unit. Whatever the cause, it’s important to address the problem immediately to prevent further damage.
- Regularly inspect your roof and gutters: Your roof and gutters play a vital role in keeping water away from your home. Regularly inspecting them for damage and cleaning out debris can help ensure they function properly and prevent water from seeping into your home.
- Seal any gaps or cracks: Small gaps or cracks in your roof or walls can allow water to seep into your home and cause damage over time. Sealing these gaps and cracks can help prevent water from getting in and causing stains on your ceiling.
- Use waterproof paint or sealant: If you live in an area prone to heavy rainfall or humidity, using waterproof paint or sealant on your ceiling can help prevent water from seeping in and causing stains.
- Properly ventilate your home: Proper ventilation can help reduce moisture levels in your home, which can help prevent water stains from forming on your ceiling. Ensure your bathroom and kitchen are properly ventilated, and consider installing a dehumidifier if necessary.
Following these tips can help prevent water stains on your ceiling and keep your home looking its best. Remember, prevention is always better than cure!
11. Common Mistakes to Avoid when Removing Water Stains
When it comes to removing water stains from your ceiling, there are certain mistakes that you should avoid to ensure successful stain removal without causing any damage to your ceiling. Here are some of the common mistakes that you should be aware of and avoid:
- Using the wrong cleaning solution: Using the wrong cleaning solution can cause damage to your ceiling and make the stain worse. For instance, using a harsh chemical cleaner on a light ceiling can cause discoloration, cracking, and peeling. Always read the label on the cleaning solution to ensure it’s safe for your ceiling material.
- Need to allow more time for the solution to work: Different cleaning solutions have different dwell times, which is how long the solution needs to work effectively. Giving the solution enough time to work can result in a suboptimal cleaning result.
- Not testing the solution on a small area first: Testing the solution on a small, inconspicuous area is crucial before applying it to the entire ceiling. This ensures the solution doesn’t cause discoloration or damage to the ceiling. Don’t proceed with the cleaning solution if you notice any adverse effects on the test area.
By avoiding these common mistakes, you can ensure a successful water stain removal process and avoid causing any damage to your ceiling.
12. Frequently Asked Questions (FAQs)
I. How long does it take to remove water stains from the ceiling?
The time it takes to remove water stains from the ceiling depends on the severity of the stain and the method used. A cleaning solution like bleach or vinegar can take a few hours to a day or two. If the stain is more severe, it may require multiple treatments.
II. What should I do if the water stain keeps reappearing after cleaning?
If the water stain reappears after cleaning, it may indicate an ongoing leak. It is important to identify and fix the source of the leak before attempting to remove the stain again.
III. Can I paint over water stains on the ceiling?
While it is possible to paint over water stains on the ceiling, it is not recommended. The stain may bleed through the paint, resulting in an unsightly finish. It is best to remove the stain before painting.
IV. Can I remove water stains from popcorn ceilings?
Water stains can be removed from popcorn ceilings using the same methods as other ceilings. However, removing the stain from the textured surface may be more difficult.
V. Is it safe to remove water stains from the ceiling myself?
Removing water stains from the ceiling can be done safely if proper precautions are taken, such as wearing protective gear and ensuring proper ventilation. However, suppose the stain is severe, or there is a risk of structural damage. In that case, it is best to consult a professional.
13. Conclusion
In conclusion, water stains on the ceiling are a common problem caused by various factors, including roof leaks, plumbing problems, and condensation. Understanding the cause of the stain is essential in choosing the best removal method. The five methods outlined in this article, including using bleach, vinegar, baking soda, hydrogen peroxide, and stain-blocking primer, provide effective ways to remove water stains from the ceiling.
It is important to take safety precautions when removing water stains, such as wearing protective clothing and goggles and ensuring proper ventilation. It is also essential to avoid common mistakes, such as using the wrong cleaning solution or not testing it on a small area first.
In some cases, alternative solutions like hiding the stain with a false ceiling or covering it with a decorative element may be necessary. Preventing water stains from forming in the first place is crucial. It can be achieved by identifying and fixing the source of the water leak and taking steps to prevent future stains.
Removing water stains from the ceiling requires patience, caution, and the right tools and materials. With the information provided in this article, you can restore your ceiling to its original state and maintain a stain-free home.
We hope this article has been informative and helpful in understanding water stains on the ceiling. If you have any further questions or concerns, please do not hesitate to contact a professional for assistance.