Category: How-To Mastery

Unlock the art of power tool usage and beyond. From mastering the intricacies of various power tools to exploring advanced techniques, our comprehensive guides empower you to become a true master. Whether you’re a beginner or looking to refine your skills, embark on a journey of mastery with How-To Mastery and unleash your potential in the world of power tools and beyond.

  • How to Remove Tree Stumps: DIY Methods That Work

    How to Remove Tree Stumps: DIY Methods That Work

    Tree stumps can be an unsightly and inconvenient addition to any yard or garden. They can get through mowing, landscaping, and other outdoor activities. They can also attract insects and fungi that can harm other plants. If you have a tree stump that you want to remove, there are several methods you can use to get the job done. This article will explore how to remove tree stumps and help you decide which is right.

    Why Remove Tree Stumps?

    Remove a tree stump from your yard or garden for several reasons. One of the most common is that they can be an eyesore and get in the way of other outdoor activities. They can also attract insects and fungi that harm other plants in your garden. Additionally, tree stumps can make it difficult to mow your lawn or do other landscaping tasks.

    Bye-Bye Stumps: How to Easily Remove Tree Stumps

    You can use several methods to remove a tree stump, depending on your level of expertise, the tools you have available, and your budget.

    1: Digging Out the Stump

    One of the most traditional methods for removing a tree stump is to dig it out by hand. This method requires some physical effort and patience but is effective for small stumps.

    Materials Needed

    • Shovel
    • Pickaxe
    • Chainsaw
    • Safety gear (gloves, eye protection, Etc.)

    Step-by-Step Process

    • Use a chainsaw to cut the stump as close to the ground as possible.
    • Dig around the stump with a shovel to expose the roots.
    • Use a pickaxe to chop away the roots, working your way around the stump.
    • Continue digging and chopping until the stump is loose enough to be pulled from the ground.

    2: Grinding the Stump

    Grinding the stump is more efficient than digging it out by hand. It requires specialized equipment and some expertise but is effective for larger stumps.

    Materials Needed

    • Stump grinder
    • Safety gear (gloves, eye protection, Etc.)

    Step-by-Step Process

    • Use a chainsaw to cut the stump as close to the ground as possible.
    • Rent a stump grinder or hire a professional to do the job for you.
    • Use the stump grinder to grind the stump into small pieces.
    • Remove the debris and fill the hole with soil.

    3: Burning the Stump

    Burning the stump is another traditional method for removing a tree stump. It requires some preparation and can be dangerous, so experienced individuals should only attempt it.

    Materials Needed

    • Kerosene or fuel oil
    • Safety gear (gloves and eye protection)
    • Ignition source (matches, lighter, Etc.)

    Step-by-Step Process

    • Drill several holes into the top of the stump and fill them with kerosene or fuel oil.
    • Wait for the kerosene or fuel oil to soak into the stump.
    • Light the stump on fire with an ignition source.
    • Monitor the fire and keep a fire extinguisher nearby in case of emergency.
    • Once the stump has burned, remove the debris and fill the hole with soil.

    4: Using Chemicals

    Using chemicals is more modern and convenient for removing a tree stump. It requires some preparation and can harm other plants in your garden, so it should be used cautiously.

    Materials Needed

    • Stump remover chemicals
    • Safety gear (gloves, eye protection, Etc.)
    • Drill

    Step-by-Step Process

    • Use a chainsaw to cut the stump as close to the ground as possible.
    • Drill several holes into the top of the stump.
    • Follow the instructions on the stump remover chemical packaging and apply the chemical to the stump.
    • Wait for the chemical to break down the stump.
    • Remove the debris and fill the hole with soil.

    Factors to Consider Before Removing a Tree Stump

    Before you decide which method to use for removing a tree stump, there are several factors you should take into account.

    Size of the Stump

    The stump’s size will determine which method is best suited for removing it. Small stumps can be dug out by hand, while larger stumps require a stump grinder or chemical treatment.

    Age of the Stump

    The age of the stump can also affect the method you use for removal. Older stumps may be more difficult to remove because they have deeper roots and are more firmly established in the ground.

    Type of Tree

    The type of tree can also affect the difficulty of stump removal. Trees with softer wood, such as pine or cedar, are generally easier to remove than hardwood trees like oak or maple.

    Location of the Stump

    The location of the stump can also affect which method you use. Stumps near buildings, power lines, or other structures may require specialized equipment or professional assistance.

    FAQs

    • How long does it take to remove a tree stump?

    The time it takes to remove a tree stump depends on the size of the stump and the method you use. Digging it out by hand can take several hours while grinding or burning it can take less time.

    • Is it necessary to remove a tree stump?

    While removing a tree stump is not always necessary, it can be beneficial for aesthetic and practical reasons. Stumps can be an eyesore and get in the way of other outdoor activities. They can also attract insects and fungi.

    • Is stump removal expensive?

    The cost of stump removal depends on the method you use and the size of the stump. Digging it out by hand is the least expensive method while hiring a professional to grind or remove the stump can be more costly.

    • Are chemicals safe for removing tree stumps?

    Chemicals can be safe for removing tree stumps if used according to the instructions on the packaging. It’s important to wear safety gear and take precautions to prevent harm to other plants in your garden.

    • After removing a stump, can I plant a new tree in the same spot?

    After removing a stump, you can plant a new tree in the same spot. However, you should remove as much of the old stump as possible and add fresh soil to the hole to promote the healthy growth of the new tree.

    Conclusion

    Removing a tree stump can be a challenging task, but there are several methods you can use to get the job done. Whether you dig it out by hand, grind it down, burn it, or use chemicals, it’s important to take safety precautions and consider the size, age, type, and location of the stump before you begin.

    You may also like these posts!

  • How to Use a Bottle Cutter Kit: From Trash to Art

    How to Use a Bottle Cutter Kit: From Trash to Art

    If you want to upcycle empty glass bottles, a bottle cutter kit is a must-have tool. It allows you to cut glass bottles into different shapes and sizes and turn them into beautiful and functional pieces such as vases, candle holders, and drinking glasses. However, using a bottle-cutter kit can be intimidating for beginners. This article will guide you through the steps on how to use a bottle cutter kit effectively.

    Understanding the Parts of a Bottle Cutter Kit

    Before you start cutting your glass bottle, it’s essential to understand the different parts of a bottle cutter kit. Here are the main components:

    • Cutter head: This part of the kit will score the glass bottle. It’s usually made of tungsten carbide and can be adjusted to different angles.
    • Cutting wheel: This is part of the cutter head that will come into contact with the glass bottle. It’s usually made of diamond or tungsten carbide.
    • Base: This is where the bottle sits during the cutting process. It’s usually made of plastic or metal and has adjustable rollers to help stabilize the bottle.
    • Ruler: This is used to measure the height of the bottle and ensure that the score line is straight and even.
    • Sandpaper: This is used to smooth the edges of the cut bottle.

    Preparing the Bottle

    The first step in using a bottle cutter kit is to prepare the bottle. Here’s what you need to do:

    • Clean the bottle thoroughly and remove any labels or stickers.
    • Measure the height of the bottle using the ruler and mark it with a piece of tape.
    • Adjust the rollers on the base of the bottle cutter to fit the diameter of the bottle.
    • Place the bottle on the ground of the bottle cutter, ensuring it’s level and stable.

    Scoring the Bottle

    Once the bottle is in place, it’s time to score it. Here’s how:

    • Adjust the cutter head to the desired angle, depending on the shape you want to cut.
    • Place the cutting wheel at the mark you made on the bottle.
    • Apply pressure to the cutting wheel and rotate the bottle one complete turn.
    • Repeat this process, applying more pressure each time until you have scored the bottle ultimately.

    Separating the Bottle

    After you have scored the bottle, it’s time to separate it. Here’s how:

    1. Hold the bottle with both hands, with your thumbs on the score line and your fingers underneath.
    2. Slowly and gently apply pressure to both sides of the score line until the bottle separates into two pieces.
    3. If the bottle doesn’t dissolve, use the back of the cutter head to tap lightly on the score line until it breaks.

    Smoothing the Edges

    Once you have separated the bottle, the edges will be rough and sharp. Here’s how to smooth them:

    • Use sandpaper to sand the edges of the cut bottle, starting with a coarse grit and working your way up to a fine grit.
    • Be sure to wear gloves to protect your hands from the sharp edges.
    • When sanding, keep the bottle wet to prevent the glass dust from getting into the air.

    Tips for Cutting Different Shapes

    If you want to cut different shapes, here are some tips:

    • To cut a straight line, use the ruler to mark a straight line around the bottle and score it.
    • To cut a curve, score a series of straight lines around the bottle, then use sandpaper to smooth the edges.
    • To cut a circle, score a complete circle around the bottle and then use the tapping method to break the bottle along the score line.
    • To cut a square or rectangle, score straight lines on all four sides of the bottle and then use the tapping method to break the bottle along the score lines.

    Safety Precautions

    Using a bottle cutter kit involves working with glass, which can be dangerous if not done correctly. Here are some safety precautions to follow:

    • Wear gloves to protect your hands from sharp edges.
    • Wear safety goggles to protect your eyes from glass shards.
    • Work on a flat surface.
    • Keep the work area clean and free of clutter.
    • Keep children and pets away from the work area.

    Frequently Asked Questions

    • What kind of bottles can be cut with a bottle cutter kit?

    Most glass bottles can be cut with a bottle cutter kit, but it’s best to start with straight-sided bottles before moving on to curved or irregularly shaped bottles.

    • Can you reuse the top part of a cut bottle?

    Yes, the top part of a cut bottle can be used as a drinking glass, vase, or candle holder.

    • Can you recycle the bottom part of a cut bottle?

    Yes, the bottom part of a cut bottle can be recycled as usual.

    • Can you cut bottles without a bottle-cutter kit?

    It’s possible to cut bottles without a bottle cutter kit using a glass cutter and some sandpaper, but it’s more complex and requires more skill.

    • Is it safe to drink from a cut bottle?

    Yes, as long as the edges have been smoothed out properly.

    Conclusion

    A bottle cutter kit helps upcycle glass bottles into beautiful and functional pieces. Following the steps outlined in this article and taking the necessary safety precautions, you can successfully use a bottle cutter kit to cut glass bottles of different shapes and sizes. So, get your bottle cutter kit and start creating!

    You may also like these posts!

  • How to Make Wood Marker Last Longer: Tips and Tricks

    How to Make Wood Marker Last Longer: Tips and Tricks

    Wood markers are a great way to add color and personality to your wooden furniture, floors, and objects. However, the color tends to fade over time due to exposure to sunlight, moisture, and other environmental factors. This can be frustrating, especially if you have invested much time and effort in coloring your wooden items. Fortunately, there are several tips and tricks that you can use to make your wood marker last longer. In this article, we will discuss some of the best ways to keep the color of your wood marker vibrant for longer.

    Understanding Wood Markers

    Wood markers are specially designed markers that are used to color wooden surfaces. They come in a variety of colors and are very easy to use. Most wood markers are oil-based, meaning they are designed to penetrate the wood fibers and provide long-lasting color. Some markers are also water-based, which means that they are easier to clean up and have a lower odor than oil-based markers. However, water-based markers tend to be less durable than oil-based markers.

    Factors that Affect the Longevity of Wood Markers

    Several factors can affect the longevity of wood markers. These include:

    • Type of marker: Oil-based markers tend to last longer than water-based markers.
    • Quality of marker: High-quality markers tend to last longer than low-quality markers.
    • Surface preparation: Properly preparing the surface before applying the marker can help the color last longer.
    • Evenness of application: Evenly applying the marker can help prevent fading and ensure the color lasts longer.
    • Sealing the surface: Sealing the surface after applying the marker can help protect the color from fading due to exposure to sunlight, moisture, and other environmental factors.
    • Storage: Properly storing the marker can help prevent it from drying out and becoming unusable.
    • Exposure to sunlight and moisture: Exposure to sunlight and moisture can cause the color to fade over time.

    How to Make Wood Marker Last Longer: Wood Marker Magic

    Here are some tips and tricks that you can use to make your wood marker last longer:

    Choose High-Quality Markers

    When it comes to wood markers, you get what you pay for. High-quality markers tend to be more durable and long-lasting than low-quality markers. They may be more expensive, but they are worth the investment if you want your wooden items to look good for longer.

    Prepare the Surface Properly

    Before applying the marker, it is important to prepare the surface properly. This involves sanding the surface to remove any rough spots and ensuring it is clean and dry. This will ensure that the marker adheres properly to the surface and that the color lasts longer.

    Apply the Marker Evenly

    When applying the marker, it is important to do so evenly. This will ensure that the color is consistent and that it lasts longer. It is also important to use a light touch and avoid applying too much pressure, which can cause the marker to bleed and create a blotchy appearance.

    Seal the Surface

    After applying the marker, it is important to seal the surface to protect the color from fading due to exposure to sunlight, moisture, and other environmental factors. There are several types of sealants that you can use, including polyurethane, varnish, and lacquer. Make sure to choose a sealant appropriate for the type of wood and marker you are using.

    Store the Marker Properly

    Properly storing the marker can help prevent it from drying out and becoming unusable. Store the marker in a cool, dry place and keep it capped when not in use.

    Avoid Exposure to Sunlight and Moisture

    Exposure to sunlight and moisture can cause the color to fade over time. To prevent this, avoid placing your wooden items in direct sunlight or areas prone to moisture, such as near windows or damp basements.

    Touch Up the Surface Regularly

    Even with proper care, the color of your wood marker may still fade over time. To keep your wooden items looking their best, touching the surface regularly is important. This involves applying a fresh marker coat and sealant to keep the color vibrant.

    FAQs

    • After applying a wood marker, can I use any sealant on my wooden items?

    No, you should choose a sealant appropriate for the type of wood and marker you are using.

    • Can I use water-based markers instead of oil-based markers?

    Yes, you can use water-based markers, but they tend to be less durable than oil-based markers.

    • Can I apply a wood marker to a surface that has already been sealed?

    It is best to apply the marker to an unsealed surface, as this will allow the color to penetrate the wood fibers and provide long-lasting color.

    • How often should I touch up the surface of my wooden items?

    This will depend on how much the item is used and how much it is exposed to sunlight and moisture. As a general rule, you should touch up the surface every 1-2 years.

    • Can I use a wood marker on painted wood?

    No, wood markers are designed to be used on bare wood surfaces.

    Conclusion

    In conclusion, wood markers are a great way to add color and personality to your wooden items. However, the color tends to fade over time due to exposure to sunlight, moisture, and other environmental factors. By choosing high-quality markers, preparing the surface properly, applying the marker evenly, sealing the surface, storing the marker properly, avoiding exposure to sunlight and moisture, and touching up the surface regularly, you can make your wood marker last longer and keep your wooden items looking their best for years to come.

    You may also like these posts!


  • How to Choose Drill Bits for Hard Metal: A Beginner’s Guide

    How to Choose Drill Bits for Hard Metal: A Beginner’s Guide

    If you need to drill through hard metals like stainless steel, titanium, or hardened steel, you need the right drill bit to do the job. Choosing the right drill bit can be challenging, especially if you must become more familiar with the various drill bits available. This article will guide you through how to choose drill bits for hard metal.

    Understanding the Types of Drill Bits

    Before choosing the right drill bit for hard metals, you need to understand the different types of drill bits available. Several types of drill bits include twist drills, step drills, and hole saws. Each type of drill bit is designed for a specific purpose, and choosing the right one for your project is crucial.

    Twist Drills

    Twist drills are the most common type of drill bit and are suitable for drilling through most materials, including hard metals. Twist drills come in various sizes and shapes, and they have two flutes that help remove chips and debris from the hole as you drill. They are typically made of high-speed steel (HSS) or cobalt, which makes them durable and long-lasting.

    Step Drills

    Step drills are designed for drilling through thin materials, including hard metals. They are ideal for creating holes of different sizes without requiring multiple drill bits. Step drills have a conical shape and multiple steps that increase in size as you drill. They are typically made of HSS or cobalt and are durable and long-lasting.

    Hole Saws

    Hole saws are used for drilling large holes in hard metals. They have a cylindrical shape with teeth on the edge that cut into the metal as you drill. Hole saws are available in various sizes and are typically made of HSS or carbide. They are ideal for creating large holes for plumbing or electrical work.

    Get the Job Done Right: How to Choose Drill Bits for Hard Metals

    Several factors must be considered when choosing a drill bit for hard metals. Here are some of the critical factors to keep in mind:

    Material

    The type of material the drill bit is made of is crucial when drilling through hard metals. HSS and cobalt drill bits are suitable for drilling through hard metals, while carbide drill bits are ideal for drilling through harder metals like titanium.

    Size

    The size of the drill bit is also essential. A larger drill bit will create a larger hole, while a smaller drill bit will create a smaller hole. Choose a drill bit that is the right size for your project.

    Coating

    Many drill bits have a coating that helps reduce friction and heat when drilling through hard metals. The coating can also extend the life of the drill bit. Look for drill bits with a titanium or black oxide coating for the best results.

    Tips for Drilling Through Hard Metals

    Drilling through hard metals can be challenging, but it can be done with the right drill bit and technique. Here are some tips for drilling through hard metals:

    Use a pilot hole

    Before drilling, use a smaller drill bit to create a pilot hole. This will help guide the larger drill bit and prevent it from slipping or wandering.

    Use lubricant

    A lubricant like cutting oil can help reduce friction and heat when drilling through hard metals. Apply the lubricant to the drill bit before you start drilling.

    Use the right speed

    Drilling through hard metals requires a slower drilling speed than softer materials. Use a lower drilling speed to avoid damaging the drill bit or the metal.

    FAQs

    • Can I use a regular drill bit to drill through hard metals?

    No, regular drill bits are not designed for drilling through hard metals and will likely break or wear out quickly.

    • What is the difference between HSS and cobalt drill bits?

    HSS drill bits are made of high-speed steel and suitable for drilling through most hard metals. Cobalt drill bits are made of a blend of cobalt and HSS and are more durable and longer-lasting than HSS drill bits.

    • What size drill bit should I use for drilling through hard metals?

    The size of the drill bit depends on the size of the hole you need to create. Choose a drill bit that is slightly larger than the diameter of the hole you need to drill.

    • What lubricant should I use when drilling through hard metals?

    Cutting oil is the best lubricant to use when drilling through hard metals. Apply the oil to the drill bit before you start drilling.

    • Can I use a hammer drill to drill through hard metals?

    Yes, you can use a hammer drill to drill through hard metals, but make sure you use the right type of drill bit and drilling speed. Hammer drills are designed for drilling into hard materials, and they use a pounding motion to help break up the material as you drill.

    Conclusion

    Choosing the right drill bit for hard metals is essential for a successful project. Consider the material, size, and coating when choosing a drill bit, and use the right technique when drilling. With the right drill bit and technique, drilling with the right drill bit and technique, drilling through hard metals can be done safely and efficiently. Always use proper safety gear like goggles and gloves when working with power tools.

    You may also like these posts!

  • How to Improve Low Water Pressure: Boost Your Water Flow

    How to Improve Low Water Pressure: Boost Your Water Flow

    Water pressure is essential for everyday tasks, such as showering or washing the dishes. However, low water pressure can be a frustrating issue affecting the quality of life. This article will discuss some effective methods on how to improve low water pressure in your home.

    Don’t Settle for Weak Water Flow: Tips for Improving Pressure

    Understanding Low Water Pressure

    Before we dive into the methods to improve low water pressure, it’s essential to understand what causes low water pressure. There are several reasons why your water pressure may be low, such as clogged pipes, water leaks, or faulty plumbing fixtures. Identifying the root cause of low water pressure is the first step in resolving the issue.

    Check for Leaks

    One of the most common causes of low water pressure is a leak in the plumbing system. Leaks can occur in various areas, such as the toilet, faucets, or pipes. Turn off all water appliances and observe the water meter to check for leaks. If the meter continues to move, even when all water appliances are turned off, it’s a sign of a leak. Contacting a professional plumber to locate and repair the leak is best.

    Clean the Faucet Aerators

    Another reason for low water pressure is clogged faucet aerators. Aerators are located at the faucet’s tip and help regulate water flow. Over time, they can become clogged with mineral deposits or debris, reducing water pressure. To clean the aerator, unscrew it from the faucet and soak it in vinegar and water. Scrub the aerator with a toothbrush to remove any buildup, then rinse it with water and reattach it to the faucet.

    Replace Old Pipes

    Old pipes can become corroded or clogged with mineral buildup, resulting in low water pressure. If your home has outdated plumbing, consider replacing the pipes with newer ones. This can improve water pressure and also prevent leaks and other plumbing issues. Contact a professional plumber to assess the condition of your pipes and provide recommendations for replacement.

    Increase Pipe Diameter

    Sometimes, low water pressure is caused by undersized pipes. If the pipes are too small, they can restrict the water flow, resulting in downward pressure. Increasing the diameter of the pipes can help improve water pressure. However, this is a complex task that requires professional expertise. Contacting a licensed plumber to assess your plumbing system and recommend the appropriate pipe size is essential.

    Install a Water Pressure Booster

    If none of the above methods improve water pressure, consider installing a water pressure booster. A pressure booster is a device that increases water pressure by pumping water through the pipes. It can be installed on the main water line, significantly improving water pressure throughout the house. However, this is a complex installation that requires professional expertise. It’s best to contact a licensed plumber to install the pressure booster.

    Maintain the Plumbing System

    Regular plumbing system maintenance can prevent low water pressure and other plumbing issues. It’s essential to have a professional plumber inspect the plumbing system periodically and address any issues promptly. Regular maintenance can also improve the lifespan of your plumbing system and save you money on repairs in the long run.

    FAQs

    • What causes low water pressure?

    Several factors, such as leaks, clogged pipes, faulty plumbing fixtures, and outdated systems, can cause low water pressure.

    • Can cleaning faucet aerators improve water pressure?

    Yes, cleaning faucet aerators can remove mineral buildup and debris.

    • Can replacing old pipes improve water pressure?

    Yes, replacing old pipes can improve the water pressure by removing mineral buildup and corrosion restricting water flow.

    • Can increasing pipe diameter improve water pressure?

    Increasing the diameter of pipes can help improve the water pressure by reducing water flow restrictions.

    • What is a water pressure booster?

    A water pressure booster is a device that increases water pressure by pumping water through the pipes. It can be installed on the main water line, significantly improving water pressure throughout the house.

    Conclusion

    Low water pressure can be a frustrating issue, but it’s not impossible to resolve. By understanding the root cause of low water pressure and implementing the methods mentioned above, you can significantly improve water pressure in your home. It’s essential to seek professional assistance and maintain the plumbing system regularly to prevent plumbing issues.

    You may also like these posts!

  • How to Choose Earbuds for Noise Cancellation

    How to Choose Earbuds for Noise Cancellation

    In today’s fast-paced world, escaping from the noise around us is becoming increasingly difficult. Whether it’s the sound of traffic, the hum of an air conditioner, or the chatter of people around us, unwanted noise can be a constant distraction. Luckily, noise-canceling earbuds can help you block out the world and enjoy your music or podcast peacefully. But with so many options available, choosing the fitting earbuds for your needs can take time. This article will explore the factors you should consider when selecting earbuds for noise cancellation.

    What to Consider When Choosing Earbuds

    What to Consider When Choosing Earbuds?

    Earbuds have become popular among many people due to their convenience and portability. Whether you use them to listen to music, make phone calls, or watch movies, earbuds are a must-have accessory for many. However, not all earbuds are created equal, and it’s important to consider several factors when choosing the right ones. This article will discuss the importance of sound quality, battery life, comfort, and fit when selecting earbuds.

    1: Sound Quality

    Sound quality is one of the most critical factors to consider regarding earbuds. Several factors, including frequency response range, sensitivity, and harmonic distortion, determine earbuds’ sound quality.

    Importance of sound quality in earbuds

    Sound quality plays a crucial role in the overall listening experience. Good earbuds provide clear, detailed sound with good bass, treble, and midrange. This ensures that every note and instrument is heard as intended by the artist.

    Frequency response range and sensitivity

    Frequency response range is the range of frequencies that the earbuds can produce. The wider the frequency response range, the better the sound quality. On the other hand, sensitivity refers to how loud the earbuds can get. Higher sensitivity means the earbuds can produce louder sounds without distortion.

    Impedance

    Impedance is the resistance of the earbuds to the electrical current produced by the device they are connected to. Low impedance means that the earbuds require less power to produce sound. High impedance requires more power to produce the same level of sound.

    2: Battery Life

    Battery life is another crucial factor to consider when choosing earbuds. This is particularly important for noise-canceling earbuds that require additional power to function.

    The significance of battery life in noise-canceling earbuds

    Noise-canceling earbuds are designed to reduce external noise, which requires additional power. This means they may have a shorter battery life than non-noise-canceling earbuds.

    How long should the battery last

    Battery life varies from one earbud model to another. Good earbuds should last at least 4-6 hours on a single charge. However, some models can last up to 12 hours or more.

    Battery charging time

    The charging time for earbuds varies from model to model. Some earbuds can be fully charged in as little as 15 minutes, while others may take several hours.

    Battery replacement options

    Some earbuds come with replaceable batteries, while others have built-in batteries that cannot be replaced. Earbuds with built-in batteries may have a shorter lifespan than replaceable ones.

    3: Comfort and Fit

    Comfort and fit are crucial factors to consider when choosing earbuds. Poorly fitting earbuds can cause discomfort, pain, and even ear damage.

    Why comfort and fit matter

    Comfort and fit are important for several reasons. First, poorly fitting earbuds can cause discomfort and pain, making listening to music or taking phone calls unpleasant. Second, ill-fitting earbuds may not deliver good sound quality since they may not seal the ear canal properly.

    Factors that affect comfort and fit

    Several factors affect the comfort and fit of earbuds, including the shape and size of the earbuds, the shape and size of the ear canal, and the type of ear tips used.

    Different earbud sizes and styles

    Earbuds come in different sizes and styles, including in-ear, on-ear,

    in-ear, and over-ear. In-ear earbuds are the most common and provide the best noise isolation. On-ear and over-ear earbuds, on the other hand, are larger and less portable but can provide better sound quality and a more comfortable fit.

    Ear tips and their importance

    Ear tips are the small rubber or foam attachments that fit onto the earbuds and into the ear canal. They come in different sizes and materials and are crucial in comfort and sound quality. Good ear tips should fit snugly into the ear canal and provide a good seal to block external noise.

    In summary, when choosing earbuds, it’s important to consider several factors affecting the overall listening experience. These factors include sound quality, battery life, comfort, and fit. Considering these factors, you can choose earbuds best suited to your needs and preferences.

    In conclusion, choosing the fitting earbuds for noise cancellation requires careful consideration of several factors. Ensure you understand the types of noise cancellation available and choose earbuds with active noise cancellation if you need maximum noise reduction. Pay attention to the fit, battery life, sound quality, brand reputation, price, compatibility, controls, and comfort to ensure a quality product that meets your needs.

    By keeping these factors in mind, you’ll be able to find a pair of noise-canceling earbuds that allow you to enjoy your music or podcast without distraction.

    4: Durability

    Durability is an essential factor to consider when selecting earbuds. A durable pair of earbuds can save you money in the long run and ensure you can enjoy your music for a long time without worrying about replacing them frequently.

    Importance of durability in earbuds

    Earbuds are often subjected to wear and tear due to frequent use and exposure to sweat, water, and other environmental factors. A durable pair of earbuds can withstand these conditions and last longer than a less durable pair.

    Durability factors to consider

    Several factors affect the durability of earbuds, including materials and construction, warranty, and customer support.

    Materials and construction

    The materials used in making earbuds can significantly affect their durability. Earbuds made with high-quality materials like aluminum, stainless steel, and reinforced plastic are more likely to last longer than those made with cheaper materials.

    Warranty and customer support

    The manufacturer’s warranty and customer support are also crucial factors to consider when selecting earbuds. A good warranty and reliable customer support can give you peace of mind and help you get the most out of your purchase.

    5: Price

    Price is another crucial factor to consider when selecting earbuds. While high-end earbuds may offer superior sound quality, they may only sometimes be the most practical or budget-friendly option for everyone.

    How to find the right balance between quality and price

    Finding the right balance between quality and price can be challenging. However, ensuring you get the most value for your money is essential. When selecting earbuds, it’s crucial to consider your budget and specific needs to find the best option.

    How much to expect to pay for noise-canceling earbuds

    Due to the additional technology required, noise-canceling earbuds are more expensive than non-noise-canceling earbuds. However, the price range can vary significantly, from budget-friendly options to high-end models that cost hundreds of dollars.

    Value for money considerations

    When selecting earbuds, it’s essential to consider the value for money. A higher-priced pair of earbuds may offer superior sound quality and durability. However, there may be better options for some. Evaluating your needs and priorities is important to find the earbuds that offer the most value for your money.

    Budget-friendly options

    Several budget-friendly options in the market offer good sound quality and durability without breaking the bank. These options may not have all the bells and whistles of higher-end models. However, they can provide a good listening experience at an affordable price.

    Types of Noise-Cancelling Earbuds In-Ear vs. Over-Ear, Wireless vs. Wired

    Types of Noise-Cancelling Earbuds: In-Ear vs. Over-Ear, Wireless vs. Wired

    Noise-canceling earbuds have become increasingly popular due to their ability to block out external noise, providing a more immersive listening experience. However, there are several noise-canceling earbuds to choose from, including in-ear vs. over-ear and wireless vs. wired. Here will discuss the different types of noise-canceling earbuds and the factors to consider when choosing between them.

    In-Ear vs. Over-Ear Noise-Cancelling Earbuds

    In-ear and over-ear noise-canceling earbuds are the two main types available in the market.

    Pros and cons of in-ear noise-canceling earbuds

    In-ear noise-canceling earbuds are smaller and more portable than over-ear earbuds. They also provide better noise isolation since they fit snugly into the ear canal. However, some people may find them uncomfortable for extended periods, and they may need to provide a different level of sound quality than over-ear earbuds.

    Pros and cons of over-ear noise-canceling earbuds

    Over-ear noise-canceling earbuds are larger and bulkier than in-ear earbuds. They provide better sound quality and comfort for extended periods, making them ideal for long flights or commutes. However, they may not be as portable as in-ear earbuds and may not provide the same level of noise isolation.

    Factors to consider when choosing between in-ear and over-ear earbuds

    The choice between in-ear and over-ear noise-canceling earbuds ultimately comes to personal preference. Consider factors like comfort, portability, and sound quality when choosing.

    Wireless vs. Wired Noise-Cancelling Earbuds

    Wireless and wired noise-canceling earbuds are two options to consider when selecting earbuds.

    Pros and cons of wireless noise-canceling earbuds

    Wireless noise-canceling earbuds are convenient since they don’t require a wired connection to the device. They provide more freedom of movement and eliminate the need for messy wires. However, they may provide a different level of sound quality than wired earbuds and require charging.

    Pros and cons of wired noise-canceling earbuds

    Wired noise-canceling earbuds provide better sound quality since they don’t rely on a wireless connection. They also don’t require charging, making them a reliable option. However, they can be less convenient since they require a wired connection to the device.

    Factors to consider when choosing between wireless and wired earbuds

    When choosing between wireless and wired noise-canceling earbuds, consider factors like sound quality, convenience, and battery life. Wired earbuds may be the better option if you prefer better sound quality and reliability. However, wireless earbuds may be a better choice if you value convenience and freedom of movement.

    Each of these popular noise-canceling earbuds can be suitable for various needs. Let’s look at their specific features and strengths to help you choose the right pair for your requirements.

    • Noise-canceling earbuds for traveling: The Bose QuietComfort Earbuds are a great choice for traveling due to their exceptional noise-cancellation capabilities and comfortable fit. They have customizable ear-tips and a secure fit to ensure comfort during long flights or commutes.
    • Noise-canceling earbuds for office or work from home: The Sony WF-1000XM4 earbuds offer excellent noise-cancellation and sound quality, perfect for office environments or working from home. They also feature customizable noise-cancellation settings, which can be useful for blocking out distractions or allowing some ambient sound when needed.
    • Noise-canceling earbuds for fitness and sports: The Apple AirPods Pro is suitable for fitness and sports enthusiasts, as they have an IPX4 rating for water and sweat resistance. Additionally, they feature a secure and comfortable fit, Active Noise Cancellation (ANC), and Transparency mode to stay aware of your surroundings.
    • Noise-canceling earbuds for meditation and mindfulness: The Jabra Elite 85t earbuds are a good option for meditation and mindfulness practices. They have adjustable noise-cancellation levels and a HearThrough mode that allows ambient sound to filter through when needed. Their comfortable fit and balanced sound profile makes them ideal for extended listening to guided meditations or calming music.

    Examples of Popular Noise-Cancelling Earbuds

    There are several popular noise-canceling earbuds available on the market, including:

    Bose QuietComfort Earbuds These earbuds offer excellent noise cancellation and sound quality. They also have a comfortable fit and long battery life.

    Sony WF-1000XM4 These earbuds have advanced noise-cancellation technology and impressive sound quality. They also have a sleek design and long battery life.

    Apple AirPods Pro These earbuds are known for their excellent noise cancellation and seamless integration with Apple devices. They also have a comfortable fit and a long battery life.

    Jabra Elite 85t These earbuds offer great noise cancellation and sound quality. They also have a customizable fit and long battery life.

    Overall, these noise-canceling earbuds are popular choices for their impressive features and performance. It is important to consider individual needs and preferences when choosing the right pair of earbuds.

    Conclusion

    When selecting earbuds, several factors should be considered, including sound quality, battery life, comfort, fit, durability, and price. By evaluating these factors and considering your specific needs and priorities, you can find the best earbuds that provide the most value for your money and offer a superior listening experience.

    FAQs

    • Can noise-canceling earbuds be used for phone calls?

    Yes, most noise-canceling earbuds come with a built-in microphone and can be used for phone calls.

    • Are noise-canceling earbuds good for travel?

    Noise-canceling earbuds are excellent for travel, as they can block out the sound of airplane engines, traffic, and other ambient noise.

    • Can noise-canceling earbuds cause ear damage?

    No, noise-canceling earbuds are designed to reduce external noise but won’t damage your ears. However, ensure you don’t listen to music at deafening volumes, which can cause hearing damage.

    • Do noise-canceling earbuds work for all types of noise?

    Noise-canceling earbuds are most effective at reducing low-frequency noise, such as an air conditioner’s hum or traffic sound. They may not be as effective at reducing high-frequency noise.

    You may also like these posts!

  • How to Sharpen Your Self Centering Drill Bit: DIY Sharpening

    How to Sharpen Your Self Centering Drill Bit: DIY Sharpening

    Self-centering drill bits are essential in woodworking, metalworking, and many other applications. They are designed to eliminate the need for a center punch and to provide accurate drilling with minimal effort. These bits have a unique design that centers the drill bit on the material’s surface and prevents it from wandering or slipping during drilling.

    However, like any other cutting tool, self-centering drill bits must be sharpened regularly to maintain efficiency and accuracy. Dull drill bits can cause damage to the material being drilled, lead to inaccurate cuts, and even cause injury to the user.

    This article will discuss the importance of sharpening self-centering drill bits and provide step-by-step instructions. We will also cover the tools needed for the sharpening process and provide tips for maintaining your drill bits. By the end of this article, you’ll understand how to keep your self-centering drill bits in top shape and achieve clean, accurate cuts every time.

    Understanding Self-Centering Drill Bits

    Consider self-centering drill bits if you’re looking for an efficient and easy way to drill clean and accurate holes. These bits are designed to center themselves automatically in the workpiece, ensuring precision and accuracy. In this article, we’ll examine what self-centering drill bits are, the different types available, and how they work.

    What are Self-Centering Drill Bits?

    Self-centering drill bits are a type of drill bit that has a spring-loaded guide built into the tip. This guide allows the bit to center itself automatically in the workpiece, preventing it from wandering or slipping during drilling. This makes drilling more accessible and ensures greater accuracy, making them ideal for precision drilling tasks.

    Types of Self-Centering Drill Bits

    Several types of self-centering drill bits are available, each designed for specific drilling applications. Here are some of the most common types:

    Vix Bits

    Vix bits are self-centering drill bits with a spring-loaded tip guide. They are designed to drill clean and accurate holes in wood, metal, and plastic. The tip of the Vix bit has two sharp points that are angled to create a center point, which helps to guide the bit into the workpiece.

    Hinge Bits

    Hinge bits are another type of self-centering drill bit specifically designed for drilling holes for hinges. They feature a spring-loaded guide on the tip that centers the bit precisely on the hinge location, ensuring accurate and clean drilling. Hinge bits come in different sizes, depending on the hinge size to be installed.

    Brad Point Bits

    Brad-point bits are a type of self-centering drill bit that is commonly used for woodworking applications. They feature a center point designed to create a clean and accurate hole without wandering. The outer edges of the bit are sharpened to cut clean holes and prevent splintering.

    Twist Bits

    Twist bits are a common type of drill bit that can be used for various drilling applications. Some twist bits are designed with a self-centering feature that allows them to center themselves in the workpiece. These bits are ideal for general-purpose drilling tasks and are often used with a drill press.

    How Self-Centering Drill Bits Work

    Self-centering drill bits work using a spring-loaded guide built into the bit’s tip. When the bit is pressed into the workpiece, the guide compresses and centers it, preventing it from wandering or slipping during drilling. This ensures that the hole is drilled precisely where intended, resulting in clean and accurate holes.

    Self-centering drill bits can save time and effort, especially for precision tasks such as installing hardware or making dowel joints. They are also helpful for novice woodworkers or DIY enthusiasts who may struggle to drill accurate holes using conventional drill bits.

    In conclusion, self-centering drill bits are an efficient and easy way to drill accurate holes. Different types are available, each designed for specific drilling applications, including Vix bits, hinge bits, brad point bits, and twist bits. These bits use a spring-loaded guide to center themselves in the workpiece, preventing wandering and ensuring accuracy. Self-centering drill bits may be worth considering if you’re looking for a more efficient and precise way to drill holes.

    Signs That Your Self-Centering Drill Bit Needs Sharpening

    Self-centering drill bits are an excellent tool for making accurate holes, but they can become dull and lose their cutting edge over time. Here are some signs that your self-centering drill bit may need sharpening:

    Dullness of the Drill Bit

    A dull drill bit will not cut as cleanly or efficiently as a sharp one. You may notice that the bit takes longer to drill holes or produces more heat and friction than usual.

    Difficulty in Making Clean Cuts

    If your self-centering drill bit is dull, it is difficult to make clean cuts. The bit may start to wander or slip, resulting in uneven or jagged holes.

    Increased Tear-Out and Chipping

    A dull self-centering drill bit can also cause increased tear-out and chipping around the hole’s edges. This can be especially noticeable when drilling in wood or other soft materials.

    Decreased Accuracy

    When a self-centering drill bit is dull, it can also cause a decrease in accuracy. The bit may also not center itself in the workpiece, resulting in off-center holes or holes that are different from the correct size.

    If you notice these signs, it may be time to sharpen your self-centering drill bit. You can either do this using a drill bit sharpener or take it to a professional to sharpen it. Keeping your self-centering drill bits sharp will ensure you always have the best drilling results.

    Steps to Sharpen Your Self-Centering Drill Bit

    Sharpening your self-centering drill bit is a simple process that can be done in a few easy steps. Here is a step-by-step guide to sharpening your self-centering drill bit:

    Step 1: Preparing the Drill Bit for Sharpening

    Before sharpening your drill bit, clean it and remove any rust or debris. Use a cleaning cloth and honing oil to wipe the drill bit clean. If there is any rust, you can use a wire brush to remove it.

    Step 2: Sharpening the Primary Cutting Edge

    The primary cutting edge is the first edge that comes into contact with the workpiece. 

    • Hold the drill bit at a 60-degree angle against the diamond file to sharpen it. 
    • Move the file circularly over the cutting edge, applying light pressure. 
    • Repeat this process until the cutting edge is sharp.

    Step 3: Sharpening the Secondary Cutting Edge

    The secondary cutting edge is the edge that cuts the hole’s circumference. Hold the drill bit at a 90-degree angle against the diamond file to sharpen it. Move the file circularly over the cutting edge, applying light pressure. Repeat this process until the cutting edge is sharp.

    Step 4: Polishing the Drill Bit

    Once sharpening both cutting edges, use the diamond file to polish the entire drill bit. This will remove any burrs or rough spots and give the bit a smooth finish.

    Step 5: Testing the Sharpened Drill Bit

    After you have finished sharpening and polishing your drill bit, it’s essential to test it. Place the bit in your drill and make a test hole in scrap material. Check the hole to ensure that it is clean and accurate.

    Following these simple steps, you can sharpen your self-centering drill bit and ensure it is always in top condition. Remember to keep your drill bit clean and well-maintained to achieve accurate and clean holes in your workpieces.

    Maintaining Your Self-Centering Drill Bit

    Proper maintenance of your self-centering drill bit is crucial to ensure its longevity and effectiveness. Here are some tips for maintaining your drill bit:

    Cleaning the Drill Bit

    After every use, it’s essential to clean your drill bit. Use a cleaning cloth and honing oil to clean the bit and remove debris. This will help prevent rust and other forms of damage.

    Proper Storage of the Drill Bit

    When not in use, store your drill bit in a dry and safe place. Avoid leaving it in damp or humid areas, which can cause rust and other damage. You can also use a protective case to store your drill bit to prevent it from getting damaged.

    Tips for Sharpening Self-Centering Drill Bits

    Sharpening your self-centering drill bit is a skill that takes practice and patience. Here are some tips to help you sharpen your drill bit effectively:

    Avoiding Excessive Grinding

    When sharpening your drill bit, avoid grinding too much material off, as this can affect the integrity of the bit. It’s best to remove a small amount of material at a time and test the bit before continuing.

    Consistency in Sharpening Angle

    Maintaining a consistent sharpening angle is crucial to ensuring the effectiveness of your drill bit. Use a sharpening jig or guide to sharpen the bit at the correct angle.

    Regular Maintenance

    Regular maintenance is vital to keeping your drill bit in good condition. Make sure to sharpen it regularly and clean it after every use. Doing this will ensure that your drill bit stays sharp and effective for longer.

    By following these tips, you can maintain your self-centering drill bit and ensure it’s always ready to perform at its best. Remember to take your time when sharpening your drill bit and use the proper tools and techniques.

    Frequently Asked Questions (FAQs)

    Here are some frequently asked questions about self-centering drill bits and their sharpening:

    What is the ideal sharpening angle for self-centering drill bits?

    The ideal sharpening angle for self-centering drill bits is typically between 118 and 135 degrees. However, the specific angle can vary depending on the type and size of the drill bit. It’s essential to refer to the manufacturer’s recommendations for the best sharpening angle for your particular drill bit.

    How often should I sharpen my self-centering drill bit?

    The frequency of sharpening your self-centering drill bit depends on how often you use it and the type of material you are drilling into. Generally, it’s best to sharpen your drill bit after every 50-60 uses or when you notice a decrease in performance.

    Can I use a file to sharpen my self-centering drill bit?

    While it’s possible to use a file to sharpen your self-centering drill bit, it’s not recommended. Files can remove too much material and change the shape of the drill bit, affecting its performance. Using a bench grinder or diamond files designed explicitly for sharpening drill bits is best.

    What is the best way to store my self-centering drill bit?

    The best way to store your self-centering drill bit is in a dry and safe place, away from moisture and humidity. You can use a protective case or drawer to store your drill bit or hang it on a pegboard or wall-mounted drill bit holder for easy access. Make sure to clean and dry the bit before storing it.

    Conclusion

    In conclusion, self-centering drill bits are essential for any DIY enthusiast or professional contractor. However, to maintain their performance, keeping them sharp is crucial. Dull drill bits can cause frustration, inaccuracies, and even damage the workpiece.

    Sharpening your self-centering drill bit is a straightforward process that requires a bench grinder, diamond files, honing oil, and a cleaning cloth. The steps involved include

    • preparing the bit,
    • sharpening the primary and secondary cutting edges,
    • polishing it, and
    • testing it for sharpness.

    Regularly maintaining your self-centering drill bit is essential to keep it functioning optimally. This includes cleaning the bit after each use and storing it in a dry and safe place.

    We hope this article has provided valuable information on the importance of sharpening self-centering drill bits and how to sharpen them effectively. Remember to avoid excessive grinding, maintain consistency in sharpening angles, and perform regular maintenance. By putting this knowledge into practice, you’ll be able to achieve clean, accurate cuts and prolong the life of your drill bits.

    You may also like these posts!

  • How to Use a Self Centering Drill Bit: Novice to Pro!

    How to Use a Self Centering Drill Bit: Novice to Pro!

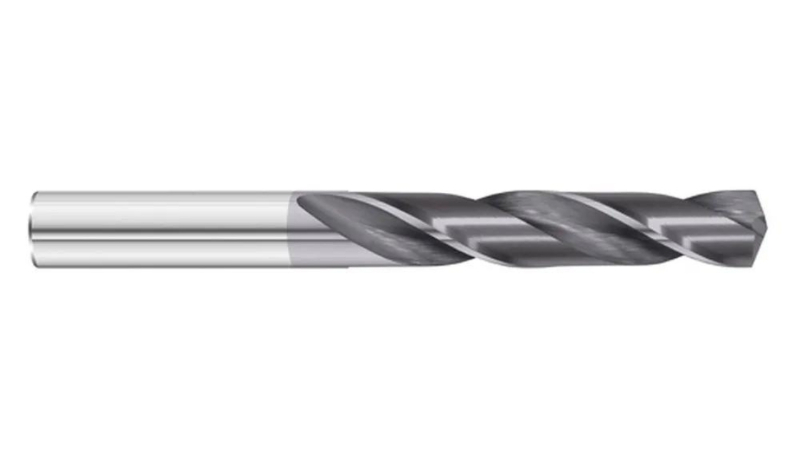
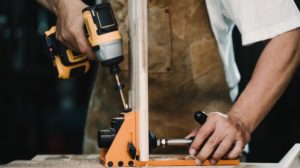
    Self-centering drill bits are essential in any DIY enthusiast or professional’s toolbox. They are designed to ensure that a hole is drilled precisely where intended, precisely and accurately. Self-centering drill bits can be used on various materials, including wood, plastic, and metals.

    This article will discuss the different types of self-centering drill bits, their advantages, and disadvantages, and provide tips and guidelines for using and maintaining them. By the end of this article, you will understand the importance of using a self-centering drill bit and be equipped with the knowledge to use one effectively.

    Types of Self-Centering Drill Bits

    Drilling is a common task in woodworking, metalworking, and DIY projects. A self-centering drill bit is a tool that makes drilling easier and more accurate. These drill bits have a centering feature that guides the bit to the center of the hole. This ensures the hole is drilled correctly and prevents the bit from wandering. Here will discuss the three self-centering drill bits: brad-point, V-point, and combination.

    1. Brad-point Self-centering Drill Bits

    Brad-point self-centering drill bits have a sharp point and two spurs that cut clean, straight holes. The spurs cut the wood fibers while the point guides the bit to the center of the hole. Brad-point bits are ideal for drilling small holes in wood, plastic, and other soft materials. They leave a clean, sharp edge and are less likely to cause splintering.

    Pros:

    • Ideal for drilling small holes
    • Clean, sharp edge
    • Less likely to cause splintering

    Cons:

    • Not suitable for drilling large holes
    • They can be brittle and break easily

    2. V-point Self-centering Drill Bits

    V-point self-centering drill bits have a sharp point and a V-shaped groove that guides the bit to the center of the hole. They are similar to brad-point bits but have a wider cutting edge. V-point bits are ideal for drilling holes in metal, plastic, and other hard materials. They can also be used for woodworking but are less effective than brad-point bits.

    Pros:

    • Ideal for drilling holes in metal and hard materials
    • Wider cutting edge

    Cons:

    • Not as effective as brad-point bits for woodworking
    • They can be brittle and break easily

    3. Combination Self-centering Drill Bits

    Combination self-centering drill bits have a center point and two cutting edges. They can drill small and large holes in wood, metal, plastic, and other materials. The center point guides the bit to the center of the hole, while the cutting edges remove material from the sides. Combination bits are versatile and can replace multiple drill bits in your toolbox.

    Pros:

    • Versatile
    • It can be used for drilling both small and large holes
    • You can replace multiple drill bits in your toolbox

    Cons:

    • Not as effective as specialized drill bits for specific materials
    • It can be more expensive than other drill bits

    Factors to Consider Before Using a Self-Centering Drill Bit

    Factors to Consider Before Using a Self-Centering Drill Bit

    Before using a self-centering drill bit, it is essential to consider several factors to ensure the success of your project. These factors include the type of material to be drilled, desired depth of the hole, the size of the hole needed, and the drill bit speed.

    Type of Material to be Drilled

    Different materials require different types of drill bits. For example, wood requires a brad-point self-centering drill bit, while metal and plastic require a V-point self-centering drill bit. A combination self-centering drill bit may be more suitable if you are working with multiple materials.

    Desired Depth of the Hole

    The depth of the hole needed will determine the length of the drill bit required. Selecting a drill bit that is long enough to drill the desired depth without causing damage to the material or the drill bit is essential.

    Size of the Hole Needed

    The size of the hole needed will determine the diameter of the drill bit required. It is essential to select a drill bit that is the right size for the hole to ensure accuracy and prevent damage to the material.

    Drill Bit Speed

    The speed of the drill bit should match the type of material being drilled. For example, softer materials require a slower drill bit speed, while harder materials require a faster drill bit speed. Using the wrong speed can cause damage to the material or the drill bit.

    By considering these factors before using a self-centering drill bit, you can ensure that your project is successful and that your holes are drilled accurately and cleanly.

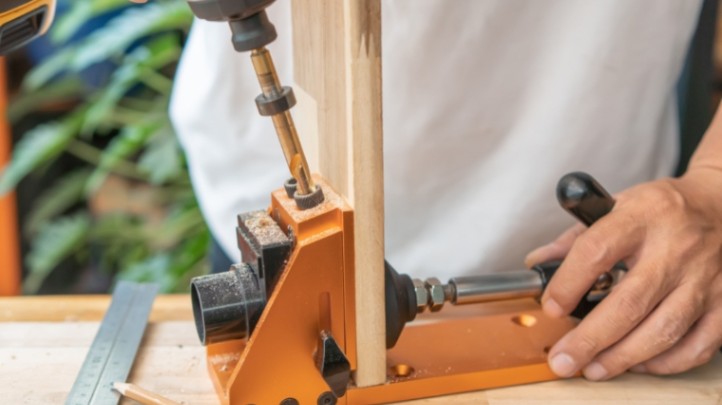
    Steps for Using a Self-Centering Drill Bit

    Using a self-centering drill bit is a simple process that can help you create accurate and clean holes in your materials. Follow these steps to use a self-centering drill bit:

    Determine the Size of the Hole Needed

    Before starting, determine the size of the hole you need to drill. This will help you select the appropriate self-centering drill bit.

    Attach the Self-Centering Drill Bit to the Drill

    Attach the self-centering drill bit to the drill according to the manufacturer’s instructions. Make sure it is securely fastened.

    Adjust the Depth Stop on the Drill to the Desired Depth

    If your drill has a depth stop, adjust it to the desired depth of the hole to ensure consistent depth for multiple holes.

    Place the Drill Bit at the Center of the Material to be Drilled

    Place the drill bit at the center of the material to be drilled. The self-centering feature will help keep the drill bit centered and prevent it from wandering or slipping.

    Apply Steady Pressure and Drill into the Material

    Turn on the drill and apply steady pressure to the material. The self-centering feature will help guide the drill bit through the material and prevent it from wandering. Drill the hole at the desired speed until you reach the desired depth.

    Release the Pressure and Remove the Drill Bit

    Once you have drilled the hole to the desired depth, release the pressure on the drill and remove the drill bit from the material. Clean the hole and the drill bit before using it for the next hole.

    Following these steps, you can use a self-centering drill bit to create accurate and clean holes in your materials.

    Tips for Using a Self-Centering Drill Bit

    To get the most out of your self-centering drill bit, here are some tips to keep in mind:

    Use a Pilot Hole for Harder Materials

    For more rigid materials like metal or hardwood, it can be helpful to create a pilot hole before using a self-centering drill bit. This will help guide the drill bit and reduce the risk of it wandering or slipping.

    Avoid Applying Too Much Pressure

    While applying some pressure to the drill is essential, it’s important to avoid applying too much pressure. This can cause the drill bit to break or cause the material to crack or splinter. Instead, apply consistent, steady pressure.

    Use a Drill Press for Precision Drilling

    For precision drilling, consider using a drill press. This will help you achieve accurate and consistent holes. A drill press can also be helpful when working with more rigid materials.

    Use a Lubricant to Reduce Friction and Extend the Life of the Drill Bit

    Using a lubricant like oil or wax can help reduce friction and extend the life of your self-centering drill bit. Apply the lubricant to the drill bit’s tip before starting to drill.

    By following these tips, you can ensure that you are using your self-centering drill bit effectively and safely.

    Common Mistakes to Avoid

    Several common mistakes can be easily avoided with proper technique and preparation when using a self-centering drill bit. Here are a few mistakes to watch out for:

    Starting the Drill at an Angle

    One common mistake when using a self-centering drill bit is starting the drill at an angle. This can cause the drill bit to wander off course, resulting in an inaccurate or uneven hole. To avoid this, ensure the drill is perpendicular to the material’s surface before drilling.

    Not Using a Pilot Hole When Necessary

    As mentioned earlier, using a pilot hole can be helpful when drilling into more rigid materials. Failing to create a pilot hole when necessary can cause the drill bit to slip or break or cause the material to splinter or crack. Continually assess the material you are drilling into and determine if a pilot hole is needed.

    Using the Wrong Size Drill Bit for the Job

    Using the wrong size drill bit can lead to problems like a hole that is too small or too large or a drill bit that breaks or becomes damaged. Before starting a job, ensure you have the correct size drill bit for the hole you must create.

    Using a Damaged Drill Bit

    Using a damaged or worn-out drill bit can cause problems like inaccurate holes or drill bits that break or become stuck in the material. Inspect your drill bits regularly and replace any that show signs of damage or wear.

    By avoiding these common mistakes, you can ensure that you are using your self-centering drill bit safely and effectively.

    Maintaining a Self-Centering Drill Bit

    Proper maintenance of your self-centering drill bit is essential to ensure its longevity and effectiveness. Here are some tips for maintaining your drill bit:

    Cleaning the Drill Bit After Use

    After using a self-centering drill bit, it’s essential to clean it properly to remove any debris or residue that may have accumulated. Use a soft cloth or brush to wipe away dirt or dust, and use a mild cleaner or solvent to remove any stubborn grime. Be sure to dry the drill bit thoroughly before storing it.

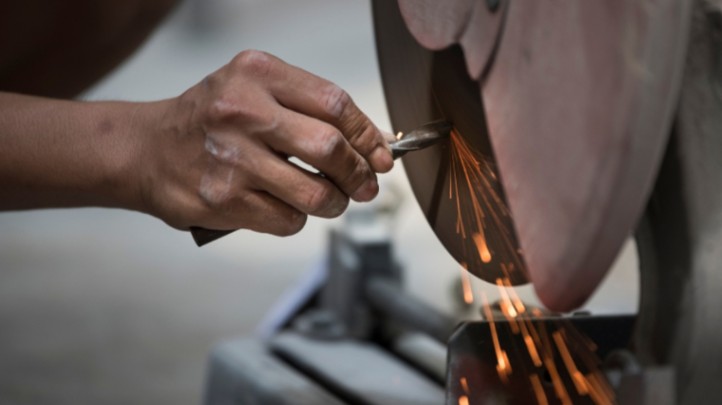
    Sharpening the Drill Bit When Necessary

    Over time, your self-centering drill bit may become dull or worn, making it less effective or unusable. To sharpen the drill bit, use a sharpening stone or file to remove any nicks or imperfections from the cutting edge carefully. Follow the manufacturer’s instructions for sharpening, and don’t over-sharpen the bit.

    Proper Storage of the Drill Bit to Prevent Damage

    When not in use, storing your self-centering drill bit properly is essential to prevent damage or wear. Keep the drill bit in a dry, cool place to prevent rusting, and store it in a protective case or pouch to prevent it from coming into contact with other tools or materials that may cause damage.

    Following these maintenance tips ensures that your self-centering drill bit remains in good condition and performs effectively for years.

    Advantages &Disadvantages of Using a Self-Centering Drill Bit 

    Advantages

    Using a self-centering drill bit offers several advantages over traditional drill bits. Here are some of the key benefits:

    • Saves Time and Effort in Centering the Hole

    One of the primary advantages of using a self-centering drill bit is that it eliminates the need for manual hole centering. This saves time and effort, especially when drilling multiple holes in a row. With a self-centering drill bit, you can place the bit at the desired location, apply pressure, and begin drilling.

    • Provides Precise and Accurate Drilling

    Self-centering drill bits are designed to provide precise and accurate drilling, even in difficult or hard-to-reach areas. The bit automatically centers itself in the material, ensuring the hole is drilled at the correct angle and depth. This can be especially important in applications where precision is crucial, such as woodworking or metalworking.

    • Reduces the Risk of the Drill Bit Slipping and Causing Damage

    Another advantage of using a self-centering drill bit is that it reduces the risk of the bit slipping and causing damage to the material or surrounding area. The bit is designed to grip the material firmly and prevent it from moving, even as you apply pressure and begin drilling. This can help to prevent accidents and ensure that your drilling is accurate and safe.

    Using a self-centering drill bit can make your drilling tasks easier, faster, and more accurate. Whether you’re a professional tradesperson or a DIY enthusiast, a self-centering drill bit is valuable in your toolbox.

    Disadvantages

    While self-centering drill bits offer many advantages, limitations and potential disadvantages exist. Here are a couple of drawbacks to using a self-centering drill bit:

    • Limited to Drilling Small to Medium-Sized Holes

    Self-centering drill bits are typically designed for drilling smaller to medium-sized holes, up to around 1/2 inch in diameter. If you need to drill larger holes, you may need to use a different drill bit or tool. However, a self-centering drill bit is more than sufficient for many applications, such as drilling pilot holes or installing hardware.

    • May Not Work Well with Certain Materials such as Metal or Glass

    While self-centering drill bits can work well with many materials, such as wood or plastic, they may be less effective with specific more complex, or more brittle materials, such as metal or glass. In these cases, you may need to use a different drill bit or tool or take extra precautions to avoid damaging the material.

    While there are some limitations to using a self-centering drill bit, they remain a valuable and versatile tool for many drilling tasks. By understanding their strengths and weaknesses, you can decide whether a self-centering drill bit is a suitable tool for your next project.

    When to Use a Self-Centering Drill Bit

    When to Use a Self-Centering Drill Bit

    Self-centering drill bits are versatile and valuable tools for various projects that require precise and accurate drilling. Here are a few situations where using a self-centering drill bit can be particularly advantageous:

    Woodworking Projects

    Self-centering drill bits are a popular choice for woodworking projects, as they make it easy to create clean and accurate holes without additional marking or centering. They are often used to drill pilot holes for screws, create dowel holes, or install hardware.

    DIY Home Improvement Projects

    Self-centering drill bits are also valuable for many DIY home improvement projects, such as installing shelves, cabinets, or other fixtures. They can help you create precise holes quickly and easily without requiring specialized tools or expertise.

    Any Job that Requires Precise and Accurate Drilling

    Finally, self-centering drill bits can be a valuable tool for any job that requires precise and accurate drilling, regardless of the specific project. They can save time and effort, reduce the risk of mistakes or damage, and help ensure that your work meets your desired specifications.

    Whether you are a professional woodworker, a DIY enthusiast, or need to tackle a few home improvement tasks, a self-centering drill bit can be a valuable addition to your toolkit. You can achieve accurate and precise results with minimal effort by choosing the right drill bit for the job and using it correctly.

    FAQs

    • Can a self-centering drill bit be used for drilling metal?

    It depends on the type of self-centering drill bit and the metal’s hardness. Brad-point self-centering drill bits work well with softer metals such as aluminum or brass but may not be suitable for drilling harder metals like steel. V-point self-centering and combination self-centering drill bits are more suitable for drilling harder metals.

    • How often should I sharpen my self-centering drill bit?

    The frequency of sharpening your self-centering drill bit depends on how often you use it and the material you are drilling. Generally, it would be best to sharpen your drill bit when you notice a decrease in performance or when it becomes difficult to drill through the material.

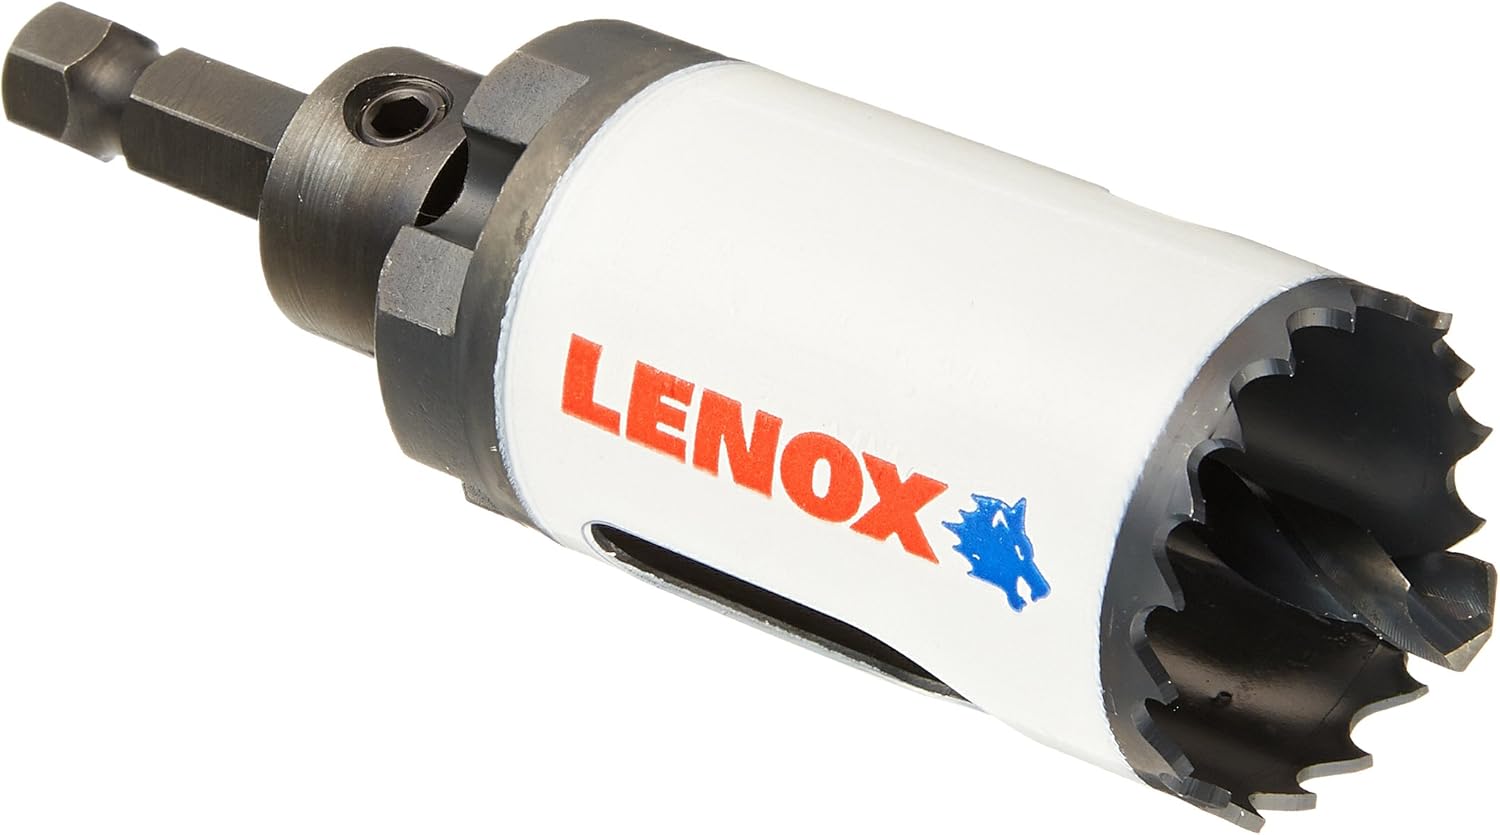
    • Can I use a self-centering drill bit for drilling holes larger than 1 inch in diameter?

    Self-centering drill bits are generally limited to drilling small to medium-sized holes, typically up to 1 inch in diameter. For larger holes, it is recommended to use a hole saw or a specialized bit designed for larger diameter holes.

    • Can a self-centering drill bit be used with a cordless drill?

    Yes, a self-centering drill bit can be used with a cordless drill as long as the drill’s chuck size matches the drill bit’s shank size.

    • How do I know if my self-centering drill bit is damaged and needs to be replaced?

    Signs that your self-centering drill bit may be damaged and needs to be replaced include dullness or bluntness of the bit, difficulty in drilling through the material, and visible wear or damage to the bit’s cutting edge. It is essential to regularly inspect your drill bit for signs of damage and replace it as necessary to ensure optimal performance and safety.

    Conclusion

    Using a self-centering drill bit can greatly benefit anyone who needs to drill precise and accurate holes quickly and efficiently. Following the simple steps outlined in this article, anyone can easily use a self-centering drill bit for their woodworking or DIY projects.

    It is important to remember to choose the right type of self-centering drill bit for the job, consider the factors before using it, and maintain the drill bit properly. By avoiding common mistakes and following the tips provided, users can ensure a long lifespan for their self-centering drill bit and accurate, efficient project results.

    You may also like these posts!

  • How to use an Automotive Short Circuit Finder

    How to use an Automotive Short Circuit Finder

    Short circuits are a common problem in any vehicle’s electrical system. A short circuit can cause a wide range of issues, from blown fuses to electrical fires. That’s why it’s essential to identify and fix short circuits as quickly as possible.

    Fortunately, modern automotive technology has made this process much easier. A short circuit finder is one of the most effective tools for diagnosing and fixing short circuits. This device uses advanced technology to locate short circuits quickly and accurately, saving time and minimizing the risk of further damage.

    In this article, we’ll explain how a short circuit finder works and why using one is important instead of traditional methods. We’ll also provide a step-by-step guide for using a short circuit finder and tips and tricks for troubleshooting and avoiding future short circuits. By the end of this article, you’ll have all the information you need to diagnose and repair short circuits in your vehicle with confidence.

    Preparing to Use a Short Circuit Finder

    If you’re experiencing electrical issues with your vehicle, using a short circuit finder can be a useful tool to help diagnose the problem. Before you begin, you need to take a few important steps to prepare. In this article, we’ll walk you through preparing to use a short circuit finder, including reviewing the vehicle’s wiring diagram, gathering necessary tools and equipment, disconnecting the battery, and setting up the short circuit finder.

    Reviewing the Vehicle’s Wiring Diagram

    Before you can begin using a short circuit finder, you must review the wiring diagram for your vehicle. The wiring diagram will provide you with an understanding of the vehicle’s electrical system and help you locate the areas where a short circuit might be occurring. If you need to become more familiar with reading wiring diagrams, take some time to familiarize yourself with the layout and symbols.

    Gathering Necessary Tools and Equipment

    You’ll need a few tools and pieces of equipment to use a short circuit finder. Here are the items you should gather before getting started:

    • Short circuit finder tool
    • Multimeter
    • Wire cutters and strippers
    • Electrical tape
    • Safety glasses
    • Work gloves

    Make sure you have all of these items before you begin.

    Disconnecting the Battery

    Once you have your tools and equipment ready, the next step is to disconnect the battery. This essential safety step will prevent electrical shock or damage to your vehicle’s electronics. Begin by turning off the engine and opening the hood. Locate the battery and use a wrench to disconnect the negative cable. Ensure the cable is secure and cannot contact any metal parts.

    Setting Up the Short Circuit Finder

    You can now set up the short circuit finder with the battery disconnected. The process will vary depending on the tool you’re using. However, most short circuit finders require connecting the leads to the vehicle’s electrical system. Follow the instructions provided with your device carefully to ensure a proper setup.

    Once the short circuit finder is set up, please turn it on and follow the instructions to locate the short circuit. The tool typically emits a tone or lights up when detecting a short circuit. Use the multimeter to confirm the location of the short circuit and make any necessary repairs.

    Locating a Short Circuit

    Short circuits can be frustrating and difficult to locate. However, the process can be easier with the right tools and knowledge. In this article, we’ll provide an overview of the step-by-step process for locating a short circuit, including using a short circuit finder to identify the general location of the short circuit, narrowing down the location using the method of elimination, and testing circuits and components to confirm the location of the short circuit.

    Overview of the Step-by-Step Process for Locating a Short Circuit

    Locating a short circuit can be time-consuming, but following a step-by-step approach can help make the process more manageable. Here are the steps to follow:

    1. Review the vehicle’s wiring diagram to understand the electrical system.
    2. Use a short circuit finder to identify the general location of the short circuit.
    3. Narrow down the area of the short circuit using the process of elimination.
    4. Test circuits and components to confirm the location of the short circuit.
    5. Make any necessary repairs and retest the electrical system.

    Using the Short Circuit Finder to Identify the General Location of the Short Circuit

    A short circuit finder is a tool that can help you identify the general location of a short circuit in your vehicle’s electrical system. To use a short circuit finder, you’ll need to connect it to the electrical system and follow the instructions provided with the tool. The short circuit finder will emit a tone or light up when it detects a short circuit. Use the information provided by the short circuit finder to identify the general location of the short circuit.

    Narrowing Down the Location Using the Process of Elimination

    Once you have identified the general location of the short circuit, you can begin narrowing down the location using the process of elimination. This involves disconnecting circuits and components in the area where the short circuit was detected and testing each one to see if the short circuit is still present. Continue this process until the specific circuit or component causing the short circuit is identified.

    Testing Circuits and Components to Confirm the Location of the Short Circuit

    Once you have identified the specific circuit or component causing the short circuit, it’s important to test it to confirm the location of the short circuit. This involves using a multimeter or other testing tool to check for continuity or resistance in the circuit or component. If the testing confirms the location of the short circuit, you can make the necessary repairs.

    Locating a short circuit in your vehicle’s electrical system can be challenging. However, it can be done effectively with the right tools and approach. By using a short circuit finder to identify the general location of the short circuit, narrowing down the location using the process of elimination, and testing circuits and components to confirm the location of the short circuit, you can diagnose and repair electrical issues with your vehicle.

    Fixing a Short Circuit

    Short circuits can cause various electrical issues in your vehicle. However, fortunately, they can often be fixed with the right tools and knowledge. In this article, we’ll provide an overview of the types of short circuits and how to fix them, strategies for repairing or replacing damaged wiring and components, using a short circuit finder to confirm the short circuit has been fixed, and tips for avoiding future short circuits.

    Overview of the Types of Short Circuits and How to Fix Them

    There are two main types of short circuits: series and parallel. A series short circuit occurs when a wire or component breaks in the circuit. In contrast, a parallel short circuit occurs when two wires or components come into contact. To fix a series of short circuit, locate the broken wire or part and replace or repair it. To fix a parallel short circuit, you’ll need to separate the touching wires or components and ensure they are properly insulated to prevent future contact.

    Strategies for Repairing or Replacing Damaged Wiring and Components

    Repairing or replacing damaged wiring and components is crucial in fixing a short circuit. It would be best to locate the damaged section and carefully strip the insulation from the wire to repair the damaged wiring. You can twist the exposed wire together or use a wire splice connector to connect the two sections. To replace damaged components, you’ll need to identify the specific part causing the short circuit and replace it with a new one.

    Using the Short Circuit Finder to Confirm the Short Circuit Has Been Fixed

    After repairing the short circuit, confirming that the issue has been resolved is important. A short circuit finder can ensure that the short circuit has been fixed by testing the circuit or component for continuity or resistance. If the short circuit finder does not detect a short circuit, you can be confident that the issue has been resolved.

    Tips for Avoiding Future Short Circuits

    Preventing future short circuits can save you time and money in the long run. Here are some tips to keep in mind:

    • Avoid overloading circuits by using the appropriate fuses and circuit breakers.
    • Inspect wiring and components regularly for signs of damage or wear.
    • Use high-quality, properly sized wires and components.
    • Properly insulate wires and components to prevent contact.
    • Follow manufacturer instructions and wiring diagrams when installing new parts.

    Fixing a short circuit in your vehicle’s electrical system can be challenging. However, it can be done effectively with the right tools and knowledge. Understanding the types of short circuits and how to fix them, using strategies for repairing or replacing damaged wiring and components, and confirming the short circuit has been fixed with a short circuit finder. Following tips for avoiding future short circuits, you can keep your vehicle’s electrical system in good working order.

    Preparing to Use a Short Circuit Finder

    If you are experiencing electrical issues in your vehicle, such as blown fuses or malfunctioning lights, could be caused by a short circuit. Locating and fixing a short circuit can be daunting, but with the right tools and knowledge, it can be done. In this article, we will discuss the steps to prepare for using a short circuit finder to locate a short circuit.

    Reviewing the Vehicle’s Wiring Diagram

    The first step in preparing to use a short circuit finder is to review the vehicle’s wiring diagram. The wiring diagram will show the layout of the vehicle’s electrical system, including the location of all the fuses, relays, switches, and wiring. It is important to understand the wiring diagram well before attempting to locate and fix a short circuit.

    Gathering Necessary Tools and Equipment

    It would be best to gather the necessary tools and equipment to prepare using a short circuit finder. This will include a short circuit finder, a multimeter, wire strippers, electrical tape, and a flashlight. It is important to ensure that all tools and equipment are in good working condition before starting the process.

    Disconnecting the Battery

    Before starting to use a short circuit finder, it is important to disconnect the battery. This will help prevent electrical surges and ensure your safety while working on the vehicle. The battery’s negative terminal should be disconnected, and the cable should be secured away from the battery to prevent accidental reconnection.

    Setting up the Short Circuit Finder

    Once the battery is disconnected, you can set up the short circuit finder. This device is designed to help you identify the general location of the short circuit. Start by setting the device to the appropriate voltage and amperage settings according to the vehicle’s electrical system. Then, attach the leads to the battery terminals and turn on the device. The short circuit finder will now begin to detect electrical anomalies in the system.

    Preparing to use a short circuit finder requires understanding the vehicle’s wiring diagram, gathering the necessary tools and equipment, disconnecting the battery, and setting up the short circuit finder. Following these steps, you will be well-prepared to locate and fix a short circuit in your vehicle’s electrical system.

    Tips and Tricks for Using a Short Circuit Finder

    Regarding electrical systems, short circuits are one of the most common issues that can cause problems with your vehicle. Locating and fixing a short circuit can be difficult and time-consuming. However, a short circuit finder can make the process much easier. Here are some tips and tricks for effectively using a short circuit finder and avoiding common mistakes.

    Best Practices for Using a Short Circuit Finder Effectively

    • Familiarize Yourself with the Short Circuit Finder – Before using a short circuit finder, it’s important to read the manufacturer’s instructions carefully and understand how it works. Familiarizing yourself with the device will help you use it more effectively and avoid potential issues.
    • Start with a Wiring Diagram – Review the wiring diagram of the vehicle you are working on to understand the electrical system and identify the location of the circuit you’re looking for. This will help you narrow down the location of the short circuit and save time.
    • Gather Necessary Tools and Equipment – Ensure you have all the tools and equipment, including a multimeter, wire cutters, and electrical tape.
    • Disconnect the Battery – Always disconnect the vehicle’s battery before working on the electrical system to avoid the risk of electric shock.
    • Use the Short Circuit Finder Methodically – Follow a systematic process when using the short circuit finder, starting at the beginning of the circuit and working your way through to the end. This will help you identify the location of the short circuit more quickly and accurately.

    Common Mistakes to Avoid When Using a Short Circuit Finder

    • Not Testing the Circuit Properly – It’s important to test each circuit component individually to confirm its functioning properly. Trying the entire circuit without isolating the problem area may lead to inaccurate results.
    • Failing to Identify the Correct Circuit – Ensure you’re testing the correct circuit by reviewing the wiring diagram and confirming that you’re in the correct location.
    • Not Calibrating the Short Circuit Finder – Many short circuit finders require calibration before use. Calibrating the device can lead to accurate results.

    Tips for Troubleshooting When the Short Circuit Finder Isn’t Working Properly

    • Check the Battery – Ensure the device is properly charged or has fresh batteries.
    • Verify the Connections – Ensure that the connections between the short circuit finder and the tested circuit are secure and not loose.
    • Calibrate the Device – If the short circuit finder gives inaccurate results, try calibrating it again, following the manufacturer’s instructions.
    • Double Check Your Methodology – Go back through the process methodically to ensure you didn’t miss a step or make a mistake.

    Tips for Troubleshooting When the Short Circuit Finder Isn’t Working Properly

    • Avoid Overloading Circuits – Don’t overload circuits using too many electrical devices simultaneously. This can cause the circuit to short out.
    • Inspect Wiring Regularly – Regularly inspect the Wiring in your vehicle to identify and address potential issues before they become bigger problems.
    • Follow Safety Precautions – Always follow safety precautions when working with electrical systems to minimize the risk of injury or damage to your vehicle.

    A short circuit finder can make locating and fixing short circuits much easier and more efficient. By following best practices, avoiding common mistakes, and troubleshooting effectively, you can confidently use a short circuit finder and get your vehicle back on the road quickly and safely.

    Frequently Asked Questions

    • What causes a short circuit in a vehicle?

    Various factors, such as damaged wiring, faulty components, or water damage, can cause a short circuit in a vehicle. Essentially, a short circuit occurs when an electrical current takes an unintended path, bypassing the intended circuit and potentially causing damage to the vehicle’s electrical system.

    • How do I know if I have a short circuit in my vehicle?

    Several signs may indicate the presence of a short circuit in a vehicle, such as blown fuses, flickering or dimming headlights, or electrical components that are not functioning properly. If you suspect a short circuit, addressing the issue promptly is important to prevent further damage.

    • Can I use a multimeter instead of a short circuit finder?

    While a multimeter can be useful for diagnosing electrical issues in a vehicle, it is less effective than a short circuit finder when locating a short circuit. A short circuit finder is designed specifically for this purpose and is often more accurate and efficient than a multimeter.

    • How do I choose the right short circuit finder for my needs?

    When selecting a short circuit finder, it’s important to consider factors such as the type of vehicle you will be working on, the frequency of use, and your budget. There are a variety of short circuit finders available on the market, each with its features and specifications, so it’s important to do your research and select the one that best meets your needs.

    • Are there any vehicles that cannot be diagnosed using a short circuit finder?

    Most vehicles can be diagnosed using a short circuit finder, but some exceptions exist. For example, certain older or specialized vehicles may require different diagnostic tools or techniques. Additionally, some vehicles may have complex electrical systems that require technical knowledge and training to diagnose and repair.

    • Can a short circuit finder be used on hybrid or electric vehicles?

    A short circuit finder can be used on hybrid or electric vehicles. However, it’s important to ensure that your specific short circuit finder is designed to work with these vehicles. Their electrical systems can be more complex than those in traditional gasoline-powered vehicles. Additionally, it’s important to follow all safety precautions when working with hybrid or electric cars, as they can present unique risks and hazards.

    Conclusion

    In conclusion, a short circuit can cause various problems in a vehicle, from a simple malfunction to a serious electrical fire. However, by using a short circuit finder and following the step-by-step process outlined in this article, anyone can diagnose and repair short circuits in their vehicle. It is crucial to follow proper safety precautions when using a short circuit finder to minimize risks and hazards associated with electrical work. By choosing the right short circuit finder and using it effectively, you can quickly and accurately identify the location of a short circuit and take the necessary steps to fix it. With the right tools and knowledge, anyone can become proficient in repairing short circuits and keep their vehicle running smoothly.

    You may also like these posts!