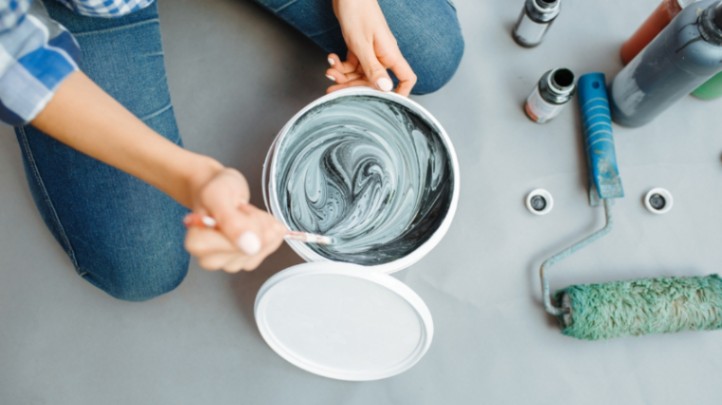
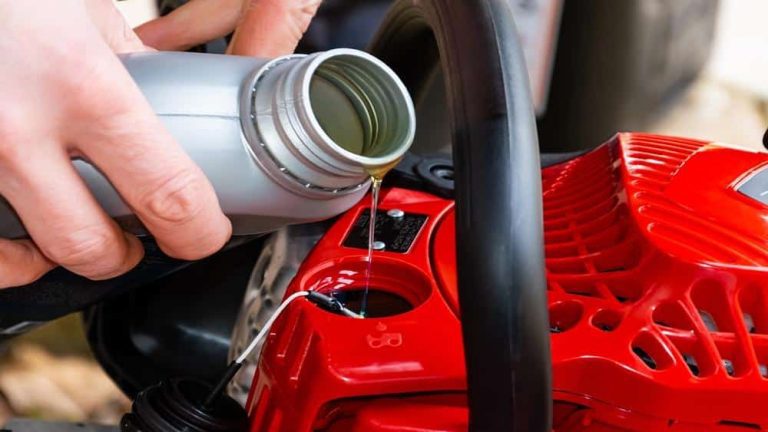
In-home improvement and DIY projects, paint plays a pivotal role in transforming spaces. But before that transformation can occur, the paint must be thoroughly mixed, especially if it’s stored in large quantities like a 5-gallon bucket. While many rely on drills to get the job done quickly, only some have one at their disposal, or perhaps they’re looking for gentler methods to preserve the paint’s quality. This “How to Mix 5 Gallon Paint without Drill” article dives deep into alternatives to the conventional drill method, guiding readers on how to mix a 5-gallon paint batch without one effectively.
From traditional hand-stirring to innovative paint shakers, we’ll cover it all, ensuring you achieve a consistent paint mix for that perfect finish. Whether you’re a seasoned DIY enthusiast or a beginner, this guide will equip you with the knowledge to mix paint like a pro.
Introduction
Painting is a task that many find enjoyable, whether it’s sprucing up a room or completing a large-scale project. Yet, behind the scenes, there’s an essential step to ensure your paint job looks top-notch – mixing the paint. Especially when dealing with sizable batches like 5 gallons, the mixing process becomes vital.
Importance of Properly Mixed Paint
Have you ever noticed a wall that seems to have different shades at various parts? That could be the result of improperly mixed paint. When the paint is mixed well, it ensures:
Uniform Color: Properly blended paint guarantees that the color is consistent from the start of your project to the finish.
Smooth Application: Lumps or sediment can form in paint over time. When mixed right, your paint will glide on smoothly, making your task easier.
Longevity: A well-mixed paint ensures an even distribution of ingredients, helping the paint to last longer and wear evenly on surfaces.
Challenges with Large Paint Batches
Now, mixing a small can of paint might seem simple. But when you’re dealing with a 5-gallon bucket, things can get tricky:
Settling of Ingredients: Over time, the solids in paint can settle at the bottom. In large batches, this settling is more pronounced, making it harder to achieve a consistent mix.
Physical Effort: It requires a lot more elbow grease to stir a 5-gallon batch manually compared to a smaller can.
Inconsistent Mixing: Without the right tools, you might find some parts of your batch are well-mixed while others aren’t. This inconsistency can result in a patchy paint job.
But don’t fret! Even without a drill, there are methods to ensure your paint is mixed to perfection. Stick around as we delve into the how-to’s of achieving a perfectly blended 5-gallon paint batch.
Alternative Tools to Drills
While drills are commonly used for mixing large paint batches due to their efficiency, only some have one on hand. But that shouldn’t stop you from getting that paint ready! Several alternative tools can help you achieve a smooth and consistent mix for your 5-gallon paint batch.
Manual Paint Stirrers
Before the age of power tools, manual paint stirrers were the go-to tool. They are:
Simple: Usually made of wood or plastic, these long sticks have a flat or slightly curved end perfect for stirring.
Accessible: You can easily find them in most hardware stores or even use a long wooden dowel in a pinch.
Effective for Light Mixing: If your paint is relatively new and just needs a quick mix, these stirrers should do the trick.
Tips for using: Stir in a circular motion, and occasionally lift the stirrer to help aerate and better combine the paint.
Paint Mixing Paddles
These are like an upgrade to manual stirrers:
Wider Surface: Unlike the simple stirrers, paddles have a broader surface, allowing for better mixing.
Variety: They come in various shapes and designs, each tailored for different mixing needs.
Great for Thorough Mixing: With their larger surface area, they can move more paint with each stir, ensuring a consistent mix.
Tips for using: Move the paddle in a figure-eight motion, making sure to reach the bottom and sides of the can.
Each of these tools has its strengths, so choose the one that suits your paint’s consistency and your comfort level. And remember, patience is key! Take your time, and you’ll end up with perfectly mixed paint, ready for your project.
Paint Shaker Method
This is an automated solution for those large paint batches:
Efficient and Fast: Unlike manual methods, paint shakers can mix paint quickly and reduce the time and effort required.
Uniform Mixing: Shakers are designed to ensure every part of the paint gets evenly mixed, reducing the chances of having any lumps or uneven color.
Handles Different Sizes: Most paint shakers can accommodate a range of can sizes, ensuring versatility in your projects.
Great for Busy Projects: If you have multiple cans to mix or are in a commercial setting, this method can be a lifesaver.
Tips for using: Ensure the paint can is sealed tight before placing it in the shaker. Run the shaker for the recommended time, usually a few minutes, and check the consistency before using the paint.
Just like other methods, understanding your needs and the characteristics of your paint is crucial. The paint shaker can be an invaluable tool for those who require efficiency and uniformity in their paint-mixing tasks. Ensure you follow the manufacturer’s instructions and safety precautions for optimal results.
Top 3 Paint Shaker Method
Hand stirring Method
If you don’t have a drill or a mixer, manually stirring paint can be a viable option. Here’s how to properly mix paint manually using a stir stick:
Open the paint can: Use a paint can opener to remove the lid from the paint can. Be cautious when opening the can, as the edges can be sharp.
Pour the paint: Pour the paint into a large container. This will give you enough room to stir the paint without splattering it everywhere.
Use a stir stick: Insert a stir stick into the paint and begin stirring in a figure-eight motion. Make sure to start the paint from the bottom of the container to the top to ensure that all the paint is thoroughly mixed.
Continue stirring: Keep stirring the paint until it is smooth and consistent. This may take some time, so be patient and take breaks if necessary. Spend at least 5-10 minutes stirring, ensuring consistency throughout.
Check for lumps: Once you think the paint is thoroughly mixed, check for any lumps or inconsistencies. If you notice any, continue stirring until they are fully incorporated.
Tips for getting the best results
Use a large container: This will give you enough room to properly stir the paint without making a mess.
Stir in a figure-eight motion: This will help ensure the paint is mixed thoroughly and evenly.
Take your time: Manually stirring paint can be time-consuming, so be patient and take breaks if necessary.
Use a high-quality stir stick: A sturdy stir stick will make the process easier and more efficient.
Common mistakes to avoid
Not stirring thoroughly: It’s essential to ensure all the paint is thoroughly mixed. Otherwise, you may end up with streaks or uneven color.
Using a small container: If the container is too small, you won’t have enough room to properly stir the paint, which can result in an uneven mix.
Not checking for lumps: Even if you think the paint is thoroughly mixed, it’s essential to check for any lumps or inconsistencies before using it.
Benefits of Using a Hand Stirring
This can be done with readily available tools
Provides greater control over the mixing process
It can be a good workout
Drawbacks of Using a Hand Stirring
Can be time-consuming
Requires physical effort
It may not be as effective as using a drill
Paint Mixing Paddles
When looking for a robust method to mix paint, especially large batches like 5 gallons, paint mixing paddles emerge as an excellent alternative to drills. Let’s delve into the how-to, benefits, and potential pitfalls of this method.
Prepare the container: Ensure your bucket or container is clean and free from any previous paint residues.
Pour the paint: Transfer your paint into the large container, leaving some space on top to prevent spills.
Insert the paddle: Hold the paint mixing paddle with both hands. Its broader surface area will allow for effective mixing.
Stir effectively: Move the paddle in an up-and-down motion while simultaneously rotating it. This ensures that the paint at the bottom, which might have settled, gets mixed thoroughly.
Inspect the consistency: After several minutes of stirring, examine the paint for a smooth and even consistency. If needed, continue stirring.
Tips for optimal results
Opt for a quality paddle: While they might seem basic, not all paddles are created equal. Some have designs that enhance the mixing process.
Stir at a steady pace: Rapid motions might introduce air bubbles into the paint. A slow, steady pace is key.
Clean immediately after use: Once you’re done, clean the paddle immediately to prevent paint from drying and sticking to it.
Common mistakes to avoid
Choosing a small paddle: For a 5-gallon batch, a bigger paddle is more efficient.
Incomplete stirring: It’s crucial to ensure the paint at the very bottom is mixed well to prevent color discrepancies.
Ignoring safety: Always wear gloves. Spills and splatters are common, and some paints can be harmful to the skin.
Benefits of Using Paint Mixing Paddles
Cost-effective: Paddles are usually cheaper than electronic mixers or drills.
No power required: Great for situations where electricity might not be accessible.
Adaptable: Works with various paint types, from latex to oil-based.
Drawbacks of Using Paint Mixing Paddles
Physical effort: It requires more manual effort compared to using a drill.
Time-intensive: Especially for larger batches, it might take longer to achieve a consistent mix.
Less efficient for very thick paints: Extremely viscous paints might be challenging to mix using just a paddle.
Paint Shaker Method
If you don’t want to mix 5-gallon paint buckets manually, you can use a paint shaker to do the job for you. A paint shaker is a machine that vigorously shakes the paint, ensuring it is mixed thoroughly. Here’s how to use a paint shaker to mix your 5-gallon paint buckets.
Get your supplies ready:
To use a paint shaker, you’ll need a few supplies, including:
Use the paint can opener to open the 5-gallon paint bucket. Ensure you have your gloves on to protect your hands from sharp edges on the lid.
Steps By Step Guide
Secure the paint bucket in the shaker: Place the 5-gallon paint bucket in the paint shaker, ensuring it is balanced and securely fastened. You don’t want the bucket to fall over during the shaking process.
Turn on the paint shaker: Please turn on the paint shaker and let it run for several minutes. The amount of time you need to shake the paint will vary depending on the type of paint you’re using and the specific paint shaker you have.
Check the paint periodically: While the paint shaker is running, check the paint periodically to see if it has been mixed thoroughly. You can do this by removing the bucket from the shaker and stirring the stain with a stir stick. If the paint is still separated, place it back in the shaker and continue shaking.
Remove the paint bucket from the shaker: Once the paint has been mixed thoroughly, turn off the paint shaker and carefully remove the paint bucket. Be sure to wipe off any excess paint on the lid and around the edges of the bucket.
Benefits of Using a Paint Shaker
A paint shaker can mix paint quickly and efficiently, saving time and effort.
It ensures the paint is mixed thoroughly, reducing the risk of inconsistencies in the finished product.
You can use it for various paint types, including latex and oil-based paints.
Drawbacks of Using a Paint Shaker
Paint shakers can be expensive to purchase or rent.
They can be loud and disruptive, especially if you’re working in a residential area.
Suppose the paint bucket is not appropriately balanced in the shaker. In that case, it can cause damage to the machine or create a safety hazard.
Tips for Using a Paint Shaker
Always wear gloves to protect your hands when working with paint.
Please ensure the paint bucket is correctly balanced in the shaker before turning it on.
Check the paint periodically to ensure it has been mixed thoroughly.
If you’re renting a paint shaker, read and follow all instructions provided by the rental company.
Common Mistakes to Avoid
Overfilling the paint bucket can cause the paint to spill out during the shaking process, creating a mess and potentially damaging the machine.
Not securing the lid properly can cause the paint to spill out during shaking.
Forgetting to check the paint periodically can result in an unevenly mixed product.
Pro Tips for Mixing Paint
Mixing paint might seem straightforward, but there are a few steps to ensure you get it just right, especially when dealing with a sizable 5-gallon batch. Let’s walk through the process so you can get the best results for your painting project.
Preparing Your Paint Can
Clean Workspace: Start by ensuring you’re working in a clean, well-lit area. This will help you see the paint’s consistency as you mix.
Open the Can Carefully: Use a paint can opener or a Flathead screwdriver. Gently pry the lid off to avoid splashing.
Examine the Paint: Before mixing, take a moment to look at the paint. If there’s a thick layer at the bottom of a skin on top, it’s a sign that your paint needs thorough mixing.
Remove Paint Skin: If there’s a dried layer or “skin” on the surface, carefully remove it using a paint scraper or a flat piece of cardboard.
Selecting the Right Mixing Tool
Assess Paint Consistency: If the paint is relatively fresh with minimal settling, a manual paint stirrer might suffice. For paint that’s more settled or has separated significantly, consider using a paint mixing paddle.
Available Tools: Check what tools you have on hand. If you don’t have specialized paint mixers, even a sturdy wooden stick can do the job in a pinch.
Safety First: Ensure your chosen tool is clean and free from any residues. This will prevent contaminants from mixing into your paint.
Mixing Technique
Stirring Motion: Start by stirring in a circular motion, ensuring you reach the bottom and sides of the can. This helps in lifting settled particles.
Aerate the Paint: Every few minutes, lift your mixing tool slightly out of the paint and then back in, introducing air into the mix. This helps in blending the paint components effectively.
Figure-Eight Motion: Switch to a figure-eight motion, which helps in distributing the paint evenly.
Consistency Check: Every so often, lift some paint with your tool and let it drip. It should flow smoothly without any lumps.
Time: Spend at least 5-10 minutes mixing, especially if the paint is heavily settled. Patience ensures a well-mixed batch.
Final Check: Once done, examine the paint one last time. It should have a uniform color and consistency throughout.
Remember, the key to a successful paint job starts with well-mixed paint. By following this guide, you’re setting the foundation for a painting project you’ll be proud of. Happy painting!
Conclusion
In conclusion, mixing 5-gallon paint without a drill can be done using manual stirring and a paint shaker. Each method has its benefits and drawbacks. The choice ultimately depends on the reader’s preference and available resources.
Manual stirring is a good option if you prefer a low-cost and traditional method. It requires essential tools and can be done with patience and effort. On the other hand, using a paint shaker is more efficient and quicker. However, it requires access to a paint shaker machine, which may not be readily available.
Regardless of the chosen method, mixing the paint thoroughly to achieve a smooth and consistent finish is essential. This can be done by following the step-by-step guides in this article, using the recommended tools, and avoiding common mistakes.
We encourage our readers to share their experiences and ask any additional questions they may have. Store any leftover paint properly to ensure it stays usable for future projects. Happy painting!
Hello. You've come to the right place if you want to learn more about power drills and how to make your home improvement projects go quicker and easier.
I'm Jacob P., the founder and content writer of drill-guy.com. Anyone who needs assistance with a project or has a query about how something works (or doesn't) can count on me to share my expertise.