Category: Expert Guides and Tips

Explore our expert guides and tips for power tools, home improvement, lawn and garden projects, and more. Get step-by-step instructions, valuable insights, and practical advice to tackle your DIY projects like a pro. Discover the best techniques, tools, and strategies to enhance your skills and achieve remarkable results.

  • Top 10 Yard Care Tips: Master Your Yard

    Top 10 Yard Care Tips: Master Your Yard

    Taking care of your yard can be daunting, but with the right techniques and tools, you can transform it into a beautiful and healthy outdoor space. Whether a seasoned gardener or a beginner, these top 10 yard care tips will help you achieve a lush and vibrant lawn.

    A well-maintained yard enhances your property’s aesthetics and provides a safe and healthy environment for your family and pets. However, keeping your yard looking its best requires effort and knowledge. This article will provide you with the top 10 yard care tips to help you achieve the perfect lawn.

    Maximize Your Yard’s Potential with These Top 10 Tips

    Know Your Soil

    The first step to achieving a healthy lawn is to know the soil type in your yard. Different soil types require other care techniques. For instance, sandy soil drains water faster than clay soil, which can hold moisture longer.

    Test Your Soil pH

    Knowing your soil’s pH level is crucial in determining the type of grass and plants that thrive in your yard. You can test your soil’s pH level using a soil testing kit available at your local garden center. Once you know your soil’s pH level, you can add the appropriate soil amendments to optimize the growth of your lawn.

    Watering Your Yard

    Watering your yard is essential for maintaining a lush and healthy lawn. However, watering your yard too much or too little can cause damage to your property. The ideal time to water your lawn is early morning or late evening when the temperature is cooler. This will ensure that the water penetrates deep into the soil and does not evaporate too quickly.

    Fertilizing Your Yard

    Fertilizing your yard is necessary to supply nutrients for your lawn’s growth. However, too much fertilizer can cause damage to your lawn. Fertilizing your lawn in the spring and fall seasons is recommended when the grass is actively growing. You can also use organic fertilizers that are less harmful to the environment.

    Mowing Your Lawn

    Mowing your lawn is essential for maintaining the appropriate height for your grass. However, mowing your lawn too short can damage the roots and cause your lawn to dry out. It is recommended to mow your lawn at least once a week and to adjust the mower blades to a height that does not remove more than a third of the grass blade.

    Aeration

    Aeration creates small holes in your lawn to improve air circulation, water penetration, and nutrient absorption. Aeration helps to loosen compacted soil and remove thatch, the layer of dead grass and organic matter accumulating on the soil’s surface. It is recommended to aerate your lawn at least once a year.

    Weed Control

    Weeds can be a nuisance in your yard, competing with your grass and plants for nutrients and water. Removing weeds as soon as you spot them is recommended, as they can quickly spread and take over your lawn. You can use herbicides or natural weed control methods to eliminate weeds.

    Pest Control

    You can use natural pest control methods such as introducing beneficial insects or using organic pest control products to minimize the use of harmful chemicals.

    Mulching

    Mulching covers the soil’s surface with a layer of organic matter such as grass clippings, leaves, or compost. Mulching helps to retain moisture in the soil, suppress weeds, and provide nutrients to your lawn and plants. It is recommended to mulch your yard at least once a year.

    FAQs

    • How often should I water my lawn?

    Watering your lawn deeply once a week, rather than frequent shallow watering, is recommended to encourage deep root growth.

    • Can I use chemical fertilizers on my lawn?

    Yes, but it is recommended to use organic fertilizers that are less harmful to the environment.

    • How often should I mow my lawn?

    It is recommended to mow your lawn at least once a week and to adjust the mower blades to a height that does not remove more than a third of the grass blade.

    • How do I identify a pest infestation in my yard?

    You can identify a pest infestation by looking for signs such as brown patches, yellowing leaves, or damaging your lawn and plants.

    • What is the best time to mulch my yard?

    It is recommended to mulch your yard in the fall season to prepare your lawn for winter.

    Conclusion

    Maintaining a beautiful and healthy yard requires effort and knowledge. However, you can achieve the perfect lawn with these top 10-yard care tips. You can transform your yard into an outdoor oasis by knowing your soil, watering and fertilizing your lawn correctly, mowing your lawn to the appropriate height, aerating, controlling weeds and pests, and mulching.

    You may also like these posts!

  • Best Practices for Leaf Mulching Lawn Mower: Green Your Lawn

    Best Practices for Leaf Mulching Lawn Mower: Green Your Lawn

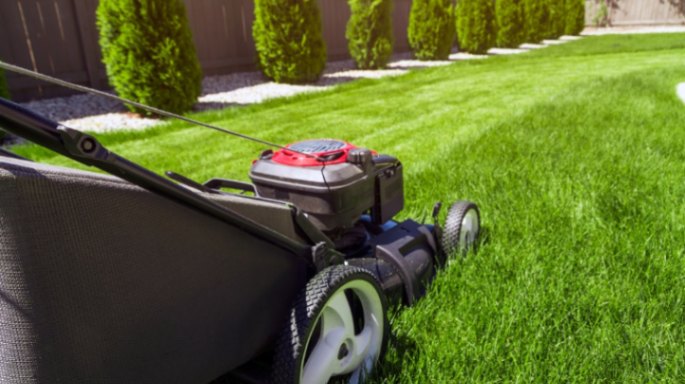
    Lawn care can be daunting, especially when managing fallen leaves in autumn. However, with the right equipment, you can make this task easier and benefit your lawn. Leaf mulching lawnmowers are a popular tool used by many homeowners to manage fallen leaves while also adding organic matter to their lawns. This article will discuss the Best Practices for Leaf Mulching Lawn Mower to get the most out of this tool.

    Choosing the Right Lawn Mower for Leaf Mulching

    If you’re a homeowner, you’re probably already familiar with the struggle of keeping your lawn and garden tidy. One of the most frustrating tasks is constantly cleaning fallen leaves during fall. However, leaf mulching is an effective solution to this problem. Not only does it help reduce the amount of waste that needs to be removed, but it also adds nutrients back into the soil. But, to effectively mulch leaves, you need the right lawn mower. Here, we’ll discuss the different types of lawn mowers suitable for leaf mulching, the features to consider when selecting a lawn mower, and the importance of the right blade.

    Types of Lawn Mowers Suitable for Leaf Mulching

    Push Reel Mowers

    Push reel mowers are an excellent option for those with smaller lawns. They are eco-friendly, budget-friendly, and produce no noise. Push reel mowers have sharp blades that work by cutting the grass and leaves in a scissor-like motion. These mowers work well for leaf mulching if the leaves are not too thick or wet.

    Electric Lawn Mowers

    Electric lawnmowers are becoming increasingly popular due to their efficiency and eco-friendliness. They come in corded and cordless models, and both can effectively mulch leaves. However, cordless electric mowers have the advantage of being more maneuverable as they don’t require an extension cord.

    Gas-Powered Lawn Mowers

    Gas-powered lawn mowers are the most potent option for leaf mulching. They are suitable for more extensive lawns and can handle thicker and wetter leaves. However, they are also the most expensive and produce emissions that are harmful to the environment.

    Preparation before Leaf Mulching with a Lawn Mower

    Before you start leaf mulching with a lawn mower, there are some essential steps you need to take to ensure that the process goes smoothly. In this section, we’ll cover the best time to mulch leaves with a lawn mower, pre-mowing tips before mulching leaves, and how to prepare your lawn mower for leaf mulching.

    The Best Time to Mulch Leaves With a Lawn Mower

    The best time to mulch leaves with a lawn mower is when the leaves are dry. Wet leaves can clog the lawn mower’s blade and chute, making it difficult for the mower to mulch the leaves effectively. Ideally, it would be best to wait until after most of the leaves have fallen and have had a chance to dry out for a few days.

    Pre-Mowing Tips Before Mulching Leaves

    Before you start mulching leaves with your lawn mower, preparing your lawn for the process is essential. Here are some pre-mowing tips to follow:

    Clear the Lawn

    Ensure your lawn is free of debris or obstacles, such as toys or branches, that could damage the lawn mower or cause injury.

    Adjust the Blade Height

    Adjust the blade height of your lawn mower to a level suitable for leaf mulching. This will prevent the mower from scalping the lawn and ensure the leaves are mulched evenly.

    Check the Air Filter

    A dirty air filter can reduce the performance of your lawn mower. Before mulching leaves, check the air filter and replace it if necessary.
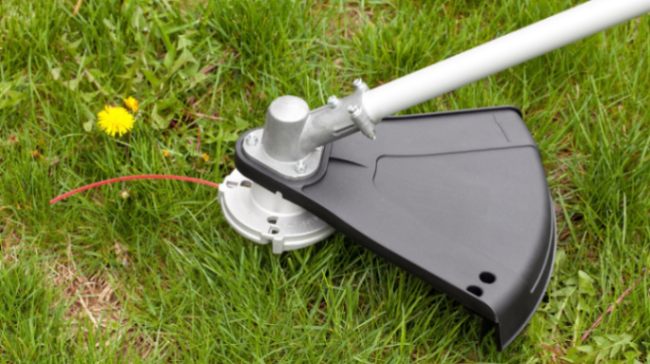
    Sharpen the Blade

    A dull lawn mower blade can tear the leaves instead of cutting them, resulting in uneven mulching. Make sure your lawn mower blade is sharp before you start mulching leaves.

    How to Prepare Your Lawn Mower for Leaf Mulching

    In addition to pre-mowing tips, there are some specific steps you can take to prepare your lawn mower for leaf mulching:

    Install a Mulching Blade

    A mulching blade is designed to cut the leaves into smaller pieces, which makes them easier to decompose and adds nutrients back into the soil. If your lawn mower has no mulching blade, you can purchase and install one separately.

    Adjust the Chute

    Adjust the chute of your lawn mower to direct the mulched leaves back onto the lawn. This will help the leaves decompose and add nutrients back into the soil.

    Clean the Lawn Mower

    Before you start mulching leaves, ensure your lawn mower is clean and debris-free. This will help prevent clogs and ensure the lawn mower operates at peak performance.

    Following these steps, you can prepare your lawn mower for leaf mulching and ensure the process goes smoothly. With the right lawn mower and preparation, you can turn a tedious task into a beneficial process for your lawn and garden.

    Proper Leaf Mulching Techniques with a Lawn Mower

    Once you have prepared your lawn mower for leaf mulching, it’s essential to use proper techniques to ensure that the leaves are mulched evenly and effectively. In this section, we’ll cover height adjustments for leaf mulching, mowing patterns for optimal leaf mulching, and how to avoid scalping when mulching leaves.

    Height Adjustments for Leaf Mulching

    The height of your lawn mower’s blade is an essential factor to consider when mulching leaves. If the blade is too low, it can scalp the lawn and damage the grassroots. If the blade is too high, it may not effectively mulch the leaves. Here are some tips for adjusting the blade height for leaf mulching:

    Set the Blade at 3 Inches

    Set your lawn mower’s blade to a height of 3 inches for optimal leaf mulching. This height will allow the blade to effectively mulch the leaves without scalping the lawn.

    Adjust for Leaf Thickness

    If you have thicker leaves, you may need to adjust the blade height slightly to ensure the leaves are mulched evenly.

    Check the Lawn After Mowing

    After mowing, check the lawn to ensure the grass is not scalped and the leaves are mulched evenly. If necessary, adjust the blade height the next time you mulch leaves.

    Mowing Patterns for Optimal Leaf Mulching

    The mowing pattern you use can also affect the quality of leaf mulching. Here are some tips for mowing patterns:

    Alternate Directions

    Mow in different directions each time you mulch leaves. This will ensure that the leaves are mulched evenly and reduce the risk of scalping the lawn.

    Overlap Slightly

    Overlap the rows slightly when mowing. This will ensure the leaves are evenly mulched and reduce the risk of leaving un-mulched patches.

    Use a Spiral Pattern

    A spiral mowing pattern can also be effective for leaf mulching. Start at the center of the lawn and mow in a spiral pattern outward. This will ensure that the leaves are evenly mulched and reduce the risk of scalping the lawn.

    How to Avoid Scalping When Mulching Leaves

    Scalping can occur when the lawn mower’s blade is too low and cuts into the grassroots. Here are some tips for avoiding scalping when mulching leaves:

    Check the Blade Height

    Ensure the blade height is set to at least 3 inches for leaf mulching.

    Avoid Uneven Ground

    Avoid mowing on uneven ground, which can increase the risk of scalping.

    Avoid Mowing Wet Grass

    Mowing wet grass can increase the risk of scalping. Wait until the grass is dry before mowing.

    Following these proper techniques, you can effectively mulch leaves with a lawn mower without damaging your lawn. Adjust the blade height, use proper mowing patterns, and avoid scalping for optimal leaf mulching.

    Maintenance of a Leaf Mulching Lawn Mower

    Maintenance is essential to owning a lawn mower, mainly when using it for leaf mulching. Proper lawn mower care and maintenance will extend its lifespan, improve its performance, and prevent potential safety hazards. Here are some essential maintenance tasks for your leaf-mulching lawn mower:

    Maintenance Schedule for a Leaf Mulching Lawn Mower

    Your lawn mower manufacturer’s instructions manual provides essential guidance for maintenance schedules. A general rule of thumb is to perform maintenance tasks regularly, such as before or after each use or after every 25 hours. A typical maintenance schedule for a leaf-mulching lawn mower includes the following:

    • Check oil levels regularly and change the oil as required, usually after 50 hours of use.
    • Replace the air filter every season or after every 25 hours of use.
    • Inspect and clean spark plugs, usually every season or after 100 hours of use.
    • Check and adjust the blade for sharpness after every 10 hours of use.
    • Inspect the belts and cables regularly and replace them if they show signs of wear or damage.

    Importance of Cleaning a Leaf Mulching Lawn Mower

    Cleaning your leaf-mulching lawn mower regularly will prevent rust and corrosion, remove dirt and debris, and keep the engine and other parts functioning correctly. Here are some cleaning tips for your lawn mower:

    • Remove any grass clippings, leaves, and debris from the lawn mower after each use.
    • Scrub the undercarriage with a wire brush to remove any stuck-on debris.
    • Clean the air filter and housing with a brush or compressed air to remove dirt and debris.
    • Wash the lawn mower exterior with soapy water and a sponge, rinse with a hose, and dry with a towel.
    • Lubricate moving parts and the throttle control cable with a spray lubricant or oil.

    How to Sharpen Blades of a Leaf Mulching Lawn Mower

    A dull blade can result in a rough and uneven cut, leading to less effective leaf mulching. It is essential to sharpen your lawn mower’s blades regularly. Here’s how to do it:

    • Remove and disconnect the spark plug wire to prevent accidental starting.
    • Remove the blade, using a wrench or socket to loosen the nut that holds it in place.
    • Use a metal file or a grinder to sharpen the blade by running it along the cutting edge.
    • Make sure the blade is balanced by placing it on a balancing tool, and add or remove metal as needed to balance it.
    • Reinstall the blade and tighten the nut securely.

    By following these maintenance tasks, you can keep your lawn mulching lawn mower in excellent working condition and enjoy an efficient leaf mulching process for years.

    Common Leaf Mulching Lawn Mower Mistakes to Avoid

    Leaf mulching with a lawn mower is an excellent way to turn your lawn’s fall leaves into nutrient-rich compost. However, people make several common mistakes when leaf mulching, which can lead to poor results and even damage to your lawn mower. Here are some common leaf mulching lawn mower mistakes to avoid:

    Over mulching

    Over-mulching is one of the most common mistakes people make when leaf mulching. This happens when you try to mulch too many leaves at once, which can clog the lawn mower’s discharge chute and cause it to stall. Over-mulching can also cause the leaves to clump together, preventing proper decomposition.

    To avoid over-mulching, it’s essential to start with a thin layer of leaves and work your way up gradually, making sure that the lawn mower is handling the load effectively. If the lawn mower is struggling or stalling, stop and clear the discharge chute before continuing.

    Not Using the Right Type of Lawn Mower

    Another common mistake is using the wrong type of lawn mower for leaf mulching. While many lawnmowers can mulch leaves, some are more effective. Mulching lawn mowers are designed for this purpose, with unique features such as high-lift blades and mulching decks designed to shred leaves finely.

    If you try to mulch leaves with a standard lawn mower, it doesn’t work either, and you may need multiple passes to achieve the desired results. This can be time-consuming and may also put unnecessary strain on the lawn mower’s engine.

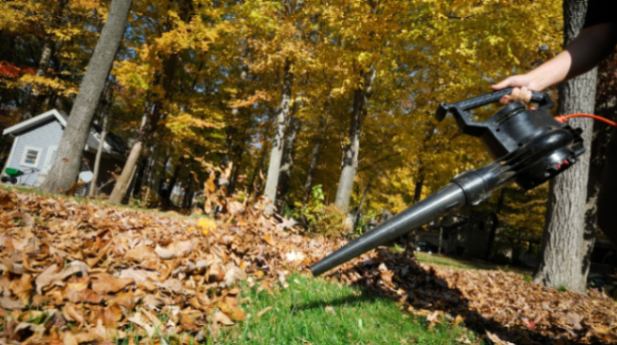
    Mulching When the Leaves Are Wet

    Mulching wet leaves is another common mistake that can lead to poor results. Wet leaves tend to clump together, making it difficult for the lawn mower to shred them finely. Wet leaves can also clog the lawn mower’s discharge chute, leading to stalls and other issues.

    To avoid this mistake, wait until the leaves are dry before mulching them with your lawn mower. You can rake the leaves into piles and let them dry in the sun for a few hours before mulching them.

    By avoiding these common mistakes, you can achieve optimal leaf mulching results with your lawn mower. It’s essential to follow the manufacturer’s instructions and properly care for your lawn mower to ensure that it performs effectively and lasts for years.

    How to Use Mulched Leaves as Fertilizer

    After mulching your lawn’s fall leaves, you can use the resulting leaf mulch as a nutrient-rich fertilizer for your garden or flower beds. Here’s how to use mulched leaves as fertilizer:

    Benefits of Using Mulched Leaves as Fertilizer

    Mulched leaves are an excellent source of organic matter that can help improve soil health and fertility. When leaves are mulched, they break down more quickly, releasing nutrients such as nitrogen, phosphorus, and potassium into the soil. This can help promote healthy plant growth and reduce the need for synthetic fertilizers.

    Using mulched leaves as fertilizer can also help improve soil structure, water retention, and drainage. This can significantly benefit gardens and flower beds with heavy or compacted soil.

    How to Use Mulched Leaves as Fertilizer

    To use mulched leaves as fertilizer, spread a layer of the mulch over your garden or flower beds, covering the soil evenly. Mix the mulch into the soil using a garden fork or tiller.

    It’s best to apply the mulch in the fall, after the leaves have been mulched, and before the ground freezes. This will give the mulch time to break down and release its nutrients into the soil over the winter months.

    Precautions When Using Mulched Leaves as Fertilizer

    While using mulched leaves as fertilizer can be beneficial, there are a few precautions to remember. First, using only leaves from trees that are not diseased or treated with pesticides or other chemicals is essential. Using contaminated leaves can introduce harmful substances into your garden or flower beds, harming plants and soil health.

    It’s also important not to over-apply the mulch, as this can lead to nitrogen tie-up in the soil. This happens when the carbon in the mulch uses up the soil’s available nitrogen as it breaks down, making it temporarily unavailable to plants. To avoid this, apply a thin layer of mulch and monitor the soil’s nitrogen levels regularly.

    In summary, using mulched leaves as fertilizer is an excellent way to improve soil health and promote healthy plant growth. Following these simple tips, you can make the most of your fall leaves and enjoy a more beautiful and productive garden.

    Benefits of Leaf Mulching Lawn Mower

    Before delving into the best practices of using a leaf-mulching lawn mower, it’s essential to understand the benefits of using one. Leaf mulching lawn mowers allow you to easily manage fallen leaves in a way that benefits your lawn. When you mulch the leaves, they break down and release nutrients into the soil, improving soil health and promoting healthier properties. Additionally, mulching the leaves can save you time and money since you won’t have to rake, bag, and dispose of the leaves.

    FAQs

    • Do I need a dedicated leaf mulching lawn mower to mulch leaves?

    While a dedicated leaf-mulching lawn mower is ideal, any mower with a mulching blade and deck can effectively mulch leaves.

    • How often should I mulch leaves?

    It’s best to mulch leaves regularly throughout autumn to promote a healthier lawn.

    • Can I leave the mulched leaves on the lawn?

    Yes, leaving the mulched leaves on the lawn can promote a healthier lawn by adding organic matter to the soil.

    • Will mulching leaves harm my lawn?

    No, mulching leaves benefits your lawn by adding organic matter to the soil and releasing nutrients.

    • How do I adjust the mower height for leaf mulching?

    Check your mower’s manual for specific instructions on adjusting the deck height. Typically, you’ll want to set the deck at the highest height to avoid damaging the grass while effectively mulching the leaves.

    Conclusion

    Leaf mulching lawnmowers help manage fallen leaves while promoting a healthier lawn. By following these best practices, you can get the most out of your leaf-mulching lawn mower and make lawn care easier and more beneficial.

    You may also like these posts!

  • Benefits of Leaf Blower Vacuum: Maximize Your Lawn Care

    Benefits of Leaf Blower Vacuum: Maximize Your Lawn Care

    If you are a homeowner, you know how important it is to keep your lawn clean and well-maintained. The beauty of your home’s exterior largely depends on how tidy and organized your lawn is. That’s where leaf blower vacuums come in. These machines are a game-changer when it comes to lawn maintenance. In this article, we’ll review the benefits of leaf blower vacuums and how they can help keep your lawn looking beautiful.

    Introduction

    Keeping your lawn clean and organized is essential for maintaining your home’s curb appeal. A leaf blower vacuum is a tool that can help you achieve this. These machines are not only efficient, but they are also eco-friendly and versatile. They can save you time and energy while ensuring your lawn is healthy and well-maintained.

    What is a leaf blower vacuum?

    A leaf blower vacuum is a machine that can blow and vacuum leaves, grass clippings, and other debris. These machines are designed to make lawn maintenance easier and more efficient. They can clear debris from large lawns, gardens, patios, and driveways.

    Types of leaf blower vacuums

    There are two types of leaf blower vacuums: handheld and backpack. Handheld leaf blower vacuums are lightweight and portable, perfect for small yards and gardens. Backpack leaf blower vacuums are more powerful and are better suited for more significant properties.

    Benefits of leaf blower vacuums

    Saves time and energy

    Leaf blower vacuums are designed to make lawn maintenance easier and more efficient. They can save you time and energy by reducing the amount of manual labor required to clear debris from your lawn. With a leaf blower vacuum, you can clear your lawn in a fraction of the time it would take to do it manually.

    Eco-friendly option

    Leaf blower vacuums are an eco-friendly option for lawn maintenance. Unlike traditional gas-powered leaf blowers, which emit harmful fumes into the air, leaf blower vacuums are electric-powered and produce no emissions. This makes them a more sustainable and environmentally-friendly option.

    Versatile tool

    Leaf blower vacuums are versatile tools that can be used for more than just clearing leaves and debris from your lawn. They can also clean gutters, remove snow, and blow up inflatables.

    Better for your lawn

    Using a leaf blower vacuum to clear debris from your lawn is better for your lawn’s health than raking or using a traditional leaf blower. Raking can damage the grass and soil, while leaf blowers can blow away the topsoil, essential for healthy grass growth. A leaf blower vacuum, on the other hand, can effectively remove debris without damaging the grass or soil.

    How to choose the right leaf blower vacuum

    When choosing a leaf blower vacuum, there are a few factors to consider. These include the size of your lawn, the type of debris you will be clearing, and the machine’s power source. It’s essential to choose a machine that is powerful enough to handle the debris on your lawn but not so powerful that it causes damage to your grass or plants.

    A handheld leaf blower vacuum may be sufficient if you have a small lawn or garden. However, a backpack leaf blower vacuum may be more suitable if you have a larger property. You should also consider the power source of the machine. Electric-powered leaf blower vacuums are quieter and more eco-friendly than gas-powered machines but may be less potent.

    Tips for using leaf blower vacuums effectively

    Using a leaf blower vacuum is easy, but a few tips can help you use the machine more effectively. First, wear ear and eye protection to prevent damage to your hearing or eyesight. When using the machine, start at the far end of your lawn and work towards the center, blowing or vacuuming debris towards the center of the lawn.

    Using the machine to clear debris from flower beds or gardens, use a lower setting to avoid damaging plants. It’s also important to avoid using the machine on wet leaves or grass, as this can cause clogs and damage the machine.

    Maintenance tips for leaf blower vacuums

    To keep your leaf blower vacuum running smoothly, it’s essential to perform regular maintenance. This includes cleaning the machine after each use, checking the air filter and spark plug, and ensuring adequate fuel and oil levels. It’s also a good idea to sharpen or replace the blades when they become dull.

    FAQs

    • Can leaf blower vacuums be used on gravel driveways?

    Yes, leaf blower vacuums can be used on gravel driveways, but you should be careful not to blow away too much gravel.

    • Are backpack leaf blower vacuums heavy to carry?

    Backpack leaf blower vacuums can be heavy, but they are designed to distribute the weight evenly, making them easier to carry for extended periods.

    • Can leaf blower vacuums be used to remove snow?

    Some leaf blower vacuums have a snow removal attachment that allows them to remove light snow from driveways and walkways.

    • Can electric-powered leaf blower vacuums handle wet debris?

    Avoiding using electric-powered leaf blower vacuums on wet leaves or grass is essential, as this can cause clogs and damage the machine.

    • Do I need to wear protective gear when using a leaf blower vacuum?

    Yes, wearing ear and eye protection when using a leaf blower vacuum is essential to prevent damage to your hearing or eyesight.

    Conclusion

    In conclusion, leaf blower vacuums are essential for anyone looking to keep their lawn clean and beautiful. They are efficient, eco-friendly, and versatile, making them a valuable addition to any lawn care arsenal. By choosing the suitable machine, using it effectively, and performing regular maintenance, you can ensure that your lawn stays healthy and well-maintained for years.

    You may also like these posts!

  • What Is 065 Trimmer Line to Use: Find Out Here!

    What Is 065 Trimmer Line to Use: Find Out Here!

    As a lawn owner, it is essential to keep your lawn looking neat and tidy. A well-manicured lawn not only enhances the beauty of your property but also keeps your home safe from pests and other harmful insects. A string trimmer, also known as a weed eater, is essential for maintaining a beautiful lawn. The trimmer uses a spool of string, also known as a trimmer line, to cut grass, weeds, and other vegetation. This article will explore what is 065 trimmer line to use.

    What is 065 Trimmer Line?

    Trimmer lines come in different shapes, sizes, and materials. The 065 trimmer line is a string that measures 0.065 inches in diameter. It is a medium-duty string suitable for light to moderate trimming tasks. It is thinner than the standard 080 trimmer line, making it more flexible and maneuverable. The 065 trimmer line is compatible with most string trimmer brands, making it a popular choice among lawn owners.

    Uses of 065 Trimmer Line

    The 065 trimmer line is ideal for light to moderate trimming tasks, such as trimming grass and weeds around flower beds, sidewalks, and other tight spaces. Its smaller diameter makes it perfect for trimming around trees and other objects without damaging them. The 065 trimmer line is also suitable for small to medium-sized lawns with grass up to six inches tall.

    Advantages of 065 Trimmer Line

    There are several advantages to using the 065 trimmer line, including:

    Increased Flexibility

    The 065 trimmer line is thinner than the standard 080 trimmer line, making it more flexible and easier to maneuver. It is perfect for trimming around objects and tight spaces where a thicker line would be too cumbersome.

    Better Cutting Performance

    The 065 trimmer line is designed to cut through grass and weeds quickly and efficiently. Its smaller diameter lets it cut through thorny vegetation without getting tangled or breaking.

    Improved Fuel Efficiency

    Using a thinner trimmer line can improve fuel efficiency. The 065 trimmer line puts less strain on the engine, allowing it to run more efficiently and for extended periods.

    Cost-Effective

    The 065 trimmer line is less expensive than thicker lines, making it a cost-effective option for lawn owners who need to trim their lawns regularly.

    Disadvantages of 065 Trimmer Line

    While the 065 trimmer line has many advantages, it also has some disadvantages, including:

    Not Suitable for Heavy-Duty Tasks

    The 065 trimmer line is unsuitable for heavy-duty tasks, such as clearing overgrown areas or cutting through thick vegetation. It is designed for light to moderate trimming tasks only.

    Prone to Breakage

    The 065 trimmer line is thinner than thicker lines, making it more prone to breakage. It may need to be replaced more frequently than thicker lines, increasing maintenance costs.

    FAQs

    • Can I use the 065 trimmer line on any trimmer brand?

    Yes, the 065 trimmer line is compatible with most trimmer brands.

    • How often should I replace the 065 trimmer line?

    The frequency of replacing the 065 trimmer line depends on how often you use it and the type of vegetation you are trimming. Generally, it is recommended to replace the trimmer line every time you start a new trimming session or when the line becomes too short or broken.

    • Is the 065 trimmer line suitable for edging?

    While the 065 trimmer line can be edged, it may need to provide a cleaner cut. Edging requires a more precise cut, which may be better achieved with a thicker trimmer line or a dedicated edging tool.

    • Can I use the 065 trimmer line on a cordless trimmer?

    Yes, the 065 trimmer line is compatible with cordless trimmers. However, it is essential to check the trimmer’s manual to ensure it can handle the thinner diameter of the 065 trimmer line.

    • How does the 065 trimmer line compare to other trimmer line sizes?

    The 065 trimmer line is thinner than the standard 080 trimmer line but thicker than the 050 trimmer line. It is a medium-duty line suitable for light to moderate trimming tasks, while thicker lines are better for heavy-duty tasks and thicker vegetation.

    Conclusion

    The 065 trimmer line is a versatile and cost-effective option for lawn owners who need to maintain their lawns regularly. Its smaller diameter makes it perfect for light to moderate trimming tasks and trimming in tight spaces. While it may not be suitable for heavy-duty tasks or thick vegetation, it provides improved flexibility, cutting performance, fuel efficiency, and cost savings.

    You may also like these posts!

  • What is 065 Trimmer Line: Why 065 Line is a Top Choice

    What is 065 Trimmer Line: Why 065 Line is a Top Choice

    If you have a lawn, you know the importance of keeping a trimmer line neat and tidy. However, with so many available options, it can take time to find the right one. This article will discuss what is 065 trimmer line and its features.

    What is a trimmer line?

    A trimmer line is a string-like cord used in a lawn trimmer or weed eater to cut grass and weeds. It spins at high speeds, cutting down anything it touches. A trimmer line is an essential tool for lawn care and maintenance.

    Types of trimmer lines

    There are different types of trimmer lines available in the market. Some of the most popular types are:

    • Round line
    • Twisted line
    • Square line
    • Serrated line

    Each type has its unique characteristics and advantages.

    What is a 065 trimmer line?

    The 065 trimmer line is a round line with a diameter of 0.065 inches. It is one of the most commonly used types of trimmer lines due to its versatility and durability.

    Diameter of a 065 trimmer line

    As mentioned earlier, the diameter of a 065 trimmer line is 0.065 inches. This size suits most lawn care and maintenance tasks, including trimming grass, small weeds, and edging.

    Advantages of a 065 trimmer line

    The 065 trimmer line has several advantages, including:

    • Versatility: It can handle most lawn care tasks, including trimming, edging, and small weeds.
    • Durability: It is made from high-quality materials, making it resistant to wear and tear.
    • Compatibility: It is compatible with most lawn trimmers and weed eaters.

    Disadvantages of a 065 trimmer line

    Like all trimmer lines, the 065 trimmer line has some disadvantages, including:

    • Not suitable for heavy-duty tasks: It is not recommended for cutting thick weeds or shrubs.
    • Can break easily: The line can break easily if the trimmer hits a hard object.

    How to choose the right trimmer line

    When choosing a trimmer line, consider the tasks you will be performing. If you have a small lawn, a 065 trimmer line will suffice. However, if you have a large lawn with thick weeds and shrubs, you may need a thicker and stronger trimmer line.

    How to replace a trimmer line

    Replacing a trimmer line is a simple process:

    • Please turn off the trimmer and unplug it from the power source.
    • Remove the old line and wind the new line onto the spool.
    • Thread the line through the trimmer head, and you are ready.

    Tips for using a trimmer line

    Here are some tips for using a trimmer line:

    • Wear safety gear, including eye and ear protection.
    • Start at the edge of the lawn and work your way in.
    • Keep the trimmer head level with the ground for an even cut.
    • Use a sweeping motion to avoid damaging plants or trees.
    • Please don’t force the trimmer line into thick weeds or shrubs; it can break easily.
    • Avoid cutting wet grass or weeds, as this can cause the line to become tangled or stuck.

    How to maintain a trimmer line

    Proper maintenance can extend the life of your trimmer line. Here are some tips:

    • Store the line in a dry place to prevent moisture buildup.
    • Check the line for wear and tear regularly and replace it when necessary.
    • Use a trimmer line compatible with your lawn trimmer or weed eater.
    • Keep the trimmer head clean and free of debris.

    FAQs

    • What does the number 065 mean in a trimmer line?

    The number 065 refers to the diameter of the trimmer line in inches.

    • Can I use a 065 trimmer line for edging?

    Yes, the 065 trimmer line is suitable for edging.

    • How often should I replace my trimmer line?

    You should replace your trimmer line when it becomes worn or broken. This can vary depending on how often you use your trimmer.

    • What is the difference between a round and a square trimmer line?

    A round trimmer line is more flexible and suitable for general trimming tasks, while a square trimmer line is more durable and suitable for heavy-duty tasks.

    • Can I use any trimmer line with my lawn trimmer or weed eater?

    No, you should use a trimmer line compatible with your lawn trimmer or weed eater. Check the manufacturer’s recommendations before purchasing a new line.

    Conclusion

    In conclusion, the 065 trimmer line is an excellent option for most lawn care and maintenance tasks. It is versatile, durable, and compatible with most lawn trimmers and weed eaters. However, it may not be suitable for heavy-duty tasks or cutting thick weeds or shrubs. When choosing a trimmer line, consider your tasks and choose a line compatible with your lawn trimmer or weed eater.

    You may also like these posts!

  • DIY Table Saw Station: Unleash Your Creativity

    DIY Table Saw Station: Unleash Your Creativity

    Are you a DIY enthusiast looking for a practical and efficient way to organize your workshop? Building your table saw station is the perfect solution! Our guide will provide comprehensive instructions on DIY Table Saw Station making a sturdy and versatile table saw station.

    Why Build Your Own Table Saw Station?

    A table saw station provides a dedicated workspace for your saw, making it easier and safer to work on woodworking projects. With a table saw station, you’ll have everything you need in one convenient location, including storage for your tools and accessories.

    Building your table saw station allows you to customize the design to your needs. You can choose the dimensions, materials, and storage options that work best for you.

    Materials Required

    To build your table saw station, you will need the following materials:

    • Plywood sheets
    • 2x4s
    • MDF sheets
    • Drawer slides
    • Casters
    • Screws
    • Wood glue

    Get Organized: Build a DIY Table Saw Station for Your Workshop

    Follow these steps to build your table saw station:

    Step 1: Cut the Plywood Sheets

    Cut the plywood sheets to the desired dimensions for the base, sides, and top of the station using a circular saw or table saw.

    Step 2: Cut the 2x4s

    Cut the 2x4s to the desired length for the frame of the station. You will need four pieces for the corners of the station and additional pieces for the frame supports.

    Step 3: Assemble the Frame

    Using wood glue and screws, assemble the frame of the station. Attach the corner pieces to the frame supports to create a sturdy base for the station.

    Step 4: Attach the Casters

    Attach the casters to the bottom of the station using screws. This will allow you to move the station around your workspace quickly.

    Step 5: Add the Drawers

    Using drawer slides and screws, attach the MDF sheets to the sides of the station to create the drawers. Ensure the drawers are level and sturdy to hold your tools and accessories.

    Step 6: Attach the Top

    Using wood glue and screws, attach the top plywood sheet to the station’s frame. Make sure the top is level and sturdy to support the weight of the table saw.

    Step 7: Add Storage

    To make the station even more functional, you can add storage options. This can include shelves, drawers, or hooks to hold your tools and accessories.

    Conclusion

    Following our comprehensive guide, you can quickly build a durable, functional, and tailored table saw station. Building your station is a great way to save money and customize the design to your liking. So why wait? Get started on your DIY project today!

    You may also like these posts!

  • Table Saw Maintenance Checklist: Table Saw Troubles?

    Table Saw Maintenance Checklist: Table Saw Troubles?

    A table saw is essential for any woodworker, carpenter, or DIY enthusiast. It’s a powerful machine that can make quick work of even the toughest cutting tasks. But like any other tool, a table saw requires regular maintenance to ensure it stays in good working condition. This article will review the table saw maintenance checklist you should regularly perform to keep your table saw running smoothly.

    Introduction

    Before diving into the maintenance checklist, let’s talk a little about why it’s important to keep your table saw in good condition. A poorly maintained saw can be dangerous, as it may not cut accurately or kick back unexpectedly. Additionally, regular maintenance can help extend the life of your saw, saving you money in the long run.

    A Cut Above: Keep Your Table Saw Running Smoothly with This Maintenance Checklist

    Cleaning and Lubrication

    The first step in any table saw maintenance checklist is cleaning and lubrication. Over time, sawdust and debris can build up inside your saw, affecting its performance. Here are a few tasks you should perform regularly:

    • Clean the Table and Fence

    Wipe down the table and fence with a clean, dry cloth after each use. This will help prevent sawdust and debris from building up and affecting the accuracy of your cuts.

    • Clean the Blade and Arbor

    Remove the blade and clean it thoroughly with a blade cleaner or solvent. Inspect the blade for any damage or dullness, and replace it if necessary. Clean the arbor and apply a few drops of lubricant to keep it running smoothly.

    • Clean the Motor and Belt

    Dust and debris can also build up inside the motor and belt. Use compressed air to blow out dust or debris, and wipe down the motor with a clean cloth. Lubricate the belt if necessary.

    • Check the Bearings and Pulleys

    Inspect the bearings and pulleys for any signs of wear or damage. Replace any worn or damaged parts to ensure your saw runs smoothly.

    Alignment and Calibration

    Once your saw is clean and lubricated, the next step is to check its alignment and calibration. A poorly aligned saw can lead to inaccurate cuts, so it’s important to check the following:

    • Check the Blade Alignment

    Use a combination square to check the alignment of the blade. Adjust the blade as necessary to ensure it’s perfectly parallel to the miter slot.

    • Check the Fence Alignment

    The fence should be parallel to the blade at all times. Use a dial indicator to check its alignment and adjust it as necessary.

    • Check the Miter Gauge Alignment

    The miter gauge should be perpendicular to the blade. Use a combination square to check its alignment and adjust it as necessary.

    • Check the Blade Height and Bevel

    Make sure the blade is at the correct height and bevel for the type of cut you’re making. Use a digital angle gauge to ensure accuracy.

    Safety Features

    Last, it’s important to check your saw’s safety features regularly. Here are a few tasks to perform:

    • Check the Blade Guard

    Make sure the blade guard is in good condition and functioning properly. Replace any parts that are worn or damaged.

    • Check the Riving Knife

    The riving knife should be properly aligned with the blade at all times. Make sure it’s securely in place before making any cuts.

    • Check the Anti-Kickback Pawls

    The anti-kickback pawls should be properly installed and functioning properly. Make sure they’re engaged before making any cuts.

    • Check the Power Switch

    Make sure the power switch is functioning properly and is easily accessible. If the switch is damaged or difficult to use, replace it immediately.

    • Check the Cord and Plug

    Inspect the power cord and plug for any damage or wear. If the cord or plug is damaged, replace it before using the saw again.

    • Check the Circuit Breaker

    Ensure the circuit breaker is functioning properly and the correct size for your saw. If the breaker trips frequently, it may indicate an electrical issue that requires further investigation.

    • Check the Dust Collection System

    A dust collection system is important for keeping your work area clean and preventing dust and debris from entering your saw. Please ensure the dust collection system is functioning properly and clean it out regularly.

    FAQs

    • How often should I perform maintenance on my table saw?

    You should perform basic cleaning and lubrication after each use and a more thorough maintenance check at least once every six months.

    • Can I perform maintenance on my table saw myself, or should I hire a professional?

    You can perform most basic maintenance tasks on your table saw yourself. However, it’s best to consult a professional if you’re unsure or uncomfortable with any of the tasks.

    • What should I do if I notice a problem with my saw during use?

    Stop using the saw immediately and investigate the issue. Continuing to use a saw that’s not functioning properly can be dangerous.

    • Is it necessary to use a dust collection system with my table saw?

    While it’s not strictly necessary, using a dust collection system can help keep your work area clean and prevent dust and debris from getting into your saw, which can affect its performance.

    • What should I do if my saw’s safety features aren’t working properly?

    Stop using the saw immediately and investigate the problem. Make any necessary repairs or replacements before using the saw again.

    Conclusion

    Performing regular maintenance on your table saw is essential for keeping it running smoothly and safely. By following this checklist, you can ensure your saw is always in good working condition, helping you make accurate cuts and extending the life of your saw.

    You may also like these posts!

  • What Not To Do With a Table Saw: Table Saw User Beware

    What Not To Do With a Table Saw: Table Saw User Beware

    A table saw is an essential tool you can only work with if you are a woodworker. It can make your work faster, more accurate, and more efficient. However, it can also be a dangerous tool if not used properly. Table saws have caused many accidents and injuries, so knowing what not to do with a table saw is essential. This article will discuss What Not To Do With a Table Saw to keep yourself safe.

    Understanding the Risks of Table Saws

    Before diving into what not to do with a table saw, it’s essential to understand its risks. If not used correctly, table saws can cause serious injuries, including amputations. The blade spins at high speeds and can easily cut through skin, bones, and muscles. Therefore, following safety guidelines and using the table saw cautiously is crucial.

    The Ultimate Guide to Table Saw Safety: What NOT to Do

    Using a Dull Blade

    Using a dull blade can cause the table saw to overheat and increase the risk of kickback. A dull blade also requires more force to cut through wood, which can cause the wood to bind and potentially cause injury. Always ensure your blade is sharp and in good condition before using the table saw.

    Removing the Blade Guard

    The blade guard is a safety feature often removed by woodworkers for convenience. However, keeping the blade guard is essential to prevent injuries. The blade guard protects your fingers from coming into contact with the blade and helps prevent kickback.

    Not Using a Push Stick

    A push stick is a safety tool that helps you push the wood through the saw without getting your fingers too close to the blade. Not using a push stick can result in your fingers being too close to the blade and potentially injured. Always use a push stick to keep your hands safe.

    Not Wearing Protective Gear

    Wearing protective gear is essential when using a table saw. Protective gear includes safety glasses, earplugs, and a dust mask. Safety glasses protect your eyes from debris, while earplugs protect your hearing. A dust mask helps prevent the inhalation of sawdust, which can harm your lungs.

    Cutting Small Pieces of Wood

    Cutting small pieces of wood can be dangerous as it can cause kickbacks. When cutting small pieces, use a push stick and ensure the wood is secured tightly to the saw. Consider using a sled to cut small pieces of wood safely.

    Not Checking the Wood for Defects

    Before cutting, inspect the wood for defects, such as knots or warps. Defective wood can cause kickback and potentially cause injury. If you notice defects, consider cutting around them or using a different piece of wood.

    Using Your Table Saw as a Workbench

    Using your table saw as a workbench is a common mistake that can cause injury. The table saw is designed for cutting wood, not using it as a workbench. It’s not built to support the weight of other tools or materials. Doing so can cause the table saw to become unstable and potentially fall, causing injury.

    Overloading the Table Saw

    Overloading the table saw can cause the motor to overheat and cause a fire. Always ensure that you are within the recommended capacity for your table saw. Follow the manufacturer’s instructions for the maximum load and avoid overloading the saw.

    Standing in the Line of Fire

    Standing in the line of fire is a significant safety hazard when using a table saw. The line of fire refers to the path the wood takes as it moves through the saw. Standing on this path can cause the wood to kick back and cause injury. Always stand to the side of the saw and out of the line of fire.

    Failing to Secure the Workpiece

    Failing to secure the workpiece can cause it to move or shift while cutting, potentially causing injury. Always ensure that the wood is secured tightly to the saw before cutting. Consider using clamps or a sled to hold the wood securely in place.

    Using the Wrong Blade for the Material

    Using the wrong blade for the material can cause kickback and potentially cause injury. Always use the correct blade for the material you are cutting. For example, use a rip blade for cutting with the grain and a crosscut blade for cutting across the grain.

    Not Cleaning the Table Saw

    Not cleaning the table saw can cause it to become clogged with sawdust and debris, potentially causing the motor to overheat and fail. Always clean your table saw after each use, and regularly check the dust collection system to ensure it’s functioning correctly.

    Rushing Through the Job

    Rushing through a job can cause you to make mistakes or overlook safety precautions, potentially causing injury. Take time and work steadily, always following safety guidelines and taking breaks when needed.

    FAQs

    • What is kickback, and how can I prevent it when using a table saw?

    Kickback occurs when the wood suddenly and forcefully moves back toward you. To prevent kickback, always use a sharp blade, a blade guard, and a push stick, and secure the wood tightly to the saw.

    • How often should I clean my table saw?

    It’s recommended to clean your table saw after each use and regularly check the dust collection system to ensure it’s functioning correctly.

    • Can I use my table saw as a workbench?

    No, using your table saw as a workbench is not recommended as it can cause instability and potentially cause injury.

    • What should I do if I notice defects in the wood I cut?

    If you notice defects in the wood, consider cutting around them or using a different piece of wood.

    • Is it essential to wear protective gear when using a table saw?

    Yes, wearing protective gear, such as safety glasses, earplugs, and a dust mask, is crucial when using a table saw to protect your eyes, ears, and lungs from potential harm.

    Conclusion

    In conclusion, a table saw is an essential tool for woodworkers but can be dangerous if not used correctly. Always follow safety guidelines and avoid the things we’ve discussed in this article, such as using a dull blade, removing the blade guard, not wearing protective gear, and standing in the line of fire. You can use your table saw safely and efficiently with proper use and caution.

    You may also like these posts!

  • Table Saw Safety Tips: Reduce the Risk of Injury

    Table Saw Safety Tips: Reduce the Risk of Injury

    Table saws are incredibly powerful tools that are essential in most woodworking projects. They can cut through various wood, plastic, and metal materials. However, with their power comes significant risks. According to a Consumer Product Safety Commission (CPSC) report, table saws are responsible for over 30,000 injuries yearly. These injuries can range from minor cuts and bruises to more severe lacerations, amputations, and even death. In this article, we will provide some essential table saw safety tips that will help reduce the risk of injury using a table saw.

    Table Saw Mastery: 15 Safety Tips Every Woodworker Should Know

    Wear Protective Gear

    The first and most important safety tip when using a table saw is to wear proper protective gear. This includes safety glasses, earplugs, and a dust mask. Safety glasses will protect your eyes from flying debris, earplugs will protect your hearing from the loud noise produced by the saw, and a dust mask will protect you from inhaling sawdust.

    Keep the Work Area Clean and Organized

    A cluttered work area can increase the risk of accidents. Ensure your work area is clean and organized, and remove any unnecessary items from the table saw. This will reduce the chances of an accident occurring.

    Use a Push Stick or Push Block

    A push stick or push block is a handy tool that helps keep your hands away from the blade while cutting. It allows you to push the material through the saw without putting your hands close to the blade. Always use a push stick or push block when cutting small or narrow pieces of wood.

    Use a Riving Knife and Blade Guard

    A riving knife is a safety device that sits behind the saw blade and prevents the wood from pinching the blade. It helps reduce the risk of kickback when the blade catches the wood and throws it back toward the operator. A blade guard is a transparent shield that covers the blade and prevents accidental contact with the blade.

    Never Remove the Blade Guard or Riving Knife

    Many woodworkers remove the blade guard and riving knife to make cutting more comfortable and faster. However, doing this can be incredibly dangerous, increasing the risk of kickback and accidental contact with the blade. Always use the blade guard and riving knife when using a table saw.

    Use Proper Techniques When Cutting

    Always use proper techniques when cutting. Keep your hands and fingers away from the blade, and never reach the saw blade. Use a feather board to hold the wood against the fence and prevent it from moving during the cut. Always stand to the side of the saw blade, never directly behind it.

    Use a Proper Blade for the Job

    Different blades are designed for different materials and types of cuts. Always use the proper blade to ensure a clean and precise cut. Using the wrong blade can increase the risk of accidents and damage to the saw.

    Never Wear Loose Clothing or Jewelry

    Wearing loose clothing or jewelry using a table saw can be incredibly dangerous. It can get caught in the saw blade and cause severe injuries. Always wear fitted clothing and remove any jewelry before using the saw.

    Never Leave the Saw Running Unattended

    Stay on the saw running, even for a short period. Always turn off the saw and wait for the blade to come to a complete stop before leaving the saw.

    Read the Manual and Follow the Manufacturer’s Recommendations

    Every table saw is different, and it’s essential to read the manual and follow the manufacturer’s recommendations for safe operation. This includes proper use, maintenance, and troubleshooting. Familiarize yourself with the features and functions of your table saw and follow the instructions carefully to reduce the risk of accidents.

    Keep Children and Pets Away from the Work Area

    Children and pets are naturally curious and can be drawn to a table saw’s loud noise and movement. Keep them away from the work area at all times to prevent them from accidentally getting hurt.

    Never Use the Saw When Tired or Under the Influence

    Using a table saw requires focus and concentration. Never use the saw when you are tired, distracted, or under the influence of drugs or alcohol. This can increase the risk of accidents and injuries.

    Use Proper Lighting

    Proper lighting is essential when using a table saw. Ensure your work area is well-lit, and use additional lighting if necessary. This will help you see the cutting line clearly and reduce the risk of accidental contact with the blade.

    Use a Stable Work Surface

    A stable work surface is essential when using a table saw. Ensure your workbench or table is sturdy and level, and never use the saw on an unstable or uneven surface.

    Keep Your Saw in Good Condition

    Regular maintenance is essential to keep your saw in good condition and reduce the risk of accidents. Keep the blade sharp and clean, and inspect the saw for any signs of wear or damage. Replace any worn or damaged parts immediately.

    In conclusion, table saws are powerful and versatile tools that can be incredibly useful for woodworking projects. However, they can also be very dangerous if not used properly. Following these safety tips can reduce the risk of injury and ensure a safe and enjoyable woodworking experience.

    FAQs

    • What is the most important safety tip when using a table saw?

    The most crucial safety tip when using a table saw is to wear proper protective gear, including safety glasses, earplugs, and a dust mask.

    • Why is it essential to keep the work area clean and organized when using a table saw?

    A cluttered work area can increase the risk of accidents. Keeping the work area clean and organized reduces the chances of an accident.

    • What is a riving knife, and why is it essential?

    A riving knife is a safety device that sits behind the saw blade and prevents the wood from pinching the blade. It helps reduce the risk of kickback when the blade catches the wood and throws it back toward the operator.

    • Can I remove the blade guard and riving knife using a table saw?

    You should never remove the blade guard and riving knife when using a table saw. Doing so can be incredibly dangerous and increases the risk of kickback and accidental contact with the blade.

    • Using a table saw, how can I ensure a safe and enjoyable woodworking experience?

    By following the safety tips outlined in this article, including wearing protective gear, using proper techniques, and keeping the saw in good condition, you can ensure a safe and enjoyable woodworking experience.

    You may also like these posts!

  • Wet Saw Vs Dry Saw: Sawing Through the Confusion!

    Wet Saw Vs Dry Saw: Sawing Through the Confusion!

    When cutting tiles or other rigid materials, the right saw can make all the difference. Two of the most popular options are wet saws and dry saws. But which one should you choose for your project? In this article, we will compare the Wet Saw Vs Dry Saw and guide you in selecting the best one for your needs.

    What is a wet saw?

    A wet saw is a powerful tool for cutting hard materials such as tiles or stone. It is called a “wet saw” because it uses water to cool the blade and suppress dust. The blade of a wet saw is typically made of diamond, allowing it to cut through even the most challenging materials quickly.

    What is a dry saw?

    A dry saw is also a powerful tool used for cutting hard materials. Unlike a wet saw, a dry saw does not use water to cool the blade or suppress dust. Instead, it relies on the blade’s design to dissipate heat and prevent overheating. Dry saws are typically less expensive than wet saws and are more portable.

    Wet Saw vs. Dry Saw: Key Differences

    The main difference between wet and dry saws is that wet saws use water to cool the blade and suppress dust, while dry saws do not. This difference has several implications for the performance and suitability of each type of saw.

    Advantages and disadvantages of wet saws

    Advantages of wet saws:

    • Wet saws produce less dust, making them cleaner and safer to use.
    • The water used by wet saws cools the blade, which helps to extend the life of the blade.
    • The water also makes the cut smoother, resulting in a cleaner and more precise cut.
    • Wet saws are generally more versatile and can be used for a broader range of materials.

    Disadvantages of wet saws:

    • Wet saws are typically more expensive than dry saws.
    • They require a water source and drainage, which makes them less portable and more difficult to set up.
    • Wet saws can be messier, as the water can splash and wet the surrounding area.

    Advantages and disadvantages of dry saws

    Advantages of dry saws:

    • Dry saws are generally less expensive than wet saws.
    • They are more portable and easier to set up.
    • They produce less mess, as there is no water involved.

    Disadvantages of dry saws:

    • Dry saws produce dust, which can be hazardous to health if proper precautions are not taken.
    • The heat from dry saws can cause the blade to wear out more quickly.
    • Dry saws are typically less precise than wet saws.

    When to use a wet saw?

    A wet saw is best suited for cutting tiles or other hard materials prone to chipping or breaking. The water used by wet saws helps to prevent these issues and produces a smooth, clean cut. Wet saws are also ideal for projects where precision and accuracy are essential, such as intricate tile patterns.

    When to use a dry saw?

    A dry saw is best suited for projects where portability and ease of use are essential. Dry saws are also ideal for cutting materials that do not require high precision, such as rough cuts on large blocks of stone or tiles.

    How to choose the right saw?

    When selecting between a wet saw and a dry saw, you should consider the following factors:

    • Material: Wet saws are better for cutting materials prone to chipping or breaking. In comparison, dry saws are better for less brittle materials.
    • Precision: A wet saw is your best option if you need a precise, clean cut.
    • Portability: A dry saw is a better choice if you need to move the saw around frequently or have a limited workspace.
    • Budget: Wet saws are generally more expensive than dry saws, so your budget may be a deciding factor.

    Wet Saw vs. Dry Saw: Which one is safer?

    Wet saws are generally considered safer than dry saws because they produce less dust, which can harm health. Wet saws also have a lower risk of causing accidents due to their smoother cutting action.

    Wet Saw vs. Dry Saw: Which one is faster?

    Dry saws are generally faster than wet saws, as there is no need to stop and refill the water supply. However, wet saws produce a smoother cut, which may reduce the need for additional sanding or grinding.

    Wet Saw vs. Dry Saw: Which one produces less dust?

    Wet saws produce significantly less dust than dry saws. Wet saws’ water helps suppress dust and prevent it from becoming airborne.

    Wet Saw vs. Dry Saw: Which one is more precise?

    Wet saws are generally more precise than dry saws. The water used by wet saws helps to keep the blade cool and lubricated, which reduces the risk of chipping or breaking the material being cut.

    Wet Saw vs. Dry Saw: Which one is more expensive?

    Wet saws are generally more expensive than dry saws due to the additional features and components required for water cooling and management.

    Wet Saw vs. Dry Saw: FAQs

    • Can I use a wet saw without water?

    You can use a wet saw without water, but this will reduce the blade’s lifespan and produce more dust.

    • How often should I change the water in my wet saw?

    You should change the water in your wet saw after every use to prevent bacterial growth and maintain the saw’s performance.

    • Can I use a dry saw for cutting tiles?

    Yes, you can use a dry saw for cutting tiles, but you may need to take additional safety precautions due to the high dust produced.

    • Can I use a wet saw for cutting wood?

    No, wet saws are not suitable for cutting wood. The water used by wet saws can damage the wood and cause it to warp.

    • Do I need to wear protective gear when using a saw?

    Yes, you should always wear appropriate protective gear when using a saw, including safety glasses, ear protection, and a dust mask.

    Wet Saw vs. Dry Saw: Conclusion

    In summary, both wet and dry saws have advantages and disadvantages. Wet saws are better suited for precision cutting, while dry saws are more portable and cost-effective. The choice between the two will depend on the specific needs of your project.

    You may also like these posts!