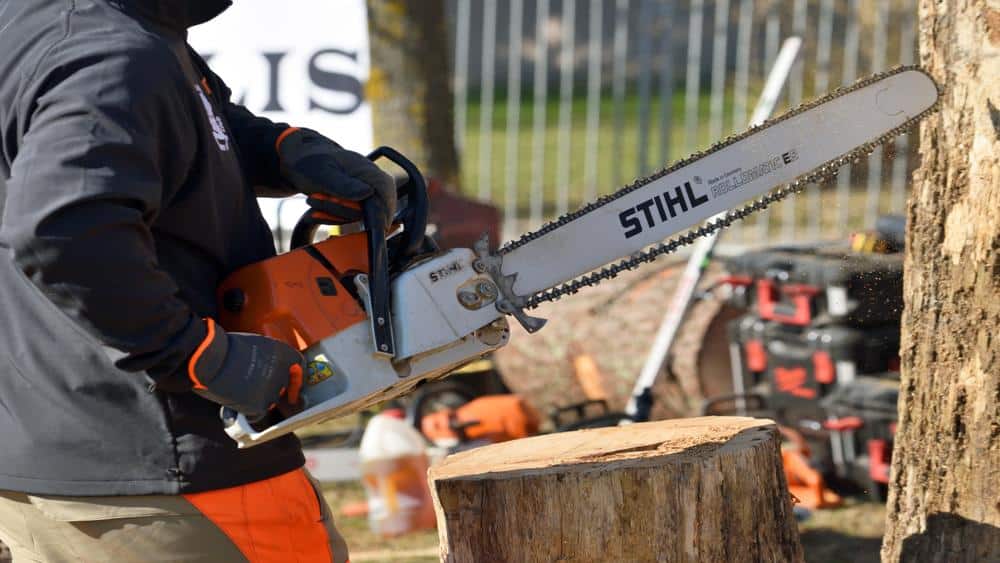
Unlock the art of power tool usage and beyond. From mastering the intricacies of various power tools to exploring advanced techniques, our comprehensive guides empower you to become a true master. Whether you’re a beginner or looking to refine your skills, embark on a journey of mastery with How-To Mastery and unleash your potential in the world of power tools and beyond.
Welcome to this comprehensive guide on How to Take Head off Dewalt Trimmer. This article is designed to assist both beginners and experienced users understand the process and importance of removing and servicing the head of their Dewalt trimmer. Whether it’s for maintenance, cleaning, troubleshooting, or replacement, knowing how to remove the trimmer head properly is a vital skill for ensuring your tool’s longevity and effective operation.
We’ll cover the reasons for removing the trimmer head, the necessary tools and safety precautions, provide detailed step-by-step guides for different models, including the 20V and 60V trimmers, and offer tips on troubleshooting common issues. Additionally, the article includes instructions on replacing the trimmer head, conducting final checks and tests, and advice on regular maintenance.
Introduction: Purpose and Importance
When it comes to maintaining your Dewalt trimmer, one of the key skills you’ll need is knowing how to remove the trimmer head. This is important for several reasons. First, removing the head is essential for performing thorough cleaning, which keeps your trimmer running smoothly. It’s also crucial when the time comes to replace a worn-out trimmer head with a new one. Additionally, understanding how to take the head off can be helpful if you need to troubleshoot any issues with your trimmer.
Removing the head of your Dewalt trimmer isn’t just about keeping it in good working order. It’s also about ensuring your safety and the longevity of the tool. Regular maintenance, including head removal, helps prevent malfunctioning that could lead to accidents. Moreover, by keeping your trimmer well-maintained, you’re also extending its lifespan, saving you money and hassle in the long run.
Reasons for Removing the Trimmer Head
Knowing how to remove the head of your Dewalt trimmer is helpful for several important reasons:
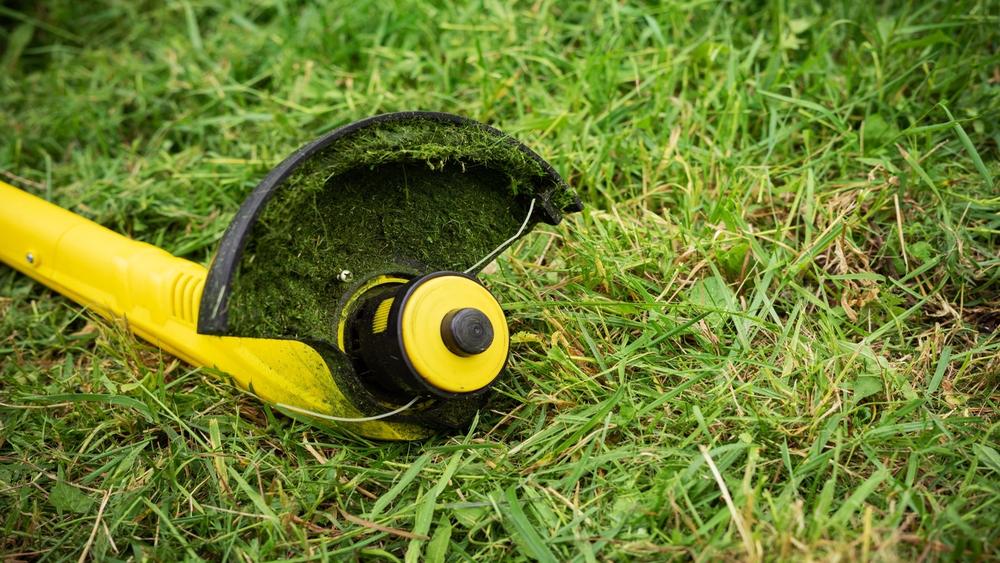
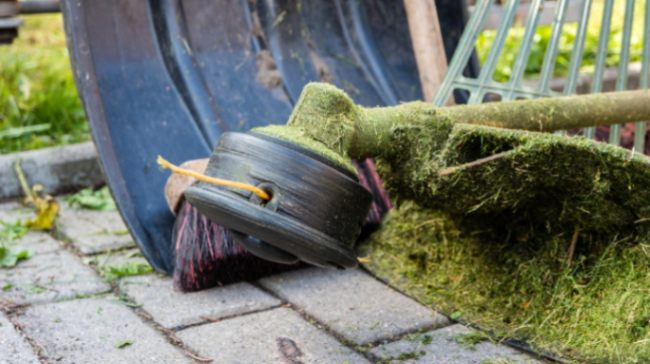
Cleaning: Over time, grass, dirt, and debris can build up in the trimmer head. Removing the head allows for a thorough cleaning, which is vital for keeping your trimmer in good working condition.
Maintenance: Regular maintenance, including checking and cleaning the trimmer head, ensures your tool operates effectively and lasts longer. It’s an essential part of tool care.
Troubleshooting: If your trimmer isn’t working as it should, removing the head is crucial in diagnosing and fixing any problems. This can include issues like line feed problems or unexpected noises.
Replacement: Eventually, trimmer heads wear out and need replacing. Knowing how to remove the old head is the first step in this process, allowing you to fit a new head and keep your trimmer working efficiently.
In summary, understanding how to remove the trimmer head is crucial for proper tool care and maintenance, helping you to keep your Dewalt trimmer in top condition for years to come.
Tools and Preparations
Before removing the head from your Dewalt trimmer, gathering the necessary tools and following safety precautions is essential.
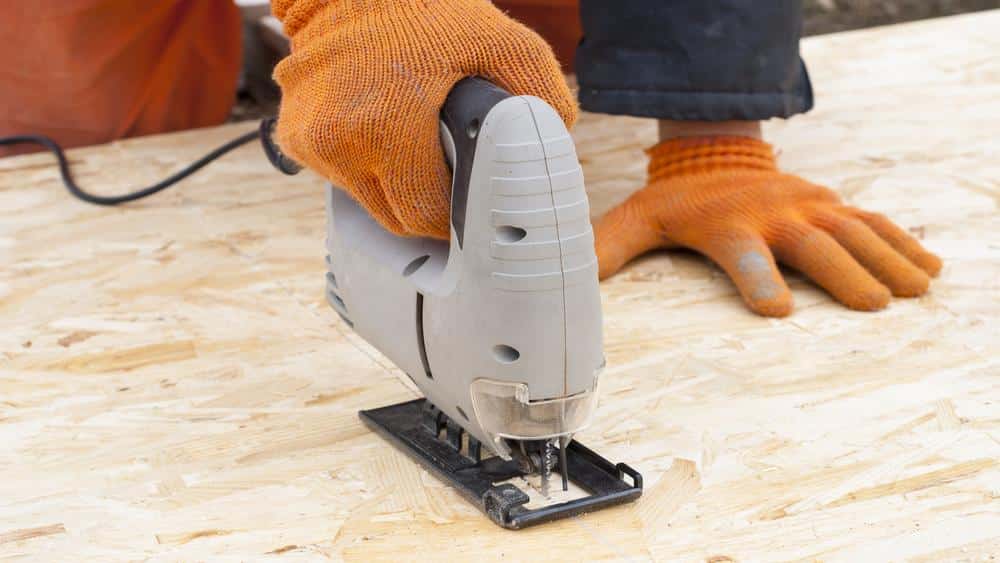
Necessary Tools: Typically, you’ll need a pair of gloves for protection, pliers for grip, and maybe a screwdriver or wrench, depending on your trimmer model. Check your user manual for specific tools required for your model.
Safety Precautions: Safety always comes first. Ensure the trimmer is turned off and disconnected from any power source. Wear protective gloves to guard against sharp edges and debris. Work in a well-lit, stable environment to avoid accidents.
Having the right tools and taking these safety measures will help you remove the trimmer head safely and effectively, avoiding damage to your device and preventing injuries.
Step-by-Step Guide for 20V & 60V Trimmers
Removing the head from a 20V Dewalt trimmer involves simple steps that are easy to follow:
Initial Steps
Safety First: Ensure the trimmer is powered off and the battery is removed.
Stabilize the Trimmer: Place the trimmer on a stable surface for easy handling.
Locate the Head: Identify the trimmer head; it’s the part where the line extends from during operation.
Detailed Procedure
Unlock the Head: Look for a lock mechanism or a knob on the head. This usually needs to be turned or pressed to loosen the head.
Turn the Head: Depending on the model, you may need to turn the head counterclockwise to loosen it.
Remove the Head: Once loosened, gently remove the head from the trimmer’s body.
Check and Clean: After removal, inspect the area for debris and clean if necessary.
Remember, each model might have slight variations, so consulting the user manual for specific instructions is always a good idea. This straightforward process doesn’t require specialized tools, making it accessible to most users.
Removing the head from a 60V Dewalt trimmer involves a slightly different process compared to other models:
Key Differences
Power Source: 60V trimmers are generally more robust, so handle them with extra care.
Head Mechanism: The mechanism for attaching and detaching the head may differ, often requiring specific steps or tools.
Detailed Steps
Safety Checks: Ensure the trimmer is off and disconnected from its power source.
Stabilize the Trimmer: Place the trimmer on a secure surface for easy access to the head.
Locate and Unlock the Head: Find the mechanism to attach the head. Depending on the model, this could be a button, a knob, or a screw.
Remove the Head: Carefully follow the specific mechanism to detach the head. This may involve unscrewing, pressing a release button, or turning the head in a particular direction.
Clean and Inspect: Once removed, clean the head area and inspect for any damage or wear.
Each 60V model may have unique features, so consulting the user manual for your specific model is recommended for precise instructions.
When dealing with a Dewalt trimmer, you might encounter a couple of common issues:
Jammed Head
Cause: Accumulation of grass, dirt, or debris inside the head.
Solution: Safely remove the head following the steps outlined earlier. Clean out any debris and check for damage to the head or line.
Worn-out Parts
Signs: Inconsistent performance, such as irregular trimming or difficulty in line feeding.
Solution: Inspect the head and other parts for signs of wear. Replace any worn-out parts to ensure optimal performance. Regular maintenance can prevent such issues.
Regularly checking and maintaining your Dewalt trimmer can quickly address these common issues and ensure your tool functions efficiently for a longer time.
Replacing the Trimmer Head
Replacing the head of your Dewalt trimmer involves two main steps:
Choosing the Right Head
Compatibility: Ensure the new head is compatible with your Dewalt trimmer model.
Type of Work: Consider the trimming work you do. Different heads may be better for heavy-duty work or finer trimming.
Installation Process
Prepare the Trimmer: Ensure the trimmer is off and the battery is removed.
Remove the Old Head: Follow the previously discussed steps to remove the old trimmer head safely.
Install the New Head: Align the new head with the trimmer’s shaft. Depending on the model, this may involve clicking it into place or using tools to secure it.
Check the Installation: Ensure the head is securely attached and rotates smoothly without any obstructions.
Properly replacing the trimmer head not only ensures efficient trimming but also extends the lifespan of your tool.
Final Checks and Testing
After replacing or servicing the head of your Dewalt trimmer, it’s essential to perform these final steps:
Ensuring Proper Functioning
Check Alignment: Make sure the new or serviced head is aligned correctly and securely attached.
Test Functionality: Turn on the trimmer briefly to ensure the head functions correctly, observing for unusual vibrations or noises.
Safety Tests
Visual Inspection: Look for any loose parts or damage that might have been missed during the replacement process.
Operational Test: Safely test the trimmer in an open area to confirm it operates safely and effectively.
These final checks are crucial to ensure the effective operation of your Dewalt trimmer and your safety while using it.
Maintenance Tips
Proper maintenance of your Dewalt trimmer is essential for its longevity and efficiency:
Regular Cleaning
After Use: Clean the trimmer head and blades to remove grass and debris.
Check for Damage: Regularly inspect for any signs of wear or damage, particularly after cleaning.
Storage Advice
Dry Location: Store the trimmer in a dry place to prevent rust and damage.
Battery Care: Remove the battery before storage for cordless models and ensure it’s charged periodically.
These simple maintenance steps can significantly extend the life and performance of your Dewalt trimmer.
Conclusion
Summary of Key Points
Understanding the Process: Knowing how to remove the head of your Dewalt trimmer is crucial for maintenance, cleaning, and replacing worn-out parts.
Step-by-Step Guidance: Follow specific steps for different models, like 20V or 60V trimmers, ensuring safety and effectiveness.
Troubleshooting: Use proper techniques to address common issues like jammed heads or worn parts.
Regular Maintenance: Keep your trimmer in top condition through regular cleaning and proper storage.
Snow removal is a winter chore that can be both tedious and challenging. Still, it can become a more manageable with the right tools and knowledge. This guide will walk you through How do you make a snow brush, a versatile tool for clearing snow from driveways, sidewalks, and vehicles. Understanding a snow brush’s mechanics and customization options can significantly enhance your winter experience. We’ll cover the materials you’ll need, step-by-step instructions for assembly, testing methods, and maintenance tips. Additionally, we’ll explore alternative snow removal tools, safety precautions, and seasonal storage and provide valuable tips for tackling various snow conditions. Embrace the winter season with confidence and a well-crafted snow brush in hand.
Purpose and Importance
This article is designed to guide you through the process of creating your own snow brush. A snow brush is an essential tool for those living in regions where snowfall is a common occurrence. It assists in removing snow from vehicles swiftly and efficiently, ensuring safe driving visibility. By creating a DIY snow brush, you not only get a customised tool suited to your specific needs, but also save money and reduce environmental waste. In a world increasingly oriented towards sustainability and individual craftsmanship, understanding how to make your own snow brush can be both a practical and fulfilling skill.
Understanding Snow Brushes
A snow brush, often paired with an ice scraper, is a handheld tool designed to aid in the removal of snow and ice from vehicles. Typically, it consists of a long, sturdy handle to reach across the width of a car, a bristle head for sweeping away snow, and a flat edge for scraping off ice. The handle is usually made of plastic or metal, providing durability and strength.
The bristle head is often composed of thick, rigid plastic bristles capable of moving heavy snow without scratching the vehicle’s surface. The ice scraper, on the other end of the handle, is a flat, hard plastic or metal edge used to break up and remove ice build-up. Some models also include a foam or rubber squeegee for clearing away slush or water. This combination of components allows for efficient and effective clearing of your vehicle during harsh winter weather.
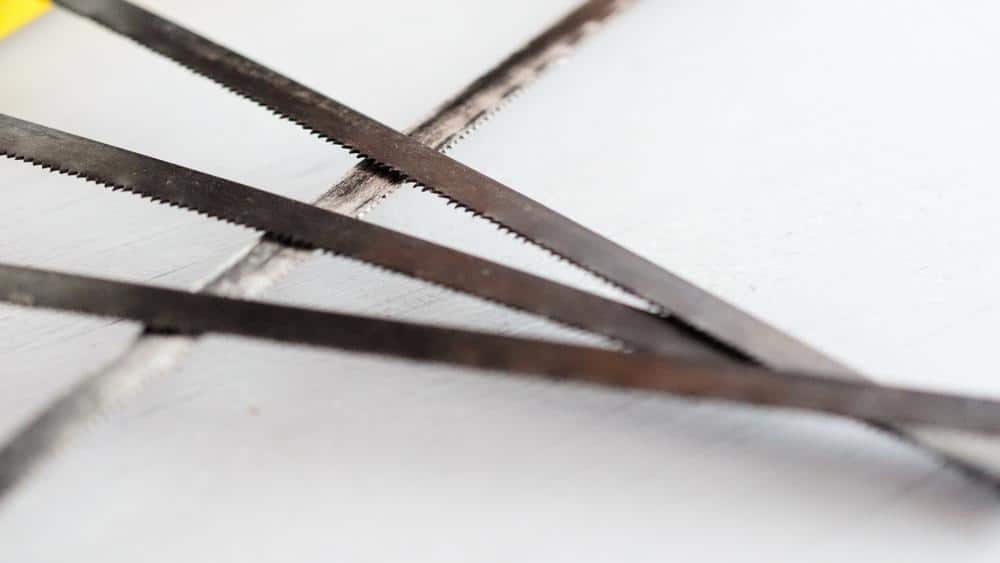
Gathering Materials
Materials Needed
In order to create your own snow brush, you will need the following items:
A long, sturdy handle: This could be made from a plastic or metal rod, or even a repurposed broom handle.
Bristle head: You can use a basic scrubbing brush with stiff, plastic bristles.
Ice scraper: A flat edge tool, such as a putty knife or an old credit card, can be repurposed as an ice scraper.
Secure fastening materials: These could include strong adhesive (like epoxy or heavy-duty glue), as well as duct tape or zip ties for additional support.
Optional squeegee element: A strip of foam or rubber can be used if you want to include a squeegee feature in your snow brush.
Safety equipment: Always ensure you have protective gloves and eyewear to safeguard against accidental injuries during the building process.
Designing Your Snow Brush
While designing your DIY snow brush, there are several aspects you need to consider to ensure it is effective, comfortable to use, and durable. Here are a few design considerations:
Length of the Handle: The length of the handle should be enough for you to reach the center of your vehicle’s roof comfortably. However, a too-long handle might become unwieldy. Hence, measure the breadth of your vehicle and your reach before deciding on the length of the handle.
Bristle Head Size and Texture: The size of the bristle head depends on how much snow you need to brush off at a time. A larger bristle head will cover more surface area, but it could also be more difficult to maneuver. The bristles should be stiff enough to remove snow but not so hard that they scratch your vehicle.
Ice Scraper Design: The ice scraper should be sturdy and flat. It should be wide enough to scrape off significant ice with each pass but not so wide that it becomes difficult to handle.
Attachment of Components: Consider how you will attach the bristle head and the ice scraper to the handle. They should be securely fastened so they do not detach during use.
Ergonomics: The snow brush should be comfortable to hold and use. You might consider adding a grip to the handle for comfort and to prevent slipping.
Optional Squeegee Feature: If you decide to include a squeegee feature, consider its placement. It should not interfere with the use of the bristle head or ice scraper.
Remember, the design of your snow brush will largely depend on your personal preferences, as well as the specific requirements of your vehicle and local weather conditions.
Step-by-Step Instructions
Assembling the Snow Brush
Here’s a step-by-step guide to assembling your snow brush:
Attach the Bristle Head: First, take your handle and your brush. Apply a generous amount of your heavy-duty adhesive to the top of the handle, and affix the brush, ensuring it’s firmly attached. If your handle and brush allow, you can also secure this connection by drilling a hole through both and inserting a sturdy screw or bolt.
Attach the Ice Scraper: On the opposite end of the handle, you’ll attach your ice scraper. Just like the bristle head, apply a liberal amount of adhesive to the handle and attach the scraper. For added stability, consider reinforcing this join with duct tape or zip ties.
Add the Optional Squeegee Element: If you’ve decided to include a squeegee feature, now’s the time to add it. Attach it to the side of the brush, opposite the handle, using your adhesive. Ensure that it doesn’t interfere with the use of the bristle head or ice scraper.
Secure All Attachments: After all components are attached, allow the glue to dry thoroughly before use. Check all attachments and reinforce any that seem loose or unstable.
Add Comfort Features: If desired, add any comfort features such as grip tape or padding to the handle. This can make using your snow brush in the chilly weather more comfortable.
Safety Check: Finally, give your snow brush a safety check. Make sure all pieces are secure and there are no sharp edges or points that could cause injury.
And there you have it! You’ve just assembled your own custom-made snow brush.
While the functional aspects of your snow brush are of paramount importance, you can also add personal touches to make it uniquely your own. Here are some ways you can customize your DIY snow brush:
Color: Add a splash of color to your snow brush by using a colored handle or by painting it. This not only makes your brush unique but also makes it easier to spot in a snow-covered landscape.
Handle Material: Though metal and plastic are common choices for the handle, you can experiment with different materials like wood for a rustic look or a lightweight composite for a modern touch.
Bristle Material: Similarly, while plastic bristles are quite effective, you can consider using natural materials like horsehair or plant fibers. Be sure to choose a material that won’t scratch your vehicle and can withstand the cold weather.
Engravings or Decals: Consider adding engravings or decals to the handle of your snow brush. This could be your name, a quote you like, or a simple pattern to add interest.
Grip Design: Add style and comfort to your snow brush by wrapping the handle with a grip tape of your choice. You can find grip tapes in various colors, patterns, and textures.
Attachment Extras: You could also consider adding extra features such as a telescoping handle for easy storage or a built-in flashlight for early morning or late-night de-icing.
Remember, the goal is to create a snow brush that not only works effectively but also reflects your personality and style. With these customization options, your DIY snow brush will be a unique tool that you’ll be proud to use.
Testing Your Snow Brush
After assembling and customizing your snow brush, it’s crucial to test it to ensure that it operates as expected. Follow these steps to test your DIY snow brush:
Dry Run: First, do a dry run by mimicking the action of brushing snow off and scraping ice without an actual vehicle. This will give you a feel for the brush and allow you to make any necessary adjustments to the handle or attachments.
Check Grip Comfort: Hold the brush as you would when using it. Is it comfortable to hold? Does the grip tape provide a good hold, even if your hands are cold or wet?
Test on a Non-sensitive Surface: Before trying it on your car, test the brush on a non-sensitive surface to ensure that the bristles and ice scraper aren’t too harsh and don’t cause scratches.
Test Under Different Weather Conditions: If possible, test your brush under various weather conditions to ensure it can handle the type of snow and ice you typically encounter. Try it with fresh, fluffy snow, packed snow, and thin and thick ice.
Test Reach: Finally, test the reach of your brush on your actual vehicle. Can you reach all areas of your car comfortably?
Remember, the effectiveness of your DIY snow brush largely depends on your execution of the design and assembly, so don’t be afraid to make tweaks and improvements after testing.
Maintenance and Care
Taking proper care of your DIY snow brush will ensure its longevity and functionality. Here are some care and maintenance tips:
Regular Cleaning: Keep your snow brush clean. After each use, remove any accumulated snow or ice. This not only prevents it from freezing onto the brush, but also maintains the effectiveness of the bristles and ice scraper.
Storage: Store your snow brush in a dry and cool place when not in use. Excessive exposure to heat or cold can deteriorate the materials of the brush sooner.
Check for Damage: Regularly check your snow brush for any signs of damage, particularly the bristles and the ice scraper edge. Replace any worn out or damaged parts promptly to maintain effectiveness.
Handle Inspection: Inspect the handle for any signs of wear or damage. If you’ve used grip tape, check it regularly to ensure it’s not fraying or peeling. Replace the tape as necessary for continued comfort and grip.
Treat Rust: If you notice any rust forming on the metal parts of your snow brush, treat it immediately to prevent further corrosion.
Lubricate Moving Parts: If your snow brush has any moving parts, such as a telescoping handle, be sure to lubricate them periodically for smooth operation.
By following these maintenance and care steps, you can ensure your DIY snow brush remains a reliable tool for many winter seasons to come.
Alternative Snow Removal Tools
While a DIY snow brush is a versatile and personalized tool for snow and ice removal, there are also other alternatives available that might suit different needs or preferences.
Heated Ice Scrapers: Heated ice scrapers can make the task of ice removal easier by providing heat to aid in breaking up and melting the ice. They are usually powered by your car’s 12-volt outlet and can be a good option for those dealing with thick ice.
Snow Brooms: Snow brooms are designed to push heavy, wet snow off of the car’s surface. They feature a wide foam head that won’t scratch the paint and often have a telescoping handle for easy storage.
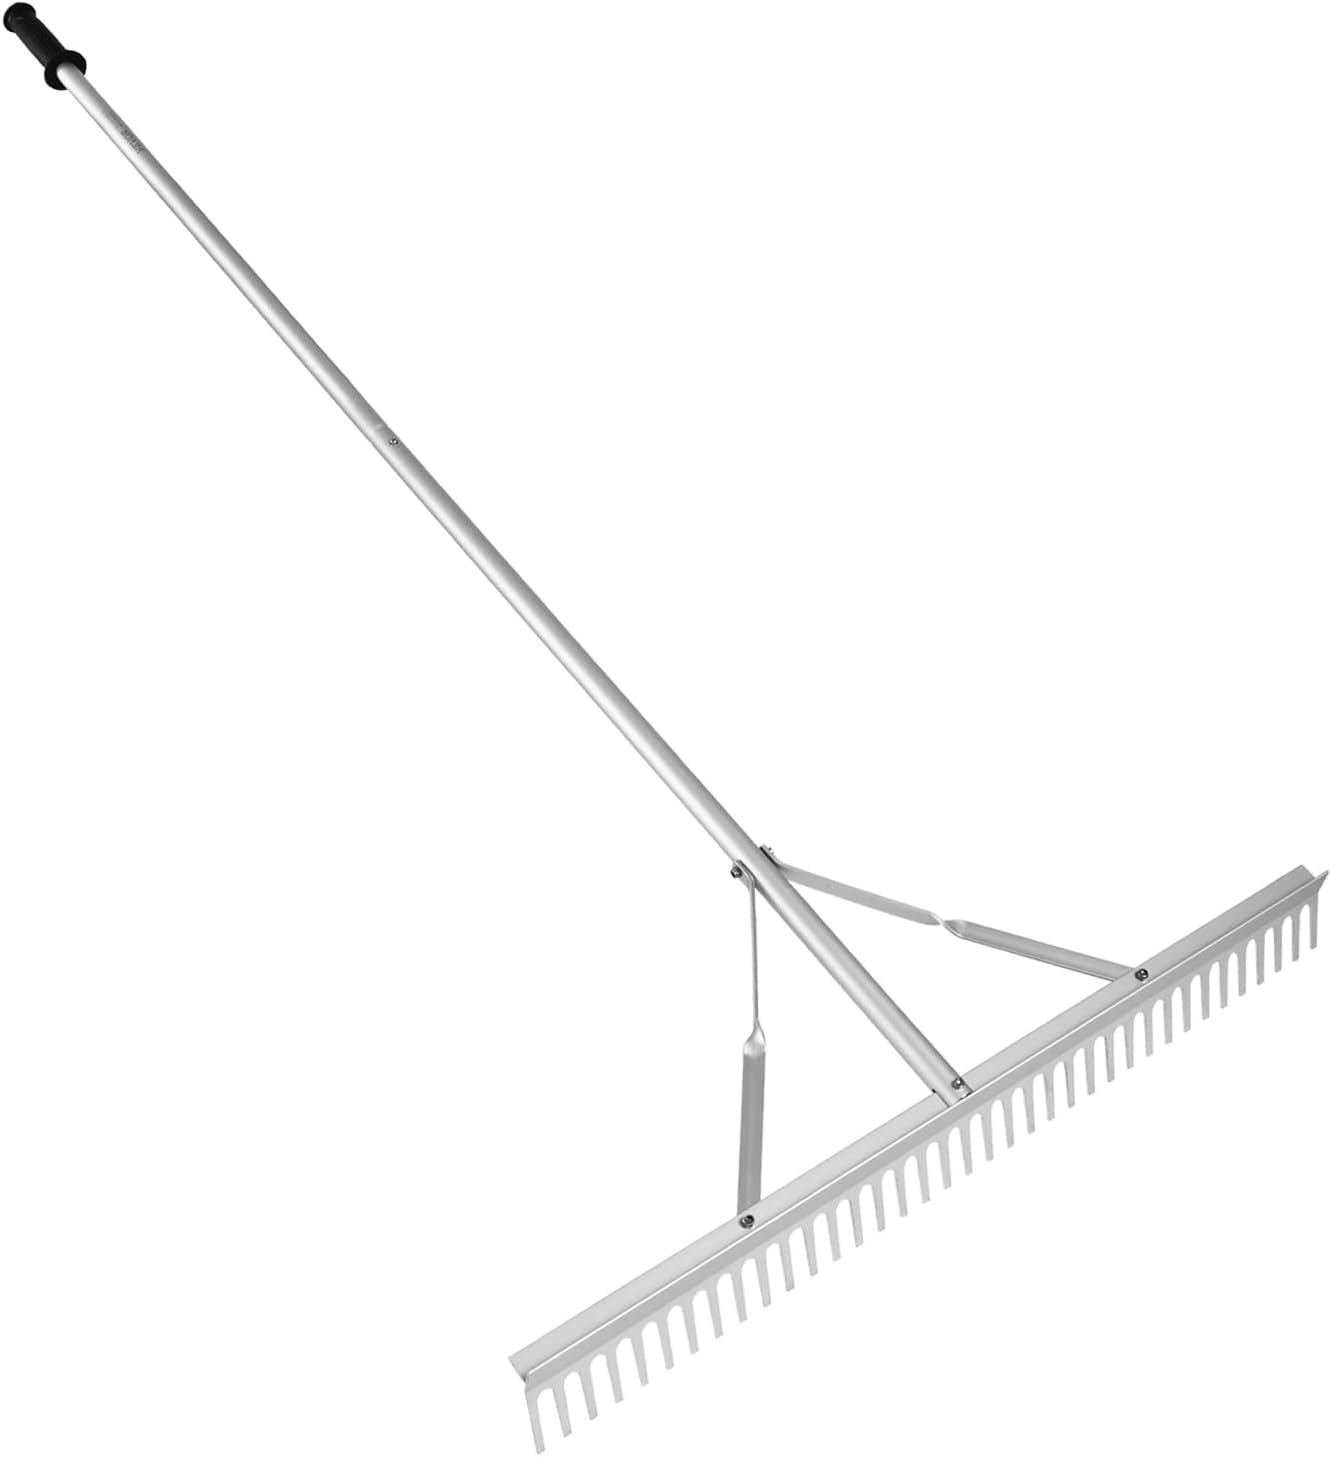
Snow Rakes: Similar to snow brooms, snow rakes are used to remove snow from the tops of larger vehicles where reaching with a standard snow brush might be difficult. They typically have adjustable, telescopic handles and large, sturdy heads to remove snow quickly and efficiently.
Windshield Snow Covers: If you’d prefer to avoid the need for a snow brush altogether, consider investing in a windshield snow cover. These covers protect your windshield from accumulating snow and ice, so you simply remove the cover and drive away.
Snow Blowers: For those dealing with large driveways or heavy snowfall, a snow blower can be a good investment. While not used for vehicle snow removal, they can make clearing paths or driveways much quicker and less strenuous.
Remember, the best tool for snow removal depends on your specific needs and circumstances. It’s always a good idea to have a backup plan in place for those particularly heavy snowfall days.
Safety Precautions
When using your DIY snow brush or any other snow removal tool, it’s important to follow safety precautions to prevent injuries or damage to your vehicle. Here are some safety tips to consider:
Dress Appropriately: Always wear gloves to protect your hands from cold and wet conditions. Opt for non-slip shoes to prevent slipping on icy surfaces.
Proper Handling: Handle the snow brush or ice scraper with care. Apply steady, even pressure when removing ice to avoid damaging the car’s surface.
Visibility: Ensure you have good visibility before starting to drive. Take the time to remove all snow and ice from your vehicle’s windows, mirrors, lights, and license plates.
Avoid Overreach: Do not overextend yourself when trying to reach the top or far areas of your vehicle to prevent strain or injuries. Use a brush with a telescoping handle if necessary.
Check Surroundings: Be aware of your surroundings. Avoid standing too close to the roadway when clearing your vehicle and be mindful of other vehicles, particularly when clearing snow in public parking spaces.
Regular Breaks: Take regular breaks when removing snow or ice to avoid fatigue, especially during heavy snowfall or extreme cold temperatures.
Vehicle Inspection: After clearing your vehicle, do a quick inspection for any signs of damage caused during the snow removal process. Address any scratches or dents promptly to prevent further harm to your vehicle.
By adhering to these safety precautions, you can remove snow and ice from your vehicle safely and efficiently, ensuring a safe driving experience.
Seasonal Storage
When winter is over, and the snow brush is no longer in active use, proper storage is essential to maintain its condition for the next winter season. Here are some tips on seasonal storage:
Thorough Cleaning: Before storing your snow brush, make sure it is thoroughly cleaned to remove any residual ice, snow, or salt. This helps to prevent any corrosion during storage.
Dry Completely: After cleaning, allow your snow brush to fully dry to prevent the growth of any mold or mildew.
Safeguard the Bristles: To maintain the integrity of the bristles, avoid placing any heavy objects on them during storage. This could lead to the bristles being crushed or deformed.
Storage Location: Store the snow brush in a dry, cool, and well-ventilated area. This helps to prevent any potential damage caused by high humidity or excessive heat.
Cover if Necessary: If you’re storing the snow brush in a garage or shed, consider covering it with a cloth or bag to prevent dust accumulation.
Following these seasonal storage tips will help ensure your DIY snow brush is ready to perform effectively when the next winter season arrives.
Tips for Different Snow Conditions
Different snow conditions can present unique challenges when it comes to snow removal. Here are some tips to handle various types of snow:
Light, Fluffy Snow: This type of snow is relatively easy to remove. A standard snow brush or broom should be sufficient. Make sure to start from the top and work your way down to prevent piling snow on areas you’ve already cleared.
Wet, Heavy Snow: This snow can be challenging due to its weight. A snow broom may be the best tool for this; its wide foam head can push a large amount of snow off in one go. Remember to lift with your legs and not your back to avoid injury.
Ice: Ice can be stubborn and may require the use of an ice scraper or heated ice scraper. Begin by making gentle, straight strokes to create a starting point, then work at it from different angles until it breaks up.
Sleet/Hail: This is a mix of rain and partially melted snow, which can be tough to remove. Start by using your snow brush to remove as much as possible, then use an ice scraper for the more stubborn areas.
Freezing Rain: This can cause a layer of ice to form on top of your snow. Tackle it with an ice scraper or heated scraper, and consider applying a de-icing spray if the ice is particularly stubborn.
By understanding how to tackle different snow conditions, you can ensure efficient and effective snow removal, no matter what winter throws at you.
Conclusion
In conclusion, a DIY snow brush is a versatile and practical tool for snow removal. Choosing the right materials and design based on your specific needs can lead to an efficient and cost-effective solution for those winter woes. It’s also crucial to observe safety precautions when removing snow or ice from your vehicle to prevent injuries and vehicle damage. When winter is over, proper storage practices can extend the life of your snow brush, ensuring it’s ready for use in the next season.
Furthermore, understanding how to handle different snow conditions can ease the snow removal process. So, why not try your hand at making your own snow brush this winter? Not only could it save you money, but it could also provide a unique, personalized tool that meets your exact needs. With the right approach and effort, you can turn the chore of snow removal into a more enjoyable and efficient task.
Whether sealing gaps or bonding materials, a manual caulking gun is an essential tool in DIY and professional toolkits. This simple device offers precision, control, and reliability, making applying sealants or adhesives effortless. From understanding its mechanics to mastering its application, this How To Use A Manual Caulking Gun guide will walk you through the steps of using a manual caulking gun, highlight common mistakes, and showcase its versatility in various projects. Dive in to ensure your caulking task is smooth, efficient, and free from messy blunders.
Why Use a Manual Caulking Gun?
A manual caulking gun is essential for any DIY enthusiast or professional handyman. It offers a cost-effective and efficient method for sealing cracks, gaps, and joints in various materials and settings. Its simple, hand-powered design requires no electricity or batteries, making it a reliable choice for onsite or remote use. Moreover, manual caulking guns give users more control over the flow and rate of application, ensuring a clean, even seal every time. This tool is versatile and easy to use, maintain, and transport, making a manual caulking gun an indispensable addition to any tool kit.
Understanding the Manual Caulking Gun
What is a Manual Caulking Gun?
A manual caulking gun is a handheld device used to dispense caulk, a type of sealing compound, from a tube. It works on a simple mechanism: as you squeeze the trigger, it pushes a rod that applies pressure to the back of the tube, forcing the caulk out through the nozzle at the front. This device allows for precision in caulk, helping seal gaps and cracks in various materials such as wood, concrete, and glass. It is a common tool in construction, home improvement, and DIY projects. Manual caulking guns are particularly appreciated for their simplicity, affordability, and control over the application process.
Types of Caulk Suitable for Manual Guns
Several types of caulk are compatible with manual caulking guns, each designed for specific applications.
Acrylic Latex Caulk: Ideal for indoor use, acrylic latex caulk is easy to apply and clean up, making it a popular choice for sealing gaps and cracks in interior walls and ceilings. It can be painted over, allowing for a seamless blend with the rest of your decor.
Silicone Caulk: Known for its flexibility and durability, silicone caulk is an excellent option for areas exposed to moisture and temperature fluctuations, like bathrooms and kitchens. It’s also ideal for sealing gaps around windows and doors.
Polyurethane Caulk: This heavy-duty caulk is designed for outdoor use, especially in sealing joints and seams in concrete, brick, and stone. It offers excellent resistance to weather, UV rays, and temperature changes.
Butyl Rubber Caulk: Butyl rubber caulk is particularly effective for sealing metal, gutters, chimneys, and rooftops. It’s known for its strong adhesion and water resistance.
Remember, choosing the right type of caulk for your project ensures a lasting seal and professional finish. Always check the product specifications to ensure they suit your specific application.
Preparing for Caulking
Gathering Necessary Materials
Before you begin the caulking process, it’s essential to have all the necessary materials at hand. This ensures a smooth, uninterrupted workflow. Here’s an important list of what you’ll need:
Manual Caulking Gun: This is your primary tool for this project. Ensure it’s clean and in good working order.
Caulk: Choose the caulk suitable for your project (as discussed above).
Utility Knife: This tool helps open the caulk tube and trim the tube’s nozzle to the desired size.
Caulk Finishing Tool or Soapy Water: These can smooth out the applied caulk, making your work look neater and more professional.
Cleaning Cloth or Rags: These are necessary for immediate clean-up of any accidental spills or excess caulk.
Masking Tape: Masking tape can create neat lines and protect areas from excess caulk.
Remember, a well-prepared workspace contributes to a successful caulking project. Take the time to gather all your materials before you begin.
Safety Precautions
Specific safety measures should be considered to prevent accidents or injuries when working with a manual caulking gun and caulk. Here are some essential safety tips:
Protective Wear: Always wear protective gear like safety glasses and gloves. These will protect your eyes from accidental splashes and your hands from potential skin irritation caused by certain types of caulk.
Ventilation: When working indoors, ensure the space is well-ventilated. Some types of caulk produce fumes that can be harmful if inhaled for prolonged periods.
Safe Storage: Always store caulk and the caulking gun out of reach of children and pets.
Correct Usage: Never point the caulking gun at yourself or another person, especially when loaded. Always ensure the nozzle is directed towards the area being sealed.
Clean Up: After finishing your project, immediately clean up any excess caulk to prevent slipping or staining. Dispose of used caulk and containers properly following local waste regulations.
Safety should always be your top priority when handling any DIY project. Following these precautions will help ensure a safe and successful caulking task.
Loading the Caulk
Selecting the Right Caulk Cartridge
Choosing the correct caulk cartridge for your project is as crucial as selecting the right type of caulk. Caulk cartridges come in different sizes, typically 9 to 29 ounces. The size you choose will depend on the scale of your project.
For smaller projects or touch-ups, a 9-ounce cartridge will often suffice. This size is easier to handle and wastes less material if you don’t use it all. However, for larger projects, like sealing an entire room or home exterior, a 29-ounce cartridge would be more efficient, reducing the number of cartridge changes and ensuring a consistent, uninterrupted flow of caulk.
In addition to size, also consider the nozzle design. Some cartridges come with a pre-cut nozzle, while others require you to cut the nozzle to your desired size. A smaller cut results in a narrower bead of caulk, suitable for smaller, precise applications, while a larger cut allows for a thicker bead, ideal for larger gaps and seams.
Remember, selecting the right caulk cartridge ensures a smooth application process and contributes to a successful, professional-looking outcome. Check the compatibility of your caulk cartridge with your manual caulking gun to guarantee a secure fit and optimal performance.
Attaching the Nozzle
After selecting the right caulk cartridge, the next step is to attach the nozzle. This often requires a utility knife, as most nozzles need to be cut to the desired bead size. Here’s how you do it:
Remove the cap from the caulk cartridge if there is one.
Using a utility knife, cut the tip of the nozzle at a 45-degree angle. The location of the cut will determine the size of the bead: the closer to the tip, the smaller the bead; the further down, the larger the bead.
Some caulk cartridges feature an inner seal that must be punctured before use. If this is the case, use the seal punch found on your caulking gun (if it has one) or a long nail to break the seal.
Remember, it’s essential to cut the nozzle accurately to ensure the desired bead size, and always ensure the nozzle is securely attached to the cartridge. This will allow for an even flow of caulk, leading to a neat and professional finish.
Cutting the Tip to Size
A crucial part of preparing your caulk cartridge is cutting the nozzle’s tip to the correct size. The size of the cut will determine the bead’s size, thus affecting the precision and neatness of your caulking work. Here’s a guide on how to cut your nozzle to the appropriate size:
Estimate the Gap Size: You must fill the gap size with caulk before cutting. This will help you determine how large or small you need to cut the nozzle.
Mark the Cut: Once you’ve estimated the gap size, mark the corresponding position on the nozzle where the cut should be made. Remember, the closer to the tip you cut, the smaller the bead; the further from the tip, the larger.
Make the Cut: Carefully cut the nozzle at the marked spot using a utility knife. Always cut at a 45-degree angle to ensure an efficient, smooth caulking application.
Test the Bead Size: After cutting, squeeze a small caulk onto a scrap material to test the bead size. If the bead is too small or too large for your project, you can adjust accordingly by trimming the nozzle further.
Remember, precision is critical when cutting your nozzle to size. An appropriate bead size contributes significantly to the success of your caulking project, ensuring your work looks neat, professional, and well-finished.
Using the Caulking Gun
Once you have prepared the caulk cartridge and attached the correctly cut nozzle, it’s time to load it into the caulking gun for use. Here is how to do it:
Proper Grip and Stance
Handling the caulking gun correctly is vital to achieving a smooth, even application of caulk. Here’s how to maintain a proper grip and stance:
Grip the Gun: Hold the caulking gun with your dominant hand on the gun’s trigger. Your other hand should support the base of the gun and help guide the nozzle.
Proper Stance: Stand in a comfortable and stable position. If sealing a vertical seam, position yourself at eye level with the caulking area. For horizontal seams, stand to the side of the line you are sealing, allowing you to see the bead of caulk as it is applied.
Smooth Motion: Apply even pressure on the trigger and move the gun along the seam in a smooth, controlled motion. Avoid jerky or rapid movements, as they can result in an uneven application of caulk.
Remember, practice makes perfect. It may take some time to get the hang of handling a caulking gun. However, with patience and practice, you can achieve a professional-looking finish.
Applying Even Pressure
When using a caulking gun, one of the most critical aspects to ensure a smooth and uniform bead of caulk is applying even pressure on the trigger. Here’s how you do it:
Steady Pressure: Begin by squeezing the caulking gun’s trigger steadily and consistently, maintaining constant pressure. Too much pressure can cause excessive caulk to be released, resulting in a messy and unprofessional finish. On the other hand, too little pressure may not release enough caulk to fill the gap or seam effectively.
Release and Repeat: Once you reach the end of a seam or when the bead of caulk is sufficient, release the pressure by letting go of the trigger and then pushing the pressure release tab or lever at the back of the gun. This will immediately stop the flow of caulk. When you are ready to apply caulk again, squeeze the trigger to reapply pressure.
Consistency is Key: Strive for consistency in your pressure application. The goal is to have a steady stream of caulk that doesn’t vary in thickness. This consistency results in a neater finish and ensures that the caulk effectively seals the gap.
Remember, even pressure is vital to a smooth, even bead and a professional-looking caulking job. It may take some practice, but you’ll feel how much pressure is suitable for your particular caulking gun and project over time.
Smoothing and Finishing
The final step in achieving a professional-looking caulk job is smoothing the caulk bead. This process helps to ensure the caulk is pressed into the gap or seam, creating a better seal and a neat appearance. Below are the steps to follow:
Wait for a Few Minutes: After applying the caulk bead, wait a few minutes for it to set slightly. However, please don’t wait too long; caulk can be difficult to smooth out once it begins to dry.
Use a Smoothing Tool or Your Finger: You can use a unique caulk-smoothing tool or a simple finger to smooth out the bead. If using your finger, moisten it slightly with water or a smoothing agent to prevent the caulk from sticking to it.
Smooth the Bead: Run your finger or tool continuously along the bead. This will push the caulk deeper into the gap or seam and smooth the surface. Be sure to wipe off the excess caulk on your finger or tool.
Clean Up: After smoothing, use a damp rag or sponge to clean up any excess caulk around the seam before dries.
Remember, achieving a neat finish with your caulking job is all in the details. Take your time smoothing the bead of caulk for a professional, clean appearance.
Cleanup and Maintenance
Maintaining your tools and workspace is an essential part of any project. Here’s a guide on how to clean up after caulking and maintain your caulking gun:
Clean the Nozzle: Clean the nozzle thoroughly once you’re done caulking. If left uncleaned, dried caulk can block the nozzle and make it difficult to use the next time. You can clean it with warm water and a small brush using water-based caulk or with a solvent such as mineral spirits for silicone-based caulk.
Wipe off Excess Caulk: Use a cloth or rag to remove excess caulk from the gun or any other tools you use.
Remove Caulk from Surfaces: If there are any caulk stains on your work surface or surrounding areas, clean them off while the caulk is still wet. Once the caulk dries, it will be harder to remove.
Store the Caulking Gun: Once cleaned, store your caulking gun in a dry and safe place. Ensure it’s protected from dust and moisture to prevent rust or damage.
Maintenance: Regularly inspect your caulking gun for any signs of wear or damage. Ensure that the trigger and pressure release tab or lever are working correctly. If any part looks worn out or isn’t functioning well, consider replacing it to avoid any issues during your next caulking project.
Remember, proper cleanup and maintenance not only prolong the life of your tools but also ensure they’re ready to use for your next project. A well-maintained caulking gun will provide a smoother application, making your caulking jobs easier and more efficient.
When using a caulking gun, uneven beads are a common pitfall that mars the appearance and effectiveness of your sealant application. Here are some points to consider:
Inconsistent Pressure: The primary cause of uneven beads is inconsistent pressure on the caulking gun’s trigger. Maintaining steady pressure throughout the application process ensures a uniform bead.
Variable Speed: Moving the caulking gun too quickly or too slowly can result in beads that are either too thin or too thick, respectively. Aim for a consistent speed that matches the rate at which the caulk is dispensed.
Inadequate Preparation: If the surface hasn’t been thoroughly cleaned or the old caulk hasn’t been completely removed, the new bead may not adhere properly, leading to irregularities.
Inappropriate Angling: Holding the gun at an incorrect angle can also lead to an uneven bead. The ideal pitch is 45 degrees.
Remember, avoiding these mistakes can significantly improve the quality of your caulking job, leading to a smoother finish and a more effective seal. Practice and patience are crucial to mastering the use of a caulking gun.
Drips and Smudges
Drips and smudges are common issues that can occur during caulking, which can negatively impact the final result. Here’s how to avoid and handle them:
Avoiding Drips: Drips usually occur due to excessive pressure on the trigger, releasing more caulk than needed. To prevent this, apply consistent pressure on the trigger and release it as soon as you finish a bead. If your caulking gun has a pressure release tab or lever, use this feature to stop the flow of the caulk immediately.
Handling Drips: If a drip does occur, don’t panic. Wipe it immediately using a clean cloth or rag. If the caulk has started to dry, use a scraping tool or knife to remove it gently.
Avoiding Smudges: Smudges can happen if your hand, tools, or caulking gun comes in contact with the freshly applied caulk. To avoid this, always keep your tools clean and be mindful of where the bead of caulk is relative to your tools and hands.
Handling Smudges: If you notice a smudge, clean it up as soon as possible. Use a moist cloth or sponge and gently wipe the smudged area until clean.
Remember, the key to avoiding drips and smudges is to work carefully and clean up any mistakes as soon as they occur. This will help you achieve a neat, professional-looking caulking job.
Caulk Drying Time
The drying time for caulk can vary greatly depending on the type used and the environmental conditions. Generally, caulk takes about 24 hours to dry completely.
Silicone-Based Caulk: This type of caulk tends to dry quickly. It usually skins over in about an hour, forming a thin layer on the surface that is dry to the touch. However, for it to dry and cure completely, it typically takes up to 24 hours.
Acrylic Latex Caulk: Acrylic latex caulk usually takes longer to dry than silicone. It may skin over within 30 minutes to an hour after application, but it can take 48 hours or more to cure fully.
Environmental Factors: The temperature and humidity levels can significantly affect the drying time. Caulk tends to dry slower in cooler or highly humid conditions.
Remember, allowing the caulk to fully cure before exposing it to water or other elements is essential. Always check the manufacturer’s instructions on the caulk tube for the recommended drying and curing times.
Project Examples
Caulking Around Windows and Doors
Caulking around windows and doors is a common DIY project that can significantly increase your home’s energy efficiency by reducing drafts. Here’s a simple guide on how to do it:
Preparation: Begin by cleaning the area around the windows and doors. Remove any old caulk, dirt, or paint residues using a putty knife or a caulk remover tool. Make sure the surface is dry before you start caulking.
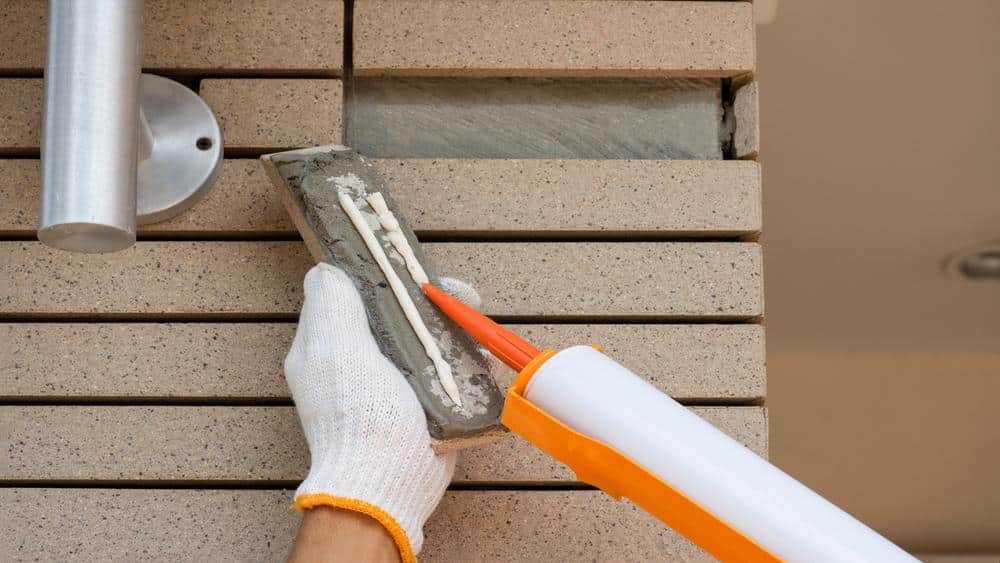
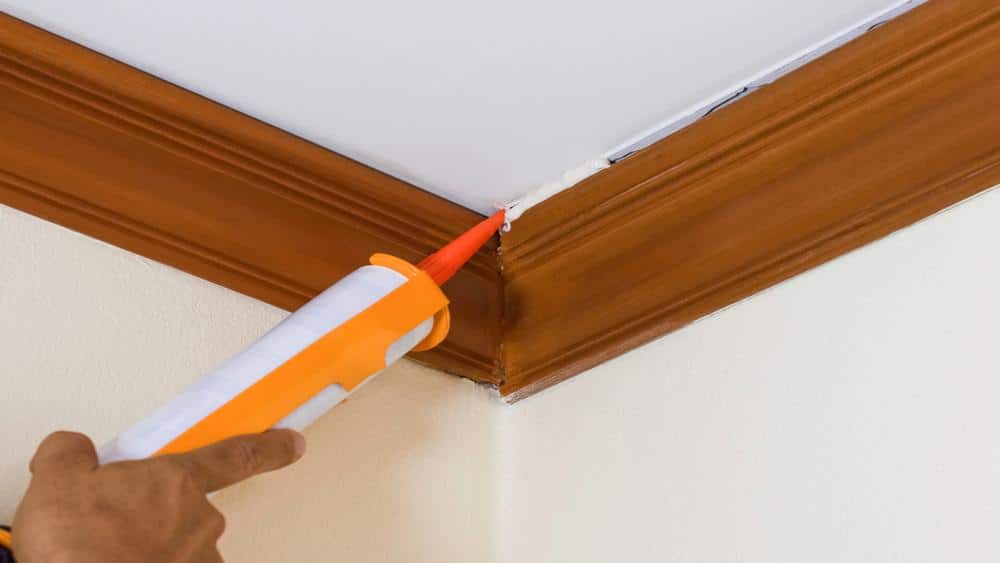
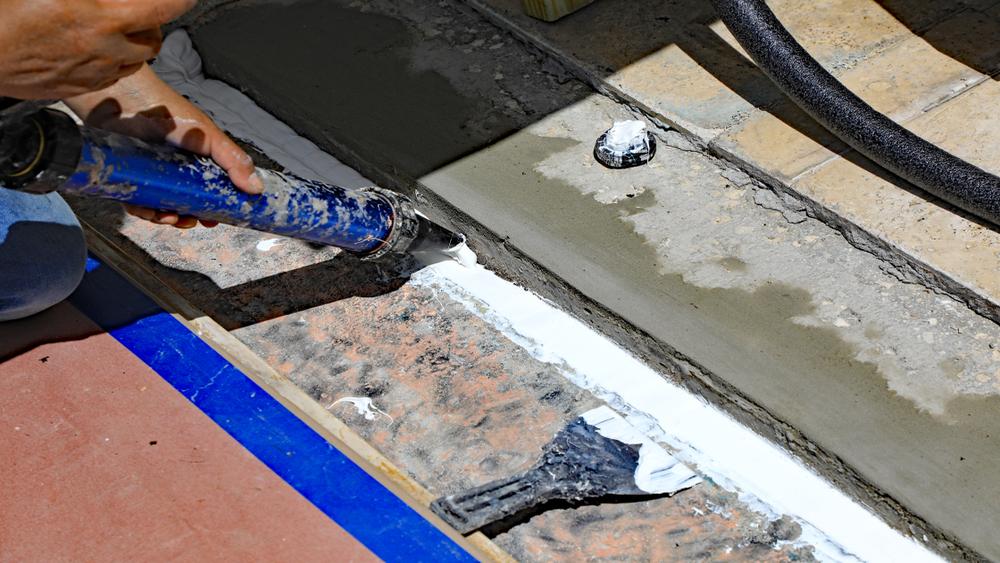
Application: Load your caulking gun with the appropriate caulk. Silicone-based caulk is generally recommended for exterior use due to its durability and weather resistance. Position your gun at a 45-degree angle to the joint and apply steady pressure on the trigger to lay down an even bead of caulk.
Smoothing: Once the caulk is applied, smooth the bead using a caulk smoothing tool or your finger (be sure to wet your finger first to avoid the caulk sticking to it). This will ensure a neat finish and proper adhesion.
Cleanup: Clean off any excess caulk immediately using a damp cloth. If you’ve masked the area with painter’s tape, remove it while the caulk is still wet.
Drying: Let the caulk dry and cure completely before exposing it to any elements. As noted earlier, this may take up to 24 hours or more depending on the type of caulk and the environmental conditions.
Remember, caulking around windows and doors not only improves the energy efficiency of your home but also prevents water infiltration which can cause serious structural damage over time. Regular inspection and maintenance of the caulking around your windows and doors is an essential home maintenance task.
Caulking in the Bathroom
Caulking in the bathroom is an essential maintenance that helps prevent water damage to walls, floors, and cabinets. It involves sealing gaps around the bathtub, sink, toilet, and tiles. Follow the steps below to ensure a successful caulking job in your bathroom:
Preparation: Begin by cleaning the areas that need caulking. Remove old caulk, mold, or soap residues using a putty knife or remover tool. Allow the surface to dry completely before proceeding.
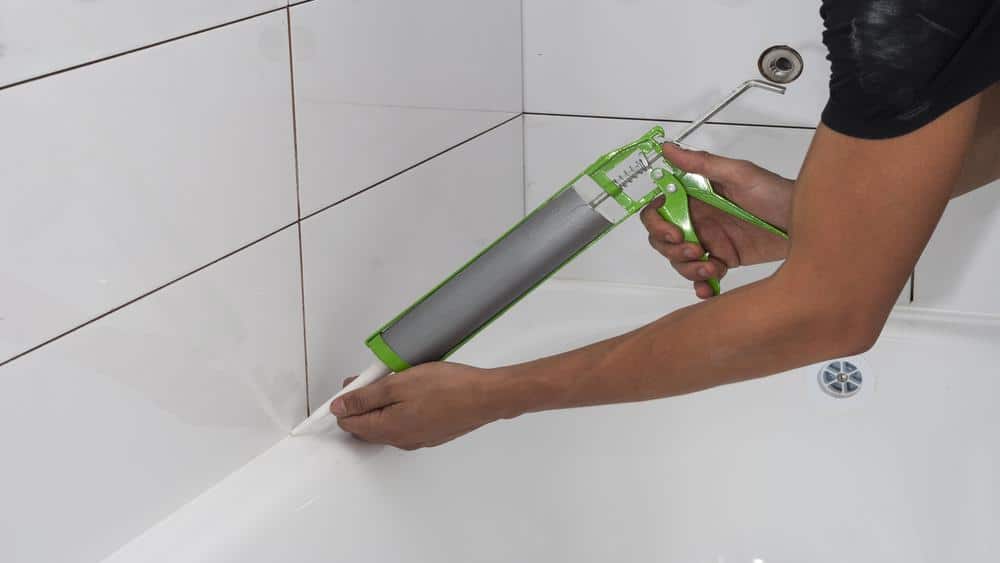
Application: Load your caulking gun with a caulk suitable for wet areas and resistant to mold and mildew, like silicone-based caulk. Cut the caulk tube’s tip at a 45-degree angle and pierce the seal inside the tube. Apply the caulk at a 45-degree angle and ensure that the bead of the caulk is even and fills the gap.
Smoothing: Wet your finger or a smoothing tool and run it along the bead of caulk, pressing the caulk into the gap and creating a smooth, concave line. Remove any excess caulk immediately with a damp cloth.
Drying: Let the caulk cure as the manufacturer recommends before using the sink, bathtub, or shower. This can take up to 24 hours or more, depending on the type of caulk and the environmental conditions.
Remember, regular inspection and replacing caulk in the bathroom can go a long way in preventing costly water damage and maintaining a clean, mold-free environment.
Outdoor Caulking Projects
Caulking isn’t just for the interior of your home. When done correctly, outdoor caulking can protect your home from severe weather, prevent heat loss, and improve the overall appearance of your house. Here are some joint outdoor caulking projects:
Sealing Gaps in Exterior Walls
Exterior walls often have gaps and cracks that can let in air, rain, and pests. Sealing these gaps with caulk can improve your home’s insulation and protect it from the elements.
Preparation: Clean the area around the gap or crack, remove old caulk or paint residues, and ensure the surface is dry before you begin.
Application: Use a silicone-based caulk for exterior walls as they are durable and weather-resistant. Apply the caulk at a 45-degree angle, ensuring it fills the gap.
Smoothing: Smooth the bead of caulk with a caulk smoothing tool or your finger, ensuring a neat finish and proper adhesion.
Drying: Allow the caulk to dry and cure entirely, as the manufacturer recommends, before exposing it to any elements.
Caulking Around Outdoor Plumbing
Outdoor faucets and plumbing fixtures must be caulked to prevent water from seeping into your home’s walls.
Preparation: Clean around the plumbing fixture and remove any dirt, old caulk, or rust residues. Be sure the surface is dry before you start.
Application: Apply silicone-based caulk around the fixture, ensuring that all gaps where the fixture meets the wall are sealed.
Smoothing: For a neat finish, smooth the caulk with a caulking tool or your finger.
Drying: Before using the fixture, let the caulk dry and cure per the manufacturer’s instructions.
Remember, caulking is an essential part of home maintenance. Regular inspection and replacement of outdoor caulking can help prevent costly repairs and maintain the aesthetic appeal of your home.
Conclusion
In conclusion, caulking is a fundamental aspect of maintaining your home’s interior and exterior. These simple DIY projects—whether they involve sealing your windows, doors, bathroom fixtures, or exterior walls—can significantly enhance your home’s energy efficiency, protect it from weather damage, and prevent costly future repairs. Regular inspection and maintenance of these areas can save you from potential hassles and ensure the longevity of your home. Remember, the proper preparation, application, and drying processes are essential to successful caulking projects.
An angle grinder is an incredibly versatile tool commonly used in metalworking and construction. Sometimes, you may need to change the disc on your grinder, but lacking the necessary key or tool. This How to remove angle grinder disc without tool, guide will walk you through the steps of safely and effectively removing an angle grinder disc without a tool using common household items. Safety is paramount when handling any power tool, so ensure you take the appropriate precautions before proceeding.
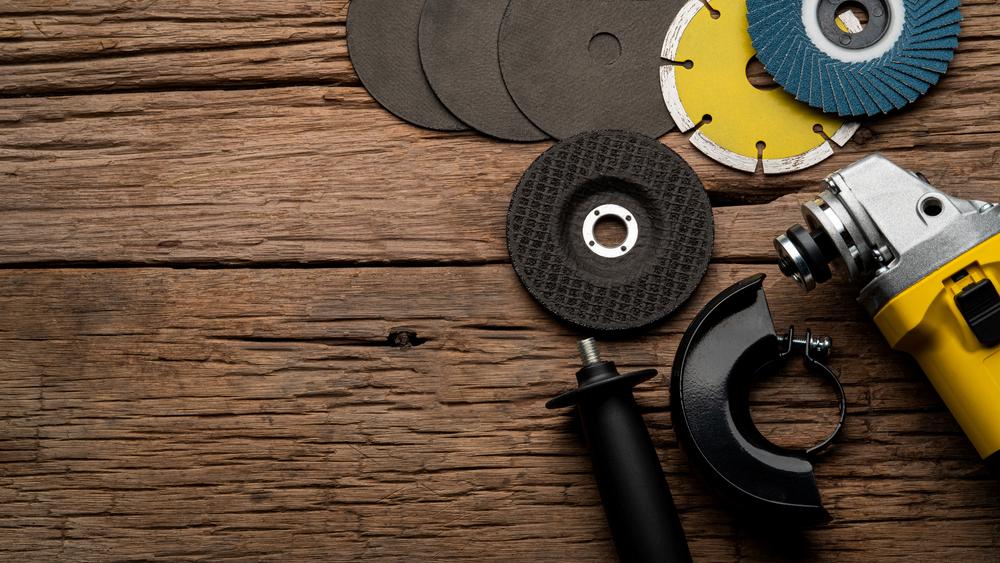
1. Why would you need to remove a disc?
There are several reasons you might need to remove a disc from your angle grinder.
First and foremost, discs can wear out over time due to continuous use and will thus need replacing.
Second, different jobs require different types of discs. You’ll need to switch out your current disc for one that’s more suitable if you’re moving from cutting metal to, say, grinding concrete.
Lastly, sometimes your disc may get damaged or jammed, in which case it would need immediate replacing to ensure safe and effective operation of your angle grinder.
Safety concerns
Before you begin the process of removing the disc from your angle grinder, it’s crucial to consider several safety aspects. Always disconnect the power supply before starting to prevent accidental startup. If your grinder is cordless, remove the battery. Don’t forget to wear appropriate safety gear, including gloves and protective eyewear to shield yourself from potential flying debris. It’s also recommended to work in a well-lit area to clearly see what you’re doing. Lastly, never force a disc off the grinder; if it doesn’t come off easily, it may be threaded and require a different removal method. Remember, your safety is paramount.
2. Step-by-Step Guide to Removing the Angle Grinder Disc
Disconnect the Power Source: The first and most crucial step is to ensure your angle grinder is unplugged from the power source. If it is a cordless model, remove the battery.
Lock the Spindle: Locate the spindle lock on your angle grinder. It is usually a button or a switch on the grinder’s body. Press or switch this lock to prevent the spindle from rotating.
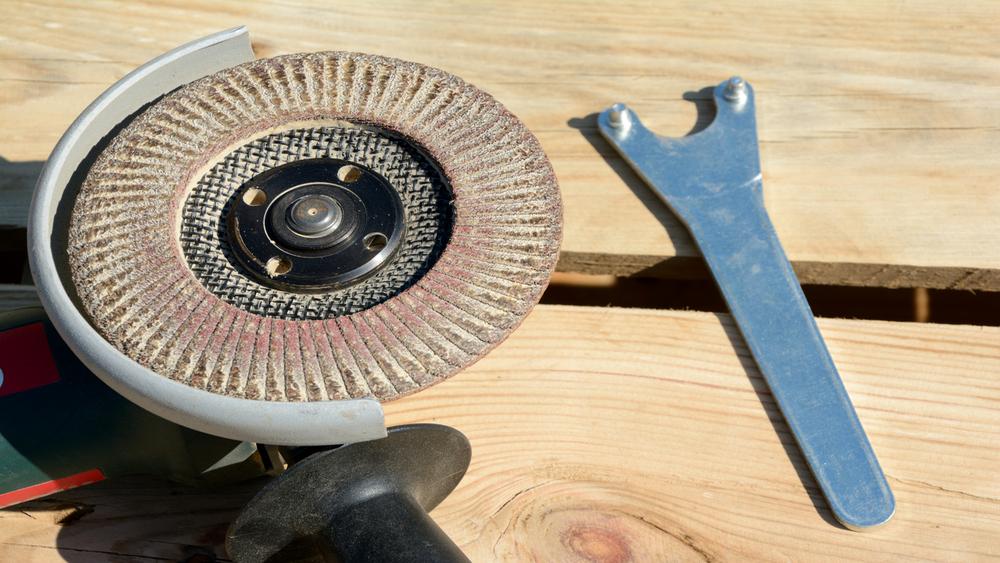
Loosen the Retaining Nut or Flange: With the spindle locked, use an adjustable wrench, a Channellock pliers, or even a pair of vice grips to loosen the retaining nut or flange that holds the disc in place. Turn it in the opposite direction to which the disc rotates.
Remove the Disc: Once the nut or flange is loose, you should be able to easily remove the disc from the grinder by simply lifting it off the spindle.
Inspect the Grinder: Before installing a new disc, take a moment to inspect your grinder. Check the spindle and the inner and outer flanges for any signs of wear or damage.
Please remember that these steps can vary slightly depending on the specific model of your angle grinder. Always refer to your owner’s manual if you are unsure.
3. Switching to a different disc
Once you have safely removed the old disc, it’s time to install the new one. Line up the hole in the center of the disc with the spindle on the grinder. Once it’s positioned correctly, press it firmly onto the grinder. Some models of angle grinders may have a locking mechanism that you will need to engage at this point.
For models without a locking mechanism, you will need to keep the disc pressed against the grinder while you screw the retaining nut or flange back onto the spindle. Tighten it with your hand initially and then use a wrench or pliers to secure it further, but be sure not to over tighten as this could damage the disc. Once the disc is securely attached, you can reconnect the power supply or insert the battery. Remember to test the grinder in a safe space, away from any potential hazards, before you start working to ensure the disc is installed correctly.
The Safety Precautions section is crucial when handling power tools. Always ensure:
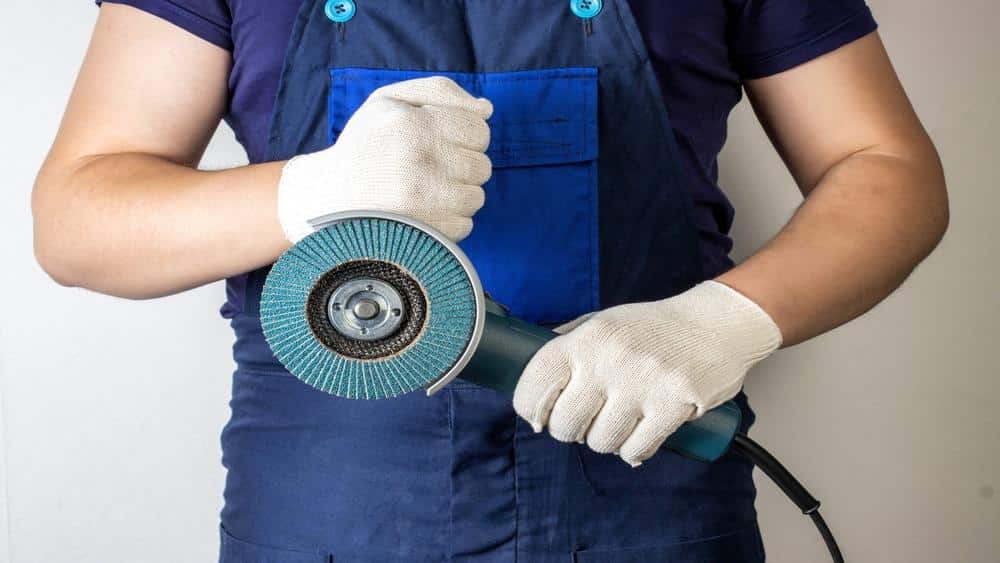
Proper attire: Wear snug fitting clothing that will not get caught in the grinder. Jewelry and loose clothing can pose a hazard and should not be worn. Long hair should be tied back.
Goggles and gloves: Always wear safety goggles to protect your eyes from flying debris. Heavy-duty gloves are also advised to protect your hands from sharp edges on the disc and grinder.
Secure the workpiece: Make certain that whatever you are grinding or cutting is securely clamped or held firmly. A loose workpiece could unexpectedly move and cause an accident.
Maintain your grinder: Regular maintenance of your angle grinder is key to safety. Always ensure it is in good, working condition before use. Regularly inspect the power cord, plug, and actual grinder for any damage.
Proper disc storage: Store your discs in a safe, dry place to prevent damage. Never use a disc that is cracked or chipped, as it can break apart during use and cause injury.
Ventilation: Always work in a well-ventilated area to prevent inhalation of dust or other particles.
Never leave a running grinder unattended: Always switch off the grinder when not in use.
Remember, these precautions are designed to keep you safe. Ignoring them could result in serious injury.
4. Tips for Maintenance
Keeping your angle grinder in optimal condition is key to ensuring its longevity and efficiency. Here are some tips for maintaining your tool:
Clean Regularly: After each use, clean your angle grinder to remove dust and debris. Particles can accumulate over time and affect the tool’s performance. Use a dry brush or compressed air for the best results.
Inspect Discs Before Use: Always examine your discs for cracks or any other signs of damage before using. A damaged disc can result in inefficient performance and could be dangerous.
Lubricate Occasionally: Certain parts of your grinder, like the gears, may require periodic lubrication to function smoothly. Check your user manual for specific recommendations.
Tighten Loose Parts: Over time, parts of your grinder may become loose due to vibration during use. Ensure all parts are tight before each use.
Replace Worn Parts: Regularly inspect your grinder for worn or damaged parts. If found, replace them immediately to maintain the grinder’s performance and safety.
Store Properly: When not in use, store your angle grinder in a cool, dry place away from moisture and extreme temperatures.
Remember, proper maintenance not only extends the lifespan of your tool, but also ensures safety during operation. Always refer to your tool’s user manual for specific maintenance instructions.
5. Frequently Asked Questions (FAQs)
Q1: What type of disc should I use for metalwork?
A: For metalwork, it’s best to use a cut-off disc or a grinding disc, depending on the specific task. Cut-off discs are thin and used to cut through metal, while grinding discs are thicker and used to grind down or shape metal.
Q2: What safety equipment do I need when using an angle grinder?
A: It’s important to wear safety goggles to protect your eyes from flying debris and heavy-duty gloves to protect your hands from sharp edges on the disc and grinder. It’s also advisable to wear ear protection due to the high noise levels produced by the grinder.
Q3: How often should I clean my angle grinder?
A: It’s recommended to clean your angle grinder after each use to remove dust and debris that could affect its performance.
Q4: How do I know when to replace the disc on my angle grinder?
A: It’s time to replace the disc when it becomes worn or damaged. Signs of wear may include scratches, chipping, or cracks.
6. Conclusion
In conclusion, how to remove angle grinder disc without tool, proper use, regular maintenance, and safety precautions are critical to optimize the performance and longevity of your angle grinder. Always wear appropriate safety equipment, inspect your grinder regularly for any signs of wear or damage, and clean it after each use. With these steps in mind, you can ensure that your angle grinder will serve you well for many future projects. Refer to your tool’s user manual for specific instructions and information. Stay safe and happy grinding!
Drilling a hole in hardened steel is a formidable task that demands precision, patience, and the right tools. Whether you’re a seasoned metalworker or a DIY enthusiast, understanding the techniques involved is essential for success. Hardened steel, known for its durability and resistance, poses challenges due to its toughness. In this guide, we will walk you through the step-by-step process of How To Drill A Hole In Hardened Steel, offering valuable insights and tips to make the job more manageable.
The key to success lies in proper preparation, tool selection, and technique. We’ll explore the importance of safety gear, the significance of a suitable drill bit (such as high-speed steel or cobalt), and the role of cutting fluid in reducing friction and heat during drilling. Additionally, we’ll cover the use of a drill press or power drill and guide on securing the workpiece to ensure stability.
By following this comprehensive guide, you’ll gain the knowledge and confidence needed to tackle drilling tasks on hardened steel effectively. Whether it’s for industrial applications or personal projects, mastering this skill opens up a world of possibilities for metalwork and construction. So, let’s embark on this journey to learn the art of drilling holes in hardened steel with precision and finesse.
Understanding Hardened Steel
Hardened steel is a term that refers to steel that has undergone specific heat treatment processes to increase its hardness and durability. This transformation occurs through a process known as quenching and tempering, where the steel is heated to a high temperature and then rapidly cooled (quenched) to lock in its hardness. Following quenching, the steel is tempered by reheating it to a lower temperature, which reduces brittleness while maintaining hardness.
What Is Hardened Steel?
Hardened steel possesses several distinctive characteristics that set it apart from regular steel:
Exceptional Hardness: Hardened steel is renowned for its impressive hardness, making it resistant to wear, abrasion, and deformation. This property is particularly advantageous in applications where toughness and durability are essential.
Increased Strength: The heat treatment process also imparts greater tensile and yield strength to hardened steel, making it suitable for demanding structural and load-bearing applications.
Improved Wear Resistance: Hardened steel exhibits outstanding resistance to wear, making it an excellent choice for components subjected to repetitive friction and stress.
Reduced Ductility: While hardness is a key asset, the trade-off is a decrease in ductility and toughness. This means that hardened steel can be more brittle and prone to fracture if subjected to sudden or excessive force.
Why Drilling It Is Challenging?
Drilling into hardened steel presents a unique set of challenges due to its remarkable hardness. These challenges include:
High Friction and Heat: The hardness of hardened steel generates significant friction and heat during the drilling process. This can lead to rapid wear and dulling of drill bits if not properly managed.
Tool Selection: Selecting the right drill bit material and design is crucial to cutting through hardened steel effectively. Inadequate tools can result in frustration and inefficiency.
Precision and Patience: Achieving precise holes in hardened steel requires patience and careful control over drilling speed and pressure. Rushing the process can lead to overheating and damage to the workpiece and tools.
Safety Considerations: Due to the toughness of hardened steel, there is a risk of broken drill bits or workpiece fragments. Proper safety gear and precautions are vital.
In summary, understanding the unique properties of hardened steel and the challenges it presents is essential for anyone attempting to drill holes in this tough material. With the right tools, techniques, and knowledge, drilling through hardened steel can be a manageable and successful endeavor.
Safety Consideration
You should follow several safety precautions when making drills on hardened Steel. They include:
Wearing safe cloth(optional)
Creating holes in metal, especially when using a drill bit, might be dangerous if you don’t have protective attire.
Wear a thick apron that will protect your body while doing the drills. However, avoid long garments that can entangle in the work area.
Furthermore, avoid carrying jewelry when working with a drill bit, and keep your hair out of the way.
Wear goggles for eye protection.
Wearing goggles for eye protection is very important While operating a drill bit. Some sharp, tiny pieces of metal might fly off the working space.
Sharp, tiny pieces of metal might cause discomfort and eye issues if it gets into your eyes. Wearing goggles to protect your eyes is highly recommended.
Besides, choose translucent goggles to protect you against the harsh light beams from the working surface.
Wear ear protector(Optional)
You don’t have to harm your ears while trying to drill through metal surfaces. This task is often complex and might make more noise from the drill bit.
Wear hand Gloves
Hand gloves are essential when drilling. Wood or metal chips may be cut or blister on your hands. Hand gloves give you the convenience of holding the drill while drilling.
Wearing a mask(Optional)
Metals produce some poisonous gases when heated; hence, you must be more cautious. Wear a costume that will cover your nose, thus protecting you against dangerous gases from the metal surface.
Tools and Materials Needed
Hardened Steel Workpiece: The steel you intend to drill through.
High-Speed Steel (HSS) Drill Bit: Use a quality HSS drill bit designed for metalworking. Cobalt drill bits are even better for harder steel.
Cutting Fluid: Lubricating the drill bit with cutting fluid helps dissipate heat and prolongs the drill bit’s life.
Safety Gear: Safety glasses, hearing protection, and gloves are essential to protect yourself during this process.
Drill Press or Power Drill: A drill press provides better control, but a power drill can work too.
Vise or Clamps: To secure the workpiece in place.
Steps to Drill a Hole in Hardened Steel:
Safety First: Put on your safety gear, including safety glasses and hearing protection.
Secure the Workpiece: Use a vise or clamps to hold the hardened steel workpiece in place securely. This prevents it from moving while you drill.
Select the Right Drill Bit: Ensure that you’re using an appropriate HSS or cobalt drill bit for metal drilling. The drill bit should be sharp and in good condition.
Mark the Hole Location: Use a center punch to create a small indentation where you want to drill the hole. This will help prevent the drill bit from wandering.
Lubricate with Cutting Fluid: Apply cutting fluid to the area you intend to drill. This helps reduce friction and heat buildup.
Start Drilling Slowly: Set your drill press or power drill to a low speed. High-speed settings can cause excessive heat and dull the drill bit quickly. Begin drilling at a slow speed, gradually increasing the speed as you go.
Maintain Steady Pressure: Apply steady and even pressure on the drill while keeping it perpendicular to the workpiece. Let the drill bit do the cutting; avoid forcing it through the steel.
Clear Chips: Periodically stop drilling to clear away metal chips and apply more cutting fluid.
Continue Drilling: Keep drilling until you reach the desired depth. Be patient and maintain consistent speed and pressure.
Cool the Workpiece: If you notice the workpiece or drill bit getting too hot, you can quench it in a container of water to cool it down. Avoid overheating, as it can affect the hardness of the steel.
Finish and Clean: Once the hole is complete, turn off the drill and clean the workpiece. Remove any burrs or sharp edges around the hole.
Inspect the Hole: Check the hole’s quality and size. If needed, you can use larger drill bits to widen the hole or ream it to a precise diameter.
Remember that drilling through hardened steel can be time-consuming, and it’s important to be patient and use the right tools and techniques. Also, keep spare drill bits on hand, as hardened steel can quickly dull them.
What drill bit to use for hardened Steel?
Sometimes, the science of drilling might be simple with the right tools. You need to determine the best drill bits for hardened Steel.
Not all drill bits can indeed make holes in hardened Steel. The first tool you must consider for the task is the cobalt drill bit set series.
Also, the Dewalt series might be the perfect tool When looking for an appropriate drill bit to drill through hardened Steel. These two varieties are affordable and are better known for power and reliability.
Workpiece Inspection
In the world of drilling through hardened steel, our journey doesn’t end when the hole is drilled. Ensuring the quality and precision of the hole is paramount. Here’s what you need to know:
Checking the Quality of the Hole: Your drilling job’s success hinges on the quality of the hole you’ve created. To evaluate it, first, measure its diameter and depth. Use precise measuring tools like calipers or a depth gauge. Confirm that it meets your project’s specifications.
Dealing with Burrs and Sharp Edges: Drilling into hardened steel can sometimes result in unwanted burrs or sharp edges around the hole. These jagged imperfections can compromise the integrity of your workpiece and pose safety hazards. To remedy this, use a deburring tool or a file to carefully remove these burrs and create a smooth, clean finish. This not only enhances the aesthetics of your work but also ensures that the hole serves its intended purpose without any snags or risks.
Remember, the attention to detail you give to inspecting and refining your work is what sets the truly skilled apart from the rest. It’s not just about drilling the hole; it’s about drilling it right every time.
Troubleshooting
When drilling into hardened steel, you may encounter challenges along the way. Understanding how to troubleshoot common issues can make your drilling experience more successful:
What to do if the Drill Bit Gets Stuck: If your drill bit becomes stuck in the hole, it’s important not to force it further. This can cause damage to both the bit and the workpiece. Instead, follow these steps:
Stop drilling immediately to prevent any further complications.
Apply cutting fluid or lubricant to the stuck area to reduce friction.
Consider using a pair of pliers or a vice grip to rotate and remove the bit gently.
In some cases, reversing the drill’s direction can help dislodge the stuck bit.
When to Replace a Dull Bit: Dull drill bits can slow down your drilling progress and may lead to overheating. Here’s how to determine when it’s time to replace a dull bit:
Pay attention to the drilling speed. If the bit seems to be cutting significantly slower than usual, it may be dull.
Increased resistance during drilling is another indicator of a dull bit.
Inspect the quality of the hole. If it appears rough or ragged instead of clean and precise, the bit may be dull.
Regularly check the cutting edges of the drill bit. If you notice chipping, blunting, or excessive wear, it’s time for a replacement.
By recognizing these signs and taking prompt action, you can maintain the efficiency and effectiveness of your drilling process. Replacing dull bits ensures that your holes remain clean and precise, especially when dealing with tough materials like hardened steel.
Alternative Techniques
While conventional drilling is effective for many applications, there are instances where alternative techniques can be more efficient or practical when working with hardened steel:
Using Step Drills or Hole Saws: Step drills and hole saws are versatile tools that can simplify the process of creating holes in hardened steel, especially when you need varying diameters or larger openings. Here’s how to leverage them:
Step Drills: These cone-shaped drills have multiple stepped diameters. Start with a smaller diameter and gradually increase it to achieve the desired hole size. Step drills are excellent for enlarging existing holes or creating holes of different sizes in a single workpiece.
Hole Saws: Hole saws consist of a circular saw blade with teeth designed to cut larger holes. They are effective for cutting clean, precise holes in hardened steel. Ensure you have a compatible arbor and pilot drill for stability and accuracy.
Tapping Hardened Steel: Tapping is a critical technique when you need to create threaded holes in hardened steel for screws, bolts, or other fasteners. Here’s how to tap hardened steel effectively:
Select the appropriate tap size and type based on the thread specifications required for your project.
Use a center punch to mark the center of the hole location to ensure precision.
Insert the tap into the hole and turn it clockwise while applying downward pressure. A tap wrench or T-handle helps maintain control.
Periodically reverse the tap to break chips and prevent binding.
Pay attention to the torque applied, as excessive force can damage the tap or workpiece.
Use cutting fluid to lubricate the tapping process and reduce friction, which is especially beneficial when working with hardened steel.
These alternative techniques offer flexibility and precision in various drilling scenarios. By understanding when and how to use step drills, hole saws, and tapping methods, you can expand your repertoire of skills when working with hardened steel, ultimately enhancing your versatility as a craftsman.
Advanced Tips for Precision
For those who strive for utmost precision in their drilling projects, these advanced techniques can make all the difference:
Reaming the Hole for a Perfect Fit: Reaming is a finishing process that refines the inner surface of a drilled hole, ensuring it meets precise specifications and provides a perfect fit for fasteners or components. Here’s how to achieve a flawlessly reamed hole:
Obtain a reamer tool of the appropriate size and type for your project. Reamers come in various styles, including hand reamers and machine reamers.
Insert the reamer into the drilled hole, ensuring it’s properly aligned with the hole’s axis.
Apply steady and controlled pressure while turning the reamer clockwise. This process smoothens the hole’s interior, removing any irregularities or imperfections.
Regularly check the hole’s dimensions with precision measuring tools to ensure it meets your specifications.
Achieving Specific Hole Diameters: In many applications, achieving precise hole diameters is critical. Whether you need a hole of exact dimensions for a component or fastener, here’s how to master this skill:
Begin by selecting the appropriate drill bit with a diameter closest to your desired hole size.
Gradually increase the hole’s diameter using larger drill bits. Incremental steps help you maintain control and prevent overshooting the desired size.
Periodically measure the hole’s diameter with calipers or a hole gauge to ensure it aligns with your project’s specifications.
If you require an exceptionally precise hole diameter, consider reaming the hole, as mentioned earlier, to achieve the perfect fit.
These advanced tips for precision drilling are essential when working on projects that demand exact measurements and tight tolerances. By incorporating reaming and careful hole diameter control into your skill set, you can elevate the quality and accuracy of your work when drilling into hardened steel.
Safety Measures and Best Practices
Ensuring a safe and responsible approach to drilling in hardened steel is of paramount importance. Here are essential safety measures and best practices to keep in mind:
Handling and Disposing of Cutting Fluid: Cutting fluid plays a crucial role in the drilling process. However, it must be handled and disposed of properly to safeguard your health and the environment. Follow these guidelines:
Wear Protective Gear: When handling cutting fluid, wear appropriate personal protective equipment, including gloves and safety glasses, to prevent skin contact and eye irritation.
Proper Storage: Store cutting fluid in a cool, dry place, away from direct sunlight and extreme temperatures. Keep it tightly sealed to prevent contamination.
Avoid Spills: Be cautious when transferring cutting fluid to ensure it doesn’t spill. Use a funnel and pour slowly to minimize splashing.
Dispose Responsibly: Never pour used cutting fluid down the drain or into the environment. Check local regulations for proper disposal methods, which often involve recycling or disposal at a hazardous waste facility.
Storing Your Drilling Tools Safely: Proper storage of your drilling tools not only prolongs their lifespan but also minimizes the risk of accidents. Here’s how to store your tools safely:
Clean and Dry: After each use, clean your drill bits and tools thoroughly to remove debris and residue. Dry them completely to prevent rust and corrosion.
Organize and Label: Store your tools in an organized manner so they are easy to locate when needed—label toolboxes or drawers for quick identification.
Secure and Lock: If you have power drills or cordless tools, ensure they are stored in a secure place, out of reach of children or unauthorized users.
Maintain Batteries: For cordless drills, remove and charge the batteries separately when not in use to prolong their life and prevent potential fire hazards.
By following these safety measures and best practices, you not only protect yourself and those around you but also extend the longevity of your drilling tools, ensuring they remain in optimal working condition for future projects. Safety should always be a top priority when working with power tools and equipment.
Common Mistakes to Avoid
When drilling into hardened steel, it’s essential to steer clear of common mistakes that can hinder your progress and compromise the quality of your work. Here are two critical errors to avoid:
Overheating and Its Consequences: Overheating is a common issue when working with hardened steel, and it can have several adverse consequences:
Dull Drill Bits: High temperatures can quickly dull drill bits, reducing their cutting efficiency and lifespan.
Workpiece Damage: Excessive heat can damage the workpiece, leading to warping or structural changes.
Loss of Hardness: Prolonged exposure to heat can soften the hardened steel, negating its desired properties.
Safety Hazards: Overheating can pose safety risks, including the potential for workpiece ejection or tool breakage.
Prevention: To prevent overheating, use cutting fluid or lubrication generously during drilling. Operate the drill at a slower speed and apply consistent but moderate pressure. Periodically stop to allow the workpiece and drill bit to cool, and consider using specialized drill bits designed for heat resistance when working with hardened steel.
Misalignment Issues: Misaligned holes can lead to significant setbacks and complications in your projects:
Ineffective Fastening: Misaligned holes may not accommodate fasteners or components properly, compromising the integrity of your work.
Structural Weakness: Misaligned holes weaken the structural integrity of your workpiece and may lead to failures or accidents.
Time and Resource Waste: Correcting misaligned holes can be time-consuming and costly, resulting in project delays.
Prevention: To prevent misalignment, take the time to mark and measure hole locations accurately before drilling. Use center punches or drill guides to create precise starting points. Maintain steady control over the drill to prevent wandering, and consider using clamps or fixtures to secure the workpiece firmly in place during drilling.
By avoiding these common mistakes, you’ll not only enhance the quality and efficiency of your drilling projects but also ensure the safety of both yourself and your workpiece. Mastery of these principles is essential for anyone working with power tools and hardened steel.
Conclusion
In conclusion, How to Drill a Hole in Hardened Steel, Apart from wearing protective garments, it would be best to take extra caution when dealing with hardened Steel. Ensure that the clamp is strong enough to hold the piece of Steel for more stability.
Your knowledge of How to Drill Through Hardened Steel is clear. Making holes in the metal may be tough with the wrong tools.
If you want good results, you should use the following drill bits. Also, as a novice, expect to make a few blunders when drilling, but that’s how you learn. Call a professional to guide you through the above steps if you feel the task needs to be revised.
This article will offer a comprehensive guide on how to cut straight with jigsaw. It will explain why this task can be challenging and highlight the importance of proper tools and techniques. After introducing the basics of a jigsaw, it will detail how to prepare for the task, choose the right blade, mark the cut line, and secure the workpiece. The article will then provide a step-by-step guide to cutting straight with a jigsaw, from setting up the workspace to finishing the cut. It will offer additional tips and point out common mistakes to avoid. The article will conclude with a summary and FAQs.
1. Why Cutting Straight with a Jigsaw is Challenging
Cutting straight with a jigsaw can be tricky, even for seasoned DIY enthusiasts. The challenge lies in the jigsaw’s nature, primarily designed for curved cuts and intricate shapes. However, it’s possible to achieve straight cuts with the right tools and techniques.
2. Importance of Proper Tools and Techniques
Having the correct tools and using them appropriately is paramount for precise cutting. This includes selecting the correct blade, accurately marking the cut line, and securely fixing the workpiece.
3. Understanding the Basics of a Jigsaw
A jigsaw is a versatile power tool capable of making straight and curved cuts in various materials. Its reciprocating blade can cut through wood, plastic, and metal, making it a must-have for any workshop.
4. Preparing for the Task
Choosing the Right Blade
Not all jigsaw blades are created equal. You’ll need a blade with large, sharp teeth for straight cuts. Choosing a blade that’s as long as the material is thick is also advisable to prevent bending.
Marking the Cut Line
Use a pencil and a straightedge to draw a clear line where you plan to cut. This will serve as your guide throughout the cutting process.
Securing the Workpiece
Before cutting, ensure your workpiece is securely clamped to a sturdy surface to prevent movement during the cut.
5. How to Cut Straight With a Jigsaw
The Step-by-Step Guide to Cutting Straight with a Jigsaw
Step 1: Set Up Your Workspace
Ensure your workspace is well-lit and free from clutter. You should have a clear view of the cut line and easy access to the workpiece.
Step 2: Prepare Your Jigsaw
Insert the appropriate blade into the jigsaw, ensuring it’s securely locked in place.
Step 3: Begin the Cut
Position the jigsaw at the edge of the workpiece, with the blade aligned with the cut line. Switch on the jigsaw and allow it to reach its full speed before starting the cut.
Step 4: Guide the Jigsaw
Keep a firm grip on the jigsaw and gently guide it along the cut line. Keep your eye on the line, not the blade.
Step 5: Finish the Cut
When you near the end of the cut, slow down and maintain control of the jigsaw to prevent tear-out or damage to the workpiece.
Unlock the full potential of your jigsaw! Before you dive into straight cuts, ensure safety with our comprehensive guide: “How to Use a Jigsaw Safely: For Novice to Expert!” Protect yourself and perfect your craft. Happy cutting!
6. Tips for Cutting Straight with a Jigsaw
Use a Straight Edge Guide
A straight-edge guide can help keep the jigsaw on track, especially for longer cuts.
Practice Makes Perfect
Don’t be discouraged if your first few cuts aren’t perfect. With time and practice, your skill will improve.
Safety Measures
Remember, safety comes first! Always wear appropriate safety gear, including goggles and ear protection.
7. Common Mistakes to Avoid
Avoid forcing the jigsaw or rushing the cut. This can lead to the blade bending or breaking.
8. FAQ (Frequently Asked Questions)
Can I use a jigsaw to cut straight lines in metal?
Yes, with the right blade, a jigsaw can cut straight lines in various materials, including metal.
How can I prevent the jigsaw blade from bending?
Use a blade if the material is thick, and avoid forcing the jigsaw.
Why is my jigsaw not cutting straight?
You may need to use the right blade type or push the jigsaw too hard. Try slowing down and using a straight-edge guide.
What safety equipment should I use when using a jigsaw?
Always wear safety goggles to protect your eyes and ear protection to safeguard your hearing.
Can I use a jigsaw for large DIY projects?
A jigsaw is a versatile tool and can be used for various tasks in large DIY projects.
9. Conclusion
In conclusion of how to cut straight with jigsaw, Learning how to cut straight with a jigsaw can open up many possibilities for DIY projects. With patience, practice, and the right techniques, you’ll be easily cutting straight lines.
Suppose you’re a DIY enthusiast or a woodworking enthusiast. In that case, knowing how to replace jigsaw blades is a vital skill that can significantly enhance your cutting results and project efficiency. Jigsaw blades come in two main types: T-Shanks and U-Shanks, each with advantages. Properly replacing the blade involves
identifying the type,
securely attaching it to the jigsaw, and
ensuring it is firmly in place.
In this article, we’ll walk you through how to replace jigsaw blade with step-by-step process of safely replacing jigsaw blades, offering expert tips for mastering this essential skill. By the end of this guide, you’ll be equipped with the knowledge to tackle various materials with ease and precision.
1. Introduction to Jigsaw Blades
What is a Jigsaw Blade?
Before we dive into the process of replacing jigsaw blades, let’s understand what a jigsaw blade actually is. A jigsaw blade is a slender, toothed cutting tool designed to fit into a reciprocating saw known as a jigsaw. It allows for intricate and curved cuts in various materials, making it a versatile tool for DIY projects and woodworking.
Types of Jigsaw Blades: T-Shanks and U-Shanks
There are two primary types of jigsaw blades: T-Shanks and U-Shanks. T-Shank blades have a T-shaped end that fits securely into the jigsaw’s blade holder, and they are more popular due to their ease of use and quick blade-changing capabilities. On the other hand, U-Shank blades have a U-shaped end. Although less common, they are known for their reliability and stability during heavy-duty cutting tasks.
2. Importance of Replacing Jigsaw Blades
Maintaining Blade Sharpness
Regularly replacing jigsaw blades is crucial for maintaining their sharpness. Dull blades produce poor-quality cuts, put unnecessary strain on the jigsaw’s motor, and may lead to overheating. By replacing blades when they become dull, you ensure optimal cutting performance and prolong the lifespan of your jigsaw.
Improving Cutting Efficiency
Using sharp and appropriate blades improves cutting efficiency and allows you to complete projects faster. When the blade matches the Material being cut, you experience smoother and more precise cuts, reducing the need for additional finishing work.
Ensuring Safety
Worn-out or damaged blades can pose safety risks during cutting tasks. Dull blades may cause the jigsaw to kick back or lead to uncontrolled movements, increasing the likelihood of accidents. Regularly replacing blades ensures safer and more controlled cutting experiences.
3. Step-by-Step Guide to Replacing Jigsaw Blades
Gather Necessary Tools
Before you start replacing the blade, gather the necessary tools: a screwdriver, a compatible replacement jigsaw blade, and safety goggles, gloves. Ensuring you have the right tools prevents unnecessary delays during the replacement process.
Identifying the Blade Type
Before removing the old blade, identify its type (T-Shank or U-Shank) to ensure you purchase the correct replacement blade. The blade type should be indicated on the packaging or the blade itself.
Removing the Old Blade
Unplug the jigsaw from the power source to remove the old blade to avoid accidental activation. Depending on your jigsaw model, either find the blade release lever and hold it down while pulling it out or use a screwdriver to loosen the blade screws and remove it.
Inserting the New Blade
Insert the new blade into the jigsaw’s blade holder, ensuring that the T-Shank or U-Shank is securely seated in the holder. Push the blade into the holder for T-Shank blades until it clicks into place. For U-Shank blades, align the hole in the blade with the pin in the holder and insert the screw through the hole.
Securing the Blade in Place
Once the new blade is in position, tighten the blade screws (if using U-Shank blades) or release the blade release lever (using T-Shank blades). Double-check that the blade is firmly secured before proceeding.
4. Tips for Effective Blade Replacement
Using a Variety Pack of Blades
Invest in a variety pack of jigsaw blades that cater to different materials and cutting tasks. Having a selection of blades for wood, metal, plastic, and other materials ensures you always have the right tool for the job.
Choosing the Right Blade for the Material
When working on a project, consider the Material you’re cutting and select the appropriate blade accordingly. For instance, use a fine-toothed blade for clean cuts in wood and a blade with fewer teeth for faster cuts in metal.
Maintaining and Cleaning Blades
After each use, inspect your jigsaw blade for any signs of damage or wear. Cleaning the blade with a soft brush or cloth and lubricating it regularly can help extend its lifespan and improve cutting performance.
Storing Extra Blades
Properly store your extra jigsaw blades in a dry and organized container to prevent damage and ensure they remain sharp for future use. Labeling the container with the blade types can save time when searching for the right blade.
5. Mastering Jigsaw Blades for DIY Projects
Cutting Straight Lines
To achieve straight cuts with a jigsaw, use a straight edge or a guide to follow as you cut. Take your time and maintain a steady hand to ensure accuracy.
Making Curved Cuts
Use a blade with smaller teeth for curved cuts and pivot the jigsaw smoothly along the cutting line—practice on scrap material to develop your technique.
Discover the secrets of Making Curved Cuts with a jigsaw in our article “How to Use a Jigsaw to Cut Curves: The Art of Curve Cutting!” Expand your woodworking skills and create stunning curved masterpieces. Don’t miss out! Could you read it now?
Handling Intricate Designs
When cutting intricate designs, consider drilling a small starter hole to allow the jigsaw blade to fit in and maneuver around tight corners.
Adjusting Blade Speed and Movement
Adjusting the jigsaw’s speed and controlling its movement will impact the quality of your cuts. Experiment with different speeds and practice making precise movements.
6. Common Mistakes to Avoid
Over-tightening the Blade
Avoid over-tightening the blade screws, as it may cause the blade to warp or bend during use. Secure the blade firmly but not excessively.
Using Dull Blades
Using dull blades will lead to poor cuts and may damage your materials. Always replace blades when they show signs of wear.
Ignoring Safety Precautions
Always wear safety goggles to protect your eyes from debris, and follow all safety guidelines provided by the jigsaw manufacturer.
Discover essential safety precautions for using a jigsaw tailored for beginners and experts. Dive into our comprehensive guide, “How to Use a Jigsaw Safely: For Novice to Expert!” Unleash your creativity with confidence. Please read it now!
7. Troubleshooting Blade Issues
Blade Gets Stuck During Cutting
If the blade gets stuck during cutting, turn off the jigsaw and check for debris or obstructions. Remove any obstacles and try cutting again.
Blade Bends or Flexes
A bending or flexing blade may result from excessive force or a dull blade. Adjust your cutting technique and replace the blade if necessary.
Uneven or Rough Cuts
Uneven or rough cuts may be caused by using the wrong blade for the Material or using a damaged blade. Ensure you have the right blade and replace any worn-out blades.
FAQ: How to Change Blades on Various Jigsaws
1. How do you change the blade on a power craft jigsaw?
To change the blade on a power craft jigsaw, follow these steps:
Unplug the jigsaw from the power source for safety.
Locate the blade release lever on the jigsaw, usually on the side or top.
Depress the blade release lever to open the blade holder.
Remove the old blade carefully, being cautious of the sharp teeth.
Please insert the new blade into the holder, ensuring it fits securely.
Release the blade release lever to lock the new blade in place.
Give the blade a gentle tug to verify it is firmly seated.
Once the blade is secure, you can plug the jigsaw back into the power source and resume work.
2. How do you put a new blade in a Bosch jigsaw?
To put a new blade in a Bosch jigsaw, here’s what you need to do:
Unplug the jigsaw from the power outlet to prevent accidental activation.
Locate the blade release mechanism near the blade, usually on the front of the jigsaw.
Activate the blade release by pushing or pulling it, depending on the model.
The blade should pop out slightly, allowing you to remove the old blade.
Insert the new Bosch jigsaw blade into the holder, ensuring it locks securely.
Release the blade release mechanism to secure the new blade in place.
Tug on the blade to confirm it is properly seated and ready for use.
Finally, plug the jigsaw back in and use your Bosch jigsaw with the new blade.
3. How do you remove a Bosch saw blade?
Removing a Bosch saw blade is a straightforward process:
Unplug the saw from the power source to ensure safety.
Locate the blade release lever or mechanism on the saw.
Activate the blade release by pushing, pulling, or pressing the lever, depending on the saw model.
The blade should loosen and come out of the blade holder.
Carefully remove the old blade from the saw.
To install a new blade, follow the reverse process, inserting it into the blade holder and releasing the blade release mechanism to secure it.
4. How do you change the blade on a Bosch 4100?
The Bosch 4100 is a table saw, and changing the blade on this model involves a slightly different process:
Unplug the Bosch 4100 table saw from the power source for safety.
Locate the blade guard and lift it to access the blade.
Use the wrench provided with the saw to loosen the arbor nut holding the blade in place.
Remove the old blade carefully, making sure not to damage the teeth.
Place the new blade onto the arbor, ensuring it aligns with the saw’s rotation arrow.
Tighten the arbor nut securely with the wrench.
Lower the blade guard back into position.
Plug the Bosch 4100 back in and verify that the blade is spinning smoothly before using the saw.
5. How do you change the blade on a Bosch PKS 55?
To change the blade on a Bosch PKS 55 circular saw, follow these steps:
Unplug the PKS 55 circular saw from the power outlet.
Locate the blade guard release lever on the saw.
Depress the blade guard and release the lever to open the blade guard.
Use the provided wrench to loosen the arbor nut holding the blade in place.
Carefully remove the old blade from the saw.
Place the new blade onto the arbor, ensuring it fits snugly and matches the saw’s rotation direction.
Tighten the arbor nut securely with the wrench.
Close the blade guard back into position.
Plug the PKS 55 circular saw back in and check the blade’s rotation before using the tool.
Remember to refer to the respective user manuals for each saw model for more specific details and safety instructions.
Conclusion
In conclusion on how to replace jigsaw blade, Learning how to replace jigsaw blades is essential for any DIY enthusiast or woodworker. By following the step-by-step guide and implementing the expert tips in this article, you can ensure the longevity of your jigsaw blades, improve cutting efficiency, and achieve outstanding results in your projects. Remember to prioritize Safety, use the right blade for each Material, and practice your cutting techniques to become a master of jigsaw blade replacement.
This article will explore how to cut plywood with jigsaw. It will provide readers with step-by-step instructions on how to achieve clean, precise cuts with minimal splintering. We’ll discuss everything from blade selection, appropriate saw settings, techniques to prevent splintering, safety measures, and the importance of maintaining a moderate cutting speed. After reading this comprehensive guide, DIY enthusiasts and woodworking beginners will be well-equipped to tackle their plywood-cutting projects confidently.
1. How to Cut Plywood with a Jigsaw
Cutting plywood with a jigsaw is a handy skill for every DIY enthusiast to master. Not only does it make your projects easier, but it also offers the satisfaction of creating something with your own hands. But how does one do it properly? Let’s find out!
2. Understanding the Basics of Cutting Plywood
What is Plywood?
Plywood is a versatile and durable material used in construction and furniture making. It’s composed of multiple layers of wood veneer glued together, which gives it strength and stability.
Why Use a Jigsaw?
A jigsaw is a powerful tool that makes curved and straight cuts in plywood. The correct technique and blade can produce smooth, clean cuts with minimal splintering.
3. Choosing the Right Blade for Cutting Plywood
Tooth Count and Sharpness
The tooth count and sharpness of the blade are crucial for cutting plywood. A blade with a high tooth count and sharpness helps to minimize splintering. Remember, a sharp blade is a safe blade!
Blade Width
The width of the blade also matters. Use a narrow blade for curved cuts and a wider one for straight cuts.
Special Blades: Reverse-Tooth and Carbide-Tipped
Using specialized blades, like reverse-tooth or carbide-tipped ones, can further enhance your cutting experience. These blades are designed to cut cleanly through plywood, reducing splintering.
4. Practical Techniques for Plywood Cutting
Use of Masking Tape
Masking tape to mark your cutting line can help keep your cuts straight and precise. Plus, it can prevent surface splintering.
Speed Control
Maintaining a moderate cutting speed is crucial. If you go too fast, you risk damaging the plywood or the blade. But go too slow, and you might cause unnecessary strain on the jigsaw and the blade.
Using a Splinter Guard
A splinter guard can help keep your plywood free of splinters during cutting, ensuring a smooth finish.
Scoring the Cut Line
Scoring the cut line with a utility knife before cutting can help reduce splintering, leading to cleaner cuts.
Importance of Support and Safety Measures
Ensure the plywood is adequately supported during the cutting process to prevent accidents. Moreover, always wear safety gear while working with power tools to protect yourself.
Avoid excessive forward pressure, which could lead to broken teeth or a snapped blade. Additionally, don’t forget to lubricate your jigsaw for smoother action.
6. FAQ (Frequently Asked Questions)
Can you use a jigsaw to cut plywood?
Absolutely! A jigsaw is one of the most versatile tools and is highly efficient in cutting plywood. What’s important is that you use the correct blade and techniques for a smooth, splinter-free cut. You also need to adjust the jigsaw settings depending on the plywood’s thickness.
How do you cut plywood without chipping a jigsaw?
Several techniques can be employed to cut plywood without chipping when using a jigsaw. These include using a high-tooth count, sharp, and ground tooth blade, slowing the cut speed, marking your cut line with masking tape, or scoring it with a utility knife. Furthermore, you can employ a zero clearance insert or a backer board to ensure smoother cuts and avoid splintering.
What are the best jigsaw blades for cutting plywood?
The choice of blade dramatically impacts the quality of cuts on plywood. A high-tooth count blade with ground teeth is recommended for plywood. Some of the best jigsaw blades for plywood include the Bosch T101AO, Gunpla 15pc Blade Set, DEWALT DW3742C 14pc Blade Set, Bosch T308B, DEWALT DW3795H, and WORKPRO 36-Piece, amongst others. These blades are highly rated due to their durability, sharpness, and ability to make precise cuts in plywood.
Which two tools are best for cutting plywood?
The jigsaw and the circular saw are the best tools for cutting plywood. The jigsaw is excellent for making curved and intricate cuts, while the circular saw is perfect for making long, straight cuts. Both tools offer precision and versatility, and when used properly, they can deliver splinter-free cuts.
How thick wood can jigsaw cut?
The cutting capacity of a jigsaw largely depends on the type of blade used. However, most jigsaws can comfortably cut up to 1.5 to 2 inches of thick wood. For thicker wood, it’s advisable to use a circular or reciprocating saw.
Can a jigsaw cut 1 inch wood?
Yes, a jigsaw can comfortably cut 1-inch wood. It’s crucial to use a sharp blade and adjust the settings of your jigsaw appropriately to ensure a clean and precise cut.
How do you use a jigsaw for beginners?
Using a jigsaw is relatively straightforward, even for beginners. First, you need to mark your cut line on the wood. Then, ensure the jigsaw is off before you insert the appropriate blade. Next, align the blade with the cut line and turn on the jigsaw. Guide the jigsaw along the cut line slowly and steadily. Always remember to wear safety gear and avoid forcing the jigsaw. Let it cut at its own pace for the best results.
7. Conclusion
In conclusion, how to cut plywood with jigsaw, Cutting plywood with a jigsaw doesn’t have to be a daunting task. With the right blade, techniques, and safety measures, you can easily make precise cuts. So why wait? Get started on your next DIY project today!
This article will provide an in-depth guide on how to start a Stihl chainsaw. From the importance of correctly starting a chainsaw to the preparatory steps and actual process of starting it, this piece covers everything you need to know. Furthermore, it will also delve into troubleshooting tips and maintenance advice to keep your Stihl chainsaw running smoothly. This all-inclusive guide is designed to educate, entertain, inspire, and drive readers to understand and handle their Stihl chainsaw better.
Safety First: Protective Gear
When operating a chainsaw, safety should always be your top priority. Invest in a reliable safety helmet system to protect your head from any potential debris or falling branches. Additionally, wearing chainsaw chaps can prevent severe injuries in case of accidental contact with the blade.
Understanding STIHL Chainsaw Controls
Before starting your chainsaw, it’s crucial to familiarize yourself with its controls. For a cold start, the positioning may differ from a warm start. Additionally, engaging the chain brake before starting is essential to prevent accidents.
How to Start a Stihl Chainsaw: Step-by-Step Guide
Now, let’s dive into the step-by-step process of starting your STIHL chainsaw. We’ll cover both the ground starting and the standing starting methods, so you can choose the one that suits your preferences and the specific situation.
Preparatory Steps
First, we need to cover some preparatory steps.
Checking the chainsaw includes ensuring the chain is sharp, the tank is filled with fresh fuel, and the bar oil reservoir is topped up.
Next, position the chainsaw safely on a flat, stable surface with the chain brake engaged.
Starting the Chainsaw
Now, to the exciting part. Setting the Master Control Lever to the cold start position is the first step.
Then, firmly hold the chainsaw while pulling the starter rope until you hear the engine’s first burble.
The Importance of Avoiding Drop Starting
Drop starting may seem like a convenient method, but it can cause serious damage to your chainsaw’s internal components. We’ll explain why it’s best to avoid drop starting and opt for the correct starting technique.
Avoiding Flooded Chainsaw Issues
Chainsaw flooding can be frustrating and prevent your chainsaw from starting. We’ll guide you through adequately using the choke, pulling the starter rope, and transitioning to idle to avoid flooding issues.
Knowing Your STIHL Chainsaw: Online Manuals
STIHL provides comprehensive online chainsaw manuals packed with safety and operational information. We’ll show you how to access these manuals, ensuring you have all the necessary knowledge before starting your chainsaw.
Critical Differences Between STIHL and Other Chainsaw Brands
STIHL chainsaws have unique starting procedures compared to other brands. Understanding these differences will help you handle various chainsaws with confidence.
Troubleshooting Tips: When Your Stihl Chainsaw Won’t Start
Have you ever had a moment when your chainsaw won’t start? Don’t panic. Our common issues and solutions section can help you troubleshoot and save a trip to the repair shop.
Taking good care of your Stihl chainsaw is essential to ensure its longevity. Our regular maintenance tips section will help you keep your chainsaw in shape. Also, knowing when to seek professional help is crucial.
FAQ (Frequently Asked Questions)
How do you cold start a Stihl chainsaw?
Cold starting a Stihl chainsaw involves several steps. You start by activating the chain brake and removing the bar cover if your chainsaw has one. If you’re using a gas-powered chainsaw, the decompression valve, and primer must be pumped before you initiate the cold start. The master control should be adjusted, and proper hand and foot positioning should be maintained. Pull the starter rope until the chainsaw fires, and then readjust the master control.
What is STIHL easy to start?
STIHL Easy2Start™ is a feature designed to make starting STIHL tools easier by reducing the effort needed to start the tool. This system has a spring between the crankshaft and the starter rope that releases stored energy to aid in starting the tool, significantly reducing the pulling force needed.
How do you turn a STIHL on?
Turning on a Stihl chainsaw involves activating the chain brake, checking the fuel cap, and removing the bar cover for safety. You’ll need to use the decompression valve and pump the primer for gas chainsaws. Then adjust the master control, and pull the starter rope until the chainsaw fires.
Why won’t STIHL chainsaw start?
Several reasons can prevent a Stihl chainsaw from starting. Common issues include a lack of fuel, a spark plug problem, a flooded engine, or a dirty air filter. If your chainsaw isn’t starting, check these areas first.
How do you start a flooded STIHL?
Starting a flooded Stihl chainsaw requires you to switch off the choke and hold the throttle wide open as you pull the starter rope. This process helps clear the excess fuel from the carburetor, allowing the engine to start.
How do you check a spark on a STIHL chainsaw?
To check for a spark, remove the spark plug from the cylinder, hold it against it, and pull the starter rope. If the chainsaw works properly, you should see a spark across the spark plug gap. Ensure to wear protective gear while doing this to avoid any accidental injuries.
Conclusion
In conclusion how to start a Stihl chainsaw, starting a STIHL chainsaw correctly is vital for your safety and equipment longevity. Following the step-by-step guide and investing in proper safety gear ensures a seamless starting process every time.
If you are a chainsaw owner, you understand how to oil a chainsaw and maintain your tool in top-notch condition. One vital aspect of this maintenance is oiling. But why is oiling so crucial, what type of oil should you use, and how frequently should you do it?
1. Why Oiling Your Chainsaw is Important
Regular oiling of your chainsaw extends its lifespan and ensures optimal performance. Proper lubrication reduces friction between the chain and the guide bar, preventing premature wear and tear. Additionally, it keeps your chainsaw running smoothly, ensuring clean and effortless cuts.
Types of Chainsaw Oils
You can use various oils to lubricate your chainsaw, each with its pros and cons. Bar and chain oil is the most common and is specifically designed for this purpose. Alternatively, you can use motor or vegetable oil in a pinch, although these may not offer the same level of protection.
When to Oil Your Chainsaw
The frequency of oiling depends on your chainsaw usage. If you use your chainsaw regularly, oiling should be done before each use. For less frequent users, oiling once every few months is typically sufficient.
2. Preparing Your Chainsaw for Oiling
Before proceeding with oiling your chainsaw, it’s essential to take some preparatory steps. First and foremost, prioritize safety and familiarize yourself with proper chainsaw handling techniques. Also, clean your chainsaw thoroughly before starting the oiling process.
3. How to Oil a Chainsaw: Step-by-Step Guide
Now that we’ve covered the basics let’s get down to the actual process of oiling your chainsaw.
Gathering the Necessary Equipment
Before starting, ensure you have the following items: the appropriate oil, a rag or cloth, safety gloves, and goggles.
Preparing the Chainsaw
Start by cleaning the chainsaw thoroughly. Remove any sawdust or debris, as these can impede the oiling process.
Applying the Oil
Next, open the oil reservoir and pour in the oil. Be careful not to overfill, as this can cause leakage.
Checking the Oil Flow
After oiling, run the chainsaw for a few seconds to ensure the oil is evenly distributed. The chain should have a slight sheen, indicating the oil is flowing properly.
4. Common Mistakes to Avoid When Oiling Your Chainsaw
Using the Wrong Type of Oil
Using engine oil or other unsuitable alternatives can cause damage to the chainsaw and hamper its performance.
Over-Oiling or Under-Oiling the Chainsaw
Finding the right balance is essential. Over-oiling can lead to excessive consumption and messy operation, while under-oiling can cause damage due to insufficient lubrication.
Ignoring Regular Maintenance
Neglecting regular maintenance, including oiling, can significantly impact the chainsaw’s overall performance and lifespan.
5. Troubleshooting Common Chainsaw Oiling Issues
Occasionally, you may encounter some issues while oiling your chainsaw.
Too Much Oil
If your chainsaw is throwing off excess oil, you may have overfilled the reservoir. Try draining some oil to resolve the issue.
Not Enough Oil
On the other hand, if your chainsaw is running dry, it might be under-oiled. Check your oil level and add more if necessary.
6. FAQ (Frequently Asked Questions)
How do you put oil in a chainsaw chain?
To put oil in a chainsaw, first, remove the chain guard. Clean the bar and chain to eliminate debris or sawdust that might impede oiling. Open the oil cap and fill the oil reservoir. Be careful not to overfill, as this could cause leakage.
Do you put oil on the chain of the chainsaw?
You indeed put oil on the chain of the chainsaw. Regular oiling keeps the chain moving smoothly, reduces friction, prevents overheating, and maintains the chainsaw’s performance and longevity.
What oil do I put in my chainsaw?
Regarding the type of oil, it’s best to use the manufacturer’s specified bar and chain oil. Vegetable oil can be an alternative, but avoid car oil due to viscosity issues.
Do you have to oil a chainsaw before use?
Oiling a chainsaw before use is essential, especially before extended use. This prevents friction and potential damage to the chainsaw.
How much oil do you put in a chainsaw?
As for how much oil to put in a chainsaw, it varies depending on your chainsaw model and the oil reservoir size. Generally, it would be best to fill the reservoir without overfilling.
How often do I oil my chainsaw?
The frequency of oiling your chainsaw depends on your chainsaw usage. If you use your chainsaw regularly, it’s best to oil it before each use. Checking and refilling the oil every few months should be sufficient for less frequent use.
7. Conclusion
In conclusion of how to oil a chainsaw, Regularly oiling your chainsaw is crucial for its longevity and optimal performance. Whether you’re a seasoned lumberjack or a homeowner with a knack for DIY, understanding how to oil your chainsaw properly is essential.