Category: How-To Mastery

Unlock the art of power tool usage and beyond. From mastering the intricacies of various power tools to exploring advanced techniques, our comprehensive guides empower you to become a true master. Whether you’re a beginner or looking to refine your skills, embark on a journey of mastery with How-To Mastery and unleash your potential in the world of power tools and beyond.

  • How to Measure Chainsaw Bar: Find Your Perfect Fit!

    How to Measure Chainsaw Bar: Find Your Perfect Fit!

    Welcome, all! If you’ve got a chainsaw in your shed and need help measuring its bar, you’re at the right place! By the end of this article, you will have all the tools and knowledge needed to measure on how to measure chainsaw bar accurately. Buckle up as we are about to slice into the world of chainsaw bars.

    How to Measure Chainsaw Bar

    1. Why Accurate Measurement Matters

    Accurate measurement of the chainsaw bar and Chain is crucial because it directly affects its performance and safety. A correctly sized bar and Chain ensure efficient cutting and reduce the risk of kickback, which is a sudden and dangerous upward movement of the chainsaw when the Chain gets pinched. Knowing the correct measurements allows you to choose the perfect replacement parts for your chainsaw, avoiding unnecessary hassle and ensuring smooth operation.

    2. Measuring the Chainsaw Bar Length

    To measure the chainsaw bar length accurately, follow these steps:

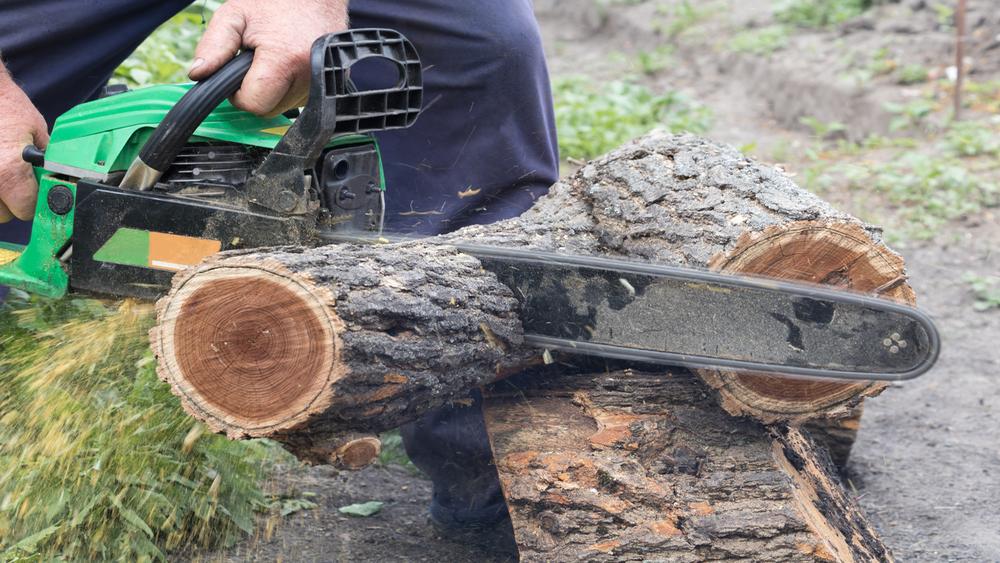
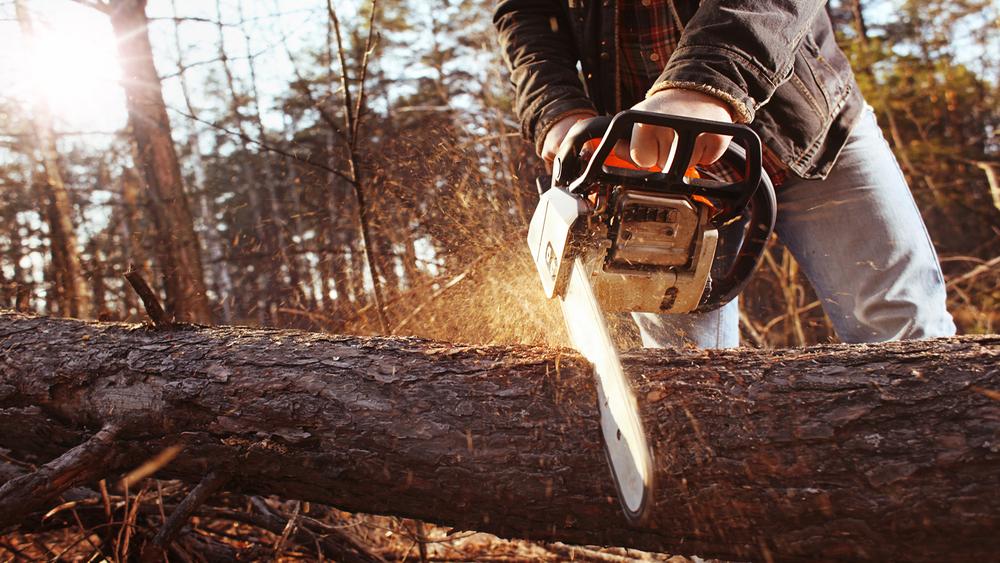
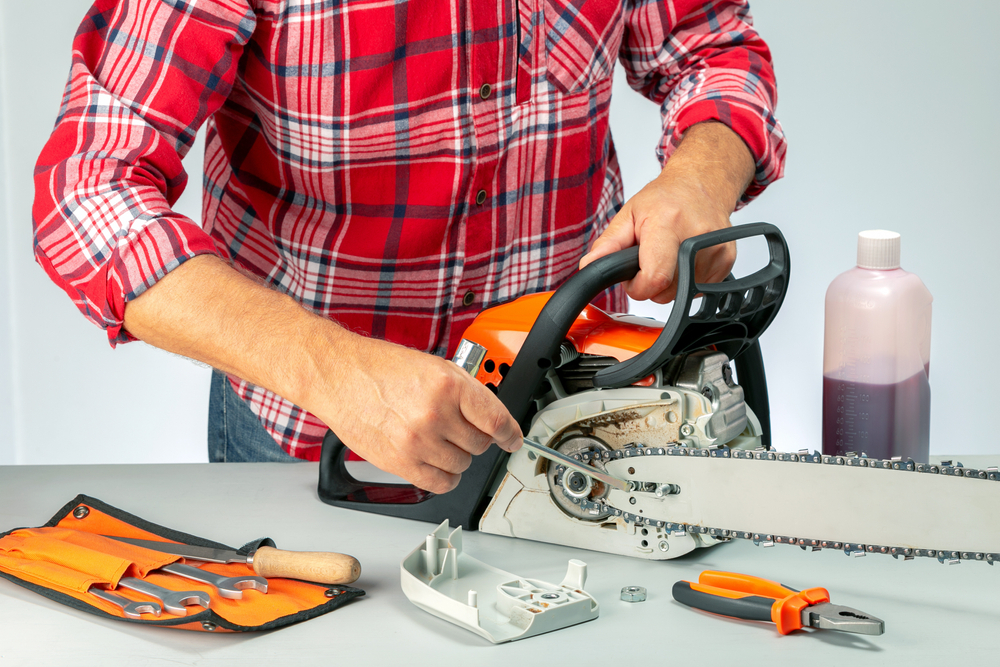
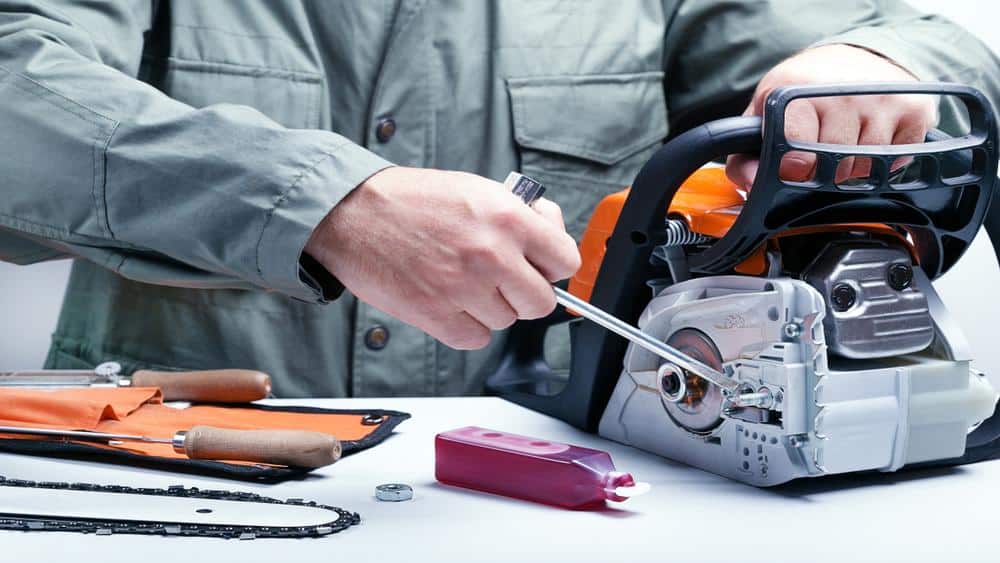
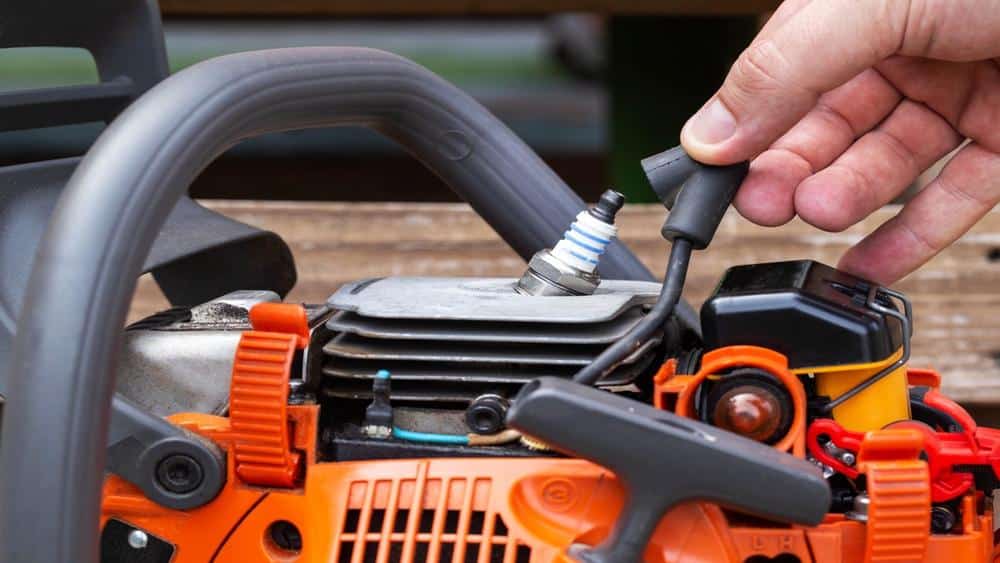
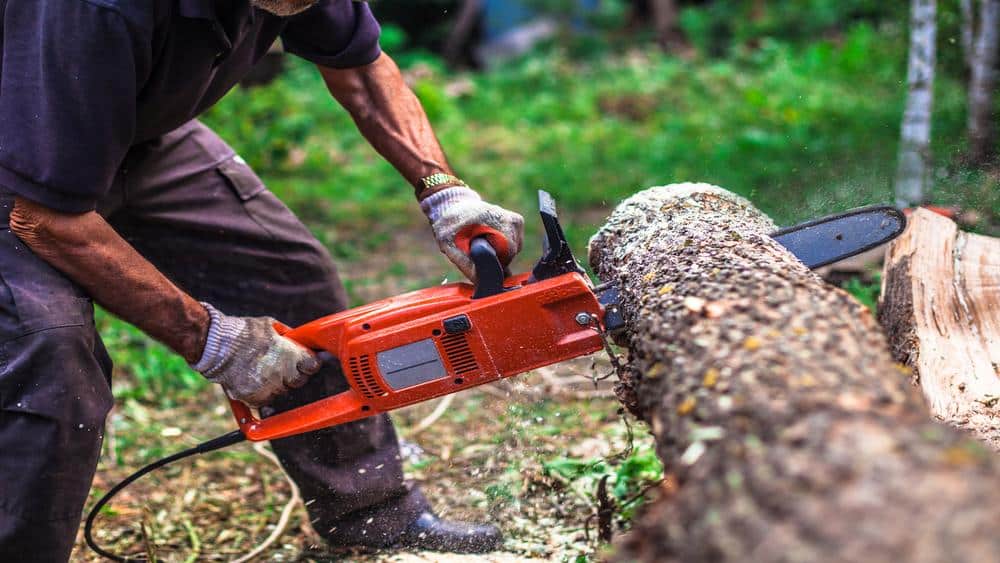
    1. Remove the Bar: Start by disconnecting the spark plug to ensure the chainsaw doesn’t accidentally start. Then, remove the guide bar from the chainsaw body.
    2. Measure Effective Cutting Length: Measure from the tip of the guide bar to where it enters the chainsaw body. This measurement is the effective cutting length.
    3. Measure True Bar Length: For a precise measurement, take the bar off completely and measure its entire length, including the part that fits into the chainsaw body.

    3. Understanding Chainsaw Bars

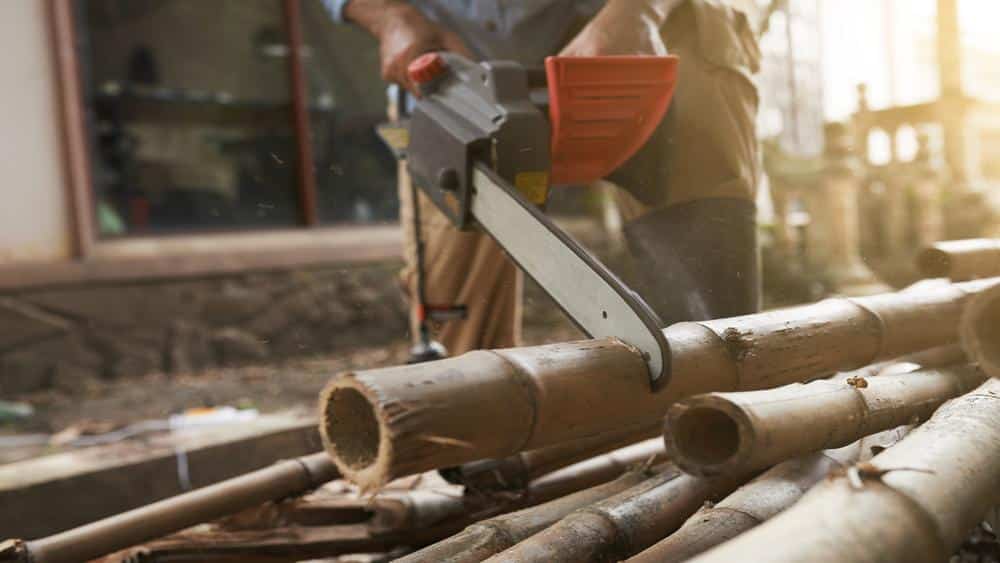
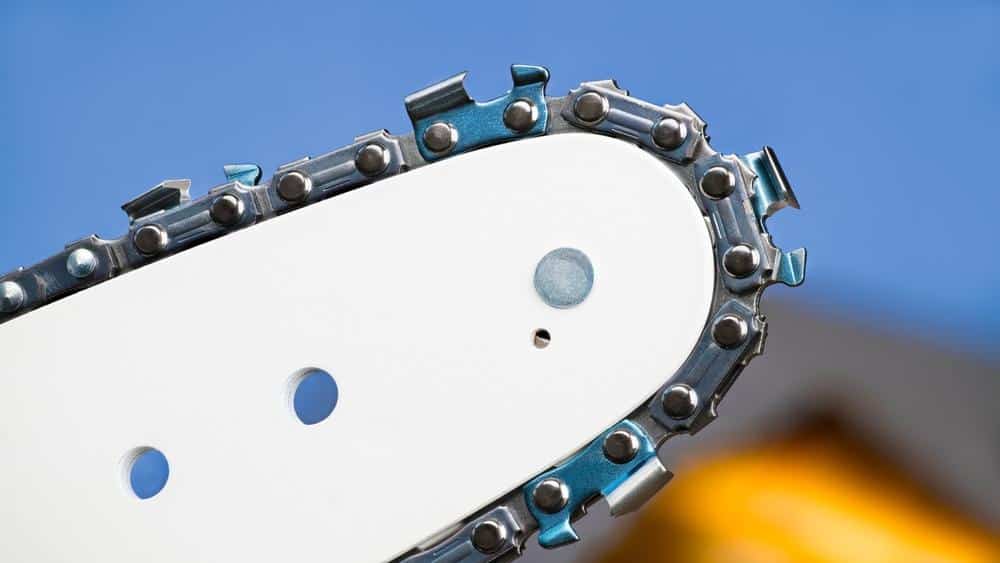
    But first, let’s answer the most basic question. What exactly is a chainsaw bar? It’s that piece of metal that guides Chain around. Chainsaw bars come in various sizes, with the bar length determining the depth of cut you can make. Now, let’s dive into how to measure this bar correctly!

    Measuring Chainsaw Bar

    4. How to Measure Chainsaw Bar?

    Steps for Measuring the Bar Length

    To measure a chainsaw bar, follow a few simple steps.

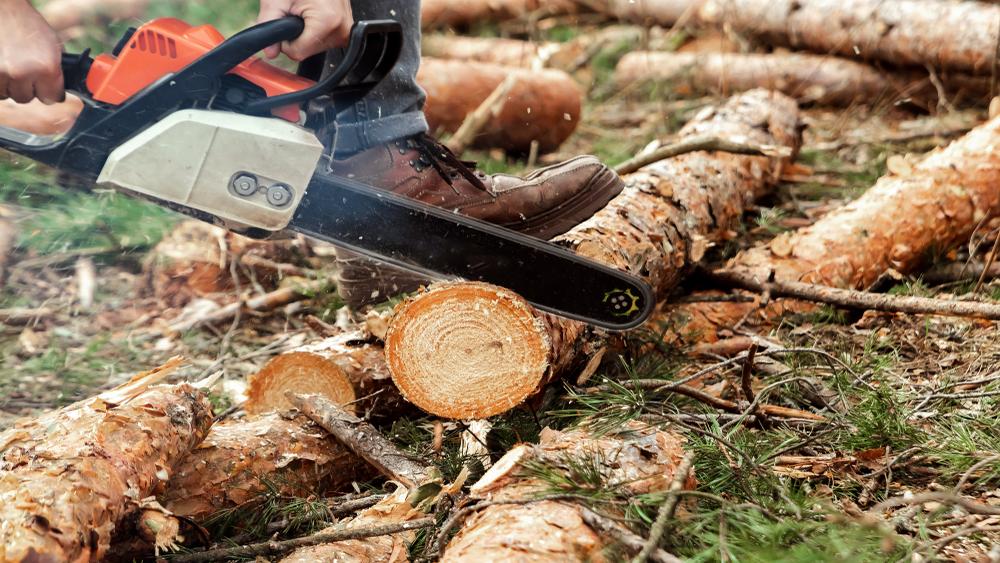
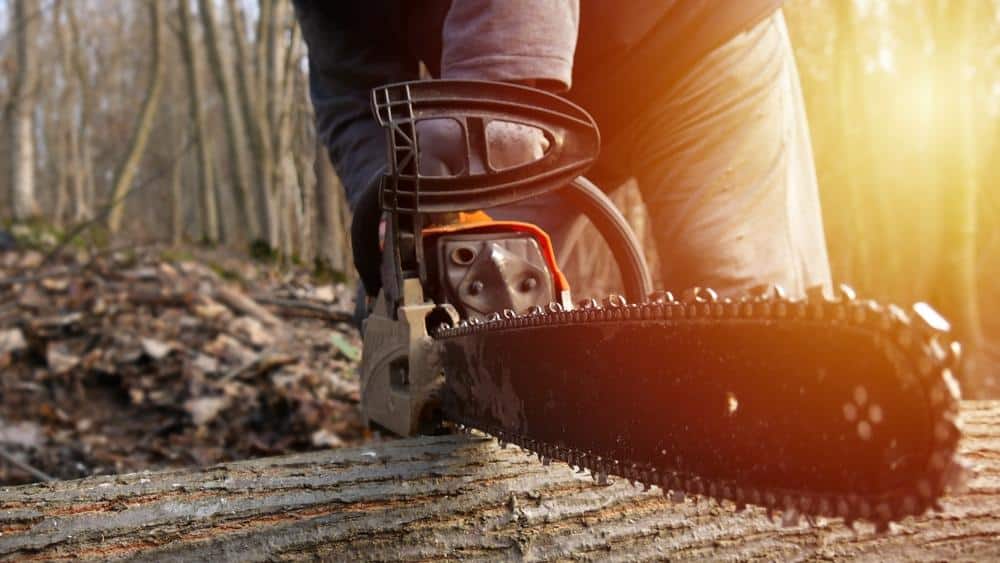
    Step 1: Measuring the Cutting Length

    First, disconnect the spark plug wire for safety. Then, place the chainsaw on a flat surface. Measure from the bar’s tip to where it enters the chainsaw’s body. This gives you the cutting length.

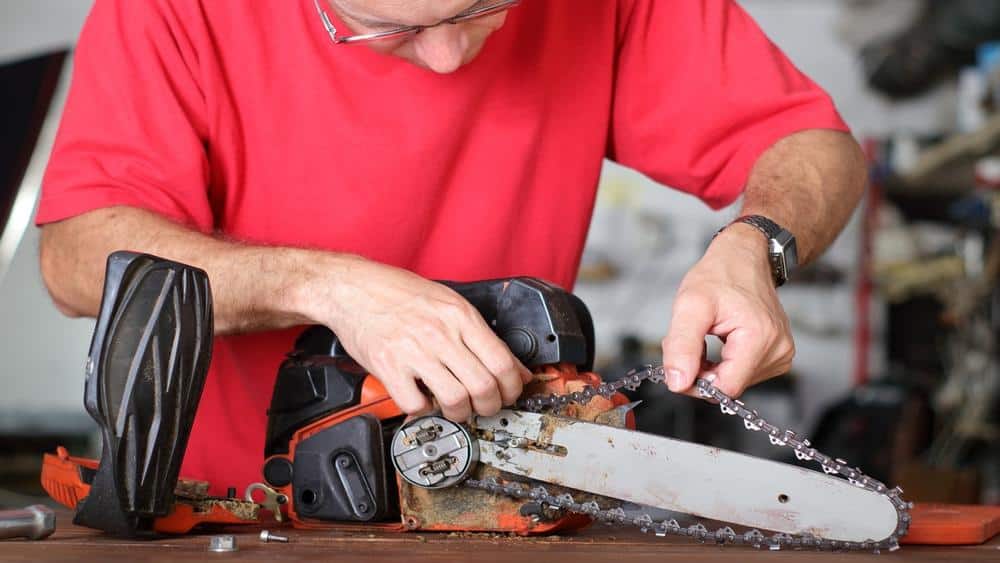
    Step 2: Finding the True Length

    Next, remove the clutch cover and measure the bar from end to end. That’s the true length of the chainsaw bar. Remember that these measurements are often rounded up to the nearest even number.

    The Importance of Accurate Measurements

    Why is it so crucial to measure the chainsaw bar accurately? Precise measurement ensures a perfect fit when replacing the bar or Chain. Would you want to avoid ending up with an incompatible part?
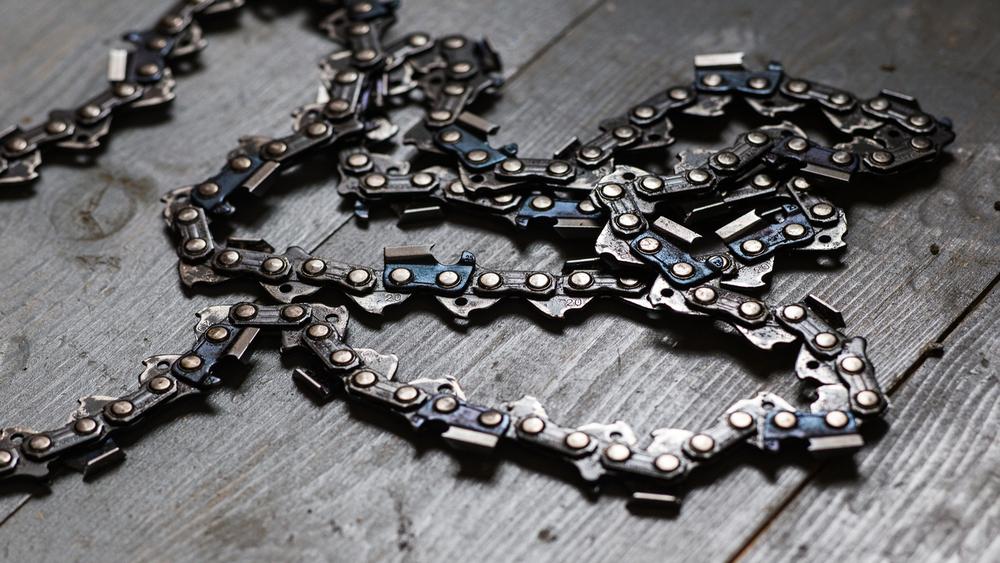
    Chainsaw Chains

    5. Chainsaw Chains

    Measuring the chainsaw bar is only half the battle. You also need to understand the chainsaw chain’s measurements.
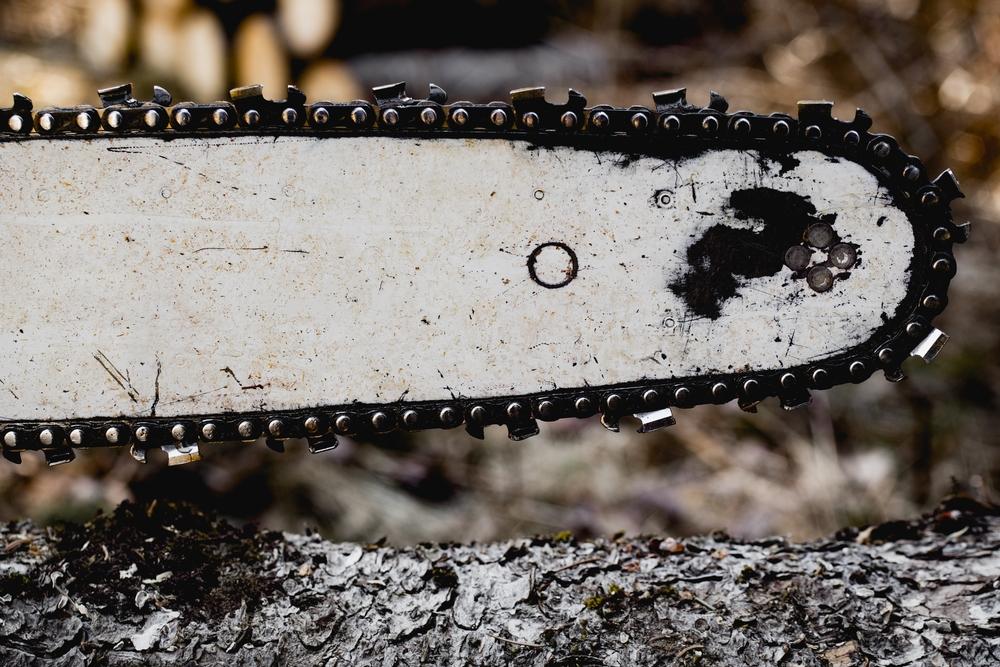
    Chain’s Pitch

    The Chain’s pitch can be found by measuring the distance between three consecutive rivets and dividing it by two.

    Chain’s Gauge

    The Chain’s gauge refers to the thickness of the drive links. Use a calliper or a multi-purpose gauge to measure this.

    Number of Drive Links

    Count the drive links by marking one and counting along the Chain.

    Chainsaw Sizes and Types

    6. Chainsaw Sizes and Types

    Chainsaw bars and chains come in various sizes and types, each suitable for different tasks.

    Gas-Powered Chainsaws

    Gas-powered chainsaws are perfect for medium to large trees. They offer significant cutting power, making them ideal for heavy-duty tasks.
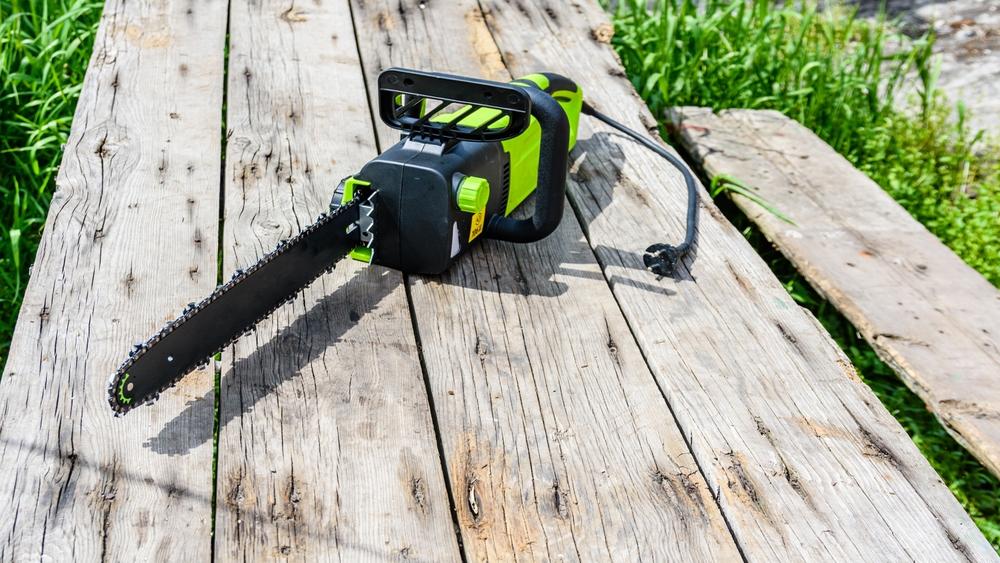
    Electric Chainsaws

    Electric chainsaws are suitable for smaller trees. They’re lighter and easier to handle, making them perfect for small jobs around the house.

    Battery-Operated Chainsaws

    Battery-operated chainsaws are great for medium-sized trees or pruning small limbs. They offer the convenience of cordless operation, providing excellent mobility.

    7. Importance of Choosing the Right Bar Size

    Selecting the right bar size is essential for safe and efficient cutting. Choosing a chainsaw bar at least two inches longer than the item’s thickness is generally recommended to prevent the saw from getting stuck in the wood.

    Efficient Cutting

    8. Tips for Safe and Efficient Cutting

    1. Keep the Chain Sharp: Regularly sharpen the chainsaw chain to ensure smooth cutting and reduce the risk of kickback.
    2. Use Proper Lubrication: Keep the chainsaw bar well-lubricated to reduce friction and prevent damage to the bar and Chain.
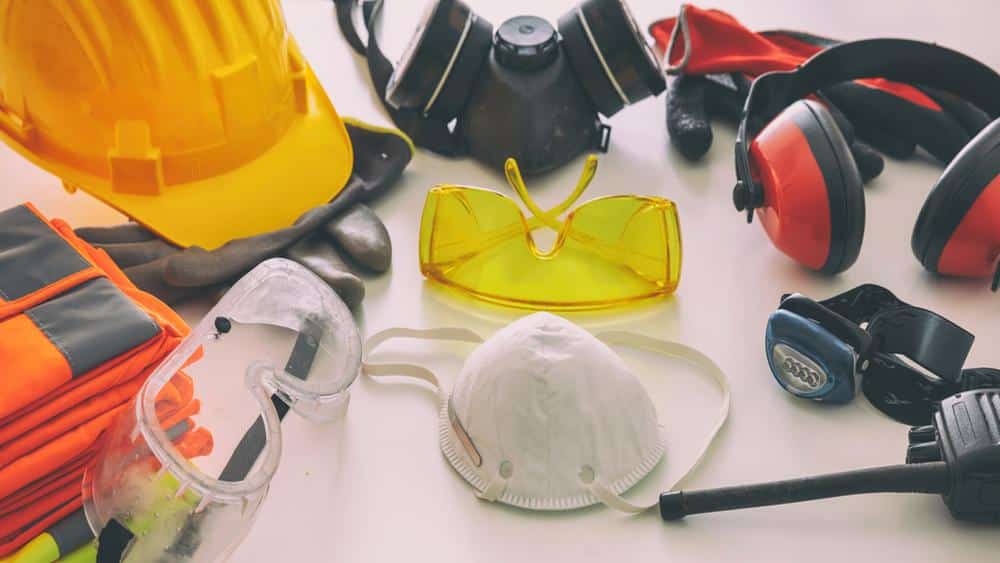
    3. Wear Safety Gear: Always wear appropriate safety gear, including a helmet, eye protection, gloves, and sturdy footwear, when operating a chainsaw.
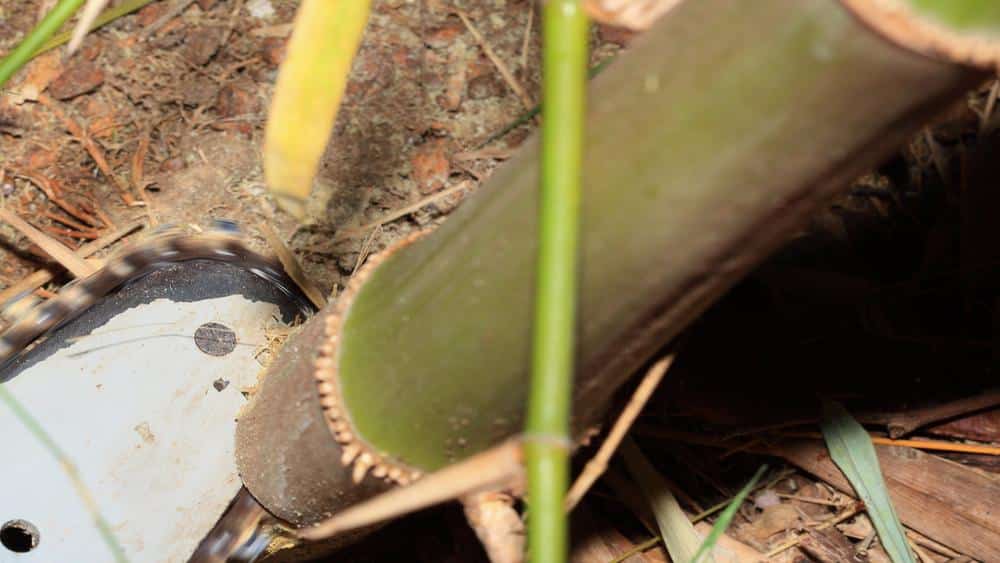
    4. Mind Your Surroundings: Be aware of your surroundings and avoid cutting near obstacles, such as rocks or metal, to prevent damage to the chainsaw chain.
    5. Proper Chain Tension: Maintain the correct chain tension to prevent chain derailment and improve cutting efficiency.

    Discover the secrets to safe and efficient chainsaw cutting! Read our article “How to Cut Straight With a Chainsaw: Mastering Precision” for expert tips. Unlock your potential today!

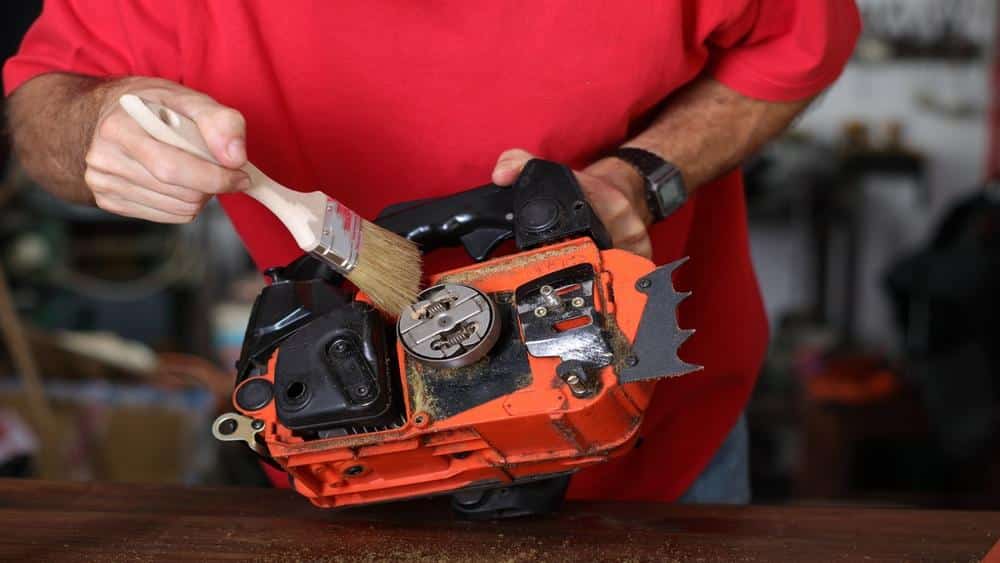
    9. Maintenance and Care Tips

    Maintaining your chainsaw bar and Chain is essential for their longevity and performance.

    Checking Chain Tension

    Regularly check the chain tension. An overly tight or loose chain can affect the chainsaw’s performance and safety.

    Adjusting Oil Flow

    Adjust the oil flow according to your chainsaw manufacturer’s instructions. Proper oiling keeps the Chain and bar lubricated, reducing wear and tear.

    Regular Sharpening

    Keep your chainsaw chain sharp. Regular sharpening ensures optimum performance and longevity of the Chain.

    10. FAQ (Frequently Asked Questions)

    What size chain for a 16 inch bar?

    Choosing the correct size chain for your chainsaw is crucial for safe and efficient operation. For a 16-inch bar, the appropriate chain size would typically have 56-57 drive links if the chain’s pitch is 3/8″ or .325″. The specific number can vary based on the pitch and gauge of the chainsaw bar.

    What is gauge on chainsaw bar?

    The gauge on a chainsaw bar is the thickness of the drive link that fits into the bar groove. It’s typically measured in inches; standard sizes are .043″, .050″, .058″, and .063″. The gauge should match your chainsaw chain for smooth operation.

    What does 72 mean on a chainsaw chain?

    The number ’72’ on a chainsaw chain refers to the type of chain. It’s usually part of a larger number that can identify the chain’s pitch, gauge, and number of drive links. For instance, an ‘Oregon 72’ chain would be a 3/8″ pitch, .050″ gauge chain.

    How do you read a chainsaw bar number?

    To read a chainsaw bar number, locate the markings on the chainsaw bar. They usually include the length, pitch, and gauge of the bar. Understanding these specifications will help you select the correct chain.

    How do you read a chainsaw size?

    Chainsaw sizes are generally read by considering the bar length, which signifies the cutting capacity, and the engine size, which indicates the chainsaw’s power. Chainsaw sizes are generally described with the bar length included.

    Where is chainsaw bar length measured from?

    Chainsaw bar length is measured from the tip of the chain to where it enters the housing. This measurement doesn’t include the portion of the bar that’s inside the casing.

    What is a normal size chainsaw?

    The term “normal-size chainsaw” is relative and depends on the specific task. A chainsaw with a bar length between 14-20 inches is considered normal for homeowners and casual users.

    What is the standard chainsaw chain size?

    Standard chainsaw chain sizes are based on the chain’s pitch and gauge. The most common pitch sizes are 1/4″, .325″, 3/8″, and .404″. The gauge usually varies between .043″, .050″, .058″, and .063″1. Remember, the chain size depends on your chainsaw’s make and model.

    11. Conclusion

    In conclusion how to measure chainsaw bar, And that’s a wrap! You now know how to measure a chainsaw bar and understand its various aspects. Remember, safety comes first! Always disconnect the spark plug before you start measuring. Happy cutting, folks!

  • How to Treat a Chainsaw Wound: Prevent, Treat, Heal

    How to Treat a Chainsaw Wound: Prevent, Treat, Heal

    Chainsaw accidents can result in severe and potentially life-threatening wounds. Understanding how to respond to these injuries is crucial to minimize complications and promote healing. This article will explore how to treat a chainsaw wound and the different types of chainsaw wounds, potential hazards and difficulties, immediate first-aid measures, treatment options, and steps to prevent infection. Additionally, we will discuss the importance of tetanus shots, signs of infection, wound care and dressing changes, pain management, potential long-term complications, chainsaw safety measures, and answer frequently asked questions.

    1. Understanding Chainsaw Wounds

    Chainsaw wounds can be deep and damaging, affecting the skin, tendons, and bones. These injuries can be classified as puncture or open wounds, depending on the nature of the wound. Puncture wounds occur when the chainsaw pierces the skin without causing much external bleeding. In contrast, open injuries involve lacerations that result in visible bleeding.

    Types of Chainsaw Wounds

    Chainsaw wounds can vary in severity, ranging from superficial cuts to deep and extensive injuries. The extent of the damage depends on various factors, including the type of chainsaw, the speed of the chain, the force applied, and the body part affected. Common types of chainsaw wounds include lacerations, amputations, and fractures.

    Common Causes of Chainsaw Wounds

    These wounds are most commonly the result of slips, equipment malfunctions, or improper handling of the chainsaw. The environment, like a slippery or uneven surface, can also be a contributing factor.

    Severity Levels of Chainsaw Wounds

    Chainsaw wounds can be minor, only involving the skin, or severe, reaching deeper tissues and causing significant blood loss. Sometimes, they can lead to chronic conditions like septic joints or tendon lacerations.

    Discover the Causes and Prevention of the most common chainsaw injuries, from cuts to caution. Expand your knowledge and stay safe by reading our article: “Most Common Chainsaw Injuries: From Cuts to Caution.

    Immediate First Aid for Chainsaw Wounds

    2. Immediate First Aid for Chainsaw Wounds

    Providing immediate first aid for chainsaw wounds is essential to prevent further harm and minimize the risk of complications. The following steps can be taken:

    1. Controlling Bleeding: If the wound is bleeding profusely, apply firm pressure on the wound with a clean cloth or your hand. Elevating the injured area can help reduce blood flow to the wound.
    2. Cleaning the Wound: Rinse the wound thoroughly with cool running water to remove dirt, debris, or sawdust. Avoid scrubbing the injury, as it may cause further damage. If available, apply antibiotic ointment to reduce the risk of infection.
    3. Covering and Protecting the Wound: Cover the wound with a sterile dressing or clean cloth once the wound is cleaned. This helps protect the damage from further contamination and promotes the healing process.

    3. Seeking Medical Attention

    While minor chainsaw wounds can be managed with first aid, seeking medical attention for severe wounds is vital. Medical professionals can assess the extent of the injury, evaluate the need for stitches or other interventions, and determine if a tetanus shot is required.

    4. Evaluation and Assessment

    During the medical evaluation, healthcare providers will assess the chainsaw wound to determine the best course of treatment. They will evaluate the depth and extent of the injury, the potential involvement of vital structures, and the risk of infection. X-rays or other imaging tests may be conducted to assess possible fractures or foreign objects.

    5. Treatment Options

    Treatment options for chainsaw wounds depend on the severity and nature of the injury. Minor wounds may require cleaning, dressing, and close monitoring for signs of infection. In extreme cases, more severe injuries may necessitate stitches, surgical repair, or even amputation. Antibiotics may be prescribed to prevent or treat infection.

    6. Preventing Infection

    Preventing infection is crucial for the proper healing of chainsaw wounds. Besides cleaning the wound thoroughly, keeping it dry and avoiding exposing it to contaminated environments is critical. Applying antibiotic ointment and changing dressings regularly can also help reduce the risk of infection.

    Tetanus Shot

    7. Importance of Tetanus Shot

    Chainsaw wounds, especially those involving deep punctures or open wounds, carry a risk of tetanus infection. Tetanus is caused by a bacterium commonly found in soil and manure, which can enter the body through open wounds. To prevent tetanus, individuals should ensure that their tetanus vaccination is current. A healthcare provider may recommend a tetanus shot after a chainsaw wound if necessary.

    8. Signs of Infection

    It’s essential to monitor chainsaw wounds for signs of infection. These can include increasing pain, redness, swelling, warmth around the wound, discharge of pus, and fever. If any of these symptoms develop, it is crucial to seek medical attention promptly.

    Wound Care

    9. Wound Care and Dressing Changes

    Proper wound care and dressing changes are vital for the healing process. Depending on the severity of the wound, healthcare providers may recommend specific instructions for cleaning the damage, applying ointments, and changing dressings. Following these instructions diligently can help prevent complications and promote healing.

    10. Managing Pain and Promoting Healing

    Chainsaw wounds can cause significant pain and discomfort. Managing pain is essential to ensure the individual’s well-being and aid in the healing process. Pain relief measures may include over-the-counter pain medications, prescribed analgesics, and techniques such as elevation and ice packs.

    11. Promoting Wound Healing

    To promote optimal wound healing, it is important to follow healthy lifestyle practices. A nutritious diet rich in protein, vitamins, and minerals can aid recovery. Additionally, avoiding tobacco use and maintaining good overall health contribute to better wound-healing outcomes.

    12. Potential Long-Term Complications

    Chainsaw wounds can lead to potential long-term complications, depending on the severity and location of the injury. Some of these complications include:

    1. Scarring and Disfigurement: Chainsaw wounds often result in noticeable scars, which can have long-term aesthetic and psychological effects.
    2. Nerve Damage: Injuries involving nerve structures can cause partial or complete loss of sensation, motor function, or both. The extent of nerve damage depends on the severity and location of the injury.
    3. Joint or Muscle Involvement: Chainsaw wounds that affect joints or muscles can result in limited mobility, weakness, or even loss of function in the affected area. Rehabilitation and physical therapy may be necessary to regain optimal function.
    Safety

    13. Chainsaw Safety: Avoiding Injuries

    Prevention is always the best approach when it comes to chainsaw injuries. Implementing safety measures can significantly reduce the risk of accidents. Here are some critical chainsaw safety measures to consider:

    1. Proper Safety Gear: Always wear appropriate personal protective equipment (PPE) when operating a chainsaw. This includes a helmet, safety goggles, hearing protection, gloves, and chainsaw-resistant leg protection.
    2. Training and Awareness: Obtain proper training on chainsaw operation and safety procedures before using one. Be aware of the potential hazards and risks associated with chainsaw use. Regularly review safety guidelines and stay informed about best practices.

    14. FAQ (Frequently Asked Questions)

    What should I do immediately after a chainsaw injury?

    Immediately after a chainsaw injury, your first step should be to ensure your safety. This might involve turning off the chainsaw and moving away from danger if it’s safe. Once the area is secure, you should administer basic first aid, including cleaning the wound, applying pressure to stop bleeding, and bandaging the wound to prevent infection. It’s crucial to seek professional medical help immediately, regardless of the severity of the harm.

    When should I seek professional medical help?

    You should seek professional medical help immediately after a chainsaw injury. Even if the wound appears minor, it’s crucial to have a healthcare professional evaluate it to determine the severity and appropriate treatment. Failure to do so could result in serious complications, such as infection or damage to deeper tissues.

    What complications should I watch out for after a chainsaw wound?

    Following a chainsaw wound, you should be vigilant for signs of infection, including increased pain, swelling, redness, warmth in the area, or pus. Other potential complications include impaired function of the injured area, persistent bleeding, and abnormal wound healing. In severe cases, a chainsaw wound can damage tendons and septic joints. Always communicate any worrisome symptoms to your healthcare provider immediately.

    How can I prevent chainsaw injuries?

    Chainsaw injuries can largely be prevented through proper equipment handling and usage. Always ensure that you understand the equipment’s operation before using it, and use it controlled and safely. Wearing appropriate safety equipment, including protective clothing, gloves, and eyewear, can also significantly reduce the risk of injury. Keeping the workspace clean and free from potential hazards that may cause slips or falls is also recommended.

    What is the importance of follow-up appointments after a chainsaw injury?

    Follow-up appointments after a chainsaw injury are crucial to ensuring the wound is healing correctly and monitoring potential complications. During these appointments, healthcare providers will examine the damage, remove sutures or staples if necessary, and assess the need for further treatment or intervention. Missing follow-up appointments can lead to complications, including infection or impaired wound healing. Therefore, attending all scheduled meetings and communicating any concerns or symptoms to your healthcare provider is essential.

    15. Conclusion

    In conclusion of how to treat a chainsaw wound, While treating a chainsaw wound might seem daunting, being equipped with the proper knowledge can be a lifesaver. This comprehensive guide walks you through understanding the nature of chainsaw wounds, immediate response measures, professional treatments, and the importance of aftercare and preventive measures. Remember, while this guide provides valuable information, it does not replace professional medical advice. Always seek immediate medical attention in the event of a chainsaw injury.

    16. You May Also Like This Posts

  • How to Cut Bamboo with A Chainsaw: Dominate Your Projects

    How to Cut Bamboo with A Chainsaw: Dominate Your Projects

    Bamboo is a remarkable natural resource known for its strength and versatility. Its eco-friendly nature and renewable properties have gained popularity in various fields. However, using the right tool is essential for precise and efficient results when cutting bamboo. A chainsaw can be a valuable asset, allowing you to cut through bamboo easily. This article will explore the necessary steps how to cut bamboo with a chainsaw, ensuring safety and effectiveness.

    How to Cut Bamboo with A Chainsaw

    1. Choosing the Right Chainsaw

    Before diving into the cutting process, selecting the appropriate chainsaw for the task is crucial. Consider the following factors when choosing a chainsaw for cutting bamboo:

    Chainsaw Size and Power

    The size and power of the chainsaw should match the thickness and density of the bamboo you intend to cut. A lighter chainsaw with a lower engine power may suffice for smaller, thinner bamboo. However, a more robust and powerful chainsaw is recommended to cut more extensive and thicker bamboo efficiently.

    Blade Length and Type

    Opt for a chainsaw with a blade length suitable for the diameter of the bamboo you’ll be working with. A longer blade allows for smoother cuts and better control. Additionally, consider using a chainsaw with a specialized bamboo cutting blade or a blade designed for hardwood, as it can withstand the challenges bamboo presents.

    Brand and Quality

    Investing in a reputable chainsaw brand known for its quality and durability is essential. This ensures a reliable and long-lasting tool that can withstand the demands of cutting bamboo.

    2. Preparing the Bamboo

    Before starting the cutting process, preparing the bamboo is essential to ensure smooth and accurate cuts. Follow these steps:

    Clear the Area

    Ensure the work area is clear of any obstructions, debris, or objects that may interfere with the cutting process. Create a safe and spacious environment to maneuver the chainsaw effectively.

    Trim Branches

    If the bamboo has branches, remove them before cutting. Trimming the branches will make cutting easier and prevent the chainsaw from getting tangled or causing accidents.

    Safety

    3. Safety Precautions

    Safety should always be the top priority when working with power tools like chainsaws. Take the following precautions to ensure a safe cutting experience:

    Wear Protective Gear

    Always wear appropriate protective gear, including safety glasses or goggles, gloves, hearing protection, and a hard hat. This will protect you from potential hazards, such as flying debris or noise-related injuries.

    Use a Sharp Chainsaw Blade

    Ensure your chainsaw’s blade is sharp before starting the cutting process. A dull blade can cause the chainsaw to kick back or lead to uneven cuts, increasing the risk of accidents. Sharpen the blade regularly or replace it if necessary.

    Secure the Bamboo

    Secure the bamboo firmly in place to prevent it from moving or slipping during cutting. Use clamps or ask a partner to hold it steady while you operate the chainsaw. This ensures stability and reduces the chances of mishaps.

    4. Cutting Techniques

    To achieve clean and precise cuts while cutting bamboo with a chainsaw, consider the following techniques:

    Angle of Cut

    Position the chainsaw at a slight angle while cutting the bamboo. This helps guide the chainsaw through the fibers, preventing it from getting stuck or causing rough cuts. Experiment with different angles to find the most effective approach for your specific bamboo.

    Divide into Sections

    If you’re working with long sections of bamboo, it’s often easier to cut them into more manageable pieces before proceeding. This allows for better control and maneuverability, resulting in smoother cuts.

    Discover the artistry hidden within logs! Enhance your skills and creativity by reading our article on How to Cut Log Slices with Chainsaw: From Logs to Art. Unleash your inner artist today!

    5. Tips for Successful Bamboo Cutting

    To optimize your bamboo cutting experience with a chainsaw, consider the following tips:

    • Secure the bamboo stalk with tape or clamps to prevent it from moving during the cutting process.
    • Use a chainsaw with a sharp blade to ensure cleaner and more efficient cuts.
    • Choose dry bamboo for cutting, as it is easier to work with.
    • Regularly inspect the chainsaw for any signs of damage or wear, and perform maintenance as needed.
    • Practice proper cutting techniques, maintaining a firm grip on the chainsaw and using controlled, steady motions.
    • Take breaks when needed, as cutting bamboo can be physically demanding.

    By implementing these tips, you can enhance your cutting experience and achieve optimal results.

    Discover the key to flawless bamboo cutting with precision! Dive into our article “How to Cut Straight With a Chainsaw: Mastering Precision” and unlock the secrets to successful cuts. Don’t miss out!

    6. Maintenance Tips

    To keep your chainsaw in optimal condition and ensure its longevity, follow these maintenance tips:

    Storing the Chainsaw Properly

    After completing the bamboo cutting process, storing the chainsaw properly is essential. Clean the chainsaw thoroughly, removing any debris or sawdust. Follow the manufacturer’s instructions for proper storage, ensuring the chainsaw is placed safely and securely. This helps prolong its lifespan and ensures its availability for future use.

    Regular Cleaning

    After each cutting session, clean the chainsaw thoroughly. Remove any sawdust, debris, or resin buildup that may affect its performance. Regular cleaning prevents clogging and extends the life of your chainsaw.

    Chain Tension and Lubrication

    Check the tension of the chainsaw’s chain regularly and adjust it if necessary. Additionally, keep the chain well-lubricated to reduce friction and enhance cutting efficiency. Refer to the chainsaw’s manual for specific tension adjustment and lubrication instructions.

    7. Alternative Power Tools for Thicker Bamboo

    While a chainsaw is suitable for cutting most bamboo, thicker and denser varieties may require alternative power tools. Consider the following options:

    Circular Saws

    Circular saws equipped with a carbide-tipped blade can effectively cut thicker bamboo. These saws provide more power and stability, allowing you to make precise cuts through denser sections.

    Reciprocating Saws

    Reciprocating saws, also known as “sabre saws,” with a blade designed for cutting wood can also be used for thicker bamboo. They offer versatility and maneuverability, making navigating through dense bamboo sections easier.

    Jigsaws

    Jigsaws equipped with a fine-toothed blade are suitable for intricate or curved cuts on bamboo. They provide greater control and precision, allowing you to create intricate designs or shapes.

    8. Seeking Professional Help or Tutorials

    Suppose you are new to cutting bamboo with a chainsaw or are still determining the process. In that case, seeking professional help or consulting tutorials can be beneficial. Experts in the field can provide valuable guidance and demonstrate proper techniques to ensure your safety and success.

    Discover the essential knowledge you need to cut bamboo with a chainsaw safely! For beginners in this task, our article Most Common Chainsaw Injuries: From Cuts to Caution. From Cuts to Caution provides crucial insights. Don’t miss out!

    9. FAQ (Frequently Asked Questions)

    Can I cut bamboo with a chainsaw?

    Yes, using a chainsaw to cut bamboo is effective, provided you follow the proper techniques and safety precautions.

    What should I wear when cutting bamboo with a chainsaw?

    Wearing protective gear, including safety glasses or goggles, gloves, hearing protection, and a hard hat, is essential to ensure your safety while operating a chainsaw.

    Do I need to sharpen the chainsaw blade before cutting bamboo?

    Yes, using a sharp chainsaw blade is crucial when cutting bamboo. A dull blade can cause accidents and result in uneven cuts.

    What are the alternative power tools for cutting thicker bamboo?

    Circular saws, reciprocating saws, and jigsaws can be used for cutting thicker bamboo, depending on the specific requirements of your project.

    Is it necessary to divide bamboo into sections before cutting?

    Dividing long sections of bamboo into smaller, more manageable pieces can make cutting more accessible and provide better control over the cuts.

    10. Conclusion

    In conclusion of how to cut bamboo with a chainsaw, Cutting bamboo with a chainsaw can be an efficient way to work with this versatile material. You can achieve precise and clean cuts by choosing the right chainsaw, preparing the bamboo properly, following safety precautions, and utilizing the appropriate cutting techniques. Remember to maintain your chainsaw regularly and consider alternative power tools for thicker bamboo when necessary. With these guidelines in mind, you’ll be well-equipped to cut bamboo effectively for construction, crafts, or other purposes.

  • How to Cut Log Slices with Chainsaw: From Logs to Art

    How to Cut Log Slices with Chainsaw: From Logs to Art

    Cutting log slices with a chainsaw allows you to incorporate natural elements into your woodworking projects. These slices, such as tabletops, wall art, or wooden coasters, can be used for decorative purposes. This article will explore two methods how to cut log slices with chainsaw: freehand cutting and using a jig. By following the step-by-step instructions and safety guidelines, you’ll acquire the skills to create stunning log slices that add a touch of rustic charm to your home.

    1. Safety Measures and Gear

    Before we delve into the cutting techniques, it’s crucial to prioritize safety. Ensure you have the following safety gear:

    • Chainsaw chaps or pants
    • Safety goggles or glasses
    • Hearing protection
    • Work gloves
    • Steel-toed boots

    Always adhere to the manufacturer’s safety guidelines and consider attending a chainsaw safety course if you’re new to operating a chainsaw.

    2. Choosing the Right Chainsaw

    Selecting the appropriate Chainsaw for cutting log slices is essential. Consider the size of the logs you’ll be working with, and choose a chainsaw with a bar length that suits your needs. A chainsaw with a 16- or 18-inch bar length is recommended for thicker logs. Refer to buying guides or consult a professional to ensure you have the right tool for the job.

    Woodworking

    3. Level Up Your Woodworking: How to Cut Log Slices with Chainsaw?

    Method 1: Freehand Cutting

    Freehand cutting is a straightforward technique that requires careful attention to safety measures and proper cutting techniques. Follow these steps:

    Elevate the Log

    Place the log on a stable surface or secure it in a way that raises it off the ground. This elevation allows the Chainsaw to cut through the log without hitting the ground, preventing damage to the Chainsaw and ensuring a clean cut.

    Avoid Knots

    Identify any knots or irregularities on the log’s surface. Knots can be challenging to cut through and may cause the Chainsaw to kick back. Aim to position your cuts away from knots for smoother and safer cutting.

    Measure and Mark the Thickness

    Use a measuring tape to determine the desired thickness for your log slice. Mark the measurement using a pencil or chalk. Take your time to ensure the marking is accurate and aligned with your project’s requirements.

    Cutting with the Chainsaw

    With safety gear in place and a firm grip on the Chainsaw, align the Chainsaw’s blade with the marked cutting line. Start the Chainsaw, allow the blade to reach full speed, and make a controlled and steady cut along the marked line. Maintain a consistent cutting speed and let the Chainsaw’s sharp blade do the work. Focus on keeping the Chainsaw aligned with the cutting line to achieve a straight and precise cut.

    If you’re eager to speed up your chainsaw cutting skills, don’t miss our other article on “How to Cut Straight With a Chainsaw: Mastering Precision” Discover additional tips and techniques to enhance efficiency and precision in no time! Check it out now!

    Method 2: Using a Jig

    Using a jig provides additional guidance and accuracy when cutting log slices. Here’s how to utilize a jig for consistent results:

    Construction of the Jig

    Construct a U-shaped box using 2×4 lumber, ensuring it fits the size of the log you’ll be cutting. Nail the pieces of lumber together securely to form the jig.

    Attaching the Jig to the Log

    Place the jig on top of the log, ensuring it is centred and aligned with your desired cutting line. Secure the jig to the log using screws or clamps, ensuring it remains stable during cutting.

    Using the Jig as a Cutting Guide

    Attach thin pieces of wood, such as slats or shims, to the Chainsaw’s blade using screws. These pieces will act as guides, sliding along the inner walls of the jig. With the Chainsaw turned on, carefully position the blade against the log’s surface, allowing the wooden guides to slide along the jig’s inner walls. Move the Chainsaw along the jig, following the desired cutting line. The jig acts as a guide, ensuring consistent thickness and a level cut throughout the log.

    If you’re experiencing difficulties starting your chainsaw, don’t worry! We have an informative article titled “How to Start a Chainsaw That Won’t Start: Chainsaw SOS” that provides helpful tips and troubleshooting steps. And if you’re dealing with a stubborn chainsaw, our guide “How to Start a Stubborn Chainsaw: Get Ready to Cut!” is just what you need. Don’t let a stubborn chainsaw stop you from getting the job done!

    Additional Tips and Techniques

    4. Additional Tips and Techniques

    To enhance your cutting experience and achieve the best results, consider the following tips and techniques:

    Grip and Control

    Maintain a firm grip on the Chainsaw, using both hands and keeping your elbows slightly bent. This grip provides stability and control while reducing fatigue during long cutting sessions. Practice proper chainsaw handling techniques to ensure optimal control over the tool.

    Leveling the Log

    Before cutting, ensure the log is levelled to prevent the Chainsaw from veering off course. Use shims or wedges to stabilize the log and maintain a flat cutting surface. A level log enhances cutting accuracy and allows for consistent and level log slices.

    Sanding the Log Slices

    After cutting the log slices, it’s common for the surfaces to be rough. To achieve a smooth finish, sand the log slices using sandpaper or a sanding block. Start with coarse-grit sandpaper and gradually move to finer grits for a polished result. Sanding enhances the appearance of the log slices and ensures a splinter-free surface.

    5. Selecting the Right Chainsaw Size

    When working with different log sizes, selecting a chainsaw with an appropriate bar length is essential. A chainsaw with a more extended bar suits larger logs, while a shorter bar is more maneuverable for smaller logs. Consider the size and thickness of the logs you’ll be cutting, and choose a chainsaw that provides the necessary power and control.

    6. Maintenance and Chainsaw Care

    Regular maintenance and care of your Chainsaw ensure its optimal performance and longevity. Follow the manufacturer’s guidelines for routine maintenance tasks, such as chain tensioning, lubrication, and cleaning. Regularly inspect the Chainsaw for any signs of damage and address any issues promptly. Proper maintenance guarantees safe and efficient cutting for years to come.

    7. FAQ (Frequently Asked Questions)

    Can you cut logs with a chainsaw?

     Absolutely! A chainsaw is a powerful tool for cutting logs, among other tasks. You can easily cut logs with a chainsaw with the appropriate technique and safety precautions.

    How do you cut logs into slices?

     You can cut logs into pieces using freehand cutting or a jig. Freehand cutting involves:
    1. elevating the log,
    2. avoiding knots,
    3. measuring and marking the desired thickness, and
    4. making controlled cuts along the markings.
    Using a jig provides additional guidance by constructing a U-shaped box and attaching it to the log as a cutting guide. Thin pieces of wood attached to the chainsaw act as guides, sliding along the jig’s inner walls to ensure consistent thickness.

    What is the easiest way to cut logs?

    The easiest way to cut logs with chainsaws depends on personal preference and the desired outcome. Freehand cutting may be suitable for simple projects, while a jig provides more guidance and accuracy. Choose the method that aligns with your skill level and project requirements.

    What are the three methods of cutting logs?

     Three common methods of cutting logs with chainsaws include overbooking, underbooking, and limbing. Overbucking involves cutting logs from the top, underbooking from the bottom, and limbing, which refers to removing branches from a fallen tree.

    What are the three main ways to cut a log?

    The three main ways to cut a log with a chainsaw are crosscutting, ripping, and plunge cutting. Crosscutting involves cutting across the log’s grain, ripping involves cutting along the grain, and plunge cutting involves cutting directly into the log.

    8. Conclusion

    Cutting log slices with a chainsaw offers a creative and unique way to incorporate natural elements into your woodworking projects. By mastering freehand cutting techniques and using a jig, you can create stunning log slices that add a rustic touch to your home decor. Always prioritize safety, choose the right chainsaw size, and maintain your equipment regularly. With practice and attention to detail, you’ll achieve precise and professional-looking log slices that elevate your woodworking craftsmanship.

  • How to Cut Straight With a Chainsaw: Mastering Precision

    How to Cut Straight With a Chainsaw: Mastering Precision

    Cutting straight with a chainsaw may seem challenging, especially considering the power and speed of these tools. However, with the proper techniques and some practice, you can achieve clean, straight cuts that rival those made with other cutting tools. In this article, we will guide you through how to cut straight with a chainsaw step by step, covering everything from choosing the right chainsaw to maintaining safety while operating it. So, let’s get started and unleash the full potential of your chainsaw!

    How to Cut Straight With a Chainsaw

    1. From Wobbly to Wow: How to Cut Straight With a Chainsaw?

    Choosing the Right Chainsaw

    Before you can cut straight with a chainsaw, selecting the right chainsaw for your needs is crucial. Consider factors such as the size and type of wood you’ll be cutting and your own physical strength and experience. Opt for a chainsaw with an appropriate blade length and power that matches the demands of your projects. Additionally, ensure the chainsaw is maintained correctly and in good working condition to maximize its performance and cutting accuracy.

    Preparing the Chainsaw

    Properly preparing your chainsaw is essential for achieving straight cuts. Start by inspecting the chainsaw for any damage or loose parts. Check the chain tension and adjust it according to the manufacturer’s instructions. Ensure that the chain is properly lubricated and the bar is clean. Sharpen the chainsaw blade if necessary to ensure smooth and efficient cutting. By preparing your chainsaw correctly, you set yourself up for success in cutting straight and maintaining optimal performance.

    If you’re experiencing difficulties starting your chainsaw, don’t worry! We have an informative article titled “How to Start a Chainsaw That Won’t Start: Chainsaw SOS” that provides helpful tips and troubleshooting steps. And if you’re dealing with a stubborn chainsaw, our guide “How to Start a Stubborn Chainsaw: Get Ready to Cut!” is just what you need. Don’t let a stubborn chainsaw stop you from getting the job done!

    Right Cutting Techniques

    Selecting the Right Cutting Techniques

    Mastering the proper cutting techniques is crucial to cut straight with a chainsaw. This section will outline the fundamental strategies for accurate and clean cuts.

    Stance and Positioning

    Maintain a stable and balanced stance while operating the chainsaw. Stand with your feet shoulder-width apart, distributing your weight evenly. This position provides stability and control, reducing the chances of the chainsaw veering off the cutting line.

    Holding the Chainsaw Properly

    Hold the chainsaw firmly with both hands, using a grip to maintain control while minimizing fatigue. Place your left hand on the front handle and your right hand on the rear handle, keeping your elbows slightly bent. This grip provides stability and ensures you can guide the chainsaw accurately along the cutting line.

    Maintaining Steady Pressure

    Apply steady and consistent pressure on the chainsaw while cutting. Avoid pushing too hard or forcing the chainsaw through the wood, leading to inaccurate cuts and kickbacks. Instead, let the chainsaw’s sharp blade and the tool’s weight do the work, guiding it smoothly through the wood.

    Using Guides and Straightedges

    Using guides and straightedges can significantly aid in cutting straight with a chainsaw. Straightedges provide a visual guide and a physical barrier for the chainsaw, ensuring the cut remains on track. Attach a straightedge, such as a level or a longboard, to the wood along the desired cutting line. This method helps maintain a consistent cutting angle and prevents the chainsaw from deviating of course.

    Marking the Cutting Line

    Accurately marking the cutting line is crucial for achieving straight cuts with a chainsaw. Use a measuring tape and a straightedge to mark the desired cutting line on the wood. Consider using a pencil or chalk for better visibility. Take your time to ensure the line is straight and aligned with your project’s requirements. A well-marked cutting line is a visual guide and helps you maintain accuracy throughout the cutting process.

    Making the First Cut

    Position the chainsaw’s blade slightly behind the marked cutting line when starting your cut. Engage the chainsaw and allow the blade to reach full speed before making contact with the wood. Bring the chainsaw’s blade forward, aligning it with the cutting line. Gradually lower the chainsaw into the wood, using controlled and deliberate movements. Focus on maintaining a steady pace and aligning the chainsaw with the cutting line for an accurate first cut.

    Following the Cutting Line

    After making the first cut:

    1. Follow the cutting line with the chainsaw.
    2. Keep a steady hand and make slight adjustments to stay on course.
    3. Maintain a consistent cutting speed and avoid rushing through the cut, which can lead to inaccuracies.

    By staying focused and following the cutting line closely, you’ll achieve straight and precise cuts with your chainsaw.

    If you’re still struggling to cut straight with a chainsaw or experiencing issues with your chainsaw veering to the left, don’t worry! We have an informative article titled “Why Is My Chainsaw Cutting to the Left: Take the Right Path” that provides insights and solutions. Check it out for further guidance!

    dull chainsaw

    2. Avoiding Common Mistakes

    To ensure optimal cutting performance and accuracy, it’s crucial to avoid common mistakes that can hinder straight cuts. Be mindful of the following:

    Pushing or Forcing the Chainsaw

    Resist the temptation to push or force the chainsaw through the wood. Let the sharp blade and the weight of the tool do the work. Applying excessive force can lead to uncontrolled movements and inaccurate cuts, compromising both your safety and the quality of the cut.

    Incorrect Chain Tension

    Maintain the appropriate chain tension according to the manufacturer’s instructions. An overly tight or loose chain can affect the cutting accuracy and increase the risk of kickback. Regularly check and adjust the chain tension as needed.

    Dull Chainsaw Blade

    A dull chainsaw blade can result in rough and imprecise cuts. Keep your chainsaw blade sharp by regularly sharpening or replacing it when necessary. A sharp blade ensures smooth cutting and reduces the chances of the chainsaw veering off course.

    Safety

    3. Safety Precautions

    When operating a chainsaw, safety should always be a top priority. Follow these essential safety precautions:

    • Wear appropriate personal protective equipment (PPE), including safety goggles, hearing protection, gloves, and chainsaw chaps or pants.
    • Ensure the work area is clear of any obstacles, ensuring a safe operating environment.
    • Keep bystanders at a safe distance and never operate the chainsaw near others.
    • Familiarize yourself with the chainsaw’s safety features and how to use them effectively.
    • Regularly maintain and inspect the chainsaw to ensure its safe operation.
    Maintaining Your Chainsaw

    4. Maintaining Your Chainsaw

    Proper maintenance is essential for the longevity and optimal performance of your chainsaw. Regularly clean the chainsaw, remove debris, and lubricate the chain to prevent it from binding. Follow the manufacturer’s guidelines for routine maintenance tasks, such as replacing filters and spark plugs. Keeping your chainsaw in good condition ensures it operates smoothly and facilitates straight cuts.

    5. FAQ (Frequently Asked Questions)

    Can I use a chainsaw to cut materials other than wood?

    Yes, chainsaws can cut materials such as plastic, metal, or ice. However, using the appropriate blade and cutting technique for each material is essential to ensure optimal results.

    How often should I sharpen the chainsaw blade?

    The frequency of sharpening depends on how frequently you use the chainsaw and the type of wood or material being cut. As a general guideline, it’s recommended to sharpen the chainsaw blade after approximately every 3-5 hours of use or whenever you notice a decline in cutting performance.

    Can I cut freehand with a chainsaw and still achieve straight cuts? 

    While cutting freehand with a chainsaw is possible, using guides or straightedges significantly improves cutting accuracy. Beginners or those seeking precise cuts are encouraged to use guides until they become more proficient with freehand cutting techniques.

    What should I do if the chainsaw starts to veer off course during a cut?

    If the chainsaw starts to veer off course, stop the cut immediately. Assess the situation, adjust your grip and stance, and realign the chainsaw with the cutting line. Remember to maintain steady pressure and controlled movements to stay on track.

    Are there any additional safety precautions for operating a chainsaw?

    In addition to wearing appropriate PPE and maintaining a clear work area, it’s crucial to be cautious of kickbacks. Kickback occurs when the chainsaw’s bar tip makes contact with an object, causing the chainsaw to be thrown back toward the operator. To prevent kickback, ensure the kickback guard functions correctly, avoid cutting with the chainsaw’s nose, and maintain a firm grip on the handles while cutting.

    6. Conclusion

    In conclusion how to cut straight with a chainsaw, Cutting straight with a chainsaw may initially seem challenging. However, you can achieve precise and accurate cuts with the proper techniques, practice, and adherence to safety guidelines. Remember to choose the right chainsaw for your needs, properly prepare it before cutting, and employ the correct techniques. Utilize guides and straightedges, mark the cutting line accurately, and make controlled cuts while following the line closely. Avoid common mistakes and prioritize safety throughout the process. Mastering cutting straight with a chainsaw enhances your woodworking projects and helps you achieve professional-level results.

  • How to Sand a Table with an Electric Sander: A DIY Guide

    How to Sand a Table with an Electric Sander: A DIY Guide

    This article provides a comprehensive guide on how to sand a table with an electric sander. The article will explain the process step by step, outlining the necessary materials and precautions that must be taken. It will also provide tips for ensuring a smooth finish and recommendations on how to choose the right equipment. Following the instructions, you will find answers to frequently asked questions.

    How to Sand a Table with an Electric Sander

    1. Introduction

    Restoring an old table can breathe new life into it and significantly enhance its appearance. One crucial step in this process is sanding. This article provides a step-by-step guide on how to sand a table with an electric sander.

    2. Importance of Sanding a Table

    Sanding a table not only helps to remove the old finish but also prepares the surface for a new one, enabling it to absorb the new stain or paint more effectively. Let’s see how you can do it!

    Electric sander

    3. How to Sand a Table with an Electric Sander

    Necessary Equipment

    List of Equipment

    To send a table, you will need certain tools and materials. These include an electric sander, sandpaper of varying grits, gloves, a mask, a cleaning cloth, and a floor protector.

    Where to Buy

    These tools and materials are readily available in local hardware stores and online marketplaces.

    Safety

    4. Safety Precautions

    Importance of Safety

    Before starting your project, it is essential to prioritize safety. SandingSanding produces dust that can be harmful if inhaled.

    Safety Measures

    To safeguard yourself, always wear a mask and gloves. You may also want to wear safety glasses to protect your eyes from dust particles.

    5. Preparing Your Work Area

    Location

    Choose an area with ample space to move around. This will make the sanding process easier and more efficient.

    Ventilation

    Ensure the area is well-ventilated, as sanding creates dust that can be harmful if accumulated in a closed space.

    Cleaning the Area

    Before you begin, clean your workspace to remove any dust or debris that may interfere with your sanding.

    6. Choosing the Right Sandpaper

    Types of Sandpaper

    There are different types of sandpaper available. The type you choose depends on the current condition of the table and the desired result.

    Grits of Sandpaper

    Sandpaper comes in different grits. A lower number indicates a coarser grit, which can remove more material. Conversely, a higher number indicates a finer grit used for finishing touches.

    7. Sanding the Table

    Step-by-step Process

    Start by sanding the table with a coarser grit to remove the existing finish. Then, use a finer grit to smooth the surface.

    Tips for Sanding

    Always sand in the direction of the wood grain to avoid scratches. Apply gentle pressure to prevent damaging the wood.

    8. Finishing Touches

    Applying Wood Stain

    After sanding, apply a wood stain to enhance the color and grain of the wood.

    Applying Clear Coat Sealer

    For added protection, apply a clear coat sealer. This also gives the table a glossy finish.

    9. Cleaning Up

    Removing Dust

    Use a cleaning cloth to remove dust from the table after sanding. A vacuum cleaner can also help remove dust from the surrounding area.

    Proper Disposal

    Ensure you dispose of the sanding dust properly, as it can be harmful if inhaled or if it comes into contact with skin.

    10. FAQ (Frequently Asked Questions)

    What kind of sander do I need to sand a table?

    There are several types of sanders that you can use to sand a table. However, the specific choice often depends on the size of the project, the table’s material, and the desired finish. A random orbital sander is often recommended for sanding tables because it provides a super-fine finish, ideal for subsequent staining or painting. On the other hand, palm sanders are quite user-friendly and affordable, making them suitable for removing paint or distressing furniture.

    Can I use an electric sander on furniture?

    Electric sanders are not only compatible with furniture. However, they can make the task more efficient and comfortable, saving time and effort. It’s important, however, to learn how to use these devices properly and to maintain safety precautions like wearing protective gear to mitigate dust and noise generated during the process.

    Is an electric sander better than hand sanding?

    Whether an electric sander is better than hand sanding depends on the specific circumstances. Electric sanders provide a more efficient and quicker sanding experience, which can be especially beneficial for larger projects. Hand sanding may be quieter, neater, and can offer more control, particularly for delicate tasks or smaller, intricate surfaces.

    Is sanding by hand better than a sander?

    Sanding by hand can be better in certain situations, especially when working on small, delicate surfaces or intricate designs requiring more control. Hand sanding is quieter and neater, and it may pose less risk of accidentally damaging the surface being worked on. However, it can be more time-consuming and labor-intensive compared to using an electric sander.

    What is the disadvantage of a sander?

    While sanders are generally efficient and effective tools for many sanding tasks, they have drawbacks. They can be more expensive than manual sanding equipment, require a learning curve to use properly, and generate dust and noise that can be disruptive and pose health risks if not properly managed. Additionally, they may need to be more suitable for delicate tasks or intricate designs where hand sanding could offer better control.

    Do you wash furniture after sanding?

    After sanding furniture, removing the dust and particles produced is crucial before proceeding with any subsequent treatments like staining or painting. This is typically done by wiping the surface with a tack or damp cloth rather than washing. Wetting the wood too much could raise the grain and undo some of the smoothness achieved by sanding. Remember always to follow the manufacturer’s instructions when cleaning products on your freshly sanded furniture to avoid damage.

    11. Conclusion

    In conclusion, how to sand a table with an electric sander, Sanding a table with an electric sander is easier than it may seem. You can rejuvenate your table and enhance its appearance with the right tools, safety measures, and patience.

  • How to Start a Car with a Screwdriver: Survival Guide

    How to Start a Car with a Screwdriver: Survival Guide

    In this article, we will delve into how to start a car with a screwdriver. While this practice is usually reserved for emergencies and should be attempted only by those with a fair understanding of car mechanics, it can sometimes be a helpful trick to know. As we dive in, we will break down the process step by step, discussing the necessary precautions and potential risks. Please remember that this method should be used responsibly and legally, and always prioritize getting professional help whenever possible.

    How to Start a Car with a Screwdriver

    1. Introduction

    Have you ever wondered if there’s a way to start your car without a key? Maybe you’ve lost your keys or are merely curious about how things work. This guide will explore the intriguing possibility of starting a car with a screwdriver. But remember, this information should be used responsibly and not encourage illegal activities like car theft. It’s primarily for emergencies when all other options have been exhausted.

    2. How to Start a Car with a Screwdriver?

    What You Need

    To kick off this tutorial, let’s discuss what tools you’ll need.

    Screwdriver

    This might seem obvious, but you’ll need a flathead screwdriver, preferably one that’s sturdy and suitable length to give you good leverage.

    Discover the ultimate guide to the Best Screwdriver with Screw Holder Expand your knowledge and make informed decisions by reading our comprehensive article. Unveil the top-rated options and essential insights that will revolutionize your screw-driving experience. Don’t miss out! Read now for a complete screwdriver exploration!

    Protective Gear

    Safety should be your top priority. Have a pair of safety gloves to protect your hands from sharp edges or hot surfaces.

    Understanding Your Car’s Ignition

    3. Understanding Your Car’s Ignition

    Before we delve into the process, it’s essential to understand your car’s ignition system.

    The Ignition Switch

    This is the interface that starts your car when you turn the key. It’s usually located on the steering column and has a slot for the key.

    The Ignition Cylinder

    This small device connects to the ignition switch, and it’s what the key turns when you start your car.

    Starting a Car with a Screwdriver

    4. Defying Dilemmas: The Art of Starting a Car with a Screwdriver

    Now, let’s dive into the step-by-step process. Remember, this should only be done in an emergency, and you should always consider contacting a professional first.

    Step 1: Preparing the Car

    • Ensure your car is in park to prevent unintended movement.
    • Activate the emergency brake for added safety.

    Step 2: Removing the Ignition Cover

    • To access the ignition cover, you may need to disassemble parts of the steering column.
    • Start by disconnecting the battery cable to ensure safety.
    • Locate the screws on the underside of the steering column cover. Use a Phillips head screwdriver to remove them.
    • Depending on your car’s make and model, you may need to remove additional screws or tabs to remove the cover fully.
    • You can access the ignition switch once the steering column cover is removed.

    Please note that the specific steps for removing the ignition cover may vary depending on the make and model of your car. It’s always recommended to consult your vehicle’s manual or seek professional assistance if you need clarification.

    Step 3: Starting the Car

    Once you’ve gained access to the ignition switch, insert the screwdriver into the keyhole and turn it like you would a key.

    Important Safety Precautions

    Keep in mind that this process can be dangerous. There’s a risk of damaging your car’s ignition system or hurting yourself.

    Legal Implications

    5. Legal Implications

    Starting a car without a key can have profound legal implications, especially if it’s not your car. Illegally hotwiring or bypassing a vehicle’s ignition system is considered theft, regardless of the intention, and can result in criminal charges such as unauthorized use or grand theft auto. In addition to legal issues, this can substantially damage the vehicle’s ignition system, causing costly repairs. Using legitimate methods for crucial replacement, such as contacting a professional assistant, is recommended. Unauthorized actions that turn off safety features can also lead to accidents and liability issues. Therefore, respecting property rights and following the law when operating vehicles is crucial.

    6. Alternatives to Using a Screwdriver

    If you’re locked out of your car or lost your keys, consider contacting a locksmith or your car’s roadside assistance service before trying to start your car with a screwdriver.

    7. FAQ (Frequently Asked Questions)

    Can you still start a car with a screwdriver?

    Yes, it is possible to start a car with a screwdriver. However, this should only be done in emergencies and when all other options have been exhausted. It’s important to stress that this action should be carried out legally and responsibly. Using a screwdriver to start a car involves removing the ignition switch and inserting a flathead screwdriver into the keyhole, then turning it as you would a key. It’s worth noting that this process can be much more complex for modern cars that feature electronic locking systems.

    How do you start an engine with a screwdriver?

    To start a car’s engine with a screwdriver, you must first remove the screws holding the ignition switch in place. Once done, you can insert a flathead screwdriver into the keyhole and turn it as if it were a key. Doing so powers the starter motor, effectively hot-wiring the car. It’s important to prioritize safety and ensure you have ownership of or permission to start the car.

    How do you use a screwdriver as a key?

    To use a screwdriver as a key, you will first need to remove any coverings or protective cases around the ignition switch. Insert the flathead screwdriver into the ignition keyhole and turn it as you would the key. Remember that this is a last resort method that may cause damage to the ignition switch and should only be used in emergencies with proper ownership or permission.

    How do you start a car without a key with a screwdriver?

    Starting a car without a key involves removing the ignition switch and inserting a flathead screwdriver into the keyhole. Turning the screwdriver as if it were a key allows you to power the starter motor and effectively hot-wire the car. This method should only be used in emergencies and only with the car owner’s permission. It’s essential to know that this procedure may be considerably more complex in modern cars with electronic locking systems.

    What is the easiest way to start a car without a key?

    While a screwdriver can work in certain circumstances, it can cause damage and isn’t recommended for untrained individuals. The easiest and safest way to start a car without a key is by calling a professional locksmith or your car’s roadside assistance service.

    What to do if you lose your car keys?

    If you lose your car keys, the first step is to check thoroughly if they might have been misplaced nearby. If the keys are lost, contact a professional locksmith who can help you gain access to your car and create a new key for you. Alternatively, suppose your vehicle is equipped with modern technology. In that case, you can contact your car manufacturer or dealership for assistance. In some cases, car insurance policies may also cover lost keys, so check your policy details. It’s essential to remember that attempting to start your car with methods such as using a screwdriver should only be a last resort as it could potentially damage your vehicle.

    8. Conclusion

    Starting a car with a screwdriver is a last-resort trick useful in emergencies. However, seeking professional help when facing car troubles is always better to avoid unnecessary risks or damages.

  • How to Start a Chainsaw That Won’t Start: Chainsaw SOS

    How to Start a Chainsaw That Won’t Start: Chainsaw SOS

    Chainsaws are handy tools for various tasks, from cutting firewood to trimming trees. However, it can be frustrating when you’re ready to get to work, but your chainsaw won’t start. There can be several reasons why a chainsaw fails to start, ranging from simple issues to more complex problems. In this article, we’ll explore the common causes of a chainsaw starting troubles and provide step-by-step on how to start a chainsaw that won’t start to help you get your chainsaw up and running again.

    How to Start a Chainsaw That Won't Start

    1. Understanding Chainsaw Starting Issues

    Before diving into the troubleshooting steps, it’s essential to understand some of the common problems that can prevent a chainsaw from starting. These issues include a defective spark plug, a clogged carburetor, a faulty ignition coil, a broken rewind spring, engine flooding with fuel, or inadvertently activating the choke in warm weather. By identifying and addressing these problems, you can increase the chances of starting your chainsaw successfully.

    2. How to Start a Chainsaw That Won’t Start?

    Troubleshooting Steps for a Chainsaw That Won’t Start. To effectively troubleshoot and start a chainsaw that refuses to start, follow these step-by-step instructions:

    Step 1: Check the Spark Plug

    The spark plug plays a crucial role in the combustion process. Start by inspecting the spark plug for signs of damage or dirt. Clean or replace it with a new one.

    Step 2: Clean the Carburetor

    A clogged carburetor can prevent fuel from reaching the engine. Carefully clean the carburetor, ensuring all the passages are debris-free. If cleaning doesn’t solve the issue, consider replacing the carburetor.

    Step 3: Test and Replace the Ignition Coil

    The ignition coil is responsible for generating the electrical spark needed for combustion. If there’s no spark, test the ignition coil and replace it if necessary.

    Step 4: Ensure Proper Assembly of the Recoil Starter

    Check the recoil starter assembly to ensure it is correctly assembled. Faulty assembly can prevent the starter cord from retracting properly. If needed, disassemble and reassemble the recoil starter.

    Step 5: Replace the Rewind Spring

    A broken rewind spring can cause the starter cord to fail to retract. Inspect the rewind spring and replace it if it’s damaged or worn out.

    Step 6: Address Engine Flooding

    If the engine is flooded with fuel, it won’t start. Check for signs of flooding and follow the steps to unflood the engine, such as removing and drying the spark plug, cleaning the air filter, and adjusting the choke lever.

    Step 7: Deactivate the Choke in Warm Weather

    In warm weather conditions, accidentally leaving the choke activated can make starting the chainsaw difficult. Ensure the choke is deactivated before starting the chainsaw.

    Step 8: Check and Replace Fuel

    Inspect the fuel in the chainsaw’s tank. If it’s deteriorated or contaminated, drain it and replace it with fresh fuel. Good fuel quality is vital for optimal chainsaw performance.

    If you’re facing stubborn chainsaw starting problems, don’t give up! Check out our article “How to Start a Stubborn Chainsaw: Get Ready to Cut!” for expert tips and solutions. Get ready to conquer any chainsaw challenge!

    Professional Assistance

    3. Seek Professional Assistance or Consider a Replacement

    If you’ve followed all the troubleshooting steps and your chainsaw still won’t start, it may be time to seek professional assistance. A qualified technician can diagnose and fix more complex issues that may require specialized knowledge and tools. Alternatively, consider replacing your chainsaw with a new one if it is old or extensively damaged.

    4. FAQ (Frequently Asked Questions)

    How do you start a chainsaw when it is flooded?

    If a chainsaw is flooded, the excess fuel in the engine can prevent it from starting. To remedy this, place the choke lever in the Off position, fully open the throttle trigger, and pull the starter rope multiple times. This process helps clear the excess fuel and allows proper starting.

    Does a chainsaw need oil to start?

    Yes, a chainsaw requires oil for lubrication, which is necessary for the smooth operation of its components. Chainsaws have two reservoirs: one for fuel and one for bar and chain oil. Before starting the chainsaw, it’s crucial to ensure the oil reservoir is adequately filled to avoid damage to the chain and bar.

    What is the best way to start a chainsaw?

    The best way to start a chainsaw is by following the manufacturer’s instructions specific to your model. Generally, it involves ensuring the On/Off switch is in the correct position, engaging the chain brake, priming the carburetor (if applicable), and pulling the starter rope with a firm, controlled motion. It’s essential to wear appropriate protective gear and position yourself correctly to maintain balance and control.

    Why won’t my chainsaw start after sitting?

    When a chainsaw has been idle for an extended period, several factors can contribute to difficulty starting it. Common culprits include stale fuel, clogged fuel lines, or a deteriorated spark plug. It’s advisable to drain the old fuel, replace it with fresh fuel, clean or replace the spark plug, and ensure proper fuel flow by inspecting and cleaning the fuel lines.

    Why is it so hard to start a chainsaw?

    Starting difficulties in chainsaws can be attributed to various factors. Common reasons include a defective spark plug, clogged carburetor, faulty ignition coil, broken rewind spring, engine flooding with fuel, or accidentally activating the choke in warm weather. Identifying and addressing these issues can help resolve starting problems.

    Is there a trick to starting a chainsaw?

    Starting a chainsaw requires following the proper procedure and taking necessary precautions. While there isn’t a specific “trick,” there are essential steps to ensure a successful start. These steps include positioning the chainsaw correctly, considering the fuel type, engaging the chain brake, utilizing the primer (if available), and following the manufacturer’s instructions.

    Are there any preventive maintenance tips to keep my chainsaw starting reliably?

    Yes, regular maintenance is crucial for a well-functioning chainsaw. Some preventive measures include cleaning or replacing the air filter, checking and tightening screws and nuts, maintaining proper oil levels, and following the manufacturer’s recommended maintenance schedule.

    Can I start a chainsaw without engaging the chain brake?

    Engaging the chain brake before starting the chainsaw is highly recommended for safety reasons. The chain brake helps prevent accidental chain rotation, reducing the risk of injuries.

    What should I do if my chainsaw’s engine is flooded?

    To unflood a flooded chainsaw engine, remove and dry the spark plug, clean or replace the air filter, and adjust the choke lever according to the manufacturer’s instructions.

    Can using old or contaminated fuel affect my chainsaw’s starting ability?

    Old or contaminated fuel can make it difficult for the chainsaw to start. Always use fresh, high-quality fuel to ensure optimal performance.

    How often should I clean or replace the spark plug in my chainsaw?

    It’s recommended to clean or replace the spark plug every 25 hours of chainsaw operation or at the start of each cutting season.

    5. Conclusion

    In conclusion of how to start a chainsaw that won’t start, Starting a chainsaw that won’t start can be frustrating. Still, understanding the common causes and following the troubleshooting steps outlined in this article can increase the likelihood of getting your chainsaw back in working order. Remember to check the spark plug, clean the carburetor, test the ignition coil, ensure proper recoil starter assembly, address engine flooding, deactivate the choke in warm weather, and check the fuel quality. If all else fails, don’t hesitate to seek professional assistance or explore purchasing a new chainsaw. With the right approach and maintenance, you can quickly start your chainsaw.

  • How to Remove Rust from Screwdriver Bits: 5 Proven Options

    How to Remove Rust from Screwdriver Bits: 5 Proven Options

    Rust is the nemesis of metal tools, and screwdriver bits are no exception. Over time, exposure to moisture and air can cause rust to form on these essential tools, compromising their functionality and lifespan. In this article, we will explore effective methods for how to remove rust from screwdriver bits and preventive measures to keep them rust-free. By following these techniques, you can ensure your screwdriver bits remain in optimal condition, ready to easily tackle any project.

    How to Remove Rust from Screwdriver Bits

    Introduction

    Rust is the enemy of any metal tool, and screwdriver bits are no exception. Over time, exposure to moisture and air can cause rust to form on these valuable tools, compromising their effectiveness. Removing rust from screwdriver bits is essential to ensure they remain in good working condition and avoid potential damage to the fasteners they are used on.

    Why is it important to remove rust from screwdriver bits?

    Removing rust from screwdriver bits is crucial for several reasons. First, rust affects the grip of the bit, making it more challenging to turn screws and potentially leading to stripped or damaged screw heads. Second, rust weakens the metal, making the bits more prone to breakage or bending during use. By removing rust, you can restore the functionality and durability of your screwdriver bits, prolonging their lifespan and ensuring reliable performance.

    The negative effects of rust on screwdriver bits

    When rust accumulates on screwdriver bits, it creates a rough and uneven surface, reducing the grip and increasing the likelihood of slippage while turning screws. This slippage can damage the fasteners, leaving them difficult to remove or causing cosmetic damage. Additionally, rust can lead to corrosion and pitting of the metal, further weakening the bits and compromising their structural integrity. Therefore, it is essential to promptly address rust on screwdriver bits to prevent further damage and maintain efficiency.

    Importance of regular maintenance

    Regular maintenance is key to preventing and managing rust on screwdriver bits. By incorporating a few simple practices into your routine, you can keep your tools rust-free and in excellent working condition. We will discuss preventive measures in detail later in the article.

    Screwdriver Bits

    How to Remove Rust from Screwdriver Bits?

    There are various effective methods for removing rust from screwdriver bits. Depending on the severity of the rust and the resources available, you can choose the way that suits your needs best. Let’s explore the most common methods:

    vinegar

    Method 1: Soaking in vinegar

    One popular and inexpensive method for rust removal is soaking the screwdriver bits in vinegar. Vinegar contains acetic acid, which helps dissolve rust. Here’s how to do it:

    1. Fill a container with enough vinegar to submerge the screwdriver bits completely.
    2. Place the bits in the vinegar and ensure they are fully immersed.
    3. Allow the bits to soak for at least a few hours or overnight, depending on the severity of the rust.
    4. After soaking, scrub the bits gently with a brush to remove any remaining rust particles.
    5. Rinse the bits with water and dry them thoroughly to prevent further rusting.

    Method 2: Using a rust remover

    If the vinegar method doesn’t provide satisfactory results, you can try using a commercial rust remover. Rust removers are specifically formulated to dissolve rust and restore the metal surface. Follow the instructions provided by the manufacturer to safely and effectively remove rust from your screwdriver bits.

    wire brush

    Method 3: Scrubbing with a wire brush

    A wire brush can scrub away the rust manually for light surface rust. Ensure you use a brush with stiff bristles to remove the rust effectively. Here’s how to proceed:

    1. Hold the screwdriver bit firmly and use the wire brush to scrub the rusted areas.
    2. Apply moderate pressure while scrubbing to remove the rust without damaging the bit’s surface.
    3. Continue scrubbing until all visible rust is removed.
    4. Rinse the bits with water and dry them thoroughly.
    baking soda paste

    Method 4: Applying baking soda paste

    Baking soda, when mixed with water, forms a paste that can effectively remove rust. Here’s the process:

    1. Mix baking soda with water to create a thick paste.
    2. Apply the paste to the rusted areas of the screwdriver bits.
    3. Let the paste sit on the rusted areas for a few hours.
    4. Scrub the bits gently with a brush or sponge to remove the rust.
    5. Rinse the bits with water and dry them thoroughly.

    Method 5: Using a rust converter

    Rust converters chemically convert rust into a stable compound that can be painted over. While primarily used for larger metal surfaces, they can also be applied to screwdriver bits. Follow the instructions provided by the manufacturer to safely use a rust converter and protect your bits from further rusting.

    Method 6: Using lemon juice

    Lemon juice contains citric acid, which can help remove rust from screwdriver bits. Here’s how to use lemon juice as a rust remover:

    1. Squeeze fresh lemon juice into a container.
    2. Submerge the rusted screwdriver bits in the lemon juice.
    3. Let the bits soak for a few hours.
    4. Scrub the bits gently with a brush to remove the loosened rust.
    5. Rinse the bits with water and dry them thoroughly.

    Discover more secrets of rust removal from drill bits in our article, “How To Remove Rust From Drill Bits: 5 Proven Ways Explained.” Expand your knowledge and ensure your tools stay in top shape. Don’t miss out! Read now for expert tips and techniques.

    Storing screwdriver bits properly

    Tips for Preventing Rust on Screwdriver Bits

    Prevention is better than cure when it comes to rust. By following these simple tips, you can minimize the risk of rust formation on your screwdriver bits:

    Storing screwdriver bits properly

    Proper storage is crucial to prevent rust on screwdriver bits. Please keep them dry, away from excessive moisture and humidity. Consider using a dedicated tool storage box or case to protect the bits from exposure to air and moisture.

    Keeping them dry

    After using screwdriver bits, wipe them clean and dry before storing them. Moisture left on the bits can lead to corrosion and rust formation over time.

    Using rust-resistant coatings

    Applying a rust-resistant coating, such as a thin layer of oil or silicone spray, can provide an additional barrier against moisture and oxidation. Before storing your screwdriver bits, apply a light coating of the rust-resistant product and ensure it covers the entire surface.

    Cleaning and lubricating regularly

    Regular cleaning and lubrication can prevent rust and keep your screwdriver bits in optimal condition. After each use, wipe off any dirt or debris from the bits using a clean cloth or brush. Additionally, apply a small amount of lubricant, such as machine oil or silicone, to keep the bits moving smoothly.

    Inspecting for rust and addressing it promptly

    Regularly inspect your screwdriver bits for any signs of rust. Even a small amount of rust can quickly spread and compromise the integrity of the bits. If you notice any rust spots, use one of the methods mentioned earlier to remove the rust promptly. Taking immediate action can prevent further damage and ensure the longevity of your screwdriver bits.

    FAQs on Removing Rust from Tools

    What is the easiest way to remove rust from tools? 

    The easiest way to remove rust from tools is by using a rust remover or a rust dissolver. These products are specifically designed to break down rust and make it easier to remove from metal surfaces. Apply the rust remover according to the manufacturer’s instructions, let it sit for a specified period, and then scrub or wipe away the rust.

    How do you remove rust from tools naturally?

    If you prefer natural methods, a few options exist for removing rust from tools. One common method is to use vinegar. Soak the rusty tools in vinegar for several hours or overnight, then scrub the rust using a brush or abrasive pad. Another natural method is to create a paste using baking soda and water, apply it to the rusted areas, let it sit, and scrub away the rust. Lemon juice and salt can also be used as natural rust removers by applying them to the rusted areas and scrubbing with a brush.

    Can toothpaste remove rust?

    Toothpaste can be used to remove light surface rust from tools. Its mild abrasive properties can help scrub away the rust. Apply a small amount of toothpaste to the rusted areas, rub it in using a cloth or toothbrush, and then rinse the tool with water. However, a dedicated rust remover or other natural remedies may be more effective for more stubborn rust.

    What liquids remove rust?

    Several liquids can be used to remove rust from tools. Vinegar, lemon juice, and Coca-Cola can be effective due to their acidic properties. These liquids help dissolve rust and make it easier to scrub away. Additionally, rust removers and rust dissolvers available in the market are specifically designed liquids for rust removal and can be highly effective.

    Does salt remove rust?

    Salt can help remove rust when combined with other substances. One common method is to create a paste by mixing salt with lemon juice or vinegar. Apply the paste to the rusted areas, let it sit, and then scrub away the rust. Salt alone may not be as effective in removing rust.

    Does Coca-Cola remove rust from tools?

    Coca-Cola has acidic properties due to its carbonation and can help remove rust from tools. The phosphoric acid in Coca-Cola acts as a rust dissolver. Soaking the rusted tools in Coca-Cola for a few hours or overnight and then scrubbing the rust can yield positive results. However, it may be more effective on light rather than heavy rust.

    What is the strongest rust remover?

    There are various strong rust removers available in the market that are highly effective. Some popular options include products containing phosphoric acid, oxalic acid, or hydrochloric acid. These powerful rust removers can break down tough rust and make removing it easier. Following the manufacturer’s instructions and safety precautions when using strong rust removers is important.

    Conclusion

    In conclusion of how to remove rust from screwdriver bits, Rust can significantly impact the performance and durability of screwdriver bits. Following the methods discussed in this article, you can effectively remove rust from your screwdriver bits and restore their functionality. Additionally, implementing preventive measures, such as proper storage, regular cleaning, and lubrication, can help minimize the risk of rust formation. Inspect your screwdriver bits regularly and promptly address any rust to maintain and extend their lifespan.

  • How to Remove Cordless Drill Chuck: Unveiling 3 Easy Methods

    How to Remove Cordless Drill Chuck: Unveiling 3 Easy Methods

    Removing the chuck from a cordless drill may seem daunting, but it can be a straightforward process with the right techniques and tools. Whether you need to replace a worn-out chuck or want to clean and maintain your drill, knowing how to remove the chuck is essential. In this article, we will guide you through how to remove cordless drill chuck and provide additional information on disassembling and cleaning the chuck, if desired.

    1. Understanding the Chuck on a Cordless Drill

    Before diving into the removal process, let’s first understand what the chuck is and why it’s important to know how to remove it. The chuck is the component on the front of a cordless drill that holds the drill bit securely in place. The chuck needs to be removed when changing drill bits. It allows you to attach and detach different drill bits, enabling versatility in drilling various materials. Over time, chucks can wear out, become damaged, or accumulate debris, making it necessary to remove and replace them.

    If you’re using a Dewalt drill and need to remove a drill bit, don’t miss our article “How To Remove A Drill Bit From A Dewalt Drill.” Discover step-by-step instructions for hassle-free drill bit changes.

    2. How to Remove Cordless Drill Chuck?

    Before starting the chuck removal process, it’s crucial to prioritize safety. Ensure that the drill is turned off and unplugged to prevent accidental starts. Additionally, gather the necessary tools for the job, which typically include wrenches, hex keys, and possibly a hammer or impact driver, depending on your chosen method.

    Chuck from a Cordless Drill

    3. Removing the Chuck from a Cordless Drill

    You can use several methods to remove the chuck from a cordless drill. We will outline three commonly used methods:

    • the retaining screw removal and wrench method
    • the hex key method
    • alternative methods for cordless drills

    Method 1: Retaining Screw Removal and Wrench Method

    1. Fully open the chuck jaws and locate the retaining screw at the bottom. If present, use the appropriate tool to remove the retaining screw by turning it clockwise (note: some screws have reverse threading).
    2. Once the retaining screw is removed, use wrenches to grip the spindle and chuck. Turn the chuck counterclockwise to unscrew it from the spindle. Applying opposing forces with two wrenches helps loosen stubborn chucks.
    3. You can use a hex key for leverage if the chuck lacks wrench provisions. Place the drill on a workbench with the chuck overhanging the edge. Apply downward pressure on the hex key and strike it with a wooden or plastic hammer to loosen the chuck.
    Hex Key

    Method 2: Hex Key Method

    1. Lay the drill flat on a workbench with the chuck overhanging the edge.
    2. Insert a hex key into the chuck and tighten it.
    3. Exert downward pressure on the hex key to release the chuck. Strike the hex key with a hammer to provide additional force if necessary.

    Method 3: Alternative Methods for Cordless Drills 

    For cordless drills and low-speed/high-torque corded models, an alternative method involves securing the hex key in a vise, setting the drill to reverse, holding it tightly with both hands and squeezing the trigger. However, caution is advised as this method carries risks such as wrist injury or burning out the drill motor. Always prioritize safety and refer to the manufacturer’s instructions.

    Disassembling and Cleaning the Chuck

    4. Disassembling and Cleaning the Chuck (Optional)

    If you want to clean or replace parts inside the chuck thoroughly, you can choose to disassemble it after removal. However, this step is optional and unnecessary for regular chuck removal or maintenance. Disassembling the chuck requires additional time and effort. However, it can be beneficial for addressing issues such as debris buildup or damaged components. Please refer to the manufacturer’s instructions or seek professional assistance if you need clarification on disassembling and cleaning the chuck.

    5. FAQs

    Can I remove the chuck on a corded drill using the same methods?

    Yes, the methods described in this article can also be applied to corded drills. However, it’s always recommended to consult the specific drill’s technical documentation or manufacturer’s instructions for any variations or specific requirements.

    Is it necessary to disassemble and clean the chuck? 

    Disassembling and cleaning the chuck is optional for routine maintenance. However, if you notice debris buildup, performance issues, or damage inside the chuck, disassembling and cleaning it can help restore optimal functionality. Refer to the manufacturer’s instructions or seek professional assistance if needed.

    Can I replace the chuck with a different type? 

    Usually, chucks are specific to the drill model and designed to fit a certain type of chuck. While replacing the chuck with a different type is possible, it requires careful consideration of compatibility, specifications, and potential modifications. Refer to the drill’s technical documentation or consult a professional for guidance on replacing chucks.

    How often should I remove and clean the chuck?

    The frequency of chuck removal and cleaning depends on usage and environmental factors. More regular cleaning may be necessary if you frequently work in dusty or debris-prone conditions. As a general guideline, inspect the chuck periodically for signs of buildup or damage and clean it as needed.

    Are there any risks involved in removing the chuck myself? 

    While removing the chuck can be a straightforward process, it’s essential to prioritize safety and exercise caution. Risks include injury from improper tool usage, accidental starts, or damage to the drill or chuck. Always follow safety guidelines, use appropriate tools, and refer to the manufacturer’s instructions to minimize risks and ensure a successful chuck removal.

    6.Conclusion

    In conclusion of how to remove cordless drill chuck, Removing the chuck from a cordless drill is a valuable skill for any DIY enthusiast or professional. Whether you need to replace a faulty chuck or want to perform maintenance on your drill, following the proper removal techniques is essential. Always prioritize safety, use the appropriate tools, and follow the manufacturer’s instructions. By mastering the art of chuck removal, you can keep your cordless drill in optimal condition and ensure smooth drilling operations.