Category: How-To Mastery

Unlock the art of power tool usage and beyond. From mastering the intricacies of various power tools to exploring advanced techniques, our comprehensive guides empower you to become a true master. Whether you’re a beginner or looking to refine your skills, embark on a journey of mastery with How-To Mastery and unleash your potential in the world of power tools and beyond.

  • How to Clean a Kettle That Has Boiled Dry: Sip Safely

    How to Clean a Kettle That Has Boiled Dry: Sip Safely

    Our kettle is an essential part of our daily routine for many of us. Whether for a morning cup of tea or a midday coffee break, the kettle is often the go-to appliance for hot water. However, when a kettle boils dry, it can cause many problems that may affect its performance and pose potential health hazards. Acquiring how to clean a kettle that has boiled dry is advantageous.

    In this article, we’ll explore the importance of cleaning a kettle that has boiled dry and provide a step-by-step guide to help you effectively clean your kettle. We’ll also discuss alternative cleaning methods, preventative measures to avoid future boiling dry incidents, and troubleshooting common issues.

    By the end of this article, you’ll better understand why it’s essential to clean your kettle regularly and how to maintain it properly to ensure its longevity and safety. So, let’s dive in and get started!

    How To Clean A Kettle That Has Boiled Dry

    1: Introduction

    Kettles are one of the most commonly used appliances in many households. They are used to boil water quickly and easily, which makes them ideal for making tea, coffee, and other hot beverages. However, problems can occur that can impact the kettle’s performance and even pose potential health hazards. In this article, we will explore the three main problems that can occur when using a kettle – boiling it dry, poor performance due to damage, and using a dirty kettle.

    2: Understanding the Problem

    Kettles are one of the most commonly used appliances in many households. They are used to boil water quickly and easily, which makes them ideal for making tea, coffee, and other hot beverages. However, problems can impact the kettle’s performance and pose potential health hazards. In this article, we will explore the three main issues that can occur when using a kettle – boiling it dry, poor performance due to damage, and using a dirty kettle.

    3: What Happens When a Kettle Boils Dry?

    I. What is a dry boil?

    A dry boil occurs when a kettle is heated without water. This can happen accidentally if the kettle is left on the stove too long or deliberately if someone is attempting to clean the kettle. A dry boil can cause severe damage to the kettle and can even pose a fire risk.

    II. How does a dry boil affect the kettle?

    When a kettle boils dry, the heating element is exposed to the air, which can cause it to burn out. This means that the kettle will no longer work and need to be replaced. In addition, the heat generated by the heating element can cause the kettle to warp or discolor, affecting its appearance and making it difficult to clean.

    III. How it Affects the Kettle’s Performance

    In addition to the damage caused by boiling a kettle dry, other problems can impact a kettle’s performance.

    IV. Burnt-out heating elements

    If a kettle’s heating element burns out after boiling it dry, it will no longer work. This means the user must replace the kettle, which can be costly.

    V. Discoloration and warping

    Suppose a kettle is subjected to high heat. In that case, it can warp or discolor, affecting its appearance and making it difficult to clean. Discoloration and warping can impact the overall performance of the kettle, as it may not heat up as efficiently as before.

    VI. Unpleasant odors and tastes

    A kettle can develop unpleasant odors and tastes if it is not cleaned regularly. Unpleasant smells and preferences can be due to the build-up of limescale or bacteria, both of which can impact the taste of the water and the quality of the beverages made with it.

    4: The Potential Health Hazards of Using a Dirty Kettle

    In addition to poor performance, a dirty kettle can pose potential health hazards.

    I. The build-up of limescale and bacteria

    If a kettle is not cleaned regularly, limescale can build up on the heating element and the kettle’s interior. Limescale is a hard, chalky deposit formed when hard water is boiled. It can affect the taste of the water and make it cloudy. Limescale can also cause the heating element to work harder, leading to damage and a shorter lifespan for the kettle.

    Bacteria can also grow in a dirty kettle, especially if it is not dried properly after each use. Bacteria thrive in warm and moist environments, which can be found inside a kettle that is not cleaned regularly. This can risk the user’s health, as bacteria can cause stomach flu, diarrhea, and vomiting.

    II. The risk of poisoning

    If a kettle is not cleaned correctly, it can also pose a risk of poisoning. This can occur if some toxic chemicals or substances have been left behind in the kettle. These can be harmful if they come into contact with the water boiled in the kettle.

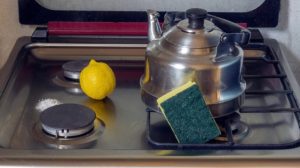
    5: Materials Needed for Cleaning

    To clean your kettle correctly, you will need the following materials:

    • White vinegar
    • Water
    • Soft cloth or sponge
    • Baking soda (optional)
    • Lemon (optional)

    I. Safe Cleaning Products to Use

    White vinegar is an excellent cleaning agent that can help remove limescale and bacteria from your kettle. It is safe and will not leave harmful chemicals or residues in your kettle.

    Baking soda is another safe and effective cleaning product that can remove limescale and stains from your kettle. It is a mild abrasive that can help scrub away dirt and grime without damaging the surface of your kettle.

    Lemon is a natural cleaning product that can help remove stains and freshen your kettle. It contains citric acid, which can help dissolve limescale and other mineral deposits.

    II. Precautions to Take When Cleaning a Kettle

    When cleaning your kettle, there are a few precautions you should take to ensure your safety:

    • Always unplug the kettle and let it cool down before cleaning it.
    • Never immerse the kettle in water or any other liquid.
    • Be careful when handling hot water or steam.
    • Use a soft cloth or sponge to clean the kettle, and avoid using abrasive materials that can scratch the surface.
    • Rinse the kettle thoroughly with water after cleaning to remove any cleaning products or residues.

    Following these precautions and using safe cleaning products, you can keep your kettle clean and free from limescale, bacteria, and other harmful substances.

    A Step-by-Step Guide to Cleaning a Boiled-Dry Kettle

    6: A Step-by-Step Guide to Cleaning a Boiled-Dry Kettle

    Cleaning your kettle can be a simple and easy process if you follow these step-by-step instructions:

    Step I: Prepare the Kettle for Cleaning

    Before cleaning your kettle, ensure it is unplugged and cooled down.

    Mix a solution of equal parts white vinegar and water. Fill the kettle with this solution, covering the heating element. Let it sit for about an hour to loosen limescale or mineral deposits.

    Add a tablespoon of baking soda to the solution if your kettle has stubborn stains. Alternatively, you can use lemon juice instead of vinegar to help remove stains and freshen up the kettle.

    Step II: Cleaning the Inside of the Kettle

    After soaking the vinegar solution for an hour, use a soft cloth or sponge to scrub the kettle’s interior. Pay special attention to areas with heavy limescale buildup.

    If the limescale is particularly stubborn, you can repeat the process or use a toothbrush to scrub the affected areas.

    Step III: Cleaning the Outside of the Kettle

    Once the inside of the kettle is clean, use a soft cloth or sponge to clean the exterior of the kettle. Pay attention to any areas with stains or dirt buildup.

    Avoid using abrasive materials that can scratch the surface of the kettle. If necessary, you can use a solution of mild dish soap and water to clean the outside of the kettle.

    Step IV: Rinse and Dry the Kettle

    After cleaning, rinse the kettle thoroughly with water to remove any cleaning products or residues.

    Wipe the kettle dry with a clean towel or let it air dry. Be sure to dry the interior and exterior of the kettle thoroughly to prevent the growth of bacteria.

    Step V: Finishing Touches

    Once your kettle is clean and dry, you can add a finishing touch to freshen it up.

    You can use a slice of lemon or a few drops of essential oil to add a pleasant scent to the kettle. Add the lemon or oil to a cup of water and boil it in the kettle for a few minutes.

    Following these simple steps, you can keep your kettle clean, fresh, and functioning correctly.

    7: Alternative Methods of Cleaning a Kettle

    If you don’t want to use vinegar or lemon juice to clean your kettle, you can try other alternative methods. Here are some natural and commercial cleaning options, as well as specialized cleaning tools:

    I. Natural Cleaning Methods

    • Baking Soda: Mix baking soda with water to create a paste. Apply the paste to the affected areas of the kettle and let it sit for about 30 minutes. Scrub the kettle’s interior with a soft cloth or sponge, then rinse and dry.
    • Citric Acid: Mix a solution of citric acid and water. Add the solution to the kettle and let it sit for about an hour. Scrub the kettle’s interior with a soft cloth or sponge, then rinse and dry.
    • Salt and Vinegar: Mix salt and vinegar to create a paste. Apply the paste to the affected areas of the kettle and let it sit for about 30 minutes. Scrub the kettle’s interior with a soft cloth or sponge, then rinse and dry.

    II. Commercial Cleaning Products

    1. Kettle Descaler Balls: Descalers are commercial cleaning products that remove limescale and mineral deposits from kettles. They are liquid or powder, and you can find them at most home improvement or hardware stores.
    2. Multi-Purpose Cleaners: Multi-purpose cleaners are also effective at cleaning kettles. Look for cleansers that are safe for use on stainless steel or plastic surfaces.

    III. Specialized Cleaning Tools

    1. Kettle Descaler Balls: Descaler balls are specialized cleaning tools designed to remove limescale buildup in kettles. Add the ball to the kettle and boil it for about 30 minutes. The ball will release citric acid, which helps dissolve limescale and mineral deposits.
    2. Kettle Cleaning Brushes: Kettle cleaning brushes are specialized brushes designed to clean the interior of kettles. They are available in different sizes and shapes to fit different types of kettles.

    No matter which cleaning method or product you choose, read the instructions carefully and take any necessary precautions to ensure your safety and the proper functioning of your kettle.

    8: Preventing Future Boiling Dry Incidents

    Preventing your kettle from boiling dry is crucial for both your kettle’s longevity and safety. Here are some tips on how to avoid a kettle from burning dry, how to tell when a kettle is boiling dry, and proper kettle usage and maintenance:

    I. Tips for Preventing a Kettle from Boiling Dry

    • Always ensure enough water is in the kettle before turning it on.
    • Use a kettle with an automatic shut-off feature. This feature will turn off the kettle when the water reaches boiling point.
    • Keep an eye on the kettle while it is heating. Never leave the kettle unattended while it is boiling.
    • Avoid overfilling the kettle with water. Overfilling can cause the water to spill over and potentially damage the kettle.
    • Clean your kettle regularly to prevent mineral buildup and other performance issues.

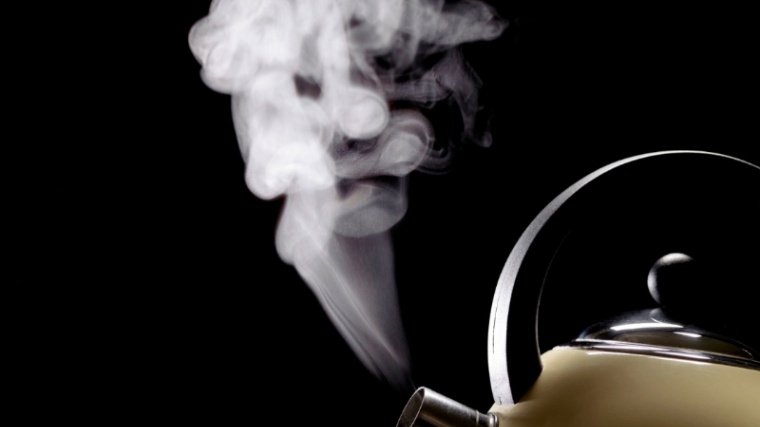
    II. How to Tell When a Kettle is Boiling Dry

    1. The kettle will start hissing or rattling as the water boils away.
    2. You will start to see steam coming out of the kettle’s spout.
    3. The kettle’s heating element may become damaged due to the lack of water.
    4. The kettle may emit an unpleasant smell.

    III. Proper Kettle Usage and Maintenance

    1. Always use your kettle according to the manufacturer’s instructions.
    2. Refrain from immersing your kettle in water. This can cause the kettle to short-circuit and become dangerous.
    3. Avoid using harsh cleaning agents, abrasive sponges, or steel wool to clean your kettle. These can damage the kettle’s surface.
    4. Regularly clean your kettle using natural or commercial cleaning products to prevent mineral buildup and other issues.

    By following these tips and adequately maintaining your kettle, you can prevent future boiling dry incidents and ensure that your kettle lasts many years.

    9: Troubleshooting Common Issues

    Even with proper maintenance, kettles can sometimes experience issues. Here are some common problems and how to troubleshoot them:

    I. Dealing with Stubborn Stains or Mineral Buildup

    • Fill the kettle with equal parts of water and vinegar and let it soak for several hours or overnight. Then, use a soft sponge or cloth to scrub the inside of the kettle.
    • You can use a descaling solution designed explicitly for kettles for stubborn mineral buildup. Follow the instructions on the product label.
    • If you’re dealing with stains on the outside of the kettle, you can use a soft sponge or cloth and mild dish soap to clean it.

    II. Restoring the Kettle’s Heating Element

    • If the heating element malfunctions, try soaking the kettle in a descaling solution overnight. This can remove any mineral buildup that may be affecting the element.
    • If the heating element is damaged, you may need to replace it. Contact the manufacturer or professional repair service for assistance.

    III. Addressing Unusual Odors or Tastes

    • If your kettle has an unusual odor or taste, try cleaning it with water and lemon juice. Let it soak for several hours before rinsing and drying.
    • If the issue persists, it may be a sign that the kettle is old and needs to be replaced.

    By troubleshooting these common issues, you can keep your kettle in good working condition and ensure that it continues to provide you with hot water for your beverages and cooking needs.

    10: Frequently Asked Questions (FAQs)

    I. How often should I clean my kettle?

    It is recommended to clean your kettle once a month to prevent mineral buildup and ensure it continues functioning correctly.

    II. Is it safe to use vinegar for cleaning a kettle?

    Yes, vinegar is a safe and effective natural cleaning agent that can be used to clean a kettle. Just rinse the kettle thoroughly after cleaning to remove any vinegar residue.

    III. What should I do if my kettle’s heating element is damaged?

    If the heating element of your kettle is damaged, you may need to replace it. Contact the manufacturer or professional repair service for assistance. If your kettle is still under warranty, the manufacturer may be able to repair or replace it for you.

    11: Conclusion

    In conclusion, cleaning a kettle that has boiled dry is crucial for the proper functioning of the appliance and for ensuring your safety. Neglecting to clean a kettle can lead to mineral buildup, stains, and unusual odors or tastes in your hot beverages.

    Following the step-by-step guide and tips in this article, you can easily clean your kettle using safe and effective methods. It’s also essential to take preventative measures to avoid future boiling dry incidents by monitoring the water level in the kettle and properly maintaining it.

    Remember to clean your kettle at least once a month and follow the manufacturer’s instructions for proper usage and maintenance.

    We hope this article has helped you understand the importance of cleaning a kettle that has boiled dry and provides the information and resources needed to clean and maintain your kettle correctly. Cheers to a good cup of tea or coffee!

  • How To Cut Metal Sheet By Hand: Techniques and Tools

    How To Cut Metal Sheet By Hand: Techniques and Tools

    Metal sheets are commonly used in construction, fabrication, and DIY projects. Whether you are a professional or a DIY enthusiast, knowing how to cut metal sheet by hand is an important skill. Not only can it save you money on hiring professionals or purchasing expensive equipment, but it can also give you greater control over the outcome of your project. However, taking appropriate safety precautions before starting any metal-cutting project is essential. This includes wearing appropriate safety gear, choosing the right cutting tool, and properly securing the metal sheet to prevent accidents. By following these precautions and learning the proper techniques, you can safely and effectively cut metal sheets by hand.

    How To Cut Metal Sheet By Hand

    1: Types of Metal Sheets and Cutting Tools

    Metal sheets are used in various applications, from construction and manufacturing to jewelry making and art projects. They come in different sizes, shapes, and materials, each with unique properties and uses. However, cutting metal sheets can only be challenging with the right tools and techniques. Here, we’ll discuss the different types of metal sheets available and the types of cutting tools, and their uses.

    Metal sheets are flat, thin pieces of metal that come in different materials and sizes. Here are some of the most common types of metal sheets available:

    I. Aluminum Sheets

    Aluminum sheets are lightweight, durable, and corrosion-resistant, making them suitable for outdoor applications. They are commonly used in the aerospace industry, transportation, and construction.

    II. Steel Sheets

    Steel sheets are strong and durable, making them suitable for structural applications such as bridges, buildings, and machinery. They come in different grades and finishes, each with unique properties and uses.

    III. Copper Sheets

    Copper sheets are malleable and ductile, making them suitable for artistic and decorative applications. They are commonly used in roofing, plumbing, and electrical applications.

    IV. Brass Sheets

    Brass sheets combine copper and zinc, making them corrosion-resistant and easy to work with. They are commonly used in decorative and architectural applications, such as door handles, nameplates, and sculptures.

    V. Stainless Steel Sheets

    Stainless steel sheets are corrosion-resistant and easy to maintain, making them suitable for medical, food processing, and automotive applications. They come in different finishes, such as brushed, mirror, and matte.

    2: Types of Cutting Tools and Their Uses

    Cutting metal sheets requires precision and the right tools. Here are some of the most common types of cutting tools and their uses:

    I. Handheld Shears

    Handheld shears are used to cut small and thin sheets of metal. They come in different sizes and shapes, such as straight, curved, and offset. Handheld shears are suitable for cutting straight lines or curves.

    II. Nibblers

    Nibblers are used to cut complex shapes and curves in metal sheets. They punch small holes in the metal and then cut between them. Nibblers are suitable for cutting thick and thin sheets of metal.

    III. Plasma Cutters

    Plasma cutters use a high-velocity jet of ionized gas to cut through metal sheets. They are suitable for cutting thick metal sheets and can make precise cuts. Plasma cutters are commonly used in metal fabrication, automotive, and aerospace industries.

    IV. Laser Cutters

    Laser cutters use a high-power laser beam to cut through metal sheets. They are suitable for cutting intricate shapes and designs and can make precise cuts. Laser cutters are commonly used in the jewelry, art, and aerospace industries.

    V. Waterjet Cutters

    Waterjet cutters use a high-pressure stream of water and abrasive particles to cut through metal sheets. They are suitable for cutting thick and thin metal sheets and can make precise cuts. Waterjet cutters are commonly used in the aerospace, automotive, and food processing industries.

    2: Preparing to Cut Metal Sheet by Hand

    Cutting metal sheets by hand can be challenging, but it can be done safely and accurately with the right tools and techniques. Here are some steps to follow to prepare for cutting a metal sheet by hand:

    I. Materials Needed for Cutting Metal Sheets

    II. Choosing the Right Work Surface

    Choose a flat and stable work surface to cut the metal sheet. Avoid uneven or wobbly surfaces, as they can cause the metal sheet to shift during cutting. A sturdy workbench or table is ideal, but you can use a piece of plywood or a similar flat surface if one is unavailable.

    III. Preparing the Metal Sheet for Cutting

    Before cutting the metal sheet, it’s essential to prepare it properly. Here are some steps to follow:

    • Measure the metal sheet: Use a measuring tape or ruler to measure the length and width of the metal sheet. Mark the dimensions with a marker or pen.
    • Secure the metal sheet: Clamp the metal sheet onto the work surface using a C-clamp or a similar clamp. Ensure the metal sheet is securely fastened to prevent it from moving during cutting.
    • Put on safety gear: Wear safety goggles to protect your eyes from metal shards and work gloves to protect your hands from sharp edges.
    • Mark the cutting line: Use a marker or pen to mark the cutting line on the metal sheet. Make sure the line is straight and accurate.
    • Cut the metal sheet: Carefully cut along the marked line using the metal cutting shears. Apply steady pressure to the shears and use short, controlled cuts. Avoid cutting too quickly or applying too much force, as this can damage the shears or the metal sheet.

    By following these steps, you can prepare to cut a metal sheet by hand safely and accurately. Always exercise caution when cutting metal sheets and wear appropriate safety gear to prevent injuries.

    3: Techniques for Cutting Metal Sheets

    Cutting metal sheets can be done using various techniques, each suitable for different cutting needs. Here are some methods for cutting metal sheets:

    I. Straight Cutting Techniques

    Straight cuts are the most common type of cuts made on metal sheets. Several techniques can be used for straight cutting:

    • Tin snips: Tin snips are metal cutting shears that can make straight cuts on metal sheets. They come in different sizes and are suitable for cutting thinner sheets.
    • Hand-held plasma cutter: A hand-held plasma cutter can make straight cuts on metal sheets. They suit thicker sheets and can cause cuts faster than tin snips.
    • Angle grinder: An angle grinder with a metal cutting wheel can also make straight cuts on metal sheets. They suit thicker sheets and can cause cuts faster than tin snips.

    II. Curved Cutting Techniques

    Curved cuts can be made on metal sheets using the following techniques:

    • Hand-held plasma cutter: A hand-held plasma cutter can make curved cuts on metal sheets. They suit thicker sheets and can cause cuts faster than tin snips.
    • Jigsaw: A jigsaw with a metal cutting blade can also make curved cuts on metal sheets. They suit thinner sheets and can cause cuts faster than hand-held plasma cutters.

    III. Angled Cutting Techniques

    Angled cuts can be made on metal sheets using the following techniques:

    • Angle grinder: An angle grinder with a metal cutting wheel can make angled cuts on metal sheets. They are suitable for thicker sheets and can make cuts faster than tin snips.
    • Hand-held plasma cutter: A hand-held plasma cutter can also make angled cuts on metal sheets. They are suitable for thicker sheets and can make cuts faster than tin snips.

    IV. Cutting Circles and Other Shapes

    Cutting circles and other shapes can be done using the following techniques:

    • Hand-held plasma cutter: A hand-held plasma cutter can make precise cuts on metal sheets to create circles and other shapes. They are suitable for thicker sheets and can cause scratches faster than other techniques.
    • Jigsaw: A jigsaw with a metal cutting blade can also make precise cuts on metal sheets to create circles and other shapes. They are suitable for thinner sheets and can make cuts faster than hand-held plasma cutters.

    Using these techniques, you can make precise cuts on metal sheets for various projects. Always exercise caution when cutting metal sheets and wear appropriate safety gear to prevent injuries.

    4: Working with Different Types of Cutting Tools

    Cutting tools are essential for working with metal sheets; different types suit different cuts. Here are some cutting tools commonly used for cutting metal sheets and how to work with them:

    I. Snips and Shears

    Snips and shears are handheld tools used for cutting thin metal sheets. They come in different sizes and shapes, and each type of snip or shear suits a specific cut. Here are some types of snips and shears and how to use them:

    • Straight snips: Straight snips are suitable for making straight cuts on metal sheets. To use straight snips, hold the snips with your dominant hand and the metal sheet with your other hand. Open the snips and place the edge of the sheet between the blades. Close the snips to cut.
    • Right and left snips: Right and left snips are suitable for making curved cuts on metal sheets. To use right and left snips, hold the snips with your dominant hand and the metal sheet with your other hand. Open the snips and place the edge of the sheet between the blades. Turn the sheet as you cut to create the curve.

    II. Tin Snips and Aviation Snips

    Tin and aviation snips are similar to snips and shears but are designed to cut thicker metal sheets. Here is how to use tin snips and aviation snips:

    • Tin snips: Tin snips are suitable for cutting thin to medium-thick metal sheets. To use tin snips, hold the snips with your dominant hand and the metal sheet with your other hand. Open the snips and place the edge of the sheet between the blades. Close the snips to cut.
    • Aviation snips: Aviation snips are suitable for cutting thicker sheets of metal. To use aviation snips, hold the snips with your dominant hand and the metal sheet with your other hand. Open the snips and place the edge of the sheet between the blades. Close the snips to cut.

    5: Nibblers and Jigsaws

    Nibblers and jigsaws are power tools that can be used for cutting metal sheets. Here is how to use nibblers and jigsaws:

    • Nibblers: Nibblers are suitable for cutting thicker sheets of metal. To use nibblers, hold the nibbler with both hands and place the cutting edge on the sheet. Apply pressure to the nibbler to cut.
    • Jigsaws: Jigsaws with metal cutting blades are suitable for cutting thin metal sheets. To use a jigsaw, attach the metal cutting blade and turn on the jigsaw. Hold the jigsaw with both hands and guide it along the sheet to cut.

    6: Rotary Cutters and Hacksaws

    Rotary cutters and hacksaws are also suitable for cutting metal sheets. Here is how to use rotary cutters and hacksaws:

    • Rotary cutters: Rotary cutters are ideal for cutting thin to medium-thick metal sheets. To use a rotary cutter, attach the cutting wheel and turn on the rotary cutter. Hold the rotary cutter with both hands and guide it along the sheet to cut.
    • Hacksaws: Hacksaws with metal cutting blades are suitable for cutting thin metal sheets. To use a hacksaw, hold the saw with both hands and guide it along the sheet to cut.

    7: Nibblers and jigsaws

    Nibblers and jigsaws are tools used for cutting metal sheets curved or angularly. Nibblers make straight or curved cuts with greater precision than snips or shears. They punch a small hole in the metal sheet and cut out the desired shape. On the other hand, jigsaws are handheld power tools that use a reciprocating blade to cut through metal sheets. They are best suited for cutting shapes with a tighter radius than can be achieved with snips or shears.

    When working with nibblers or jigsaws, it is essential to use a slow and steady approach. These tools are designed for precision cutting and require patience to operate effectively. Start by punching a small hole in the metal sheet and then gradually work around the desired shape. If using a jigsaw, be sure to use a blade that is specifically designed for cutting metal.

    8: Rotary cutters and hacksaws

    Rotary cutters are handheld power tools that use a rotary blade to cut through metal sheets. They are handy for cutting thin sheets of metal quickly and efficiently. Hacksaws, conversely, are manual cutting tools that use a toothed blade to cut through metal sheets. They are best suited for cutting thicker metal sheets or making more intricate cuts.

    When working with rotary cutters or hacksaws, using the right blade for the job is essential. For example, a fine-toothed blade is best for cutting thin metal sheets, while a coarse-toothed blade is better suited for thicker sheets. Maintaining a steady hand and applying even pressure when cutting is also essential to avoid jagged edges.

    9: Plasma cutters and angle grinders

    Plasma cutters and angle grinders are powerful tools that can quickly and efficiently cut through metal sheets—plasma cutters work by ionizing the gas and using the resulting plasma to cut through the metal sheet. Angle grinders, on the other hand, use a rotating abrasive disc to grind away at the metal.

    When working with plasma cutters or angle grinders, it is essential to take proper safety precautions. Both tools produce sparks and generate heat, which can be dangerous if improperly handled. Wear protective clothing, including gloves and eye protection.

    10: Common Mistakes to Avoid

    While cutting metal sheets, some common mistakes can lead to a less-than-desirable outcome. Here are some errors to avoid when working with metal sheets:

    • Rushing the job: Cutting metal sheets requires patience and attention to detail. Running the job can result in mistakes and uneven cuts.
    • Not wearing appropriate safety gear: Cutting metal sheets can be dangerous, and it is essential to wear the proper safety gear, including gloves, eye protection, and a face shield. Without appropriate protection, you risk injury from flying metal fragments or sparks.
    • Not using the right cutting tool for the job: Different cutting tools are designed for different cuts and metal thicknesses. Not using the right tool can result in damaged or uneven cuts.
    • Properly securing the metal sheet: Metal sheets should be attached appropriately before cutting to avoid slipping or moving during the cutting process. Failure to do so can result in uneven cuts or injury.

    By avoiding these common mistakes, you can ensure that your metal-cutting projects are successful and safe.

    11: Tips for Achieving Precision and Accuracy:

    When cutting metal sheets, achieving precision and accuracy is essential to ensure that the finished product meets your specifications. Here are some tips for achieving precision and accuracy when cutting metal sheets:

    • Measuring and marking the metal sheet: Before cutting, use a ruler or measuring tape to mark the cut line on the metal sheet. Double-check your measurements to ensure accuracy.
    • Using clamps and guides: Clamping the metal sheet to a work surface and using principles can help keep the metal sheet in place and ensure that your cuts are straight and accurate.
    • Taking breaks to prevent fatigue: Cutting metal sheets can be physically demanding, and fatigue can lead to mistakes. Take breaks as needed to avoid fatigue and maintain focus.

    12: Finishing Touches

    Once you have cut your metal sheet to the desired size and shape, there are some finishing touches you can make to ensure a clean, professional look:

    • Removing sharp edges and burrs: Using a file or sandpaper, remove any sharp edges or burrs left on the metal sheet after cutting.
    • Sanding and smoothing the edges: Sanding the edges of the metal sheet can give it a smooth, polished appearance. Use fine-grit sandpaper for best results.
    • Deburring and polishing the metal sheet: If desired, use a polishing compound and a cloth to give the metal sheet a shiny, polished finish.

    Following these tips and finishing touches can achieve a precise, accurate, and professional-looking cut metal sheet.

    13: Maintenance and Care for Cutting Tools:

    To ensure that your cutting tools last as long as possible and perform at their best, it’s essential to maintain and care for them properly. Here are some tips for maintaining and managing cutting tools:

    • Cleaning and storing cutting tools: After using them, clean them thoroughly and dry them before storing them in a dry, secure place. Keep cutting tools away from moisture and other corrosive substances.
    • Sharpening and maintaining cutting tools: Regularly sharpen your tools to support their sharpness and cutting ability. Keep cutting tools lubricated with suitable oil to prevent rust and maintain performance.
    • Replacing worn-out cutting tools: When a cutting tool becomes worn or damaged, replace it immediately. Using a dull or damaged cutting tool can result in poor-quality cuts or even damage to the metal sheet.

    14: Troubleshooting Common Issues

    Even when using the right cutting tools and techniques, issues can still arise when cutting metal sheets. Here are some common problems and tips for troubleshooting them:

    • Uneven or jagged cuts: This can be caused by using a dull or improperly sized cutting tool or improper cutting techniques. Ensure that you are using the right cutting tool for the job and that it is properly sharpened.
    • Stuck or jammed cutting tools: This can be caused by using too much force when cutting, using the wrong cutting tool, or using a damaged cutting tool. Stop the cut immediately and examine the tool and metal sheet for any signs of damage or wear.
    • Dull or damaged cutting edges: If your cutting tool is not cutting through the metal sheet cleanly, it may be dull or damaged. Sharpen or replace the cutting tool as needed.
    • Warped or distorted metal sheets: This can be caused by improper cutting techniques, excessive heat during cutting, or using the wrong cutting tool. Ensure that you are using the right cutting tool for the job and that you are using proper cutting techniques.

    By properly maintaining and caring for your cutting tools and troubleshooting common issues, you can ensure that your metal sheet cutting projects are successful and produce high-quality results.

    15: Frequently Asked Questions

    I. How do I choose the right type of metal sheet?

    Choosing the correct type of metal sheet depends on the project you’re working on. Some factors to consider include the desired strength and durability, the thickness required, and the metal’s resistance to corrosion. Steel, aluminum, and copper are common types of metal sheets, each with unique characteristics and uses. It’s essential to research the properties of every kind of metal before making a decision.

    II. What is the best cutting tool for a beginner?

    For beginners, snips or shears are an excellent place to start. They are simple to use and come in various sizes and shapes for different types of cuts. Tin and aviation snips are also good for cutting straight or curved lines. Nibblers and jigsaws are more advanced tools that require more skill and experience.

    III. What safety gear do I need when cutting metal sheets?

    When cutting metal sheets, wearing protective gear is essential to prevent injuries. This includes safety glasses, gloves, and a face shield. It’s also vital to wear ear protection if using power tools that produce loud noises.

    IV. How do I prevent the metal sheet from vibrating while cutting?

    Vibrations can occur while cutting metal sheets, especially if using power tools. To prevent this, ensure the metal sheet is securely fastened to the work surface using clamps or other secure methods. You can also use a vibration-absorbing mat under the metal sheet to reduce vibrations.

    V. How do I remove stubborn burrs from the edges of the metal sheet?

    You can use a file or sandpaper to remove burrs from the edges of a metal sheet. Start with a coarse grit and gradually work up to a finer grit to achieve a smooth, polished edge. You can also use a deburring tool or a polishing wheel for more precision.

    16: Conclusion

    In conclusion, metal sheets are used in various applications, and knowing how to cut them is a valuable skill. You can achieve precision and accuracy in your cuts by selecting the correct type of metal sheet, preparing it correctly, and using the appropriate cutting tool. It is essential to avoid common mistakes, such as rushing the job or not wearing proper safety gear, and to properly maintain and care for your cutting tools. You can become proficient at cutting metal sheets and produce high-quality results with practice and patience. So, feel free to start practicing and refining your cutting skills, and always prioritize safety when working with metal sheets and cutting tools.

  • How to Install Shade Sails: Stay Cool and Stylish

    How to Install Shade Sails: Stay Cool and Stylish

    If you’re looking for How to Install Shade Sails in an effective way you came to the right place. They provide protection from the sun’s harmful UV rays and add a stylish and modern touch to your backyard, patio, or pool area.

    However, installing shade sails can be daunting if you’ve never done it before. That’s why we’ve created this comprehensive guide to help you through the process, step-by-step.

    In this article, we’ll cover everything you need to know about shade sails, from measuring and choosing the right location, selecting the right type of sail and fabric, and installing and maintaining it. We’ll also provide you with some common issues you may encounter and how to deal with them.

    By the end of this article, you’ll have all the information you need to install a shade sail in your outdoor space confidently. So let’s start and create a comfortable and stylish outdoor oasis you and your family can enjoy for years to come.

    1: Introduction

    If you want to add shade to your outdoor space while improving its aesthetics, shade sails are a great option. In this guide, we will discuss what shade sails are, why they are popular for outdoor shade solutions, and how to install and maintain them.

    What are Shade Sails?

    Shade sails are large fabric stretched over outdoor spaces to provide shade and protection from the sun’s harmful UV rays. They are a popular choice for residential and commercial properties, as they can be easily customized to fit any size or shape of outdoor space.

    Shade sails come in various shapes, sizes, and colors, making them a versatile and stylish option for outdoor shade solutions. They are typically made from high-quality materials that are durable, weather-resistant, and provide excellent UV protection.

    Why Choose Shade Sails over Other Shade Solutions?

    Shade sails offer several benefits over traditional shade solutions, such as awnings or pergolas. One of the main advantages of shade sails is their cost-effectiveness. Shade sails are typically less expensive than other shade solutions and do not require extensive construction or installation permits.

    Another benefit of shade sails is their versatility. Shade sails come in various shapes and sizes. They can be installed in any outdoor space, making them an excellent choice for properties with irregularly shaped or hard-to-cover outdoor areas.

    Finally, shade sails protect from the sun’s harmful UV rays. They are made from high-quality materials designed to block significant UV radiation, keeping you and your family safe from harmful sun exposure.

    2: Measuring and Choosing a Location for Your Sail: A Guide

    Sailing can be a fun and exhilarating hobby, but it requires proper preparation to ensure a safe and enjoyable experience. One crucial aspect of sailing is choosing the right location and measuring the area properly. This article will discuss the steps involved in measuring the area, choosing the location, checking for any obstructions, and deciding on the sail’s orientation.

    Measuring the Area

    Before choosing a location, you need to measure the area where you plan to sail. Here are the steps involved in measuring the area:

    Determine the Boundaries

    First, determine the boundaries of the sailing area. You can use a GPS or a map to do this. It is essential to know the boundaries to avoid sailing in restricted areas.

    Measure the Water Depth

    Next, measure the water depth. This is important to avoid shallow areas, which can damage the boat or cause accidents. You can use a depth finder to measure the water depth accurately.

    Calculate the Wind Direction

    Finally, calculate the wind direction. This is important to determine the orientation of the sail. You can use a weather app or a windsock to determine the wind direction.

    Choosing the Location

    After measuring the area, you need to choose the right location. Here are the steps involved in choosing the location:

    Consider the Weather Conditions

    First, consider the weather conditions. Choose a location that has suitable weather conditions for sailing. Avoid locations with strong winds or heavy rains.

    Look for Accessible Launching Sites

    Next, look for accessible launching sites. Choose a location that has easy access to the water. Avoid locations that require long walks or difficult launches.

    Check for Facilities

    Finally, check for facilities. Choose a location that has facilities such as bathrooms, parking, and picnic areas. This will make your sailing experience more enjoyable.

    Checking for Obstructions

    Before sailing, it is essential to check for any obstructions in the water. Here are the steps involved in checking for obstructions:

    Look for Hazards

    First, look for hazards such as rocks, logs, or buoys. These can damage the boat or cause accidents.

    Check for Other Boats

    Next, check for other boats in the area. Avoid sailing in crowded areas to avoid collisions.

    Watch for Wildlife

    Finally, watch for wildlife, such as dolphins or whales. These animals can damage the boat or cause accidents.

    Deciding on the Sail’s Orientation

    Finally, you need to decide on the sail’s orientation. Here are the steps involved in deciding on the sail’s orientation:

    Determine the Wind Direction

    First, determine the wind direction. Use a weather app or a windsock to determine the wind direction accurately.

    Adjust the Sail’s Angle

    Next, adjust the sail’s angle according to the wind direction. The sail should be perpendicular to the wind for maximum efficiency.

    Trim the Sail

    Finally, trim the sail to optimize the sail’s performance. Adjust the sail’s shape and tension to ensure the best performance.

    In conclusion, measuring the area, choosing the location, checking for any obstructions, and deciding on the sail’s orientation are crucial steps in sailing. By following these steps, you can ensure a safe and enjoyable sailing experience.

    3: Selecting the Right Shade Sail

    Shade sails are a great way to add style and comfort to your outdoor living space while protecting you from the harsh sun. Choosing the right shade sail can be daunting, as many options are available in terms of types, fabrics, and colors. In this article, we will discuss the steps involved in selecting the right shade sail.

    Different Types of Shade Sails

    Before choosing a shade sail, it is important to know the different types of shade sails available. Here are the most common types of shade sails:

    Triangular Shade Sails

    Triangular shade sails are popular because of their versatility and ease of installation. They come in different sizes and can be combined to create unique shapes and designs.

    Square Shade Sails

    Square shade sails provide maximum shade coverage and are ideal for larger outdoor spaces. They are more challenging to install than triangular sails, but they offer more protection from the sun.

    Rectangular Shade Sails

    Rectangular shade sails are a great choice for long and narrow outdoor spaces. They are ideal for patios, decks, and other outdoor living spaces.

    Choosing the Right Fabric

    The fabric of your shade sail is essential when choosing a shade sail. Here are the most common fabrics used for shade sails:

    Polyester

    Polyester is a popular choice for shade sails because it is affordable and durable. It is resistant to fading, tearing, and mildew, making it ideal for outdoor use.

    High-Density Polyethylene (HDPE)

    HDPE is a high-quality fabric that offers excellent UV protection and is resistant to mildew and fading. It is more expensive than polyester, but its superior quality is worth the investment.

    PVC

    PVC is a heavy-duty fabric that is resistant to fire and mildew. It is more expensive than polyester and HDPE, but it offers excellent protection from the sun and is highly durable.

    Deciding on the Color

    The color of your shade sail is another important consideration. Here are some factors to consider when choosing the color of your shade sail:

    Functionality

    If you want your shade sail to blend in with the surrounding environment, choose a color that complements the color of your home or landscape. If you want your shade sail to stand out, choose a bold and vibrant color.

    UV Protection

    Choose a dark color if you want maximum UV protection. Dark colors absorb more UV rays than light colors, making them ideal for outdoor use.

    Temperature

    Choose a light-colored shade sail to keep the temperature under the sail cool. Light colors reflect heat and light, making them ideal for hot and sunny climates.

    In conclusion, selecting the right shade sail requires careful consideration of the type, fabric, and color. Following the steps outlined in this article, you can choose the perfect shade sail that will provide comfort and protection while adding style to your outdoor living space.

    4: Necessary Equipment and Tools

    Having the right equipment and tools is essential when installing a shade sail. You can ensure the installation goes smoothly and safely with the proper tools and safety equipment. This section will cover the necessary equipment and tools for installing a shade sail.

    Required Tools:

    • Measuring tape – to accurately measure the area and size of the shade sail
    • Spirit level – to check the levelness of the installation site
    • Ladder – to reach high installation points
    • Power drill – to drill holes into the installation site and secure the shade sail
    • Masonry drill bit – for drilling into concrete, brick, or masonry walls
    • Socket set – for tightening nuts and bolts

    Optional Equipment:

    • Shade sail installation kit – includes all necessary hardware such as turnbuckles, eye bolts, snap hooks, and wire rope
    • Tensioning device – to adjust the tension of the shade sail over time
    • Poles and post supports – to create a freestanding installation
    • Concrete mix – for creating a solid foundation for pole or post supports

    Safety Equipment:

    • Safety glasses – to protect your eyes from debris and dust
    • Gloves – to protect your hands while using tools
    • Hard hat – to protect your head from falling objects
    • Safety harness and anchor points – to prevent falls from heights during installation

    It is important to note that safety should always come first when installing a shade sail. Follow the manufacturer’s instructions and use the appropriate safety equipment when necessary.

    5: Installing Shade Sails: Step-by-Step 

    You can install your shade sail now that you have the necessary equipment and tools. This section will go through a step-by-step guide to help you install your shade sail safely and correctly.

    A. Preparation

    • Preparing the sail and hardware: Before installing the shade sail, ensure that all the necessary hardware is included and in good condition. Make sure the sail is clean and dry before installation.
    • Preparing the mounting points: Check that the mounting points are secure and can handle the weight of the shade sail. If necessary, reinforce the mounting points or use a different location.
    • Assembling the sail: Lay out the sail and assemble the hardware according to the manufacturer’s instructions. Double-check that all the components are securely attached.

    B. Installing the Sail

    • Securing the sail to the mounting points: Attach the eye bolts to the mounting points using the appropriate hardware. Be sure to check that the eye bolts are level and spaced correctly.
    • Adjusting tension: Use the turnbuckles to adjust the tension of the shade sail. Start with a loose tension and gradually tighten the turnbuckles until the sail is taut.
    • Checking for proper installation: Check that the sail is level and the corners are evenly tensioned. Look for any wrinkles or sagging in the fabric. Adjust the tension if necessary.

    It’s important to note that the installation process may vary depending on the type of shade sail and the mounting location. Always refer to the manufacturer’s instructions for specific installation guidelines.

    6: Maintenance

    • Cleaning the shade sail: Regular cleaning can help prevent dirt, debris, and mold buildup on your shade sail. Use a mild soap and water solution to clean the fabric. Avoid using harsh chemicals or abrasive materials that can damage the fabric.
    • Inspecting for damage: Regularly inspect your shade sail for any signs of damage, such as tears, holes, or frayed edges. Address any issues promptly to prevent further damage.
    • Repairing and replacing components: If any components of your shade sail become damaged, such as the hardware or fabric, repair or replace them as soon as possible. Using damaged components can compromise the effectiveness and safety of the shade sail.

    7: Common Issues

    • Sagging: Your shade sail may begin to sag or lose tension over time. Various factors, such as wind or changes in temperature, can cause this. To address sagging, adjust the tension of the turnbuckles until the sail is taut again.
    • Wind damage: Strong winds can damage your shade sail or the mounting hardware. If you know a storm is coming, remove your shade sail to prevent damage. If your shade sail does sustain wind damage, inspect it thoroughly and repair any damage before reinstalling.
    • Mold and mildew: Mold and mildew can grow on your shade sail if it needs to be cleaned regularly or installed in a damp location. To prevent mold and mildew growth, clean your shade sail regularly and ensure it’s installed in a well-ventilated location.

    Following these maintenance tips and addressing common issues promptly ensure your shade sail stays effective and in good condition for years.

    8: Frequently Asked Questions

    • How long does a shade sail last?

    The lifespan of a shade sail depends on several factors, such as the quality of the fabric, the frequency of maintenance, and the weather conditions. However, a well-maintained shade sail can last 5-10 years on average.

    • Can shade sails be used in windy conditions?

    Yes, but it depends on the wind conditions and the strength of the shade sail. It is recommended to use a shade sail with a high wind resistance rating and to take it down during extremely windy conditions.

    • Do shade sails block UV rays?

    Yes, shade sails are designed to block UV rays and provide shade to protect you from harmful sun rays. However, the amount of UV rays blocked depends on the type and color of the fabric used. Choosing a shade sail fabric with a high UV protection rating for maximum protection is advisable.

    9: Conclusion

    In conclusion, installing a shade sail is a simple process that can be accomplished with the right tools and equipment. Measuring the area, choosing the location, and selecting the right shade sail are crucial steps to consider. Preparing the sail and hardware, assembling the sail, and securing the sail to the mounting points are important steps during installation.

    The benefits of shade sails are numerous. They provide shade and protection from harmful UV rays, are cost-effective compared to traditional building structures, and come in various colors and styles to match any outdoor space.

    In summary, shade sails are an excellent solution to provide shade and protection for outdoor spaces while adding a stylish touch to the area. Following the steps outlined in this guide, you can easily install a shade sail on your property and enjoy its benefits for years.

    You may also like these posts!

  • How to Drill Fiberglass without Cracking: Tips for Success

    How to Drill Fiberglass without Cracking: Tips for Success

    Fiberglass is a versatile material used in various applications, from boats and cars to home insulation and aerospace technology. However, drilling holes in fiberglass can be challenging due to its unique properties. Without the proper techniques, the material can crack or splinter, ruining the project’s integrity. This article will discuss How to Drill Fiberglass without Cracking and the best practices for drilling fiberglass, including selecting the right tools, preparing the surface, applying the correct pressure and speed, troubleshooting common issues, and protecting the newly drilled area. Following these tips and tricks, you can drill fiberglass confidently and precisely, avoiding costly mistakes and ensuring a successful outcome.

    How to Drill Fiberglass without Cracking

    1: Introduction

    Fiberglass is widely used in various industries due to its strength, durability, and versatility. It is made by combining fine glass fibers with a polymer resin, resulting in a composite material that can be molded into different shapes and sizes. Fiberglass is commonly used in construction, automotive manufacturing, aerospace, and marine industries.

    I. Common problems encountered when drilling fiberglass

    However, drilling fiberglass can be challenging, as it is a brittle material that can easily crack or chip if not drilled properly. Common problems when drilling fiberglass includes splintering, cracking, and delamination, which can be frustrating and time-consuming.

    II. Importance of proper drilling techniques to prevent cracking

    Proper drilling techniques prevent these problems and ensure a successful drilling process. Choosing the right tools, applying the correct pressure and speed, and taking safety precautions to prevent damage or injury are important. This article will cover the important steps and techniques to drill fiberglass and avoid common mistakes successfully.

    2: Understanding Fiberglass: Properties, Types, and Applications

    Fiberglass is a versatile and widely-used material in various applications, from construction to transportation and aerospace industries. This article aims to provide an in-depth understanding of what fiberglass is, how it is made, its properties, and common types used in various applications.

    I. Introduction to Fiberglass

    Fiberglass, or glass-reinforced plastic (GRP), is a composite material made from glass fibers and plastic resin. The glass fibers, made from molten glass drawn into thin strands, are woven into a fabric-like material or mat. The resin, typically made from polyester or epoxy, is poured onto the fibers, saturating them and creating a solid and durable material once it cures.

    Fiberglass has been in use since the early 20th century. Its popularity has grown due to its excellent mechanical properties, high strength-to-weight ratio, and resistance to corrosion and temperature extremes.

    II. How Fiberglass is Made

    The process of making fiberglass begins with the production of glass fibers. The glass fibers are made by melting silica sand, soda ash, limestone, and other ingredients in a furnace at temperatures over 2,000 degrees Fahrenheit. The molten glass is then drawn out into fine filaments using fiberization. The filaments are cooled by air and collected onto a spool.

    The glass fibers are then woven into a fabric-like material or mat coated with resin. The resin is typically applied in layers, each being allowed to cure before the next is added. The cured resin and glass fiber combination forms a strong and durable material.

    III. Properties of Fiberglass

    Fiberglass has several properties that make it a challenging material to work with, particularly when it comes to drilling. These properties include:

    • High strength and durability: Fiberglass is a strong and durable material, making it an ideal choice for applications where strength is essential.
    • Low thermal conductivity: Fiberglass is a poor conductor of heat, making it an excellent insulator.
    • Corrosion-resistant: Fiberglass is highly resistant to corrosion from chemicals and water, making it ideal for use in harsh environments.
    • Brittle: Fiberglass can be brittle, making it challenging to work with, especially when drilling or cutting.

    IV. Common Types of Fiberglass

    There are several common types of fiberglass used in various applications, including:

    • E-glass: E-glass is the most common fiberglass used in commercial and industrial applications. It is an alkali-free glass with excellent electrical insulation properties and high tensile strength.
    • S-glass: S-glass is a high-strength fiberglass used in applications where maximum strength is required, such as in aerospace and military applications.
    • C-glass: C-glass is a fiberglass with high resistance to chemical corrosion and is used in chemical processing plants and other harsh environments.

    V. Applications of Fiberglass

    Fiberglass is used in a wide range of applications, including:

    • Construction: Fiberglass is used to construct buildings and structures, including roofs, insulation, and siding.
    • Transportation: Fiberglass is used to manufacture automobiles, boats, and airplanes.
    • Industrial: Fiberglass is used in industrial applications, such as tanks, pipes, and chemical processing equipment.
    • Sports and Recreation: Fiberglass is used to construct sports equipment, such as surfboards, skis, and fishing rods.

    3: Materials and Tools You Need Drill Fiberglass without Cracking

    If you’re planning to drill fiberglass, having the right tools and safety equipment is essential to ensure the job is done correctly and safely. Here are the necessary materials and tools you’ll need:

    I. Materials

    • Fiberglass material
    • Drill bits
    • Masking tape
    • Lubricating oil
    • Safety goggles
    • Dust mask
    • Gloves

    II. Tools

    • Power drill
    • Hole saw or spade bit
    • Sandpaper
    • Measuring tape
    • Pencil

    III. Necessary tools for drilling fiberglass

    You’ll need a power drill, a hole saw or spade bit, and sandpaper to drill fiberglass. The hole saw, or spade bit will be used to make the hole, while sandpaper is necessary to smooth out the edges after drilling. Measuring tape and a pencil are also handy for marking the hole’s location before drilling.

    IV. Best drill bits for fiberglass

    When drilling fiberglass, not all drill bits are created equal. For the best results, you’ll want to use drill bits specifically designed for fiberglass use. These bits typically have a diamond or carbide tip that can cut through the material without causing cracking or splintering.

    V. Proper safety equipment to wear

    Drilling fiberglass can produce dust and small particles that harm your eyes and lungs. Therefore, wearing proper safety equipment, including safety goggles and a dust mask, is essential. Gloves can also protect your hands from any sharp edges or fiberglass particles.

    Before drilling, it’s also important to ensure the work area is well-ventilated and to lay down a drop cloth or other protective covering to catch any debris. You should also use lubricating oil to cool the drill bit and reduce friction during drilling.

    In conclusion, drilling fiberglass requires specific tools and safety equipment to ensure a safe and successful job. By using the right materials and tools and following proper safety procedures, you can easily and safely drill fiberglass for various applications.

    4: Preparing to Drill Fiberglass

    Before you start drilling fiberglass, preparing properly is important to ensure a successful outcome. Here are some steps you can take to get ready:

    I. Planning the drilling process

    Before drilling, it’s important to plan the process carefully. Consider the size and location of the hole you need to make and how it will fit into your project. It’s also important to consider the type of drill bit you’ll use and the speed and pressure you’ll need to apply to drill through the fiberglass effectively.

    II. Marking the area to be drilled

    Once you’ve planned the drilling process, use a measuring tape and pencil to mark the hole’s location on the fiberglass’s surface. Ensure the markings are accurate and clear so you know exactly where to drill.

    III. Cleaning the surface of the fiberglass

    Before drilling, it’s important to clean the fiberglass’s surface thoroughly. Dust and debris can interfere with the drilling process and damage the drill bit. Use a clean, dry cloth or paper towel to wipe away any dust, dirt, or debris from your drilling area.

    IV. Securing the fiberglass to prevent movement

    Fiberglass can be fragile, and movement during drilling can cause cracking or splintering. Secure the fiberglass to a stable surface using clamps or other tools to prevent movement. Make sure the fiberglass is held securely in place before starting to drill.

    By taking these steps to prepare before drilling fiberglass, you can ensure a safe and successful outcome. Planning the drilling process, marking the area to be drilled accurately, cleaning the surface of the fiberglass, and securing the fiberglass to prevent movement will help you achieve the best possible results.

    5: Techniques for Drilling Fiberglass

    Drilling fiberglass can be challenging, but with the right techniques and tools, creating precise, clean holes is possible. Here are some techniques to help you drill fiberglass effectively:

    I. Choosing the right speed for drilling

    The speed of your drill is important when drilling through fiberglass. Too high of a speed can cause the fiberglass to heat up and melt, while too slow can cause the fiberglass to crack or splinter. It’s recommended to use a drill speed of around 2000-3000 RPM (revolutions per minute) for drilling through fiberglass.

    II. Applying the right amount of pressure

    When drilling through fiberglass, applying the right amount of pressure to the drill bit is important. Too much pressure can cause the fiberglass to crack, while too little pressure can cause the drill bit to slip or not penetrate the fiberglass. Apply moderate pressure to the drill bit, and let the drill do the work.

    III. Using a lubricant to reduce friction

    Fiberglass can create much friction, which can cause the drill bit to overheat and become dull. To reduce friction and prolong the life of your drill bit, use a lubricant such as oil or water. Apply the lubricant to the area you’ll be drilling before starting and periodically throughout the drilling process.

    IV. Using a drill press for precise holes

    For precise, clean holes in fiberglass, consider using a drill press. A drill press allows you to set the drill speed and pressure precisely and creates a stable platform for drilling. It can also help reduce the risk of cracking or splintering the fiberglass and ensure a straight and accurate hole.

    Using these techniques, you can drill through fiberglass effectively and achieve precise, clean holes. Choosing the right speed for drilling, applying the right amount of pressure, using a lubricant to reduce friction, and using a drill press for precise holes are all important factors in successfully drilling through fiberglass.

    6: Troubleshooting

    Even with the best techniques and tools, drilling fiberglass can sometimes result in problems. Here are some common troubleshooting tips for dealing with issues that may arise during the drilling process:

    I. What to do if the drill bit gets stuck

    If your drill bit gets stuck in the fiberglass, stop drilling immediately. Do not force the drill or try to remove the bit by hand. Instead, try using a reverse drill bit or drill bit extractor to remove the bit from the fiberglass. If these methods do not work, seek professional assistance.

    II. How to fix cracks that occur during drilling

    Cracks in fiberglass can occur during drilling, especially if too much pressure is applied or the wrong speed is used. First, remove any loose or damaged fiberglass around the crack to fix the cracks. Then, apply a fiberglass repair kit or epoxy resin to the crack and let it dry completely. Sand down the area to create a smooth finish.

    III. Preventative measures for future drilling

    To prevent issues from arising during future drilling projects:

    1. Take preventative measures.
    2. Use the proper speed and pressure when drilling and a drill press for more precise holes.
    3. Secure the fiberglass to prevent movement during drilling, and use a lubricant to reduce friction.
    4. Wear proper safety equipment such as eye protection and a dust mask, and work in a well-ventilated area.

    Following these troubleshooting tips, you can handle issues that may arise during the drilling process and take preventative measures to ensure successful future drilling projects. Always work safely and use the proper techniques and tools for drilling fiberglass.

    7: After Drilling

    After drilling fiberglass, it’s important to take some steps to clean and protect the newly drilled area properly. Here are some tips for what to do after drilling fiberglass:

    I. Removing debris from the drilled area

    Once drilling is complete, use a soft-bristled brush or compressed air to remove debris or dust from the newly drilled hole or area. This will help to prevent debris from getting lodged in the hole or causing damage to surrounding fiberglass.

    II. How do fill and sand any holes or cracks?

    If there are any holes or cracks in the fiberglass due to drilling, it’s important to fill and sand them properly. Use a fiberglass repair kit or epoxy resin to fill the hole or crack, and let it dry completely. Then, sand down the area to create a smooth finish. Suppose the hole or crack is particularly large or deep. In that case, you may need to repeat this process several times until the area is level with the surrounding fiberglass.

    III. Protecting the newly drilled area from the damage

    After drilling, it’s important to protect the newly drilled area from further damage. Apply a coat of wax or a sealant to the area to protect it from moisture or corrosion. If the fiberglass is located where it may be bumped or damaged, consider installing a protective cover or barrier to prevent damage.

    By following these steps after drilling fiberglass, you can ensure that the newly drilled area is properly cleaned, filled, and protected. Remember always to wear proper safety equipment and take your time to complete the drilling process safely and effectively.

    8: Tips and Tricks

    Drilling fiberglass can be challenging, but by following some best practices and expert tips, you can achieve successful results. Here are some tips and tricks for drilling fiberglass:

    I. Best practices for drilling fiberglass

    • Use a sharp, high-quality drill bit that is designed for drilling fiberglass.
    • Always wear appropriate safety equipment, including eye protection and a respirator.
    • Work in a well-ventilated area to avoid inhaling fiberglass dust.
    • Use a low speed and steady pressure when drilling to prevent cracking or splintering.
    • Use a lubricant to reduce friction and heat during drilling.
    • Use a drill press for precise and accurate holes.

    II. How to avoid common mistakes

    • Don’t rush the drilling process. Take your time to ensure that the fiberglass is properly secured and the drilling area is clean.
    • Use only a little pressure or speed when drilling, which can cause the fiberglass to crack or splinter.
    • Only drill with appropriate safety equipment, as fiberglass dust can harm your health.

    III. Expert tips for successful drilling

    • Before drilling, make sure the fiberglass is fully cured and hardened.
    • Use a backing plate or support to prevent the fiberglass from cracking or splintering.
    • If drilling a large or deep hole, start with a small pilot hole and gradually increase the size.
    • When using a drill press, ensure it is properly aligned and adjusted for the specific drilling task.
    • Consider using a diamond-coated or carbide drill bit for more challenging drilling tasks.

    Following these tips and tricks can improve your fiberglass drilling skills and achieve successful results. Remember always to work safely and take your time to ensure a precise and accurate drilling process.

    9: Applications

    Fiberglass is a versatile material that is used in a variety of applications across different industries. Here are some common applications of fiberglass and examples of drilling fiberglass in different applications:

    I. Where and how fiberglass is commonly used

    • Construction: Fiberglass is commonly used for insulation, roofing, and reinforcing materials.
    • Automotive and aerospace industries: Fiberglass makes lightweight and durable parts, such as car bodies and airplane wings.
    • Marine industry: Fiberglass is used for boat hulls, decks, and other structural components.
    • Sporting goods: Fiberglass makes fishing rods, hockey sticks, and other sports equipment.
    • Electronics: Fiberglass is used as a substrate for printed circuit boards.

    II. Examples of drilling fiberglass in different applications

    • Drilling holes for electrical wiring in a fiberglass boat hull.
    • Drilling holes for mounting hardware in a fiberglass shower enclosure.
    • Drilling holes for attaching hardware to a fiberglass RV body.

    III. How to approach drilling fiberglass in unique applications

    When drilling fiberglass in unique applications, it is important to consider the specific properties and requirements of the material and the application. Here are some tips for approaching drilling fiberglass in unique applications:

    • Research the specific type of fiberglass and any potential challenges or considerations for drilling.
    • Consult with experts in the field or seek professional guidance if necessary.
    • Test the drilling process on a small, inconspicuous area before proceeding with larger holes or drilling tasks.
    • Take into account any factors that may impact the drilling process, such as the thickness of the fiberglass or the need for precision drilling.

    By understanding the common applications of fiberglass and how to approach drilling in different scenarios, you can expand your knowledge and expertise in working with this versatile material.

    10: Frequently Asked Questions

    QI: What are some common mistakes when drilling fiberglass?

    A: Some common mistakes when drilling fiberglass includes using too much pressure, drilling too fast, using dull drill bits, and not securing the fiberglass properly.

    QII: Can I use a regular drill bit to drill fiberglass?

    A: While it is possible to use a regular drill bit to drill fiberglass, it is recommended to use a drill bit specifically designed for fiberglass to ensure better results.

    QIII: How do I know if I am drilling too fast or too slow?

    A: If drilling too fast, you may notice that the fiberglass is overheating or melting around the drill bit. If drilling is too slow, you may notice that the drill bit needs to progress through the material and is getting clogged with debris.

    QIV: How can I prevent cracking when drilling fiberglass?

    A: To prevent cracking when drilling fiberglass, it is important to use the right amount of pressure and drill slowly. Using a lubricant can also help reduce friction and prevent cracking.

    QV: What kind of lubricant should I use when drilling fiberglass?

    A: A silicone-based lubricant is recommended for drilling fiberglass. It is important to avoid using oil-based lubricants, as they can damage the fiberglass material.

    11: Conclusion

    In conclusion, drilling fiberglass can be a challenging task. However, having the right tools and techniques is not impossible. It is important to plan, mark the area to be drilled, and clean the fiberglass surface before drilling. Choosing the right speed and applying the right amount of pressure is also crucial for successful drilling. A lubricant can help reduce friction and prevent cracking, and a drill press can provide more precise holes.

    After drilling, it is important to remove debris from the drilled area, fill and sand any holes or cracks, and protect the newly drilled area from damage. Best practices for drilling fiberglass include

    • using the right drill bits,
    • securing the fiberglass properly, and
    • practicing patience and caution during drilling.

    You can successfully drill fiberglass in various applications with the right preparation, techniques, and safety precautions. Remember to take your time, be patient, and practice safe and effective drilling techniques.

    We hope this article has helped you understand fiberglass and how to drill it effectively. Always prioritize safety and follow the manufacturer’s recommendations for your tools and equipment. Happy drilling!

  • How to remove bite marks from plastic: Bite Marks Be Gone

    How to remove bite marks from plastic: Bite Marks Be Gone

    Plastic is ubiquitous in our daily lives, used in everything from food packaging to toys to household items. However, one issue that many people face with plastic is the problem of bite marks. Whether it’s a curious pet or a teething toddler, bite marks on plastic can be unsightly and even a health hazard if left uncleaned. Fortunately, with the right tools and techniques, removing bite marks from plastic and restoring it to its original condition is possible. In this article, we’ll explore How To Remove Bite Marks From Plastic with different types of plastic, their vulnerability to bite marks, and the best methods for removing bite marks and preventing future damage.

    How to remove bite marks from plastic

    1. Understanding Plastics

    Before we delve into the different types of plastic, it is essential to understand how plastics are classified. Plastics are categorized based on their chemical composition, which determines their physical properties, such as hardness, strength, and flexibility.

    The most common way of classifying plastics is using the Resin Identification Code (RIC), a numbering system developed by the Society of the Plastics Industry (SPI). The RIC assigns a number from 1 to 7 to different types of plastic, each representing a specific type of plastic.

    2. Types of Plastic

    When it comes to plastics, there are several types available on the market. Each type of plastic has unique characteristics that make it suitable for specific applications. Here are some of the most common types of plastic:

    I. Polyethylene (PE)

    Polyethylene is a thermoplastic that is commonly used for packaging and industrial applications. It is a lightweight material resistant to moisture, chemicals, and impact. There are two main types of polyethylene: high-density polyethylene (HDPE) and low-density polyethylene (LDPE). HDPE is commonly used for containers, pipes, and toys, while LDPE is used for packaging and films.

    II. Polypropylene (PP)

    Polypropylene is a versatile thermoplastic commonly used for packaging, automotive components, and household appliances. It is a lightweight material resistant to heat, chemicals, and moisture. Polypropylene is also easy to process, which makes it a popular choice for injection molding and extrusion.

    III. Polyvinyl Chloride (PVC)

    Polyvinyl chloride is a synthetic plastic commonly used for construction, medical devices, and automotive components. It is a durable material resistant to weather, chemicals, and abrasion. PVC is also easy to process, which makes it a popular choice for extrusion and injection molding.

    IV. Polystyrene (PS)

    Polystyrene is a versatile plastic commonly used for packaging, disposable utensils, and insulation. It is a lightweight material that is easy to process, which makes it a popular choice for injection molding and extrusion. Polystyrene is also resistant to moisture, chemicals, and impact.

    V. Polyethylene Terephthalate (PET)

    Polyethylene terephthalate is a thermoplastic commonly used for packaging, bottles, and fibers. It is a lightweight material resistant to moisture, chemicals, and impact. PET is also easy to process, which makes it a popular choice for injection molding and extrusion.

    Overall, each type of plastic has its unique characteristics and applications. While some plastics are more commonly used than others, choosing the right kind of plastic for your specific application is essential.

    3. Which types are more susceptible to bite marks

    Plastics are ubiquitous in our daily lives, and they are used in a wide range of applications. While plastics have many benefits, they can also be susceptible to bite marks, which can cause damage or create a breeding ground for bacteria. In this section, we will discuss which types of plastics are more susceptible to bite marks and why some plastics are more difficult to clean.

    Polyethylene (PE) and Polypropylene (PP) are two of the most commonly used plastics, and they are both relatively resistant to bite marks. PE and PP are used in various applications, including packaging, food containers, and toys. They are known for their durability and resistance to abrasion. While it is possible to leave bite marks on these plastics, they are less likely to be damaged than other plastics.

    On the other hand, Polyvinyl Chloride (PVC) and Polystyrene (PS) are more susceptible to bite marks. PVC is commonly used in building materials, plumbing, and electrical applications. In contrast, PS is used in disposable cups, food containers, and packaging. Both plastics are brittle and prone to cracking, making them more vulnerable to damage from biting or chewing.

    4. Why some plastics are more difficult to clean

    One reason why some plastics are more difficult to clean than others is because of their surface properties. Plastics with a smooth surface, like PE and PP, are easier to clean because dirt and bacteria are less likely to adhere to the surface. In contrast, plastics with a rough or textured surface, like PVC and PS, can be more challenging to clean because dirt and bacteria can become trapped in the surface crevices.

    Additionally, some plastics may have additives that make them more challenging to clean. For example, plasticizers may be added to PVC to make it more flexible. However, these additives can also make the plastic more prone to attracting dirt and bacteria. These additives may even leach from the plastic and contaminate food or other products.

    In conclusion, while all plastics are vulnerable to bite marks, some are more susceptible than others. PE and PP are less likely to be damaged by biting or chewing, while PVC and PS are more prone to cracking and damage. Additionally, some plastics are more difficult to clean than others due to their surface properties and any additives they may contain. It is essential to consider these factors when selecting plastic products for use in different applications to ensure safety and hygiene.

    5. Tools and Materials You Will Need

    When cleaning plastic, some specific tools and materials can help make the job easier and more effective. Before you begin, it’s essential to take some safety precautions to protect yourself and the plastic you’ll be cleaning.

    I. Safety Precautions Before You Start

    • Wear gloves to protect your hands from cleaning solutions or any chemicals used in the cleaning process.
    • Ensure the area is well-ventilated if using any cleaning agents.
    • Avoid using abrasive materials like steel wool or scouring pads, as they can scratch the plastic surface.

    II. The Essential Tools You Need

    • Soft-bristled brush: Use a soft-bristled brush to gently scrub away any dirt or grime on the plastic surface.
    • Microfiber cloth: A microfiber cloth can wipe down the plastic surface and remove any remaining debris.
    • Vacuum cleaner: A vacuum cleaner can remove any loose debris before cleaning.
    • Spray bottle: A spray bottle can apply cleaning solutions evenly on the plastic surface.

    III. Materials to Have on Hand

    • Water: Water is the most essential cleaning agent that can be used for cleaning plastic.
    • Dish soap: A mild dish soap can be used for washing most plastic surfaces.
    • Vinegar: A solution of vinegar and water can be used for cleaning tough stains or marks on plastic surfaces.
    • Rubbing alcohol: Rubbing alcohol can clean stubborn stains and sanitize plastic surfaces.

    IV. Tips for Choosing the Right Cleaning Products

    • Always check the cleaning product’s label to ensure that it is safe for use on plastic.
    • Avoid using cleaning products that contain bleach or ammonia, as they can damage the plastic surface.
    • If you need help deciding which cleaning product to use, test it on a small, inconspicuous plastic surface area first.

    Using the right tools and materials and taking the necessary safety precautions, you can effectively clean plastic surfaces and keep them looking new for longer.

    6. How to Remove Bite Marks from Hard Plastic

    For hard plastic surfaces like toys or utensils, there are a few different methods you can try to remove bite marks:

    • Toothpaste: Apply toothpaste to the bite mark and scrub gently with a soft-bristled brush.
    • Baking soda: Mix baking soda with water to form a paste, then apply to the bite mark and scrub gently with a soft-bristled brush.
    • Magic Eraser: Wet a Magic Eraser and gently scrub the bite mark until it disappears.

    I. Techniques for Removing Bite Marks from Soft Plastic

    Soft plastics like rubber or silicone can be more challenging to clean. Here are a few methods to try:

    • Vinegar: Soak a cloth in vinegar and place it over the bite mark for several hours. The acidity of the vinegar can help break down the mark.
    • Baking soda: Mix baking soda with water to form a paste, then apply to the bite mark and sit for several hours before rinsing off.
    • Lemon juice: Apply lemon juice to the bite mark and sit for several hours before rinsing off.

    II. Tips for Removing Bite Marks from Flexible Plastic

    Flexible plastics like food storage bags or tubing can be especially tricky to clean. Here are a few tips to try:

    • Boiling water: Fill a pot with water and bring it to a boil. Submerge the plastic item with the bite mark for several minutes, then remove and gently scrub with a soft-bristled brush.
    • Rubbing alcohol: Soak a cloth in rubbing alcohol and place it over the bite mark for several hours. The alcohol can help break down the mark.
    • Vegetable oil: Apply vegetable oil to the bite mark and sit for several hours before gently scrubbing with a soft-bristled brush.

    Using these techniques and being patient can effectively remove bite marks from various plastic surfaces. Always first test any cleaning method on a small, inconspicuous plastic surface area.

    7. Step-by-Step Guide to Removing Bite Marks from Plastic

    Removing bite marks from the plastic can be simple with the right tools and techniques. Here is a step-by-step guide to help you remove bite marks from plastic:

    I. Preparation: Clean and Dry the Plastic

    Before you begin, make sure the plastic surface is clean and dry. Use a mild detergent and warm water to clean the plastic, and then dry it thoroughly with a clean cloth.

    II. Choose the Right Cleaning Method

    Choose the appropriate cleaning method based on the plastic type and the bite mark’s severity. Refer to the previous section for techniques specific to different types of plastic.

    III. Step-by-Step Instructions for Removing Bite Marks

    Depending on the cleaning method you have chosen, follow these steps:

    • Apply the cleaning solution to the bite mark.
    • Use a soft-bristled brush or cloth to scrub the mark gently.
    • Be patient and continue to scrub until the mark disappears.
    • Rinse the plastic thoroughly with water.
    • Rinse and Dry the Plastic

    After removing the bite mark, rinse the plastic thoroughly with water to remove any residue from the cleaning solution. Dry the plastic with a clean cloth to prevent water spots or streaks from forming.
    Always first test any cleaning method on a small, inconspicuous plastic surface area. Also, avoid damaging the plastic using harsh chemicals or abrasive scrubbing tools. With these tips and techniques, you can effectively remove bite marks from plastic and restore its appearance.

    8. Tips and Tricks for Removing Stubborn Bite Marks

    While removing bite marks from the plastic can be straightforward, sometimes it can be more challenging. Here are some tips and tricks for removing stubborn bite marks:

    I. What to Do if the Bite Marks Won’t Come Off

    If the bite marks don’t come off with the standard cleaning methods, try using a more powerful cleaning solution, such as vinegar or baking soda. Mix a small amount of the solution with water and apply it to the bite marks, scrubbing with a soft-bristled brush. Rinse the plastic thoroughly with water after scrubbing.

    II. Techniques for Tackling Deep Bite Marks

    Try using a melamine foam eraser, such as a Magic Eraser, for deeper bite marks. Wet the eraser and gently scrub the bite mark until it disappears. Be careful not to scrub too hard, which can damage the plastic surface.

    III. Tips for Removing Multiple Bite Marks from the Same Area

    If you have multiple bite marks in the same area, use a cotton swab or toothbrush to apply the cleaning solution to each mark individually. This will help you focus on each mark and prevent the cleaning solution from spreading too much.

    Always be gentle when removing bite marks from plastic, and never use harsh chemicals or abrasive tools that can damage the plastic surface. With these tips and tricks, you can tackle even the most stubborn bite marks and restore the plastic’s appearance.

    9. Preventing Bite Marks on Plastic

    Preventing bite marks on plastic can be just as important as removing them. Here are some tips for preventing bite marks on plastic:

    I. How to Discourage Biting Behavior

    If you have a pet that likes to bite plastic objects, it’s important to discourage this behavior. One way to do this is to provide your pet with plenty of chew toys and other appropriate objects to bite and play with. You can also use deterrent sprays, such as bitter apple spray, to discourage your pet from biting certain objects.

    II. Tips for Pet Owners to Prevent Bite Marks on Plastic

    If you have plastic objects your pet is attracted to, try keeping them out of your pet’s reach. This can be done by storing them in a cabinet or on a high shelf. You can also cover the objects with a cloth or place them in a container with a secure lid.

    III. How to Keep Plastic Objects Out of Reach of Curious Pets

    Another way to prevent bite marks on plastic is to keep the objects out of reach of curious pets. This can be done by placing them in a room your pet doesn’t have access to or using baby gates or other barriers to block off certain areas of your home. You can also use deterrent devices like motion-activated alarms to protect your pet from certain objects.

    By following these tips and taking proactive measures to prevent biting behavior, you can help reduce the risk of bite marks on plastic objects in your home.

    10. Cleaning and Maintenance Tips to Keep Bite Marks at Bay

    Cleaning and maintaining your plastic objects is important for preventing future bite marks. Here are some tips to keep bite marks at bay:

    I. Tips for Cleaning Plastic to Prevent Bite Marks

    • When cleaning plastic objects, it’s important to use the right cleaning products and techniques to avoid damaging the plastic. Here are some tips for cleaning plastic to prevent bite marks:
    • Use mild soap and warm water to clean plastic objects. Avoid using harsh chemicals or abrasive cleaners that can scratch the surface of the plastic.
    • Use a soft sponge or cloth to clean the plastic. Avoid using scouring pads or other abrasive materials that can leave scratches or marks on the plastic.
    • Rinse the plastic thoroughly after cleaning to remove any soap residue.

    II. How to Care for Plastic Objects to Prevent Future Damage

    In addition to cleaning, proper care and maintenance can also help prevent future bite marks on plastic objects. Here are some tips for caring for plastic objects:

    • Store plastic objects in a safe place where pets and children can’t access them.
    • Avoid exposing plastic objects to extreme temperatures or direct sunlight, which can cause the plastic to warp or crack.
    • Handle plastic objects carefully to avoid causing scratches or other damage.
    • Replace plastic objects that are cracked or damaged, as these can be more susceptible to bite marks.

    By following these tips for cleaning and maintaining your plastic objects, you can help prevent future bite marks and prolong the life of your plastic items.

    11. Frequently Asked Questions

    I. Can I use household cleaners on plastic?

    It depends on the type of plastic. Some household cleaners may be too harsh and damage certain types of plastic, while others may be safe to use. It’s best to check the cleaner’s label to ensure it’s safe for the type of plastic you are cleaning.

    II. Will bleach damage plastic?

    Bleach can be damaging to some types of plastic, especially if it’s left on for too long or used in high concentrations. It’s best to avoid using bleach on plastic whenever possible and opt for a more gentle cleaner.

    III. How often should I clean plastic objects?

    The frequency of cleaning plastic objects depends on how frequently they are used and how dirty they get. For items that are used daily, like food containers or utensils, it’s a good idea to clean them after each use. They can be cleaned as needed for items used less frequently, such as storage bins.

    IV. Can I use a toothbrush to remove bite marks?

    Yes, a toothbrush can be an effective tool for removing bite marks from plastic. However, it’s important to use a soft-bristled toothbrush and be gentle to avoid causing additional damage.

    V. Can I use heat to remove bite marks?

    Heat can be effective for removing some types of bite marks from plastic. For example, using a hairdryer on low heat can help soften the plastic and make it easier to remove the marks. However, it’s important to be cautious and not overheat the plastic, as this can cause warping or other damage.

    12. Conclusion

    In conclusion, bite marks on plastic objects can be frustrating. However, they can be removed effectively with the right tools and techniques. Hard, soft, and flexible plastics each require different methods for removing bite marks. Choosing the appropriate cleaning method and taking the necessary safety precautions before starting is important. In addition to removing existing bite marks, it’s important to take steps to prevent future marks from occurring. This can be done by discouraging biting behavior and keeping plastic objects out of reach of curious pets. Regular cleaning and maintenance of plastic objects can also help prevent bite marks from forming. Following these tips and tricks, you can keep your plastic objects looking clean and free of bite marks for years.

    Thank you for reading this article; we hope it has been helpful. If you have any further questions or concerns about removing bite marks from plastic, please refer to our FAQs section or consult a professional.

  • How to Start a Stubborn Chainsaw: Get Ready to Cut!

    How to Start a Stubborn Chainsaw: Get Ready to Cut!

    A chainsaw is an essential tool for people who work in forestry, landscaping, and woodworking. However, it can be frustrating when your chainsaw won’t start, especially if you have much work to do. This article will discuss the most common reasons why a chainsaw won’t start and how to troubleshoot and fix the issue. We will cover how to start a stubborn chainsaw and chainsaw maintenance, starting techniques, and troubleshooting tips to help you get your stubborn chainsaw up and running.

    How to Start a Stubborn Chainsaw

    1. From Frustration to Success: Starting Your Chainsaw Like a Pro

    I. Check the Fuel and Oil Levels:

    Before starting your chainsaw, check the fuel and oil levels. A chainsaw that is low on fuel or oil will not start, so it’s essential to ensure that you have enough of both before attempting to start your saw. Check the user manual to determine what fuel and oil your chainsaw requires and fill it up accordingly.

    II. Choke the Chainsaw:

    Choking the chainsaw means restricting the airflow to the carburetor, which helps to create a richer fuel mixture that is easier to ignite. Locate the choke lever and switch it to the “on” position to choke your chainsaw. Check the user manual if you need to find out where the choke lever is located.

    III. Prime the Engine:

    Priming the engine means pumping fuel into the carburetor to help start the chainsaw. To prime the engine, locate the primer bulb (usually located near the fuel tank) and press it several times until you see fuel in the bulb. You may need to prime the engine several times, especially if your chainsaw has been sitting for a while.

    IV. Pull the Starter Cord:

    Once you have choked the chainsaw and primed the engine, it’s time to pull the starter cord. Stand in a stable position and firmly grip the starter cord handle. Slowly pull the cord until you feel resistance, then pull the cord quickly and firmly to start the engine. You may need to repeat this process several times, especially if your chainsaw is cold or has not been used for a while.

    V. Adjust the Carburetor:

    You may need to adjust the carburetor if your chainsaw is still not starting. The carburetor is responsible for mixing the fuel and air in the correct proportions, so if it’s not working correctly, your chainsaw may not start. Adjusting the carburetor can be complicated, so it’s best to consult the user manual or take your chainsaw to a professional for help.

    2. Expert Tips and Tricks

    I. Chainsaw Maintenance

    Regular maintenance is crucial to keep your chainsaw in good condition and to prevent starting issues. Make sure to regularly check the fuel system, spark plug, engine compression, carburetor adjustment, ignition system, air filter, and chain lubrication. Clean and replace any parts that are worn out or damaged. Chainsaws are also known for being quite noisy, so check the muffler and replace it if necessary.

    II. Chainsaw Starting Techniques

    Before starting your chainsaw, wear proper safety equipment, such as eye protection, gloves, and earplugs. Make sure also to follow the manufacturer’s instructions for starting the chainsaw. Usually, you must prime the fuel system by pumping the primer bulb, setting the choke, and pulling the starter rope. Some chainsaws may have a decompression valve that you can use to reduce the engine compression, making it easier to start. If your chainsaw doesn’t start after a few attempts, take a break and let it cool down before trying again.

    III. Chainsaw Troubleshooting

    If your chainsaw doesn’t start, check the fuel system first. Ensure the fuel tank is full, and the fuel mixture is correct. If the fuel is old or contaminated, drain the tank and replace it with fresh fuel. Check the fuel filter and fuel lines for clogs or damage. If everything looks good, move on to checking the spark plug. Remove the spark plug and check the electrode for wear or damage. Clean or replace the spark plug if necessary.

    IV. Chainsaw Fuel System

    The fuel system is one of the most critical components of a chainsaw, and it is often the cause of starting problems. Ensure the fuel tank is full, and the fuel mixture is correct. If the fuel is old or contaminated, drain the tank and replace it with fresh fuel. Check the fuel filter and fuel lines for clogs or damage. Ensure the carburetor is adjusted correctly, as a poorly adjusted carburetor can cause starting issues.

    V. Chainsaw Spark Plug

    The spark plug is responsible for igniting the fuel mixture in the engine. If the spark plug is worn or damaged, the chainsaw won’t start. Remove the spark plug and check the electrode for wear or damage. Clean or replace the spark plug if necessary.

    VI. Chainsaw Engine Compression

    The engine compression is another critical factor that affects the chainsaw’s starting ability. If the engine compression is too high, starting the chainsaw can be challenging. Some chainsaws may have a decompression valve that you can use to reduce the engine compression, making it easier to start.

    VII. Chainsaw Carburetor Adjustment

    The carburetor is responsible for mixing the fuel and air in the correct ratio for combustion. If the carburetor is not adjusted correctly, the chainsaw may not start or run poorly. Check the owner’s manual for instructions on adjusting the carburetor, or take it to a professional if you need more confidence in doing it yourself.

    VIII. Chainsaw Ignition System

    The ignition system is responsible for providing the spark that ignites the fuel mixture in the engine. If the ignition system is not working correctly, the chainsaw won’t start. Check the ignition coil, spark plug wire, and spark plug boot for damage or wear. Ensure that the wiring is properly connected and that there are no loose connections.

    IX. Chainsaw Air Filter

    The air filter prevents dust and debris from entering the engine. If the air filter is clogged, it can reduce the airflow and make it difficult to start the chainsaw. Check the air filter and clean or replace it if necessary.

    X. Chainsaw Chain Lubrication

    The chainsaw chain requires proper lubrication to prevent friction and wear. Make sure that the oil tank is full and that the oil is flowing to the chain. Check the oil filter and oil lines for clogs or damage.

    3. Conclusion

    Starting a stubborn chainsaw can be a frustrating experience. However, following these tips can troubleshoot and fix the issue. Regular maintenance and proper starting techniques can prevent starting problems from occurring. Regularly check the fuel system, spark plug, engine compression, carburetor adjustment, ignition system, air filter, and chain lubrication to keep your chainsaw in good condition. If you need help fixing the problem, take your chainsaw to a professional for repairs. Remember always to wear proper safety equipment when using a chainsaw.

  • How to Keep a Metal Roof Straight: Metal Roofing Mastery

    How to Keep a Metal Roof Straight: Metal Roofing Mastery

    Metal roofing has become a popular option for homeowners and business owners alike. It is known for its durability, longevity, and energy efficiency. However, proper installation and maintenance are key to ensuring that your metal roof lasts for a long time. Keeping your metal roof straight is one of the most important factors in this process. In this article, we will discuss How to Keep a Metal Roof Straight and the various aspects of keeping a metal roof straight, including roofing materials, roof installation, roof support, structural integrity, roof alignment, roof trusses, roofing screws, metal roof panels, roofing insulation, thermal expansion, roofing designs, roofing safety, and roofing contractors.

    How To Keep A Metal Roof Straight

    1. Align and Shine: Tips for Maintaining a Straight Metal Roof

    I. Metal Roofing Materials

    You can choose steel, aluminum, copper, and zinc for metal roofs, among other things. Each type of material has its pros and cons. For example, steel is the most common material for metal roofs because it is cheap, strong, and easy to put up. Aluminum is strong, lightweight, and doesn’t rust, so it’s a great choice for seaside places. Copper is a more expensive element, but it lasts longer and doesn’t need much upkeep. Zinc is also strong, and it can last up to 100 years with the right care.

    II. Roof Installation

    Proper roof installation is crucial for keeping a metal roof straight. It involves several steps, such as laying down the roofing felt, installing the roof trusses, and securing the metal panels. The use of roofing screws is essential to prevent the panels from shifting or warping over time. It is also important to ensure that the metal roof panels are properly aligned, with no gaps or overlaps that could allow water to seep through.

    III. Roof Support and Structural Integrity

    Metal roofing requires proper support to maintain its structural integrity. The roof trusses must be sturdy enough to withstand the weight of the metal roof panels and any snow or wind loads that may occur. Additionally, it is important to ensure that the roof is properly ventilated to prevent moisture buildup and reduce the risk of mold and rot.

    IV. Roof Alignment

    To keep a metal roof straight, proper alignment is crucial. The metal roof panels should be installed straight without buckling or bending. If the panels are not aligned correctly, it can cause water to pool and damage the roof over time. Additionally, it can impact the overall appearance of the roof.

    V. Roof Trusses

    The roof trusses provide support for the metal roof panels. They are typically made from wood or metal and must be designed to withstand the roof’s weight. Ensuring the trusses are properly spaced and secured is important to maintain the roof’s structural integrity.

    VI. Roofing Screws

    Roofing screws are an essential component of metal roofing. They secure the metal roof panels and prevent them from shifting or warping over time. It is important to use the correct type and size of screw for the metal roofing material to ensure a tight fit and prevent leaks.

    VII. Metal Roof Panels

    The metal roof panels are the visible component of the roof and protect against the elements. They come in various shapes and sizes and can be installed in different patterns to create unique roofing designs. Choosing a high-quality metal roofing panel that is resistant to rust and corrosion is important.

    VIII. Roofing Insulation

    Insulation is an important aspect of metal roofing. It helps to regulate the temperature inside the building and reduce energy costs. Choosing the correct type and amount of insulation for your specific climate and building type is important.

    IX. Thermal Expansion

    Metal roofing can expand and contract due to changes in temperature. This thermal expansion can cause the metal roof panels to warp or buckle over time. Proper installation and the use of expansion joints can reduce the impact of thermal expansion on metal roofing. Expansion joints allow the metal roof panels to expand and contract without causing damage to the roof.

    X. Roofing Designs

    Metal roofing can be used to create a variety of unique designs. The panels can be installed in different patterns, such as standing seam, corrugated, or shingle style. Additionally, metal roofing can be painted in various colors to match the style of the building. It is important to choose a design that complements the architecture of the building and provides adequate protection against the elements.

    XI. Roofing Safety

    Roofing safety is crucial when working with metal roofing. Falls from roofs are a common cause of injuries and fatalities in the construction industry. Following safety protocols, such as using fall protection equipment and ensuring the roof is properly secured before beginning work, is important.

    XII. Roofing Contractors

    When installing or repairing metal roofing, choosing a reputable and experienced roofing contractor is important. A qualified contractor will ensure that the roof is installed correctly and provide guidance on proper maintenance to keep the roof straight and in good condition for years.

    2. FAQs(Frequently Asked Questions)

    I. What are the benefits of using metal roofing materials?

    Metal roofing materials have several benefits, including durability, longevity, and energy efficiency. Metal roofs can last up to 50 years or more with proper maintenance and can help reduce energy costs by reflecting heat from the sun.

    II. What is the best way to install a metal roof?

    The best way to install a metal roof is to work with an experienced roofing contractor who can ensure that the roof is properly aligned and supported. Proper installation techniques, such as using roofing screws instead of nails, can also help keep the roof straight and secure.

    III. How can I maintain my metal roof to keep it straight?

    Regular maintenance, such as inspecting the roof for damage, cleaning out debris from gutters and valleys, and replacing damaged panels or screws, can help keep a metal roof straight. Additionally, using expansion joints can help reduce the impact of thermal expansion on the roof.

    IV. What is the importance of roof support in keeping a metal roof straight?

    Roof support, such as using proper trusses and ensuring that the roof is securely attached to the building’s frame, is essential for maintaining the roof’s structural integrity and keeping it straight. Insufficient support can cause the roof to sag or warp over time.

    V. Can metal roofing be used for different roofing designs?

    Metal roofing can be used for various roofing designs, including standing seam, corrugated, and shingle styles. Additionally, metal roofing can be painted in different colors to match the style of the building. It is essential to choose a design that complements the architecture of the building and provides adequate protection against the elements.

    3. Conclusion

    Keeping a metal roof straight is essential for its longevity and durability. Proper installation, maintenance, and support are crucial to maintaining the roof’s structural integrity. Choosing high-quality materials and working with experienced roofing contractors is important to ensure a properly aligned and secure metal roof. With the right techniques and attention to detail, a metal roof can provide protection and energy efficiency for many years.

  • How to Install a Garage Door Opener: Can You Do It Yourself?

    How to Install a Garage Door Opener: Can You Do It Yourself?

    Installing a garage door opener may seem daunting. However, it can be done easily and efficiently with the right tools and instructions. This article will guide you on How to Install a Garage Door Opener step-by-step, from preparing for the installation to testing the garage door opener. We will also cover some troubleshooting and maintenance tips to ensure that your garage door opener continues functioning smoothly for years to come. So, let’s start and learn how to install a garage door opener easily.

    Importance of Installing a Garage Door Opener

    • Convenience: One of the primary reasons for installing a garage door opener is convenience. With a garage door opener, you no longer have to get out of your car to manually open or close the garage door. Press a button on the remote control, and the door will open or close automatically. This is particularly useful during bad weather when your hands are full or in a hurry.
    • Security: Another important reason to install a garage door opener is security. Garage door openers provide your home with an added layer of security by preventing unauthorized entry. With a garage door opener, you can keep your garage door locked and secure, deterring burglars and intruders.
    • Safety: Garage door openers also provide safety benefits. They eliminate the need for you to lift heavy garage doors manually, which can be dangerous and cause injuries. With a garage door opener, you can avoid accidents and injuries from lifting heavy doors.
    • Energy Efficiency: Garage door openers also provide energy efficiency benefits. They can help keep your garage insulated and prevent heat loss, saving you money on your energy bills. With a well-insulated garage, you can also protect your vehicles and belongings from extreme temperatures and weather conditions.

    Benefits of Having a Garage Door Opener

    • Increased Home Value: Installing a garage door opener can increase the value of your home. A garage door opener is a desirable feature that many homebuyers look for when purchasing a home. By installing a garage door opener, you can increase the resale value of your home.
    • Enhanced Curb Appeal: A garage door opener can also enhance your home’s curb appeal. With a sleek and modern garage door opener, you can improve the overall look and feel of your home’s exterior.
    • Improved Functionality: Garage door openers improve functionality compared to manual garage doors. With a garage door opener, you can open your garage door more efficiently and effectively.
    • Remote Access: With a garage door opener, you can access your garage remotely using a smartphone app or remote control. This can be particularly useful when you are away from home and must let someone in or out of your garage.
    • Reduced Noise: Garage door openers are designed to operate quietly and smoothly. With a garage door opener, you can avoid the loud and disruptive noise often accompanying manual garage doors.

    Types of Garage Door Openers

    Garage door openers are available in several types, each with unique features and benefits. Here are the five main types of garage door openers:

    • Chain-Drive Openers: Chain-drive openers are the most common type of garage door opener. They use a metal chain to pull the door along a track, allowing it to open and close. Chain-drive openers are reliable and affordable, but they can be quite noisy.
    • Belt-Drive Openers: Belt-drive openers use a rubber belt instead of a metal chain to move the garage door. They are quieter than chain-drive openers and require less maintenance but are usually more expensive.
    • Screw-Drive Openers: Screw-drive openers use a threaded steel rod to move the garage door. They are quiet and require minimal maintenance but are not as common as chain-drive or belt-drive openers.
    • Direct-Drive Openers: Direct-drive openers use a motor to move the garage door along a stationary chain. They are the quietest and most reliable type of garage door opener, but they can be more expensive than others.
    • Jackshaft-Drive Openers: Jackshaft-drive openers mount on the wall beside the garage door instead of on the ceiling. They use a motor to turn a gear that moves the garage door. Jackshaft-drive openers are quiet and space-saving, but they can be more expensive than other types.

    Each garage door opener type has unique features and benefits, so it’s important to consider your needs and preferences when choosing an opener for your garage.

    Tools Required for the Installation

    You will need several tools to ensure a safe and proper installation when installing a garage door opener. Here are the tools that are typically required for the installation:

    • Power drill: A power drill is necessary for drilling holes in the ceiling or wall to mount the garage door opener.
    • Socket wrench set: A socket wrench set will be needed to tighten bolts and screws during installation.
    • Stepladder: A stepladder is necessary to reach the ceiling or wall where the garage door opener will be installed.
    • Level: A level will be used to ensure that the garage door opener is installed straight.
    • Measuring tape: A measuring tape will be needed to measure and mark the location of the garage door opener.
    • Screwdriver: A screwdriver will attach the mounting bracket to the ceiling or wall.
    • Pliers: Pliers may be needed to assist in removing or attaching certain parts during installation.

    Having these tools readily available will help ensure that your garage door opener installation goes smoothly and is completed safely and properly.

    Preparing for Installation

    Before installing a new garage door opener, properly preparing for the installation process is important. Here are some steps to take when preparing for a garage door opener installation:

    • Measuring the garage door: Before purchasing a new garage door opener, it is important to measure the height and width of your garage door to ensure that you purchase the right size opener for your door.
    • Checking the ceiling for clearance: Make sure you have enough clearance on the ceiling to mount the garage door opener. If you have a low ceiling, purchase a jackshaft opener that mounts on the wall instead of the ceiling.
    • Removing the old garage door opener: If you are replacing an old one, make sure to remove it before installing the new one. This may require disconnecting the opener from the garage door and unmounting it from the ceiling.
    • Checking the garage door for balance: It is important to ensure it is balanced before installing a new opener. An unbalanced door can put extra strain on the opener and cause it to wear out more quickly. To check the balance of your garage door, disconnect the opener and manually lift the door halfway. The door should stay in place without moving up or down. If the door is not balanced, you may need to adjust the springs or call a professional to help.

    By preparing for a garage door opener installation, you can help ensure that the installation process goes smoothly and that your new opener is installed safely and properly.

    Installing the Garage Door Opener

    Installing the Garage Door Opener

    Now that you have prepared for your garage door opener installation, it’s time to start the installation process. Here are the steps to follow for a typical garage door opener installation:

    Step 1: Assemble the Rail and Trolley

    Assemble the rail and trolley according to the manufacturer’s instructions. This will involve attaching the trolley to the rail and inserting the rail into the motor unit.

    Step 2: Install the Rail and Trolley

    Position the rail and trolley assembly on the ceiling or wall, ensuring it is level and properly aligned. Use the provided mounting hardware to secure the rail to the ceiling or wall.

    Step 3: Attach the Motor Unit

    Attach the motor unit to the ceiling or wall near the center of the garage. Ensure the motor unit is level and aligned with the rail and trolley assembly.

    Step 4: Install the Chain or Belt

    Install the chain or belt according to the manufacturer’s instructions. Ensure the chain or belt is properly tensioned and runs smoothly on the sprocket or pulley.

    Step 5: Connect the Opener to the Door

    Attach the opener arm to the garage door and adjust it to align and level properly. Connect the arm to the trolley using the provided hardware.

    Step 6: Install the Safety Sensors

    Install the safety sensors according to the manufacturer’s instructions. These sensors are typically mounted near the bottom of the garage door and will stop the door from closing if an object is detected in the door’s path.

    Step 7: Install the Wall Control Unit

    Install the wall control unit near the entry door to the garage. This unit will allow you to open and close the garage door from inside the garage.

    Step 8: Test the Garage Door Opener

    Test the garage door opener to make sure that it is working properly. Use the wall control unit or the remote control to open and close the garage door several times, ensuring the door operates smoothly, and the safety sensors work correctly.

    By following these steps, you can install a garage door opener safely and properly and enjoy its convenience and security.

    Troubleshooting Tips

    You may need help with your garage door opener despite following the installation process carefully. Here are some troubleshooting tips for common issues:

    • Garage door opener not responding to remote: First, check the batteries in the remote control and replace them if needed. If the batteries are not the issue, check the remote’s programming by referring to the manufacturer’s instructions. If the remote still doesn’t work, it could be an issue with the opener’s circuit board or the remote itself. You may need to contact a professional for further assistance.
    • Garage door opener making strange noises: If your garage door opener is making unusual noises, it could be due to loose hardware or worn-out parts. Check the mounting hardware and tighten any loose bolts or screws. Lubricate any moving parts, such as the rollers, hinges, and springs, with a silicone-based lubricant. If the noise persists, it could be due to worn-out gears or bearings, and you may need to contact a professional for repair or replacement.
    • Garage door opener not closing properly: If your garage door opener is not closing properly, first check the safety sensors. Ensure that they are properly aligned and clean and that nothing obstructs their view. Check the garage door’s alignment and balance to see if the sensors work properly. Adjust the tracks or springs to ensure the door is properly aligned and balanced. If the problem persists, it could be due to a faulty opener or motor. You may need to contact a professional for repair or replacement.

    Following these troubleshooting tips, you can address common issues with your garage door opener and ensure that it works properly and safely.

    Maintenance Tips

    To ensure the longevity and proper functioning of your garage door opener, it’s essential to perform regular maintenance. Here are some maintenance tips to keep in mind:

    Lubricating the moving parts:

    The moving parts of your garage door opener, such as the rollers, hinges, and springs, must be lubricated regularly to prevent them from wearing out. Use a silicone-based lubricant and apply it to the moving parts, being careful not to apply too much.

    Checking the safety sensors:

    The safety sensors of your garage door opener are essential for preventing accidents and injuries. Regularly check that the sensors are properly aligned and clean and that nothing obstructs their view. If the sensors are not working properly, the door may not open or close correctly or reverse unexpectedly.

    Testing the garage door balance:

    A garage door that is out of balance can cause strain on the opener and lead to premature wear and tear. To test the balance of your garage door, disconnect the opener and manually open the door halfway. If the door stays in place, it is properly balanced. If it falls or rises, it needs to be adjusted by a professional.

    By performing regular maintenance on your garage door opener, you can prevent issues from arising and prolong the opener’s life. It’s recommended to perform these maintenance tasks at least once a year or more frequently if you use the garage door frequently.

    Frequently Asked Questions

    How long does it take to install a garage door opener?

    The time it takes to install a garage door opener can vary depending on the type of opener and the complexity of the installation. On average, it can take anywhere from 4-6 hours to install a garage door opener.

    Can I install a garage door opener by myself?

    While it is possible to install a garage door opener by yourself, it is recommended that you have some experience with DIY projects and electrical work. Suppose you need more clarification about your ability to install the opener safely and correctly. In that case, it’s best to hire a professional.

    How much does it cost to install a garage door opener?

    The cost of installing a garage door opener can vary depending on the type of opener, the complexity of the installation, and the location. On average, installing a garage door opener can range from $200-$500.

    Can a garage door opener be installed on any type of garage door?

    Most garage door openers can be installed on most types of garage doors. However, it’s important to check the specifications of the opener to ensure that it is compatible with your garage door.

    Do I need to replace my garage door if I want to install a garage door opener?

    In most cases, you do not need to replace your garage door if you want to install a garage door opener. However, suppose your garage door is old and worn out. In that case, replacing it at the same time as the opener may be a good idea to ensure that everything is working properly.

    Conclusion

    Installing a garage door opener can be relatively easy if you follow the correct steps and have the necessary tools. You can successfully install a garage door opener by assembling the rail and trolley, attaching the motor unit, and connecting the opener to the door.

    A garage door opener has numerous benefits, including increased convenience, improved safety and security, and increased home value. It is important to remember to regularly maintain your garage door opener by lubricating the moving parts, checking the safety sensors, and testing the garage door balance. With these steps, you can enjoy the benefits of a well-functioning garage door opener for years.

  • How To Stop Wind Whistling Through Door: Seal the Deal

    How To Stop Wind Whistling Through Door: Seal the Deal

    Many people find it annoying and stressful when the wind whistles through the door. Not only does it make the place chilly, but the loss of heat or air conditioning can also cause your energy bills to go up. You can stop the wind blowing through your door by taking a few steps. In this post, we will show you how to stop wind whistling through door with step by step.

    How To Stop Wind Whistling Through Door

    No More Annoying Whistles: How to Seal Your Door and Keep the Wind Out

    Step I: Check for Gaps

    Check for gaps. This is the first step to stop wind from blowing through your door. Check the door and its frame for gaps, holes, or cracks that could be letting air through. Use a flashlight to help you find places around the door where light is coming in. Pay close attention to the bottom of the door, as this is where most of the gaps are.

    Step II: Apply Weather Stripping

    Once you’ve found any holes or cracks, you can start putting weather stripping in them. Weatherstripping is a stretchy material that can seal spaces around the door. Weather stripping comes in many forms, including foam tape, rubber seals, and door sweeps. Pick the kind of weather stripping that fits your wants and your budget the best.

    Step III: Install a Door Sweep

    You should install a door screen if your door has a big gap at the bottom. A door sweep is a piece of metal or plastic connected to the bottom of a door. It makes a seal between the door and the opening so air can’t get through. You can find door sweeps at most hardware shops that are easy to put in.

    Step IV: Seal the Sides of the Door

    You may also need to seal the sides of the door after you’ve sealed the bottom. Fill any spaces between the door and the frame with weather stripping or glue. This will make it harder for air to get through and stop the wind from whistling.

    Step V: Install a Storm Door

    You should install a storm door if your door is old or if you live in a place where the weather is terrible. A storm door is a second door that goes outside your main door. It adds another layer of insulation and safety from the weather.

    2. Frequently Asked Questions (FAQ)

    I. How do I know if there are gaps around my door?

    Close your door and shine a flashlight around the edges of the frame to see if there are any holes. If you can see the light coming in, a hole probably needs to be closed.

    II. What type of weather stripping should I use?

    What kind of weather stripping you use depends on the gap’s size and where it is. Foam tape is easy to use and works well for smaller gaps, but door sweeps are better for bigger gaps at the bottom of the door.

    III. Can I install weather stripping myself?

    Weatherstripping is easy to put in, so you can do it yourself. Most weatherstripping has a sticky back that lets you stick it to the door or frame.

    IV. Do I need a storm door to stop wind whistling?

    Even though a storm door can add another layer of protection, it’s not always necessary. If your door and frame are in good shape and you have weather stripping on them, you may not need a storm door.

    V. Will stopping wind whistling reduce my energy bills?

    Yes, stopping the wind from whistling can help lower your energy bills by keeping heat or air conditioning from leaving through gaps around the door. This can make a home use less energy and save money on utilities.

    3. Conclusion

    In conclusion, wind whistling through the door is a problem that can be frustrating for many homes. But if you follow the steps in this piece, you can stop the wind from whistling through your door for good. Make sure to check for gaps, add weather stripping, install a door sweep, and seal the sides of the door. If you need to, you could also install a storm door. Following these steps can make your home more comfortable and use less energy.

  • How To Make a Fake Security Camera Look Real

    How To Make a Fake Security Camera Look Real

    Regarding home security, having a security camera is an effective way to deter burglars and intruders. However, not everyone can afford a real security camera system; some may not want to spend money on a professional installation. That’s where fake security cameras come in handy. Fake security cameras are an inexpensive and simple solution to make your home appear more secure. But how can you make a fake security camera look real? This article will explore some tips and tricks on How To Make a Fake Security Camera Look Real.

    How To Make A Fake Security Camera Look Real

    1. Faking It: A Step-by-Step Guide to Creating a Realistic Fake Security Camera

    I. Choose a High-Quality Fake Security Camera

    Choosing a high-quality fake security camera is the first step to making it look real. Look for a camera that is designed to mimic the appearance of a real security camera, with features such as a blinking red light, a natural casing, and a visible lens. A good fake security camera should also be weather-resistant and durable.

    II. Install the Camera in a Visible Location

    Placing your fake security camera is crucial in making it look real. Install the camera in a visible location, such as above your front door, near your garage, or backyard. Ensure it is easily visible from the street so it looks like it is monitoring your property.

    III. Make Sure the Camera is Positioned Correctly

    The positioning of your fake security camera is also important. Ensure the camera is positioned at the right angle so it looks like it is monitoring the area. A good angle is usually around 45 degrees downward, giving a clear view of the area without appearing too intrusive.

    IV. Add Realistic Wiring and Accessories

    Add some realistic wiring and accessories to make your fake security camera look even more convincing. This includes adding a power cord leading to a nearby outlet and mounting brackets and screws. You can also add a warning sign that says “24-hour surveillance” or “Smile, you’re on camera.”

    V. Ensure the Camera Appears to be Functioning

    A fake security camera that doesn’t appear to be functioning is a dead giveaway that it’s fake. To make it look real, ensure the camera functions by adding a blinking red light or a spinning motor. You can also add a small speaker that emits a clicking sound to make it sound like the camera is recording.

    VI. Maintain the Camera

    Keeping your fake security camera clean and well-maintained is important to make it look real. Clean the camera regularly to remove any dirt or debris that may have accumulated on it. Also, ensure the batteries are always fully charged so the camera is always ready to function.

    VII. Use Multiple Fake Cameras

    Using multiple fake security cameras can make your home appear even more secure. Install several cameras around your property, and make sure they are visible from the street. This will make it appear like you have a full security camera system, which can deter burglars and intruders.

    2. Maintaining Your Fake Security Camera

    So, you’ve set up your fake security camera, and it’s doing its job of deterring potential intruders. But, just like a real security system, it’s important to maintain your fake camera to ensure that it looks realistic and functions properly. Here are some tips for maintaining your fake security camera:

    I. Cleaning your fake security camera

    Regularly cleaning it is important to keep it looking authentic. Use a soft cloth to wipe down the lens and casing of the camera and remove any dirt or debris that may have accumulated on it. If the camera is placed in an area exposed to the elements, such as rain or snow, it may need to be cleaned more frequently.

    II. Replacing batteries

    If your fake security camera has a blinking red light, it likely requires batteries. Check the batteries regularly and replace them as needed to ensure that the light continues to blink. A camera with a dead battery can appear suspicious and reveal that it is fake.

    III. Making sure it looks like it’s being maintained

    A fake security camera that appears neglected or in disrepair can tip off potential intruders that it is not real. To maintain the illusion of a functioning security system, periodically adjust the camera’s angle and ensure it looks like it’s being maintained. Additionally, consider adding signs or stickers that indicate the presence of a security system to enhance the illusion further.

    By following these simple maintenance tips, your fake security camera will continue to serve as an effective deterrent against potential intruders. Remember, the goal is to create the illusion of a functioning security system, so keeping up appearances is important.

    In conclusion, a fake security camera can be a cost-effective and easy way to enhance the security of your home or business. Choosing a high-quality fake camera, installing it strategically, and maintaining it regularly can create the illusion of a functioning security system without breaking the bank. And, if the sight of your fake camera deters a potential intruder, it’s just as effective as a real one.

    3. Alternatives to Fake Security Cameras

    While fake security cameras can be a cost-effective solution for enhancing the security of your home or business, they do have limitations. Here are some alternatives to consider:

    I. Understanding the limitations of fake security cameras

    While they can help deter potential intruders, they do not replace an entire security system. They also do not provide any actual security footage or alert authorities in the event of a break-in. It’s important to understand the limitations of fake cameras before relying solely on them for your security needs.

    II. Other home security options

    Many other options are available that can provide actual security footage, alert authorities in the event of a break-in, and offer more advanced features such as motion detection and remote access. Options include:

    • Wired or wireless security cameras
    • Smart home security systems
    • Alarm systems
    • Door and window sensors
    • Motion sensors

    3. How to choose the best security system for your home

    When choosing a security system, consider factors such as the size and layout of your home, your budget, and your specific security needs. It’s important to research, read reviews, and compare features and prices before deciding. Additionally, consider consulting with a professional security company to help determine the best security system for your needs.

    In conclusion, while fake security cameras can be a cost-effective solution for enhancing the security of your home or business, they do have limitations. Many other home security options can provide actual security footage, alert authorities in the event of a break-in, and offer more advanced features. When choosing a security system, it’s important to consider your specific security needs and research to ensure you choose the best option for your home.

    4. Legal Considerations

    While fake security cameras can be useful for deterring potential intruders, it’s important to understand the legal considerations before installing them. Here are some important things to consider:

    I. The legality of fake security cameras

    In general, it is legal to use them as long as they are not being used to invade someone’s privacy or deceive law enforcement. However, it’s important to understand that laws vary by state and locality, so it’s important to research the laws in your area before installing fake security cameras.

    II. Understanding your state’s laws

    Each state has laws regarding using fake security cameras, and some localities may have different laws or regulations. It’s important to research the laws in your area and ensure that you comply with them.

    III. Potential consequences of using fake security cameras

    If you use fake security cameras in a way that violates someone’s privacy or deceives law enforcement, you could face legal consequences. In addition, if your fake security cameras give someone a false sense of security and they are subsequently victimized, you could face liability for their damages.

    In conclusion, while it is generally legal to use fake security cameras, it’s important to understand the laws in your area and ensure that you are using them in a way that does not violate anyone’s privacy or deceive law enforcement. Additionally, if you use fake security cameras, it’s important to ensure they do not give someone a false sense of security and potentially leave you liable for damages.

    5. FAQs(Frequently Asked Questions)

    I. Are fake security cameras effective?

    Fake security cameras are effective in deterring burglars and intruders. They create the impression that your home is being monitored, making potential intruders think twice about breaking in.

    II. Can fake security cameras be used indoors?

    Yes, fake security cameras can be used indoors as well as outdoors. They are a great way to create the illusion of a security system without installing one.

    III. What are some features to look for in a high-quality fake security camera?

    A high-quality fake security camera should have features such as a blinking red light, a natural casing, a visible lens, and be weather-resistant and durable.

    IV. How often should I clean my fake security camera?

    It would be best to clean your fake security camera regularly to remove any dirt or debris that may have accumulated. How often you clean depends on your location and how dirty it gets, but once a month is a good general guideline.

    V. Are fake security cameras legal?

    Yes, fake security cameras are legal in most jurisdictions. However, it’s important to note that if you use a fake security camera to monitor employees or customers, you may need to inform them that the camera is not real.

    VI. Are fake security cameras legal?

    The legality of fake security cameras is a common concern among homeowners. While the use of fake security cameras is generally legal, there are certain legal considerations that you need to be aware of before using them to enhance your home security.

    6. Conclusion

    A fake security camera is an effective and inexpensive way to make your home appear more secure. Following the tips and tricks outlined in this article, you can make your fake security camera look real and convincing. Remember to choose a high-quality fake camera, install it in a visible location, and add realistic wiring and accessories. Doing so can deter potential burglars and intruders and keep your home safe and secure.