How well you use a drill press is usually influenced by several factors. But also, using it the right way will have a positive impact on the results.
If you follow the right steps, your chances of doing it right are enhanced. This guide will help you understand more about how to use a drill press.
However, you need to understand that controls vary from one model to another, even though several elements remain the same across the models.
Most importantly, the instructions that the manufacturer provides should serve as one of the primary sources of guidance for you. Remember to unplug the drill press from the main before you begin.
1. What is a Drill press?
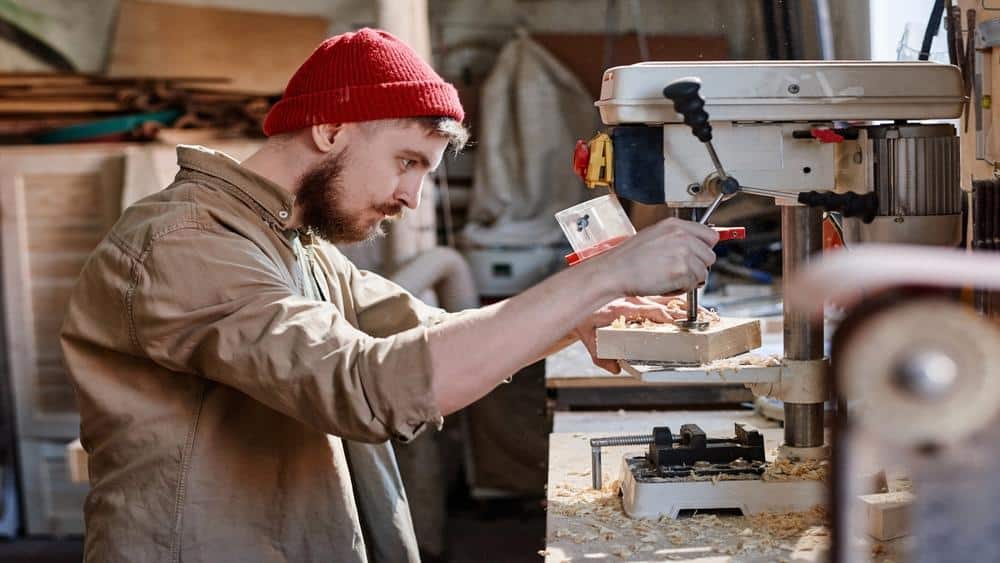
A drill press is a powerful tool used to create holes in materials during construction or in a workshop. One of the things that set the use of this tool apart from using other hole drilling methods is that it makes it possible for you to create the holes in a controlled and highly accurate way.
A drill press is made up of various parts, including the base, column, table, and head. The head contains the drilling equipment and the motor that runs it. This tool is suited for drilling larger holes more precisely and on a large scale.
2. Drill Press Safety Rules
There are several safety precautions you should follow while using a drill press. They include:
I. Wearing Safe Cloth(Optional)
Creating holes in metal, especially when using a drill press might be dangerous if you don’t have protective attire. Wear a thick apron that will protect your body while making the drills. However, avoid long garments that can entangle in the work area.
II. Wear goggles for eye protection
When operating a drill press, some sharp tiny pieces of metal might fly off the working space. If such parts enter your eyes, it might be tough to remove those, hence causing pain and eye problems.
It is advisable to wear goggles for the protection of your eyes. Besides, choose goggles that are translucent to protect you against the harsh light beams from the working surface.
III, Wear Ear Protector(Optional)
You don’t have to damage your eardrums while making drills on metal or hard surfaces. Wear ear protectors to avoid damaging your eardrums.
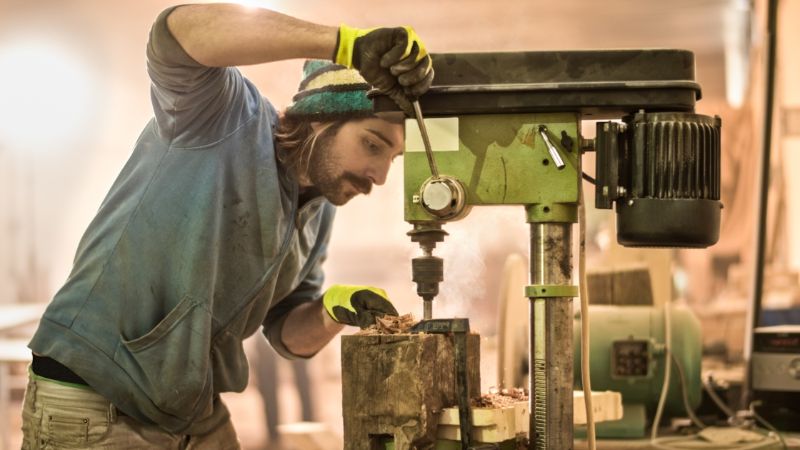
IV. Wear gloves
Always use gloves when using the drill press. when drilling you are more likely to cut your hand with a sharp metal object or get hot metal chips in your hand and get blisters.

3. Steps to Follow to Use a Drill Press
I. Setting Up
You need to set it up properly to start using a drill press. Adjust the drill press table and height to suit your comfort and the workpiece. Choose the drill bit for the desired hole size and securely install it in the chuck. Adjust the speed and depth settings based on the material and hole requirements, ensuring optimal drilling performance.
II. Speed Set
You begin by adjusting the speed of the drill press. Achieving this requires you to control the speed of most of these tools with the drive belt, moving it from pulley to pulley. The rate of the spin determines the sizes of these pulleys. The rate increases with the decrease in the size of the lifts.
Different materials also need varying drilling speeds. For instance, drilling metal requires a slower rate of spin. On the other hand, drilling wood requires a faster spin speed. Therefore, choose the right gear depending on the material’s nature. You can consult the user’s manual for more guidance.
Never use your hand while cleaning string swarf, use little metal or wooden stick to clean that junk even you can use a brush for this.
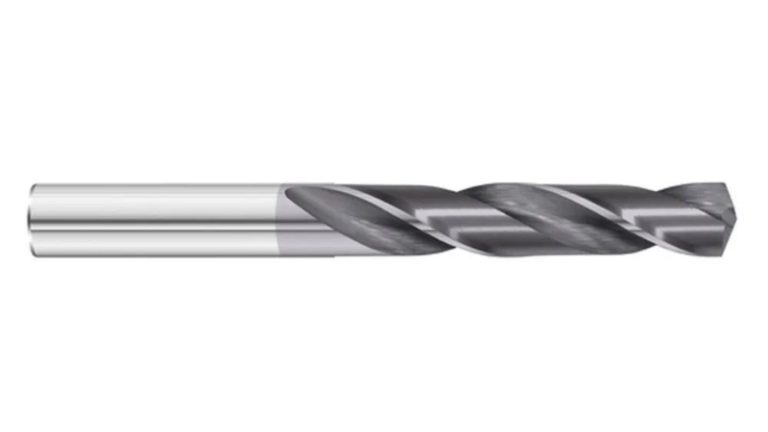
III. Bit Fitting
The next step involves drill bit fitting. When putting the bit in place, you begin by opening the chuck so that you can slide the bit right into it. Once the bit is in place while snugging the chuck with your hand holding the shaft of the bit, use the key to tighten the three jaws of the chuck, which you should remove at this point. If you do not, it would be dangerous when you will be turning on your drill.
This is the best time to remove it, and you should remember that for the sake of everyone’s safety. Also, when you want to drill large holes, you should first drill a pilot hole, which is usually smaller.
IV. Table Adjustment
You need to adjust your drill table to a height appropriate for each function. Different drill press models have different table designs. Therefore, the way to control one may differ from another. In some drill press models, the table moves with ease once you free it with the fastening levers. In other models, adjusting the table is done by the use of a crank.
Referring to the manufacturer’s guide or user’s manual can help you out, especially if you are not sure how to adjust it right. When setting the table, consider your height, and the nature of the drilling task at hand. The accuracy of the adjustment heightens the chances of success.
V. Gauge the Depth
This step is not always necessary, but it is all determined by the nature of your drilling task or project. For instance, when drilling simple holes in stocks or wood, gauging your depth might not be necessary. However, when creating a stopped hole with a fixed bottom, you need to estimate the extent.
The depth gauging occurs at the threaded rod used to control the distance of the spindle when drilling. You can gauge the extent by dropping the bit until it reaches your desired length or depth.
Then, adjust the knurled nuts, usually found at their depth gauge, until they get to the right stopping point. The pair of knurled nuts have different functions. You use the first nut to bring the spindle to a halt, and the one to lock the first in position.
VI. Secure your Workplace
You must adequately secure whatever material you want to drill a hole in before you begin. Before you power on or use the drill press, make sure you fix the workplace in place. If you fail to secure it correctly, as the bit spins in the workplace, the tool may spin the material.
The worktable has clamps put in place for this purpose. Use them to hold the material that you are drilling tightly in position for better drilling processes and results. You can choose between clamping the workplace to your drill’s worktable or simply bracing it against the column for support.
Clamps prevent accidents, so make sure everything is stiff before drilling.
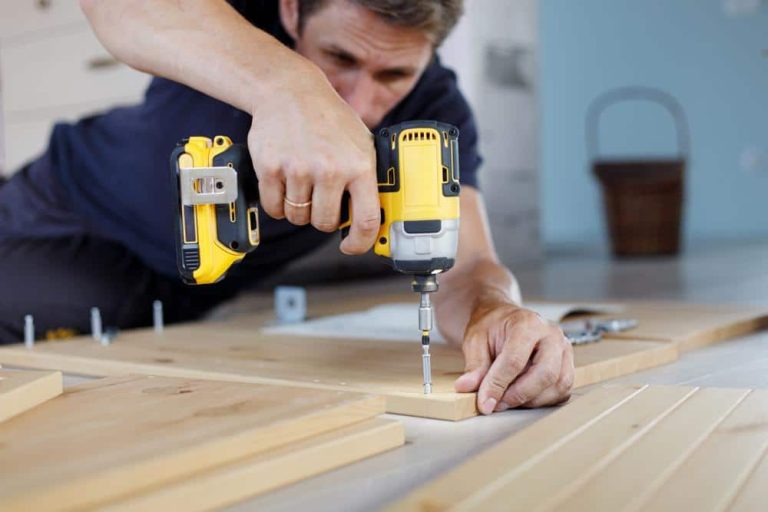
VII. Start Drilling
Stand comfortably and balanced, aligning yourself with the drill press. Position the workpiece on the table and adjust the drill bit to align perfectly with the desired drilling spot. Engage the drill press by activating the power switch, and with steady hands, apply consistent downward pressure on the handle to start drilling. Release the pressure once the drilling is complete, and turn off the drill press.
Avoid loose clothing, watches, bracelets, and neck chains, if you have long hair, tie it when using a drill press.
VIII. Drilling Techniques and Tips
When drilling, maintain a consistent and controlled pressure to ensure a smooth drilling process. Different materials require specific techniques. For instance, when drilling metal, use cutting fluid to reduce heat and prolong the lifespan of the drill bit. For wood, apply gentle pressure to prevent splintering. To achieve clean and accurate holes, start with a pilot hole, especially for larger drill bits.
4. Problems and their solutions to users encounter when using a drill press
Using a drill press can greatly simplify your drilling tasks, but it may present some challenges like any tool. Understanding users’ common problems when using a drill press and their solutions can help you overcome these issues and achieve optimal results. Here are a few problems you might encounter and their corresponding solutions:
I. Wobbling or Vibration
a. Problem
One common issue with a drill press is wobbling or excessive vibration during operation. This can affect the accuracy of your drilling and even lead to damage or breakage of the drill bit.
b. Solution
Ensure the drill press is properly secured to a stable surface. Check that all the components, including the table, column, and base, are securely tightened. Use the appropriate drill speed for the material you are drilling to minimize vibration.
II. Inaccurate Drilling Depth
a. Problem
If your drill press fails to achieve the desired drilling depth consistently, it can be frustrating and affect the quality of your work.
b. Solution
Calibrate the depth stop on your drill press to ensure accurate and consistent drilling depth. Follow the manufacturer’s instructions to adjust the depth stop and test it on a scrap piece before proceeding with your project. Regularly check and readjust the depth stop as needed.
III. Drilling Burn Marks
a. Problem
When drilling certain materials, such as wood or plastics, you may notice burn marks around the drilled hole. This can detract from the overall appearance of your workpiece.
b. Solution
To avoid burn marks, use a sharp drill bit specifically designed for your drilling material. Ensure that the drill bit is clean and free from debris. Applying cutting fluid or a lubricant while drilling can also help reduce friction and heat buildup, thereby minimizing burn marks.
IV. Difficulty in Securing Small Workpieces
a. Problem
Holding small or irregularly shaped workpieces securely in place can be challenging, especially when using a drill press.
b. Solution
Use a drill press vise or clamps to firmly secure small or irregularly shaped workpieces. This will prevent them from spinning or moving during drilling. Consider using auxiliary support, such as a backing board or sacrificial material, to provide additional stability and prevent tear-out.
V. Chip Clogging
a. Problem
Chip clogging can occur when drilling deep holes or working with materials that produce a significant amount of chips or debris. This can hinder the drilling process and affect the performance of the drill press.
b. Solution
Periodically withdraw the drill bit while drilling to clear away accumulated chips and debris. Using a drill press with a built-in chip evacuation system or attaching a vacuum cleaner can help effectively remove chips and maintain a clean workspace. Additionally, wearing a dust mask can protect you from inhaling airborne particles.
VI. Snapping or Breaking of Drill Bits
a. Problem
Drill bits can sometimes snap or break during drilling, especially if excessive force or incorrect techniques are used.
b. Solution
Avoid using excessive force when drilling and let the drill bit do the work. Ensure that you use the appropriate drill bit for the drilled material. If a drill bit breaks or snaps, turn off the drill press and carefully remove the piece using pliers or a broken tap extractor. Replace the drill bit with a new one before resuming your work.
VII. Lack of Precision
a. Problem
If your drill press fails to provide the level of precision required for your project, it can be frustrating and impact the overall quality of your work.
b. Solution
Check that all components of the drill press, such as the chuck, table, and depth stop, are properly aligned and tightened. Lubricate moving parts regularly to ensure smooth operation. Additionally, take your time to align the workpiece and the drill bit
5. Additional Drill Press Benefits
I. Sanding
You can use a drill press in place of an oscillating spin sander, which works best for sanding curved cuts from a jigsaw or bandsaw. As long as your drill press has a barrel sander attachment, you can use it for sanding, and it will work well. Just like you adjust its drilling speed, you can also change the spindle sanding speed.
II. Deburring
The bottom edge of drilled holes often contains burrs, unlike the top side, which is usually clean. To remove these burrs, you need to use a deburring tool. You can use a drill press to insert a deburring tool into the hole and then moderate pressure. Run the device around the edges of the holes to deburr them
III. Reaming
A reamer is generally used where higher precision is needed, whether for interference or slip fits. Typically, drill presses drill holes within two-thousandths of one-inch diameter accuracy. However, where you need higher precision than this, you can use a reamer. You can use a reamer with a drill press to drill holes.
IV. Mortises
If you want to cut mortises, you need a specialist machine for it. There are machines for it, but you can improvise whenever you lack one. You can use a drill press to create mortises. There are lots of fantastic drill presses that come with a hollow chisel mortising attachment.
6. Things to Consider Before Buying Drill Press
There are many things to consider while buying a drill press. Here we explained the top four features short.
I. Which Projects Would Use This For
There are so many things to do with a drill press. The nature of your work and the variety of projects you expect to use it on should guide you in choosing the right drill press. If your projects need a high degree of drilling accuracy or precision, select a drill press that can deliver just that.
Also, choosing a drill press that can be used for other functions such as sanding or mortising would have its advantages that you should consider too.
II. How Much It Cost
The cost of the drill press can be the reason for choosing it or leaving it. You need to consider your budget when choosing a drill press. If its price falls within your preset budget and it meets other desired standards, then you can purchase it. Also, you need to consider its operating cost, including power consumption.
III. Drill Press Table
The quality, size, and adjustment method of the table are just a few of the things that you can consider when looking at the worktable. You will need to choose a drill press that has a table that makes your work easier and contributes to the degree of success. The position and quality of the clamps can be considered as part of the table.
IV. Horsepower
This is one of the most important factors to consider when choosing a drill press. You must select a machine whose power will make it easier for you to handle the task at hand more efficiently and conveniently.
Higher horsepower might be significant, but it can be disastrous on some projects, while smaller strength can be time-wasting on some projects. Therefore, do your research before purchasing to help you choose the most appropriate power.
7. Final Verdict
With the help of this guide, you have the right information on how to use a drill press. These steps not only help you get the best results out of every drilling process but also keeps you and everyone around safe during the process.
Follow them every time you need to use a drill press. You should also learn how to sharpen a drill bit if you want to be a better expert who also understands their machines well.