Do you find that your clothes aren’t drying as they should be, even after a full cycle in the dryer? It could be an issue with your dryer’s moisture sensor. In this article, we will explain what a dryer moisture sensor is, common issues that can arise, and most importantly, provide step-by-step instructions on how to test your dryer’s moisture sensor using a multimeter. Read on to learn How To Test Dryer Moisture Sensor With Multimeter and ensure your clothes come out dry every time.
1. Introduction
When it comes to laundry, we depend primarily on our dryers to do the job quickly and efficiently. However, suppose your dryer’s moisture sensor isn’t operating correctly. In that case, it may cause a slew of problems, such as wet clothing or over drying, which can damage the fabric. That is why it is critical to confirm that your dryer’s moisture sensor is working correctly. So, let’s get this party started! This article will walk you through testing your dryer’s moisture sensor using a multimeter. Following these easy steps, you can troubleshoot any problems and verify that your dryer is performing optimally.
2. Understanding Dryer Moisture Sensors
Dryer moisture sensors are an essential part of contemporary dryers since they guarantee that your clothing is dried efficiently and effectively. These sensors measure the moisture level of your garments and modify the drying cycle appropriately, ensuring that your clothes are neither over- nor under-dried.
Several sensors, like thermistors and conductivity sensors, are employed in dryers. Thermistors are temperature-sensitive resistors that alter resistance as the temperature changes. At the same time, conductivity sensors estimate the moisture level by measuring the electrical conductivity of the garments.
While dryer moisture sensors are typically trustworthy, frequent concerns like incorrect readings and malfunctioning sensors can arise. Incorrect readings may lead garments to be under or over-dried. At the same time, faulty sensors might cause the dryer to stop operating entirely. As a result, it is essential to regularly examine your dryer’s moisture sensors to verify that they are working correctly.
What are dryer moisture sensors, and how do they work?
Dryer moisture sensors are electrical devices used in contemporary dryers that measure the amount of moisture in the garments. They detect the moisture content of the air as it travels through the dryer drum during the drying process. The sensor provides a signal to the control board of the dryer, which changes the drying time and temperature appropriately.
The different kinds of sensors
Dryer moisture sensors are classified into two types: thermistors and conductivity sensors. Thermistors detect the temperature difference between wet and dry clothing. Wet clothing cools down as they remove moisture, prompting the thermistor to transmit a signal to the control board to extend the drying time. On the other hand, conductivity sensors function by detecting the electrical conductivity of the clothing. The electrical conductivity of the clothing reduces as they dry, prompting the sensor to signal the control board to cease the drying cycle.
Dryer moisture sensors are vital because they prevent garments from being over or under-dried, which may damage textiles and waste energy. They also save time and money by ensuring that the dryer only runs when necessary. However, the sensors are not working correctly. In that case, they might cause the dryer to overheat, posing safety risks and increasing energy expenditures. As a result, it is essential to regularly examine your dryer’s moisture sensors to verify that they are functioning correctly.
The most prevalent problems with dryer moisture sensors
A few frequent difficulties influence the functioning of dryer moisture sensors. Inaccurate readings are one of the most typical problems, resulting in clothing either being too wet or too dry after a drying cycle. In certain situations, the sensors may fail to detect moisture, leading the dryer to shut off prematurely.
Another problem with dryer moisture sensors is malfunctioning sensors. Many things, including sensor damage or wiring difficulties, may cause this. Sensor failure might cause the dryer to run longer than required, wasting energy and damaging the garments.
In addition to these concerns, dryer moisture sensors may get dirty or clogged with residue from dryer sheets or fabric softeners. This may impair their ability to detect clothing moisture levels, resulting in unsatisfactory drying performance. It is essential to clean the sensors regularly to avoid these problems.
3. Symptoms of a Faulty Dryer Moisture Sensor
A faulty dryer moisture sensor may create many problems with your machine’s drying efficiency. Here are some frequent signs of a moisture sensor malfunction in your dryer:
- Clothes not drying correctly: If your dryer’s moisture sensor isn’t operating properly, it may fail to recognize when your garments are dry, resulting in damp clothes.
- The washer shuts off prematurely: If the moisture sensor wrongly senses that the clothes are dry, the dryer may stop before they are completely dry, leaving them wet or wrinkled.
- Excessive moisture in the dryer: If the moisture sensor is not functioning correctly, it may not precisely detect the moisture level in the dryer, forcing the dryer to run for longer than required, resulting in excessive moisture build-up in the machine.
- Clothing that has been burned or damaged: A defective moisture sensor may also cause the dryer to overheat and burn or damage your clothing.
Whether you see any of these signs, you should examine your dryer’s moisture sensor to see if it is broken and needs to be fixed or replaced.
4. Take Control of Drying Efficiency: How to Test Dryer Moisture Sensor with Multimeter?
Dryer moisture sensors are critical components that assist in avoiding over-drying and under-drying textiles by sensing moisture levels and changing drying times appropriately. However, if the sensor fails, the garments may not dry correctly, causing annoyance and energy loss. As a result, it’s critical to test the dryer moisture sensor on a regular basis to guarantee it’s operating correctly.
Here’s how you accomplish it using a multimeter:
Step 1: Unplug the dryer from the power supply
To avoid electric shock or damage, unplug the dryer from the power source before beginning the testing procedure.
Step 2: Discover where the moisture sensor is
Depending on the dryer’s type and brand, the moisture sensor’s placement may differ. In most cases, the sensor is placed near the dryer’s lint filter or within the dryer drum.
Step 3: Take away the moisture sensor
Remove the moisture sensor gently by unscrewing any screws or clips that are keeping it in place.
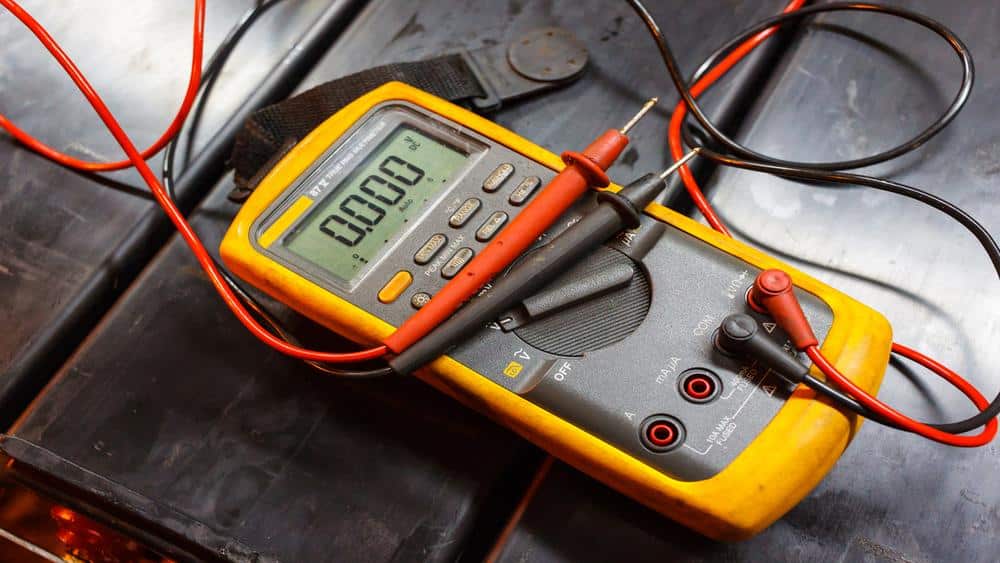
Step 4: Switch the multimeter to resistance mode
Turn on your multimeter and set the resistance to ohms (Ω). The precise setting may vary depending on the type of multimeter.
Step 5: Use the multimeter to test the moisture sensor.
It’s now time to use the multimeter to test the moisture sensor. Connect the multimeter’s two probes to the metal prongs on the sensor’s rear. The sensor is operating properly if the multimeter reports a resistance of roughly 50,000 ohms. If the resistance is infinite, the sensor is faulty and must be replaced.
Specific Directions for Various Dryer Brands
- Samsung Dryers: The moisture sensor is situated on the front bulkhead of the dryer. Remove the two screws at the bottom of the front panel and raise the panel up and out to get access.
- LG Dryers: The moisture sensor is situated on the grill of the dryer. Remove the two screws at the bottom of the front panel and raise the panel up and out to get access.
- GE Dryers: The moisture sensor on GE dryers is situated on the rear of the drum. Remove the front panel and drum to get access, then unhook the wire harness and remove the sensor.
- Maytag Dryers: The moisture sensor is situated on the dryer’s blower housing. Remove the front panel and drum to get access, then unhook the wire harness and remove the sensor.
- Electrolux Dryers: The moisture sensor in Electrolux dryers is situated on the front of the drum. Remove the front panel and drum to get access, then unhook the wire harness and remove the sensor.
- Bosch Dryers: The moisture sensor is situated on the filter housing of the dryer. Remove the filter and the filter housing to get access, then unhook the wire harness and remove the sensor.
Safety and Tips
- Before trying to test the moisture sensor, always unplug the dryer from the power source.
- To prevent damaging the moisture sensor, follow the manufacturer’s instructions for removing and installing it.
- Handle the moisture sensor with care since it is delicate and easily damaged.
- Suppose you need more clarification about testing the moisture sensor. In that case, getting a professional expert to perform it for you is recommended.
5. How to Troubleshoot Dryer Moisture Sensor Problems
While checking your dryer’s moisture sensor may help discover difficulties, it’s also crucial to know how to fix any problems. Here are some examples of typical issues and solutions:
- Sensor not working: Check whether your moisture sensor is clean and clear of debris. Also, disconnect the dryer and wait a few minutes before plugging it back in to reset the sensor.
- Dryer not heating correctly: A faulty moisture sensor may occasionally prevent a dryer from properly heating. In this instance, make sure the sensor’s connections and cables are not loose or broken. It would be best to examine the heating element, thermal fuse, and thermostat to ensure they are all working correctly.
Other problems:
- If your dryer is still not working correctly after testing and troubleshooting the moisture sensor, examine the dryer vent for any obstructions or limits.
- Ensure the check vent option is not turned on and the dryer is adequately vented.
- Inspect the dryer for condensation, which may be produced by using too much detergent or fabric softener or running the dryer at a low temperature.
Following these troubleshooting steps, you can confirm that your dryer’s moisture sensor is working correctly and that your clothes are drying effectively. If the problem persists, you may need to visit a professional to repair or replace the sensor or other components.
6. Conclusion
In this post on how to test dryer moisture sensor with multimeter, we explored the need to check your dryer’s moisture sensor regularly. We offered complete instructions on how to do so using a multimeter.
- We defined dryer moisture sensors, how they operate, and the most prevalent problems that may occur with them.
- We also gave troubleshooting instructions for some of the most typical problems, such as a sensor that isn’t functioning or a dryer that isn’t heating up correctly.
- Finally, frequent maintenance and testing of your dryer’s moisture sensor will help prevent problems and keep your dryer running efficiently, which is critical for ensuring your clothes dry correctly and avoiding any safety dangers.
Here are some additional resources and suggestions:
- For precise instructions and troubleshooting advice, see the user handbook for your dryer.
- Additional materials, including instructional videos and support forums, may be found on the manufacturer’s website.
- For help diagnosing and repairing more complicated problems, contact a professional appliance repair service.
- Consider routine maintenance.
7. FAQ (Frequently Asked Questions)
How does a moisture sensor work in a dryer?
Thermostat-Based Sensors: These sensors measure the temperature in the dryer drum. As the clothes dry, the temperature rises. When the desired dryness level is reached, the sensor detects the change and signals the dryer to stop.
Conductivity-Based Sensors: Conductivity-based sensors measure changes in electrical conductivity caused by the presence or absence of moisture. When clothes are wet, they are more conductive, and as they dry, their conductivity decreases. The sensor detects this change and determines the moisture level.
Capacitance-Based Sensors: Capacitance-based sensors measure changes in capacitance caused by moisture. When clothes are wet, they increase the capacitance between the sensor’s plates. As the clothes dry, the capacitance decreases, allowing the sensor to determine the moisture level.
How do you test a moisture sensor with a multimeter?
Testing a moisture sensor in a dryer with a multimeter can be done using the following steps:
1. Disconnect the dryer from the power source and locate the moisture sensor. It is usually positioned near the dryer drum.
2. Set the multimeter to the appropriate setting for resistance or capacitance measurement, depending on the type of moisture sensor present in the dryer.
3. Using the multimeter probes, test the resistance or capacitance values of the moisture sensor. Refer to the dryer’s user manual or consult the manufacturer’s specifications to ensure you are obtaining accurate readings.
4. Compare the readings obtained from the multimeter with the recommended values provided by the manufacturer. Suppose the readings deviate significantly from the specified range. In that case, it may indicate a faulty moisture sensor that requires further inspection or replacement.
What voltage does a moisture sensor work at?
Moisture dryer sensors typically operate at low voltages, often in the range of a few volts or less. The exact voltage can vary depending on the specific dryer model and the design of the moisture sensor. It is important to refer to the manufacturer’s documentation or user manual for the precise voltage specifications of the moisture sensor in your dryer.
What is the output of a moisture sensor?
The output of a moisture sensor in a dryer depends on the type of sensor used. Conductivity-based sensors may provide a resistance value or a change in resistance, indicating the moisture level. Capacitance-based sensors can provide a capacitance value or a change in capacitance to indicate the moisture level. The dryer’s control system interprets these output values to determine the drying time and adjust the cycle accordingly.
8. Conclusion
Moisture sensors in dryers are crucial in achieving efficient and effective drying. They utilize various techniques such as temperature measurement, electrical conductivity, or capacitance changes to assess the moisture level in clothes. By accurately detecting moisture, these sensors help prevent over-drying or under-drying, optimizing the drying process.
Testing a moisture sensor with a multimeter allows users to verify its functionality and detect potential issues. It is recommended to consult the dryer’s user manual or manufacturer’s specifications for specific testing procedures. Moisture sensors typically operate at low voltages, and their output can be resistance values, capacitance values, or changes in these parameters, providing crucial information for the dryer’s control system.
Regular maintenance and cleaning of the moisture sensor are also important to ensure accurate readings and reliable drying performance. Understanding how moisture sensors work and how to test them can help users achieve optimal drying results and prolong the lifespan of their dryers.