This article will provide valuable information on how to use a screw extractor without a drill. It can be incredibly frustrating to deal with a stuck screw, but knowing the right tools and techniques can save you time, money, and stress. Read on to learn about the different types of screw extractors, the step-by-step process for using them, common problems and solutions, and tips for avoiding issues.
1: Introduction
Dealing with a stuck screw can be one of the most frustrating experiences in any DIY project or repair job. No matter how hard you try, it won’t budge, leaving you feeling defeated and helpless. However, learning how to remove a stuck screw can save you time, money, and many headaches. In this article, we’ll discuss one of the most effective tools for removing a stuck screw: the screw extractor. We’ll cover the different types of screw extractors, how to select the correct one, and the step-by-step process for using a screw extractor without a drill. We’ll also discuss common problems and solutions, tips for avoiding problems, and what to do after extraction. By the end of this article, you’ll understand how to effectively remove a stuck screw using a screw extractor, allowing you to tackle any DIY project or repair job confidently.
2: Types of Screws
I. Wood Screws
Wood screws are designed to hold two pieces of wood together and come in various sizes and lengths. They have a tapered shank and a pointed tip, making them easier to insert into the wood. Wood screws also have different types of heads, such as flat, oval, round, and pan heads, to suit other applications.
II. Machine Screws
Machine screws are used to fasten metal parts together and come in different sizes and thread pitches. They have a straight shank and a flat or rounded head, which allows them to be used in countersunk or non-countersunk holes.
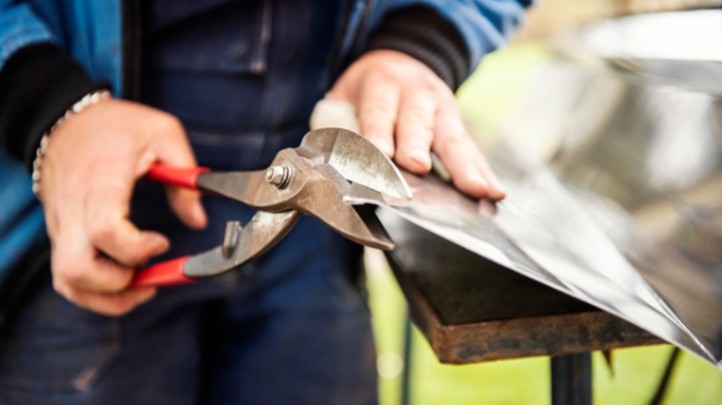
II. Sheet Metal Screws
Sheet metal screws are used to fasten thin sheets of metal to each other or other materials. They have a sharp point that allows them to penetrate the metal without drilling a hole first. Sheet metal screws also come in different head types, such as pan, flat, and hex heads, to suit various applications.
IV. Self-Tapping Screws
Self-tapping screws are similar to sheet metal screws. However, they have a sharper point and a unique thread design that allows them to create their threads while being screwed into the material. They are commonly used in plastics and other materials that do not require pre-drilling.
V. Lag Screws
Lag screws are large, heavy-duty screws that secure heavy objects to wood or other materials. They have a hexagonal head and a sharp point that allows them to penetrate the wood easily.
VI. Concrete Screws
Concrete screws are designed to fasten materials to concrete, brick, or other masonry materials. Their unique tread design allows them to grip the material tightly and prevent them from loosening over time.
2. The Importance of Selecting the Correct Screw Extractor
Selecting a suitable screw extractor is crucial in preventing damage to screws and workpieces, saving time and effort, and enhancing safety.
I. Prevents Damage to Screws and Workpieces
Using the wrong screw extractor can damage the screw and the workpiece, making it challenging to remove the screw without causing further damage. A suitable screw extractor is designed to grip the screw firmly and remove it without damaging the surrounding material.
II. Saves Time and Effort
Removing a stripped or broken screw without the proper tool can be time-consuming and frustrating. A screw extractor makes the process quick and effortless, allowing you to remove the screw and return it to your project.
III. Enhances
Using the wrong tool to remove a screw can be dangerous and lead to injury. A screw extractor is designed to provide a secure grip on the screw, reducing the risk of the tool slipping and causing damage.
3: When to Use a Screw Extractor
Screw extractors are essential tools for removing stripped or broken screws. They are helpful when other methods, such as pliers or a screwdriver, have failed to remove the screw. Here are some everyday situations where a screw extractor is necessary:
I. Stripped Screw Heads
A stripped screw head is one of the most common reasons for using a screw extractor. When a screwdriver or drill bit slips, it can strip the head of the screw, making it difficult to remove. A screw extractor can grip the screw securely and remove it without damaging the surrounding material.
II. Broken Screws
A broken screw is another situation where a screw extractor is necessary. When a screw breaks off in the material, it can be difficult to remove using traditional methods. A screw extractor can grip the remaining part of the screw and remove it from the material.
III. Corroded Screws
Corroded screws can be challenging to remove using traditional methods. The corrosion can cause the screw to become stuck, making it difficult to turn. A screw extractor can grip the screw and provide the torque needed to remove it from the material.
4: When Not to Use a Screw Extractor
While screw extractors are valuable tools, there are situations where they should not be used. Here are some cases where a screw extractor is not recommended:
I. Soft Materials
Screw extractors can cause damage to soft materials such as plastic or thin metal. In these situations, using other methods to remove the screw is best.
II. Small Screws
Screw extractors are not suitable for removing small screws. The extractor may damage the screw or surrounding material, making it difficult to remove the screw.
III. Improper Use
Misusing a screw extractor can cause damage to the material or the extractor itself. It is essential to follow the instructions for the extractor carefully to avoid damaging the material or injuring yourself.

4: How To Use a Screw Extractor Without a Drill
Using a screw extractor without a drill can be more challenging, but it is possible with the right tools and technique. Here’s how to do it:
I. Materials Needed
To use a screw extractor without a drill, you will need the following:
- A pair of pliers
- A hammer
- A screw extractor
- A wrench (optional)
II. Step-by-Step Instructions
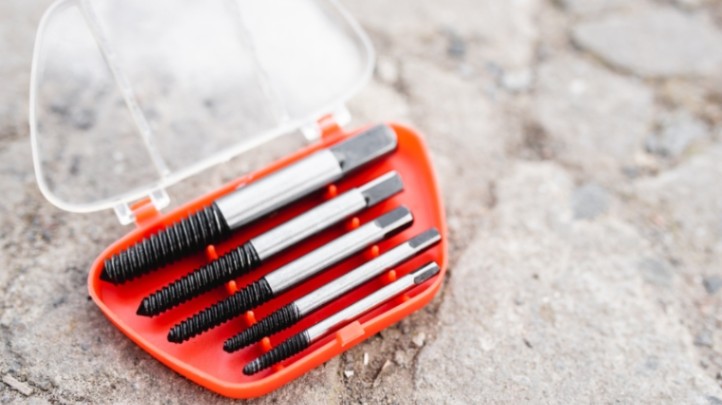
- Choose a suitable screw extractor: Look for a screw extractor that is small enough to fit into the screw hole but large enough to grip the screw firmly. You can use a screw extractor set with multiple sizes to find the best one for your screw.
- Position the screw extractor: Place the screw extractor into the screw hole and use your pliers to grip the top of the extractor. Make sure the extractor is centered and secure in the screw hole.
- Turn the extractor: Use the pliers to turn the extractor counterclockwise. The extractor should grip the screw and turn it as you turn the extractor. If the screw is very tight, you can use a wrench to apply more torque.
- Tap the extractor: If the extractor starts to slip or the screw won’t budge, tap the end of the extractor gently with a hammer to help it grip the screw more firmly. Be careful not to hit the extractor too hard, as this can damage it.
- Continue turning: Keep turning the extractor counterclockwise until the screw comes out. If the screw is very tight, you may need to tap the extractor and apply more torque with the pliers or wrench several times to loosen it.
III. Tips and Tricks
- Choose the right size extractor for the screw you are trying to remove. Using an extractor that is too large or too small can damage the screw or the workpiece.
- If the screw is very tight or rusted, try applying penetrating oil or a rust dissolver to help loosen it before using the extractor.
- If the extractor slips or strips the screw, stop and try another method to remove the screw, such as drilling it out with a drill bit.
- Be patient and take your time using a screw extractor without a drill. It can be a slow process, but avoiding damaging the workpiece is worth it.
5: How To Use a Screw Extractor With a Drill
Removing a stripped or broken screw can be frustrating, but with the right tools and technique, it’s possible to do it yourself. Here are the steps to use a screw extractor to remove a stubborn screw:
Step 1: Preparation
Before you begin, gather the following tools:
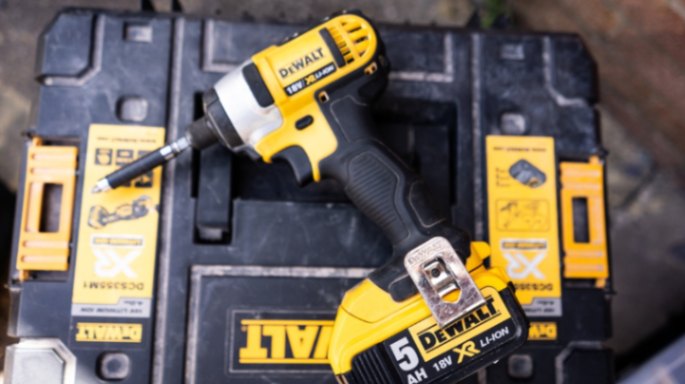
- Drill
- Screw extractor
- A drill bit is slightly smaller than the screw
- Pliers
- Safety glasses
And follow these safety precautions:
- Wear safety glasses to protect your eyes from flying debris.
- Ensure the workpiece is secured to prevent it from moving around while you work.
Step 2: Positioning
- Identify the center of the screw: Use a straightedge or ruler to locate the center of the screw head.
- Make a guide hole: Use a drill bit slightly smaller than the screw to make a pilot hole in the center of the screw head. The pilot hole will help guide the screw extractor into place.
Step 3: Extracting the Screw
- Install the screw extractor: Choose a screw extractor the right size for the screw and insert it into the pilot hole you created. Use pliers to twist the extractor counterclockwise to engage it into the screw.
- Turn the screw extractor: Use pliers to turn the screw extractor counterclockwise. This will cause the extractor to dig into the screw and start to loosen it.
- Remove the screw: Continue turning the extractor until the screw comes out. If the screw is very tight, you may need to apply more pressure with the pliers or gently tap the extractor’s end with a hammer to help it grip the screw.
6: Troubleshooting
Using a screw extractor without a drill can effectively remove stubborn screws, but sometimes things can go wrong. Here are some common problems and solutions when using a screw extractor without a drill, as well as tips for avoiding these problems:
I. Problem: The screw won’t budge
- Solution: Apply penetrating oil to the screw and let it sit for a few hours to help loosen it. Use a hammer to gently tap the end of the screwdriver to help loosen the screw before attempting to use the screw extractor.
II. Problem: Screw extractor breaks off
- Solution: Use a pair of pliers or a wrench to grip the end of the extractor and turn it counterclockwise to remove it. If that doesn’t work, try using a tiny drill bit to drill a hole into the center of the extractor and use a screwdriver to turn it counterclockwise.
III. Problem: Screw extractor slips
- Solution: Make sure the screw extractor is the right size for the screw. Apply pressure with pliers to keep the extractor in place, and turn it slowly and carefully.
IV. Problem: Screw breaks
- Solution: If the screw breaks off while using the screw extractor, use a drill bit to drill around the screw and remove it carefully. If the screw is stuck and won’t come out, use a tap and die set to re-thread the hole and install a new screw.
V. Tips for Avoiding Problems
- Use the suitable size screw extractor for the screw you are removing.
- Apply a penetrating oil to the screw to help loosen it before attempting to use the screw extractor.
- Use pliers to apply pressure to the extractor and turn it slowly and carefully.
- If the screw is stubborn, try tapping the end of the screwdriver with a hammer to help loosen it before using the screw extractor.
6: After Extraction
After successfully removing the stubborn screw with the screw extractor, it’s essential to inspect the extracted screw to make sure it is still in good condition. Here are the steps for inspecting the extracted screw and repairing the damaged area:
I. Inspecting the Extracted Screw
- Clean the screw with a wire brush to remove any debris or rust.
- Check the threads on the screw to ensure they are still in good condition.
- Check the head of the screw to ensure it is not stripped or damaged.
It must be replaced if the screw is damaged or has stripped threads. Additionally, suppose the area around the screw is damaged. In that case, you may need to repair it with wood filler or another suitable material before installing a new screw.
II. Repairing the Damaged Area
- Remove loose wood or debris from the damaged area with a chisel or scraper.
- Fill the damaged area with wood filler, epoxy, or another suitable material, following the manufacturer’s instructions.
- Sand the repaired area smoothly with sandpaper.
- If necessary, drill a new pilot hole for the screw.
- Install a new screw, ensuring the material and application are the correct size and length.
By following these steps, you can ensure that the repaired area is solid and secure and that the new screw can hold the weight and stress of the application.
7: Frequently Asked Questions (FAQs)
I. What is a screw extractor?
A screw extractor is designed to remove stripped or broken screws from wood, metal, or plastic materials.
II. Can you use a screwdriver instead of a screw extractor?
A screwdriver is often insufficient for removing a stripped or broken screw. A screw extractor is specifically designed to grip the remaining screw threads and remove them from the material.
III. How can I prevent a screw from becoming stuck?
To prevent a screw from becoming stuck, it’s essential to use the correct size and type of screw for the material and a pilot hole to guide the screw into it.
IV. Can a screw extractor damage the surface?
If misused, a screw extractor can potentially damage the surface surrounding the screw. It’s essential to follow the instructions carefully and to apply gentle, steady pressure to avoid damaging the surrounding material.
V. How do I know if a screw is stripped?
A stripped screw will not tighten or loosen and may spin in place without gripping the surrounding material. It may also have visible damage to the head or threads.
VI. Is it possible to reuse the extracted screw?
It depends on the condition of the extracted screw. It could be reused with entire threads if it is still in good condition.
VII. Can I use a screw extractor on any type of screw?
No, screw extractors are designed for specific styles and sizes of screws. Choosing the correct size and type of screw extractor for the screw you are trying to remove is essential.
VIII. What should I do if I encounter a stubborn screw?
Suppose a screw is stubborn and difficult to remove. In that case, it may be necessary to use additional tools or techniques, such as heat or lubricant, to loosen it.
IX. How long should I expect the screw extraction process to take?
The length of time it takes to remove a screw with a screw extractor can vary depending on the size and condition of the screw, as well as the skill of the person using the tool. Generally, it can take anywhere from a few minutes to several hours.
X. Do I need a specific type of screw extractor for different types of screws?
Yes, there are different types and sizes of screw extractors designed for use on particular types and sizes of screws. Choosing the correct type and size of screw extractor for the screw you are trying to remove is essential.
7: Conclusion
In conclusion, understanding the different types of screws and the importance of selecting the correct screw extractor can save you time, money, and frustration. It’s important to remember that not all screws are the same. Using the wrong type of screw extractor can damage the screw and its embedded material.
When using a screw extractor without a drill, following the proper steps and using the correct tools are essential to ensure success. Always take safety precautions, identify the center of the screw, and make a guide hole to ensure proper positioning.
Common problems when using a screw extractor without a drill include the extractor breaking or becoming stuck, which can be avoided by applying even pressure and using penetrating oil to loosen the screw.
After extraction, inspect the extracted screw for damage and repair the damaged area as necessary.
Remember, it’s always better to take the time to correctly identify the type of screw and select the correct screw extractor rather than risking damage to both the screw and the material it is embedded in. Removing a stubborn screw can be much more manageable and successful with the right tools and technique.
So next time you encounter a problematic screw, remember the importance of using the correct tools and following the proper steps. You can successfully extract the screw and move on with your project with patience and effort.