Outdoor pine wood is a popular choice for decks, fences, and other outdoor structures. However, without proper care and protection, pine wood can become damaged and deteriorate quickly when exposed to the elements. One major step in protecting outdoor pine wood is waterproofing. Waterproofing helps keep the wood dry, which helps prevent rot, mold, and other forms of damage. In this guide, we will take a step-by-step look at how to waterproof pine wood for outdoor use, so that it will last for years to come.
In summary, to waterproof outdoor pine wood, follow these steps:
- Clean the surface using a pressure washer or soapy water and a stiff brush.
- Apply a wood preservative specifically formulated for outdoor use.
- Apply a sealant designed for outdoor use and compatible with the wood preservative.
- Reapply the wood preservative and sealant as needed to maintain protection.
1. What is Pine Wood and Why is it Used Outdoors?
I. Pinewood and its characteristics
Pinewood is a type of softwood that comes from various species of pine trees. It is known for its light color, distinctive grain pattern, durability, and versatility. Pine wood is a popular choice for many distinct types of projects, including furniture, flooring, and cabinetry.
II. Why pine wood is commonly used for outdoor projects
When it comes to outdoor projects, pine wood is a common choice due to its affordability and availability. It is inexpensive compared to other types of wood and is widely available at most lumberyards and home improvement stores. Pine wood is also relatively lightweight, making it easy to work with and transport.
III. The potential downsides of using pine wood outdoors without proper protection
However, pine wood does have some potential downsides when used for outdoor projects. One of the biggest issues is that it is not naturally resistant to rot, mold, or insects. Without proper protection, pine wood can quickly deteriorate when exposed to the elements. This is why it is important to take steps to protect outdoor pine wood, such as waterproofing, to ensure that it lasts for years to come.
Another downside is that pine wood is considered a softwood, meaning it is not as strong as hardwood and can be more prone to dents and scratches. Additionally, pine wood is also not as resistant to weathering and UV exposure as other types of wood, which can cause it to turn gray and weathered over time.
In conclusion, Pinewood is a popular and affordable choice for outdoor projects due to its availability and affordability. However, it is important to take steps to protect the wood to prevent damage caused by the elements. Proper care and maintenance such as waterproofing, staining, and regular cleaning can help to prolong the life of outdoor pine wood and ensure that it looks great for years to come.
2. Way to Waterproof Pine Wood For Outdoor Use
Step 1: Clean the Wood
a. The importance of cleaning the wood before waterproofing
Step 1 in waterproofing outdoor pine wood is to clean the surface of the wood. This step is important because any dirt, grime, or other debris on the surface can interfere with the waterproofing process. If the wood is not cleaned properly, the preservatives and sealants may not adhere correctly, which can lead to poor protection of the wood.
b. Instructions for cleaning the wood using a detergent solution
To clean the wood, you can use a pressure washer or a stiff brush and soapy water. For a detergent solution, you can mix a mild detergent such as dish soap with water in a bucket. Use the brush to scrub the wood, paying extra attention to any areas that are particularly dirty or greasy. Be sure to rinse the wood thoroughly with a garden hose or a pressure washer and allow it to dry completely before moving on to the next step.
It is important to note that when cleaning outdoor wood, it is best to avoid using harsh chemicals or bleach as they can damage the wood or cause discoloration. Also, it is a clever idea to wear gloves and protective eyewear to protect yourself from any splinters or debris.
By following this step, you will ensure that the wood surface is clean, which will help the preservatives and sealants to adhere better, providing better protection for the wood. This will also help to ensure that your outdoor pine wood lasts for years to come.
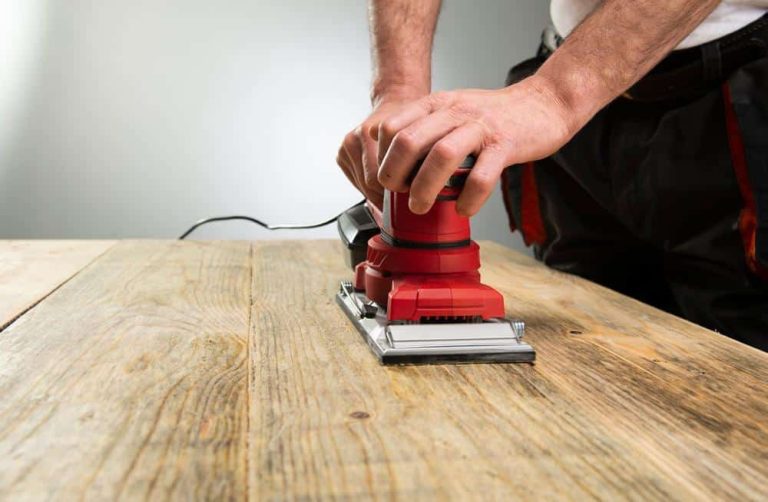
Step 2: Sand the Wood
c. The importance of sanding the wood before waterproofing
Step 2 in waterproofing outdoor pine wood is to sand the surface of the wood. Sanding the wood before waterproofing is a key step because it helps to smooth out any rough or uneven surfaces, which can interfere with the adhesion of the preservatives and sealants. Sanding also helps to remove any remaining debris or stains from the wood, which can also affect the adhesion of the preservatives and sealants.
d. Instructions for sanding the wood using different grits of sandpaper
To sand the wood, you will need a belt sander, orbital sander, or hand sander, and various grits of sandpaper. Start with a coarse grit, such as 80 or 100, to remove any rough spots or stains on the wood. Move on to medium grit, such as 120 or 150, to smooth out any remaining roughness or unevenness. Finally, use a fine grit, such as 220 or 240, to give the wood a smooth, even finish. Be sure to sand with the grain of the wood and pay extra attention to any areas that may be particularly rough or uneven.
It is important to note that when sanding outdoor wood, it is best to wear a dust mask, safety goggles, and gloves to protect yourself from dust and splinters. Also, it is a promising idea to keep the area well-ventilated, since the dust from sanding can be harmful to breathe in.
By following this step, you will ensure that the wood surface is smooth, which will help the preservatives and sealants to adhere better, providing better protection for the wood. This will also help to ensure that your outdoor pine wood lasts for years to come.
Step 3: Apply a Waterproofing Sealant
e. The different types of waterproofing sealants available
Step 3 in waterproofing outdoor pine wood is applying a waterproofing sealant to the wood’s surface. Sealants are designed to protect the wood from the elements by creating a barrier that repels water and prevents it from piercing the wood. There are several unusual types of sealants available, such as oil-based, water-based, and clear sealers.
Oil-based sealers are typically made from linseed oil or tung oil and provide a rich, natural-looking finish to the wood. Water-based sealers are typically made from acrylic or polyurethane and dry faster than oil-based sealers. Clear sealers provide a natural finish and allow the wood’s natural color to show through.
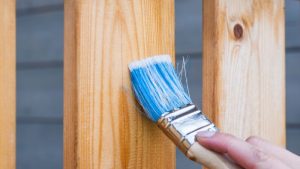
f. Instructions for applying a sealant to the wood
To apply a sealant, you will need a paintbrush or roller, a paint tray, and a stir stick. First, stir the sealant well to ensure that any settled particles are mixed in. Next, apply a thin, even coat of sealant to the wood using a paintbrush or roller, paying extra attention to any areas that may be quite rough or uneven. Be sure to follow the plant instructions for the specific sealant you are using, as some may require multiple coats or a specific drying time.
Note that when applying the sealant to outdoor wood, it is best to wear gloves, protective eyewear, and a mask to save yourself from fumes and splinters. Also, it is a good idea to work in a well-ventilated area and to check the weather forecast, as some sealants may require a certain temperature or humidity range to dry properly.
By following this step, you will ensure that the wood surface is protected by a waterproof barrier, which will help to prolong the life of your outdoor pine wood. This will also help to ensure that your outdoor pine wood stays looking beautiful for years to come.
Step 4: Re-apply as Needed
g. The importance of re-applying the sealant as needed
Step 4 in waterproofing outdoor pine wood is to re-apply the sealant as needed. The elements can take a toll on even the most well-protected wood, and it is important to reapply the sealant to maintain the wood’s protection. The frequency of reapplication will depend on the specific type of wood and the conditions it is exposed to, but it is an innovative idea to re-apply the sealant every one to two years.
h. Instructions for re-applying the sealant
To re-apply the sealant, simply follow the instructions provided in step 3. Clean the wood, sand it lightly and apply a thin, even coat of sealant. Be sure to pay extra attention to any areas that may be showing signs of wear or damage.
It is important to note that when re-applying the sealant, you should check the weather forecast, as some sealants may require a certain temperature or humidity range to dry properly. Also, make sure you wear gloves, protective eyewear, and a mask to protect yourself from fumes and splinters.
By following this step, you will ensure that your outdoor pine wood is always protected from the elements, which will help to prolong the life of your outdoor pine wood. This will also help to ensure that your outdoor pine wood stays looking beautiful for years to come.
3. FAQs (Frequently Asked Questions)
I. Can I use any type of sealant to waterproof pine wood?
It is recommended to use a sealant specifically designed for wood, as it will provide the best protection. Sealants that are specifically formulated for wood will have ingredients that will penetrate the wood fibers and protect them from water damage and decay. Other types of sealants may not be as effective and could potentially harm the wood.
II. How often do I need to re-apply the sealant?
The frequency of reapplication will depend on the specific type of wood and the conditions it is exposed to. But it is a promising idea to re-apply the sealant every one to two years.
III. Can I paint over the sealant?
Yes, you can paint over the sealant once it has fully cured. However, it is important to note that painting may change the color and appearance of the wood. Additionally, paint does not provide the same level of protection as a sealant.
IV. Is it necessary to clean and sand the wood before waterproofing it?
Yes, cleaning and sanding the wood before waterproofing is essential. Cleaning removes dirt, grime, and other contaminants that can prevent the sealant from properly adhering to the wood. Sanding removes any roughness, unevenness, and splinters, which allows the sealant to be applied evenly and creates a smooth surface to which the sealant to adhere.
V. Can I use this method for indoor pine wood as well?
Yes, this method can be used for indoor pine wood as well, but it is not necessary. Indoor pine wood is not exposed to the same elements as outdoor pine wood, and therefore, may not require as much protection.
VI. What are the best sealants for waterproofing pine wood?
There are several sealants considered the best for waterproofing pine wood. Some popular options include:
- Penetrating oil sealants, such as linseed oil or tung oil, soak into the wood fibers to protect within.
- Water-based sealants, such as polyurethane, create a protective barrier on the wood’s surface.
- Epoxy sealants, are exceptionally durable and provide excellent protection against water damage.
VII. Can I apply the sealant with a brush or roller?
Yes, you can apply the sealant with a brush or roller. A brush is best for getting into small crevices and tight spaces. A roller is best for applying a smooth, even coat of sealant over large surfaces.
VIII. How do I know if my pine wood needs to be re-sealed?
If you notice any signs of water damage, such as warping, cracking, or discoloration, it is time to re-apply the sealant. Additionally, if you have not reapplied the sealant in over two years it is time to re-seal it. If you are unsure, it is always best to err on the side of caution and reapply the sealant.
4. Conclusion
In conclusion, waterproofing pine wood for outdoor use is essential for protecting it from the elements and prolonging its life.
I. The steps outlined in the guide
The guide provided a step-by-step process for waterproofing pine wood, including cleaning the wood, sanding it, applying a waterproofing sealant, and re-applying as needed. By following these steps, you can ensure that your outdoor pine wood is protected and stays looking beautiful for years to come. Remember that the key to protecting your outdoor pine wood is regular maintenance and re-application of the sealant as needed.