Painting outdoor surfaces can be a challenging task. However, proper preparation is key to achieving a successful and long-lasting paint job. This article will discuss the importance of painting preparation for outdoor surfaces and provide tips and techniques for achieving a professional-looking finish. We’ll cover painting preparation for outdoor surfaces, selecting the right materials, and using the proper painting techniques.
We’ll also discuss how to care for and maintain your newly painted surface to ensure longevity. By following the tips in this article, you can create a beautiful and durable paint job that will withstand the elements and look great for years to come.
Understanding Your Surface: A Guide to Outdoor Painting
Before starting any outdoor painting project, it’s essential to understand the type of surface you’ll be working with. Different outdoor surfaces require other preparation methods for a successful and long-lasting paint job. In this guide, we’ll explain the different types of outdoor surfaces, how to determine the appropriate preparation methods for each character, and the importance of cleaning the surface before painting.
Types of Outdoor Surfaces
The most common types of outdoor surfaces include wood, metal, concrete, and masonry.
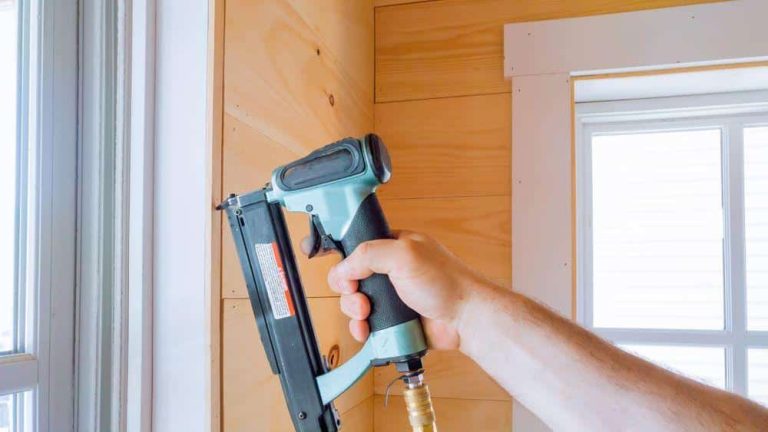
- Wood: Wood is popular for outdoor surfaces such as decks, fences, and siding. However, wood surfaces can be challenging to paint due to their porous nature and tendency to absorb moisture. Additionally, wood surfaces can be prone to cracking, splitting, and warping due to exposure to sunlight and moisture.
- Metal: Metal surfaces, such as gates, railings, and outdoor furniture, require specific preparation to ensure the paint adheres correctly. Metal surfaces can rust, which can cause the paint to peel and flake.
- Concrete: Concrete surfaces, such as driveways and patios, require a different preparation process than wood or metal surfaces. Concrete surfaces can be porous and require sealing to prevent moisture absorption, leading to cracks and surface degradation.
- Masonry: Masonry surfaces, such as brick, stone, and stucco, are often used for outdoor walls and require specific preparation methods. These surfaces can be porous and require cleaning and sealing before painting.
Determining the Appropriate Preparation Methods
To determine the appropriate preparation methods for each surface, you should consider the following factors:
- Type of surface: The surface you’ll be painting will determine the appropriate preparation method. As mentioned earlier, wood, metal, concrete, and masonry surfaces require different preparation methods.
- Surface condition: The condition of the surface you’ll be painting will also impact the preparation process. If the surface is dirty, damaged, or has existing paint, you must take extra steps to prepare it properly.
- Paint type: The paint you plan to use will also impact the preparation process. Some types of paint, such as oil-based paint, require different preparation methods than water-based paint.
Once you’ve determined the appropriate preparation methods for your surface, you can start preparing it for painting.
Importance of Cleaning the Surface Before Painting
Cleaning the surface before painting is a crucial step in the preparation process. If you skip this step, your paint may not adhere correctly, and your finished product may look uneven or flake off over time.
Remove any dirt, debris, or loose paint when cleaning the surface. If the character has mold or mildew, you must take additional steps to remove it properly. Additionally, if the surface has grease or oil stains, you’ll need a degreaser to remove them before painting.
In conclusion, understanding your surface is crucial to achieving a successful and long-lasting outdoor paint job. By determining the appropriate preparation methods for your character and cleaning it before painting, you can ensure that your finished product looks great and lasts for years.

Tools and Materials Needed for Outdoor Surface Painting
To prepare for outdoor surface painting, you’ll need several tools and materials, including:
- Tools: The tools you’ll need for painting preparation will depend on the surface you’ll be painting. In general, you’ll need the following:
- Sandpaper or sanding block: for smoothing rough surfaces and removing loose paint
- Wire brush or scraper: for removing rust, flaking paint, and other debris
- Pressure washer: for cleaning concrete and masonry surfaces
- Paint sprayer, roller, or brush: for applying paint
- Materials: The materials you’ll need for outdoor surface painting will also vary depending on the surface you’ll be painting. In general, you’ll need the following:
- Primer: for preparing the surface and improving paint adhesion
- Paint: for adding color and protection to the surface
- Sealant: for protecting wood, concrete, and masonry surfaces from moisture and weather damage
- Drop cloths or plastic sheeting: for protecting surrounding areas from paint splatters and drips.
Choosing the Right Paint for Outdoor Surfaces
Choosing the right paint for outdoor surfaces is essential to achieving a long-lasting and attractive finish. Here are some tips for selecting the right paint:
- Consider the surface material: Different surface materials require different types of paint. For example, wood surfaces may require oil-based or acrylic latex paint. In contrast, metal surfaces may require paint with rust inhibitors.
- Consider the location: The location of the surface you’ll be painting can also impact your paint choice. For example, suppose the surface is exposed to direct sunlight or high humidity. In that case, you may need a paint formulated to resist fading, cracking, or mildew growth.
- Consider the color: The color of the paint can also impact its durability. Dark colors may fade faster in direct sunlight, while lighter colors may show dirt and stains more easily.
In conclusion, preparing for outdoor surface painting requires the right tools and materials. You can achieve a beautiful and long-lasting finish by choosing the appropriate tools and materials for your surface and selecting the right paint.
Surface Preparation for Outdoor Painting
Proper surface preparation is essential to achieving a successful outdoor paint job. Here are the steps involved in preparing a surface for outdoor painting:
- Cleaning the Surface: Before painting, thoroughly clean the surface to remove any dirt, grime, or other contaminants. Use a pressure washer, scrub brush, or cleaning solution to clean the surface thoroughly. Allow the surface to dry completely before proceeding to the next step.
- Repairing any Damage to the Surface: If the surface has any damage, such as cracks, holes, or rotting wood, you’ll need to fix it before painting. Use wood filler or epoxy to fill any holes or cracks in wood surfaces. Use a rust converter to remove rust from metal surfaces and smooth the surface.
- Filling any Cracks or Holes: After repairing any damage, fill any remaining cracks or holes with a filler appropriate for your surface. Use a putty knife to apply the filler and allow it to dry according to the manufacturer’s instructions.
- Sanding the Surface: Sanding the surface helps to smooth out any rough areas, remove any loose paint or stain, and improve paint adhesion. Use a sanding block or electric sander for sanding the surface until it is smooth.
- Removing Old Paint or Stain: If there is old paint or stain on the surface, you’ll need to remove it before painting. Use a paint stripper or scraper to remove the old paint or stain. Be sure to wear protective gear and follow the manufacturer’s instructions carefully.
- Priming the Surface: Before painting, prime the surface with an appropriate primer. Priming helps to improve paint adhesion and prevent future peeling or cracking. Apply the primer according to the manufacturer’s instructions and allow it to dry completely before painting.
Safety Precautions for Painting and Preparation
Working with paint and preparation materials can pose certain dangers. Here are some essential safety precautions to follow:
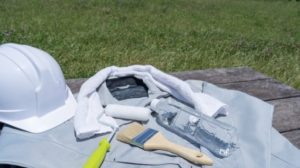
- Use protective equipment: Wear protective gear, such as gloves, goggles, and a mask, to protect yourself from fumes, dust, and debris.
- Work in a well-ventilated area: When working with paints and solvents, ensure you work in a well-ventilated area to avoid inhaling fumes.
- Follow instructions carefully: Follow the instructions on the labels of paints and solvents carefully to avoid accidents and mishaps.
- Keep children and pets away: Keep children and pets away from your work area to avoid accidental ingestion or exposure to hazardous materials.
- Properly dispose of hazardous materials: When you’re finished with your project, dispose of any hazardous materials properly. Check with your local waste management facility for instructions on safely disposing of hazardous materials.
- Store materials properly: Store paints and solvents in original containers and keep them in a cool, dry place, away from heat sources or flames.
Following these safety precautions can help protect yourself and others while working with paint and preparation materials. Remember always to read labels, follow instructions carefully, and properly dispose of hazardous materials to help protect the environment.
Safety Precautions
When working with paint and preparation materials, knowing the potential dangers is essential. Paints and solvents can contain harmful chemicals that can be hazardous to your health if not handled properly. Here are some safety precautions and tips to help you stay safe while working with these materials.
Explanation of the dangers of working with paint and preparation materials
- Toxic fumes: Paints and solvents can emit poisonous fumes that can be harmful if inhaled. This can cause respiratory problems, headaches, and dizziness.
- Skin irritation: Contact with paint and solvents can cause skin irritation and even chemical burns. This is especially true if the chemicals are not washed off promptly.
- Fire hazard: Many paints and solvents are flammable and can ignite if exposed to heat or sparks. This can result in fires and explosions.
Safety tips for working with these materials
- Wear protective gear: Always wear protective equipment such as gloves, goggles, and respirators when working with paint and solvents.
- Work in a well-ventilated area: Ensure enough fresh air circulation in the workspace to minimize exposure to toxic fumes. This can be achieved by opening windows, using fans, or working outside.
- Avoid smoking and open flames: Keep away from sources of heat and ignition, such as smoking, open flames, and sparks.
- Follow manufacturer instructions: Always read and follow the manufacturer’s instructions on the label of the paint or solvent. This will provide valuable information about proper usage, handling, and disposal.
How to properly dispose of hazardous materials
- Check local regulations: Before disposing of hazardous materials, check your local regulations to ensure proper disposal. Some areas may have specific requirements for handling these materials.
- Store properly: Store hazardous materials in a secure and labeled container, away from children and pets.
- Do not pour down the drain: Never pour hazardous materials down the drain or into the trash. This can pollute the environment and harm wildlife.
- Contact local disposal services: Contact your local disposal services to learn about hazardous waste pickup and disposal. They can advise on properly disposing of these materials safely and environmentally friendly.
Following these safety precautions and tips can ensure a safe and healthy working environment while minimizing environmental harm.
Painting Techniques
Preparing for a project is essential for its success. Here are some tips for successful preparation:
- Preparing a work area: Before starting a project, prepare a designated area. This includes clearing the area of any obstacles or debris that could cause accidents and organizing the tools and materials needed for the project.
- Working in the right weather conditions: When planning a project that involves outdoor work, consider the weather conditions. Avoid working during extreme temperatures, high winds, or heavy rain, which can affect the quality of the work and pose safety risks.
- Properly ventilating the work area: Many projects involve using chemicals, such as paint or solvents, which can produce harmful breathing fumes. Properly ventilating the work area by opening windows or using fans can help minimize the risk of respiratory issues.
- Using the proper protective gear: Protective gear is essential to ensuring safety during a project. Always wear the appropriate equipment, such as gloves, goggles, or respirators, to prevent injury or exposure to harmful chemicals.
- Properly storing preparation materials: When not in use, it’s essential to correctly keep preparation materials to maintain their effectiveness and prevent accidents. Store materials in a cool, dry, and well-ventilated area, away from sources of heat or open flames.
Following these tips can ensure a successful project while minimizing risks to yourself and others involved.
Maintaining Your Painted Surface
Painting can be fun and rewarding, but using the proper techniques to achieve the best results is essential. Here are some painting techniques to help you get started:
- How to properly apply paint to outdoor surfaces: When painting outdoor surfaces, it’s essential to properly prepare the surface by cleaning it thoroughly and allowing it to dry completely. Use a high-quality paintbrush or roller to apply the paint evenly and avoid leaving streaks. Apply the paint in thin coats, allowing each coat to dry completely before applying another.
- Tips for getting a smooth finish: Use a high-quality paintbrush or roller and apply the paint in thin coats to achieve a smooth finish. Avoid overloading the brush or roller with paint, leading to drips and uneven application. Use long, smooth strokes and avoid going back over areas that have already been painted.
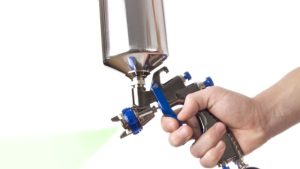
- How to properly use a paint sprayer: Paint sprayers can quickly and efficiently apply paint, but they require proper technique. Make sure to use the correct nozzle for the paint type and adjust the spray pattern to match the surface being painted. Keep the sprayer moving at a consistent speed and maintain a constant distance from the painted surface to avoid uneven coverage.
- Techniques for painting tricky areas, such as corners and edges: When painting problematic areas, such as corners and edges, it’s essential to use the proper tools and technique. Use a small brush or roller to apply the paint carefully, avoiding getting paint on adjacent surfaces. Use painter’s tape to protect adjacent surfaces and create straight lines.
Using these painting techniques, you can achieve a professional-looking finish while minimizing mistakes and frustrations.
Maintaining Your Painted Surface
After spending time and effort painting a surface, it’s essential to maintain it properly to ensure its longevity and appearance. Here are some tips for keeping your painted surface:
- How to care for your newly painted surface: After painting an exterior, allow it to dry completely before touching or cleaning it. Avoid harsh chemicals or abrasive materials, as these can damage the paint. Use a soft cloth or sponge to clean the surface as needed gently.
- Tips for maintaining the surface’s appearance and longevity: To maintain the appearance and longevity of your painted surface, regularly inspect it for signs of damage or wear. Address any issues promptly to prevent further damage. Avoid exposing the surface to extreme temperatures or moisture, as these can affect the paint’s durability. Consider using a protective coating or sealer to help extend the life of the paint.
- When to touch up or repaint: Over time, painted surfaces may need to be touched up or repainted to maintain their appearance and protect against damage. Keep an eye out for fading, chipping, or peeling paint, and address these issues immediately to prevent further damage. A good rule of thumb is to touch up or repaint every 5-10 years, depending on the quality of the paint and the conditions the surface is exposed to.
By following these tips, you can maintain the appearance and longevity of your painted surface, saving time and money in the long run.
Conclusion
In conclusion, proper painting preparation is crucial for achieving a successful and long-lasting paint job for outdoor surfaces. By taking the time to properly prepare the surface, choosing suitable materials, and following the correct painting techniques, you can ensure a professional-looking finish that will withstand the elements and maintain its appearance for years to come.
Essential points covered in this article include:
- The importance of adequately preparing the work area, working in the right weather conditions, properly ventilating the area, using the right protective gear, and properly storing preparation materials.
- Tips for achieving a smooth finish, using a paint sprayer properly, and painting tricky areas such as corners and edges.
- How to care for and maintain a newly painted surface, including avoiding harsh chemicals and abrasive materials, regularly inspecting for damage or wear, and knowing when to touch up or repaint.
By following these key points, you can ensure a successful paint job and an excellent surface that lasts for years.