Category: How-To Mastery

Unlock the art of power tool usage and beyond. From mastering the intricacies of various power tools to exploring advanced techniques, our comprehensive guides empower you to become a true master. Whether you’re a beginner or looking to refine your skills, embark on a journey of mastery with How-To Mastery and unleash your potential in the world of power tools and beyond.

  • How to Use Cordless Drill as Screwdriver: Drill or Drive?

    How to Use Cordless Drill as Screwdriver: Drill or Drive?

    The article provides a comprehensive guide to cordless drills and their functionality. It explores the different types of cordless drills and screwdrivers available. It helps readers choose the right tool for their needs. The article highlights how to use cordless drill as screwdriver and the benefits of using a cordless drill as a screwdriver and provides techniques for efficient usage. It also emphasizes safety precautions to ensure injury-free operation. By the end of the article, readers will have a solid understanding of cordless drills and be able to make informed decisions when using them.

    How To Use Cordless Drill As Screwdriver

    1. Introduction

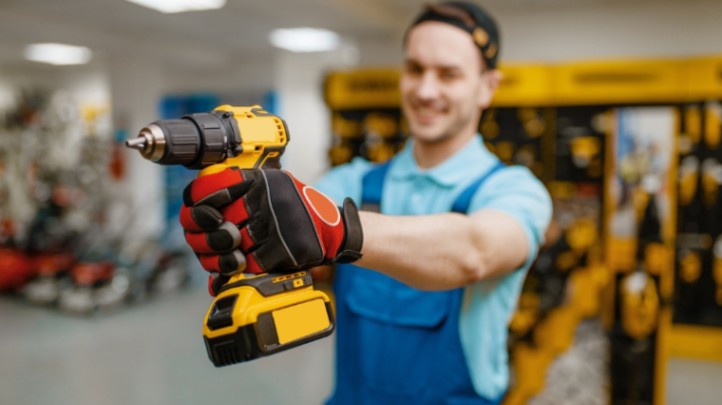
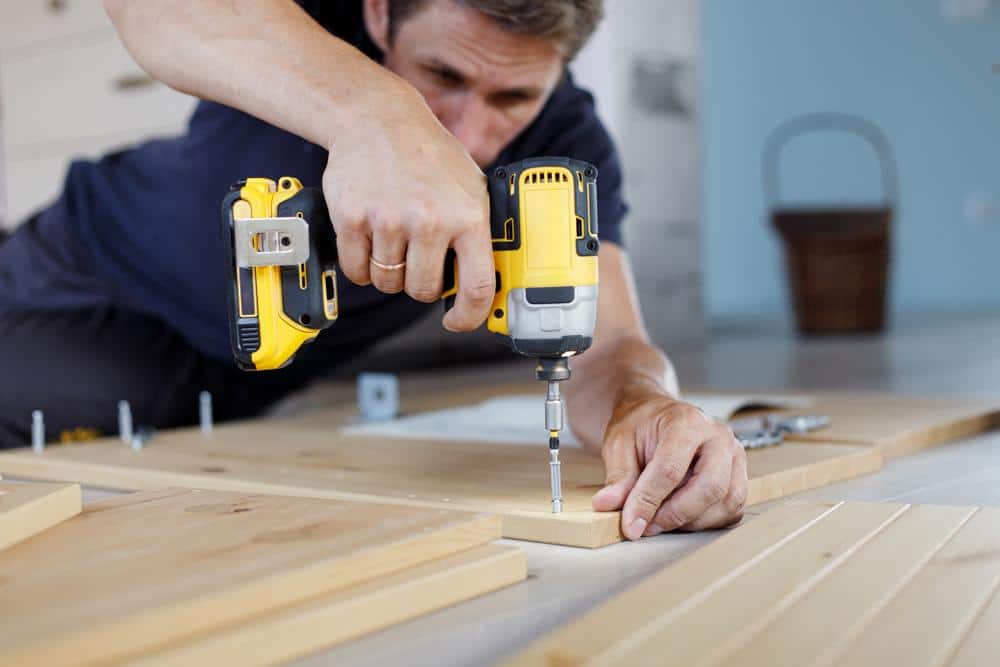
    Cordless drills are versatile power tools that have revolutionized how we handle DIY projects, woodworking, and various other tasks. These tools provide convenience, mobility, and freedom from the limitations of cords. This section delves into what cordless drills are and how they function.

    I. What is a Cordless Drill?

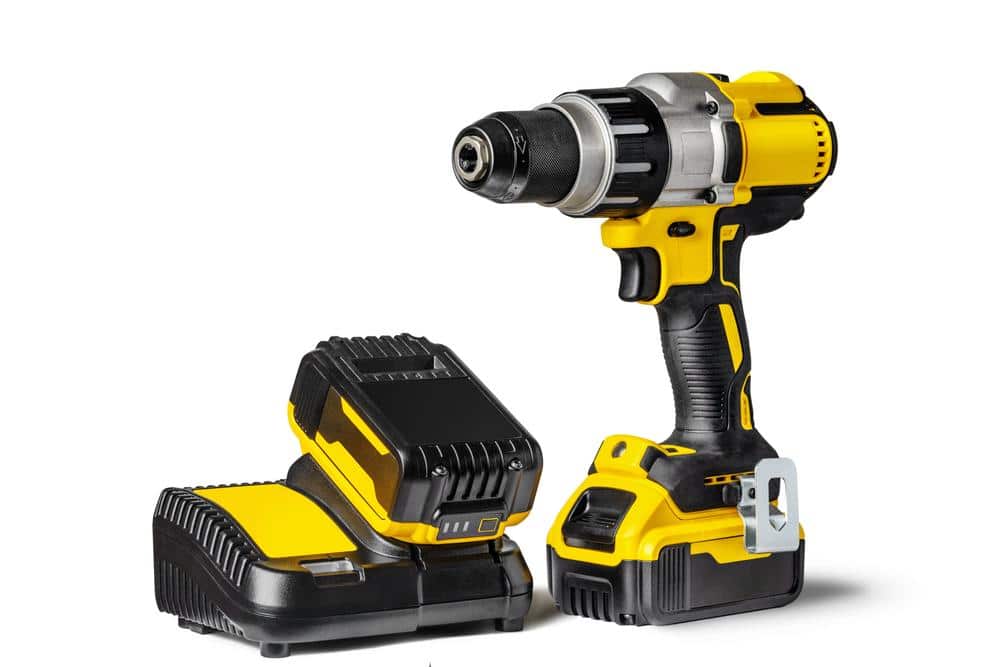
    A cordless drill is a portable power tool designed to drill holes and drive screws efficiently. Unlike traditional corded drills, cordless drills operate on rechargeable batteries, allowing users to move around without being tethered to a power outlet. They come in various sizes and configurations, offering different levels of power and performance.

    II. How Does a Cordless Drill Work?

    Cordless drills consist of a motor, a gearbox, a clutch, a chuck, and a battery. When the trigger is pressed, it activates the motor, which drives the gearbox. The gearbox transfers the power to the chuck, where different drill bits or screwdriver bits can be attached. The clutch allows users to control the torque applied, preventing overdriving or stripping of screws. The battery provides the necessary power to run the drill and can be recharged.

    2. Different Types of Cordless Drills and Screwdrivers

    When it comes to cordless drills and screwdrivers, there are several options available in the market. Understanding the different types can help you choose the one that best suits your needs. Some common types include:

    I. Cordless Drill/Driver

    This type of drill is designed for drilling and screw-driving applications. It offers versatility and is suitable for a wide range of tasks.
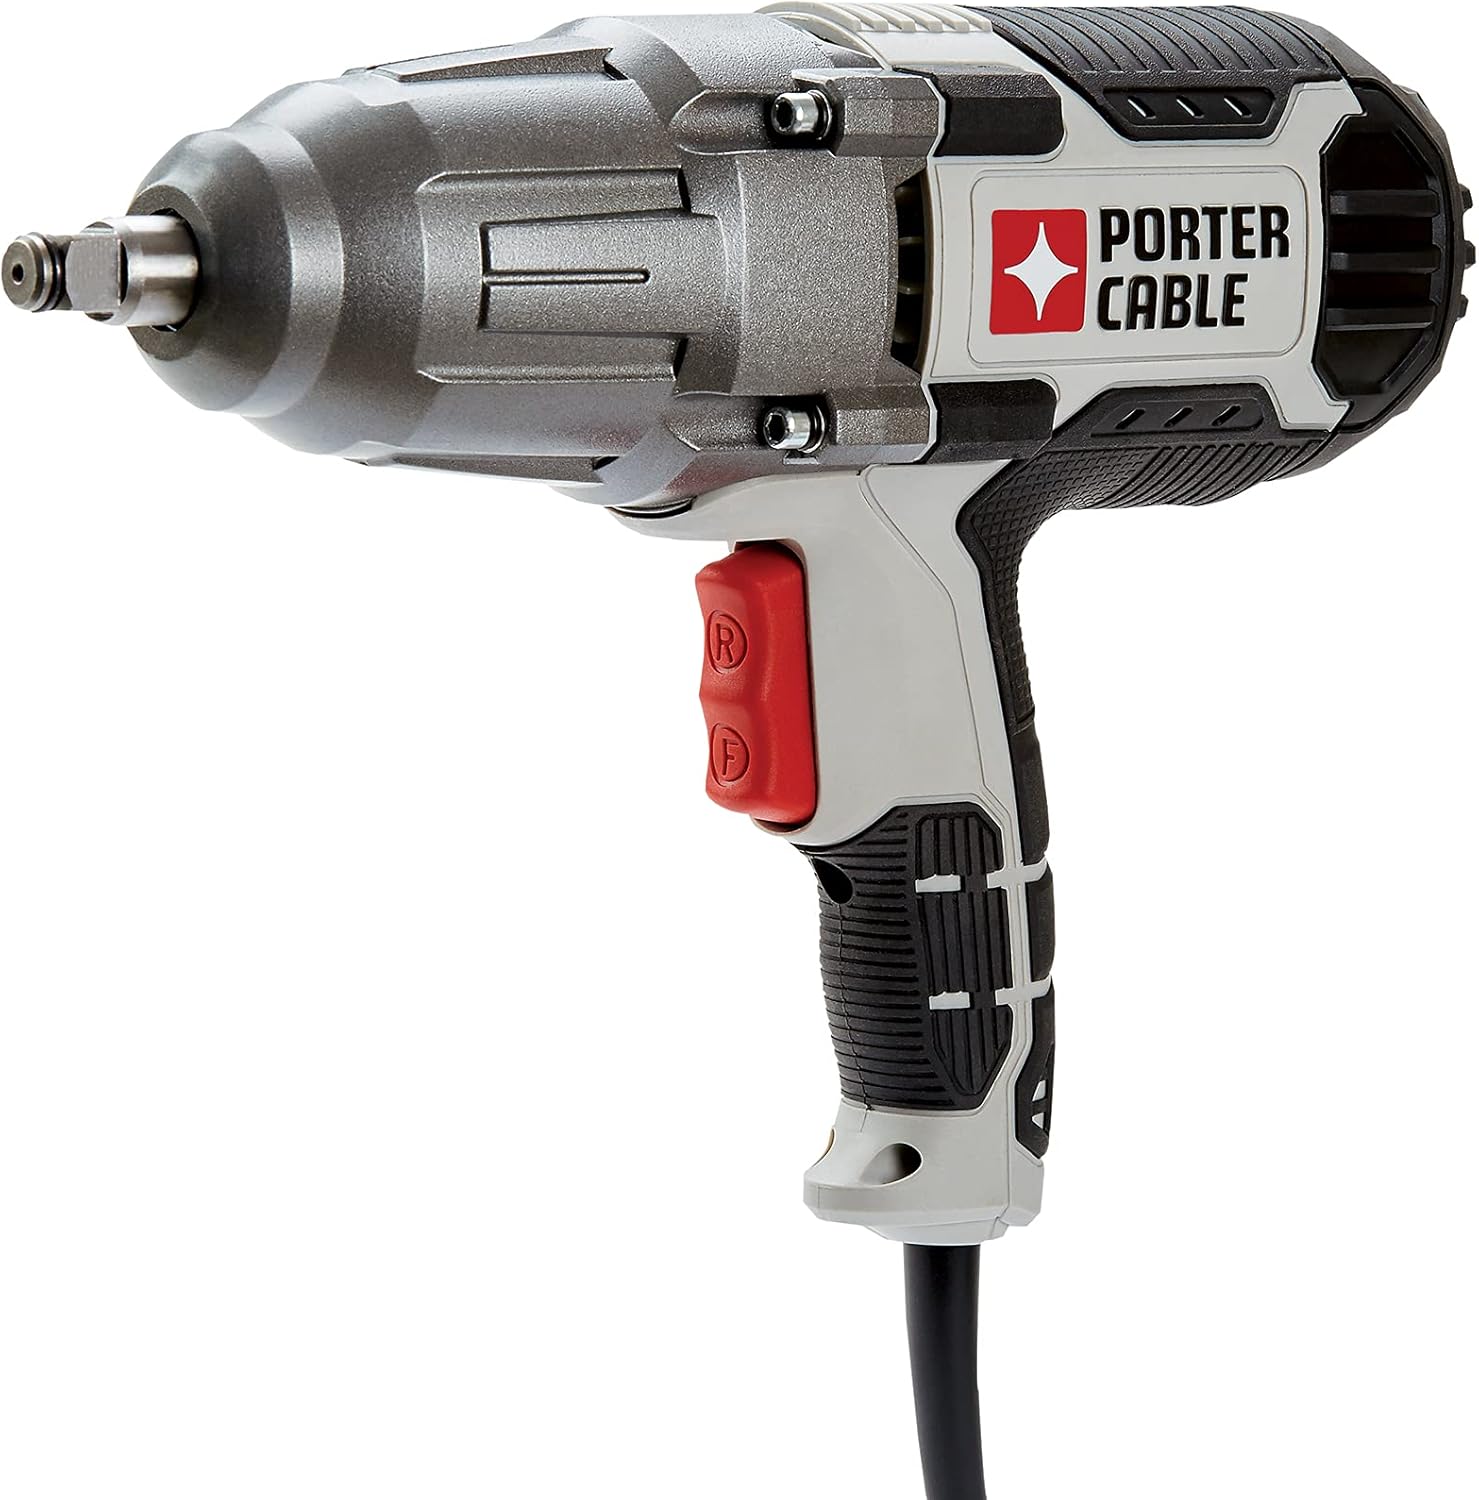
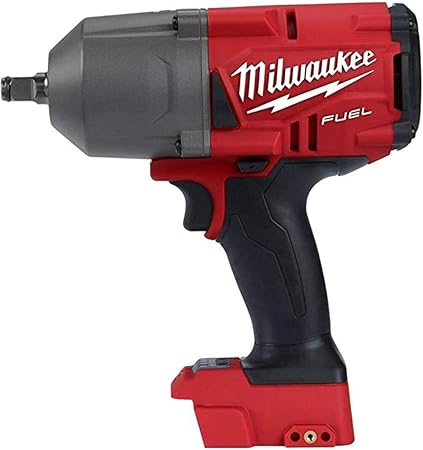
    II. Impact Driver

    An impact driver is specifically designed for driving screws and fasteners. It delivers high torque and is ideal for heavy-duty applications.

    III. Hammer Drill

    Hammer drills can drill into masonry and concrete surfaces. They combine rotational drilling with a hammering action to provide extra power.

    IV. Screwdriver

    Cordless screwdrivers are compact and lightweight tools primarily used for driving screws. They are ideal for tasks that require precision and control.

    Cordless Drill

    3. Choosing the Right Cordless Drill

    When selecting a cordless screwdriver or drill, there are a few factors to consider:

    I. Power and Voltage

    The drill’s voltage rating determines its power. Higher voltage drills generally offer more power, making them suitable for heavy-duty applications.

    II. Battery Life and Capacity

    Consider the battery life and capacity of the drill. Longer battery life allows for extended use without recharging, while higher-capacity batteries provide more power.

    III. Speed and Torque Settings

    Look for a drill with adjustable speed and torque settings. This will give you greater control over the tool and enable you to adapt to different tasks.

    IV. Ergonomics and Comfort

    Consider the design and ergonomics of the drill. A comfortable grip and well-balanced weight distribution can reduce fatigue during prolonged use.

    V. Accessories and Features

    Check for additional features such as LED lights, built-in levels, and magnetic bit holders, as these can enhance the functionality and convenience of the drill.

    4. Benefits of Using a Cordless Drill as a Screwdriver

    Using a cordless drill as a screwdriver offers several benefits:

    I. Versatility

    Cordless drills are multi-purpose tools that handle drilling and screw-driving tasks. This versatility eliminates the need for separate tools, saving time and money.

    II. Mobility

    Cordless drills provide freedom of movement as power cords do not restrict them. You can easily maneuver the drill in tight spaces or work areas without worrying about the cord getting tangled or limiting your reach.

    III. Convenience

    With a cordless drill, you can work anywhere, whether inside your house or outside in the yard. You’re not limited to areas with power outlets, allowing for greater convenience and ease of use.

    IV. Time-saving

    Cordless drills are generally more powerful than manual screwdrivers, allowing you to drive screws more quickly and efficiently. This can significantly speed up your projects and save you valuable time.

    V. Increased Power and Control

    Cordless drills offer adjustable speed and torque settings, enabling you to customize the driving force according to the type of screw and material you’re working with. This provides better control and reduces the risk of damaging the screw or the work surface.

    VI. Accessibility

    Using a cordless drill as a screwdriver makes accessing hard-to-reach areas or overhead installations easier. The compact size and lightweight design of cordless drills allow for greater accessibility and maneuverability.

    Techniques for Using a Cordless Drill as a Screwdriver

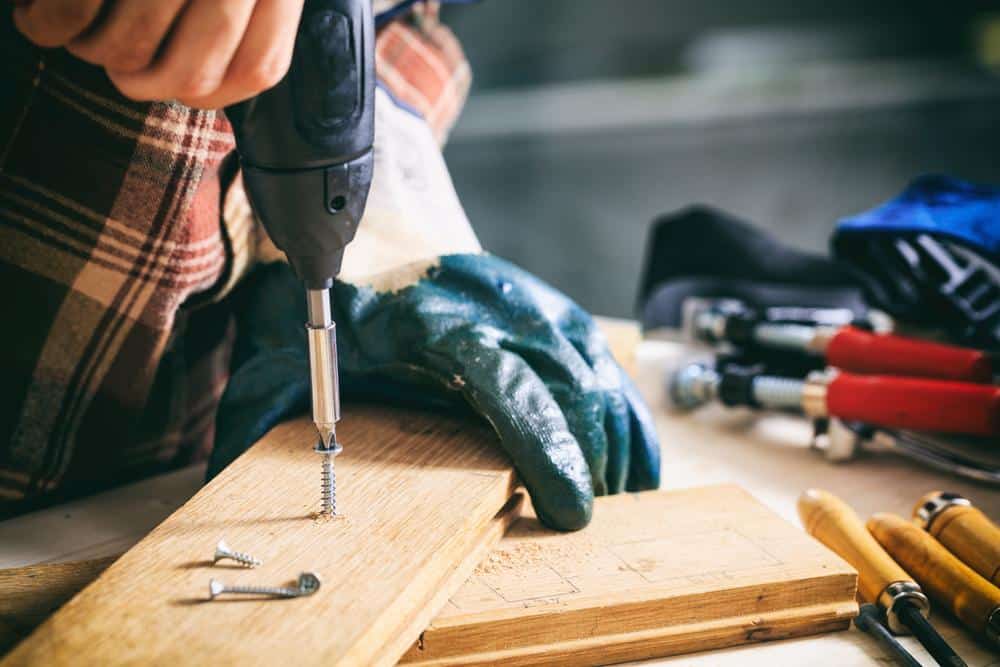
    5. Techniques for Using a Cordless Drill as a Screwdriver

    To effectively use a cordless drill as a screwdriver, follow these techniques:

    I. Choose the Right Bit

    Select a screwdriver bit that matches the type of screw you’re using. The most common is the star-shaped Phillips head, for which a No. 2 Phillips head driver bit is suitable. Other bits include an internal hex drive, square drive, and nut setter hex bit, each designed for specific screw types.

    II. Adjust the Drill Speed

    Set the drill to a low speed when driving screws, especially when using Phillips head bits that may not securely lock into the screw head. Low speed provides better control and reduces the risk of stripping the screw or damaging the work surface. Once you’re comfortable using the drill as a screwdriver, you can increase the speed to expedite the process.

    III. Use the Screw Setting

    Most cordless drills have a switch with symbols representing a screw, a hammer, and a drill bit. Set it to the screw set to indicate that the drill is ready for screwdriving. The other settings are general drilling and hammer mode for masonry or concrete drilling.

    IV. Adjust the Torque Setting

    The torque setting determines the turning power of the drill. Use the adjustable collar on the drill to select the appropriate torque setting based on the material and the type of screw you’re working with. Soft materials generally require a low torque setting, while harder materials may require a higher one.

    V. Maintain Pressure

    When driving screws, maintain a steady pressure on the drill to ensure the bit remains engaged with the screw head. This will prevent slippage and help drive the screw smoothly and securely.

    VI. Avoid Overdriving

    Be mindful of the torque setting to avoid overdriving on the screw. Overdriving can cause the screw to go too deep into the material or strip the screw head. Test the torque setting at the beginning of the task to find the appropriate level for the job.

    VII. Proper Bit Engagement

    Ensure the driver bit is properly inserted and seated in the screw head before driving the screw. A worn or damaged bit may not provide a secure fit, increasing the risk of slippage or stripping the screw head.

    When it comes to DIY projects or simple household tasks, having the right tools can make all the difference. One such versatile tool is the cordless drill. In our previous article on how to use a drill machine for screws, we explored the fundamentals of using a drill machine for various purposes. Building upon that knowledge, we will now delve into the specific technique of using a cordless drill as a screwdriver. This guide will equip you with the necessary information and step-by-step instructions to efficiently utilize your cordless drill for screwdriving tasks.

    Safety Precautions

    6. Safety Precautions When Using a Cordless Drill as a Screwdriver

    While cordless drills are valuable tools, it’s essential to prioritize safety during operation. Here are some important safety precautions to follow:

    I. Wear Appropriate Safety Gear

    Protect yourself by wearing safety goggles to shield your eyes from flying debris. Use ear protection if the noise level is excessive. If working on projects with the potential for flying particles or debris, wear a dust mask and gloves to protect your respiratory system and hands.

    II. Secure Your Workpiece

    Ensure your workpiece is securely clamped or held in place before drilling or driving screws. This prevents it from moving or spinning unexpectedly, reducing the risk of accidents and injuries.

    III. Keep the Drill and Work Area Clean

    Maintain a clean work area, free of clutter and obstructions. Remove any debris or loose objects that could interfere with the drilling process. Regularly clean your cordless drill, especially the chuck, to prevent buildup and ensure optimal performance.

    IV. Avoid Over-Tightening

    Exercise caution when tightening screws. Over-tightening can lead to stripped screws, damage to the material, or even injury. Use the clutch settings to control the torque applied, and stop tightening once the screw is secure.

    V. Store the Drill Properly

    Store your cordless drill in a safe and dry place, away from moisture and extreme temperatures when not in use. Keep it out of reach of children and ensure that the battery is disconnected or removed to prevent accidental activation.

    Following these safety precautions will help you use your cordless drill as a screwdriver safely and effectively, minimizing the risk of accidents or damage.

    7. FAQs(Frequently Asked Questions)

    I. Can a cordless drill be used as a screwdriver? 

    Yes, cordless drills can be used as screwdrivers. They offer the power and torque required to drive screws quickly and efficiently.

    II. What is the difference between an electric screwdriver and a drill?

    While both tools can drive screws, electric screwdrivers are generally smaller, lighter, and designed specifically for driving screws. Cordless drills, on the other hand, are more versatile, allowing for both drilling and driving functions.

    III. What are the benefits of using a cordless drill as a screwdriver? 

    Using a cordless drill as a screwdriver offers versatility, time and energy savings, portability, flexibility, and increased productivity.

    IV. Can a power screwdriver replace a cordless drill? 

    Power screwdrivers are designed primarily for driving screws and are suitable for lighter tasks. However, cordless drills offer more versatility and power, making them a better choice for drilling and heavy-duty projects.

    V. What are some of the best electric screwdrivers available? 

    Several highly regarded electric screwdrivers exist, including models from popular brands such as Bosch, DEWALT, and Makita. It’s recommended to read reviews and compare features to find the best electric screwdriver.

    8. Conclusion

    Cordless drills are versatile and indispensable tools for DIY enthusiasts, professionals, and homeowners alike. Their functionality as drills and screwdrivers provides convenience, efficiency, and flexibility. You can make the most of your cordless drill as a screwdriver by understanding the different types of cordless drills, choosing the right tool for your needs, and employing proper techniques and safety precautions. Enjoy the benefits of increased productivity, time-saving, and versatility as you easily tackle various projects.

  • How to Choose a Paint Sprayer: Painting Made Easy

    How to Choose a Paint Sprayer: Painting Made Easy

    Choosing a suitable paint sprayer is crucial for achieving professional-looking results and saving time on your projects. With numerous types of paint sprayers available on the market, it can be overwhelming to make the right choice. This article will guide you on how to choose a paint sprayer by discussing the different types of sprayers, essential features to consider, tips for selection, comparisons of paint sprayer brands, and recommendations for various project types.

    How to Choose a Paint Sprayer

    1. Importance of Choosing the Right Paint Sprayer

    Selecting the appropriate paint sprayer is essential because it directly impacts the quality and efficiency of your painting endeavors. A high-quality sprayer will provide smooth, even coverage and help you complete projects faster. On the other hand, using the wrong sprayer can lead to uneven application, wasted paint, and a frustrating experience overall. Investing time in understanding the available options and evaluating your specific requirements, you can choose a paint sprayer that best suits your needs.

    2. Types of Paint Sprayers

    There are three primary types of paint sprayers: airless paint sprayers, HVLP paint sprayers, and compressed air paint sprayers. Each type has advantages and disadvantages, which we’ll explore in more detail.

    I. Airless Paint Sprayers

    Airless paint sprayers are potent machines that utilize high pressure to atomize the paint. They are known for their efficiency and ability to handle large-scale projects quickly. Airless sprayers are suitable for both interior and exterior painting tasks. They can take a variety of paint types, including latex and oil-based paints.

    a. Pros:

    • The fast and efficient painting process
    • Suitable for large-scale projects
    • Versatile and compatible with various paint types

    b. Cons:

    • Overspray may occur if not handled properly.
    • Requires more skill to achieve even coverage
    • It can be noisy and produce more waste.

    II. HVLP Paint Sprayers

    HVLP stands for High-Volume Low-Pressure, which describes the operating principle of HVLP sprayers. They used a lower pressure to atomize the paint, resulting in a higher transfer efficiency and reduced overspray. HVLP sprayers are ideal for detailed work and smaller projects, such as furniture refinishing or cabinet painting.

    c. Pros:

    • Reduced overspray and minimal waste
    • Precise control for detailed work
    • Suitable for smaller projects

    d. Cons:

    • Slower than airless sprayers for large areas
    • It may require more coats for even coverage.
    • Not as effective with thicker coatings

    III. Compressed Air Paint Sprayers

    Compressed air paint sprayers use compressed air to atomize the paint. They are commonly used in automotive painting and other industrial applications. These precise sprayers can handle various paint types, including automotive finishes and lacquers.

    e. Pros:

    • Precise control and fine finish quality
    • Suitable for automotive and industrial applications
    • Compatible with different types of coatings

    f. Cons:

    • Require an air compressor for operation.
    • It can be more expensive compared to other types.
    • Require more maintenance and cleaning.

    3. Features to Consider When Choosing a Paint Sprayer

    When selecting a paint sprayer, several key features should be considered to ensure the best match for your needs. Consider the following factors:

    I. Project Requirements

    Assess the scale and nature of your painting projects. Determine if you’ll paint large surfaces, intricate details, or both. This evaluation will help you choose a sprayer with the appropriate power, control, and paint flow.

    II. Power Source

    Paint sprayers can be powered by electricity, battery, or compressed air. Electric sprayers are the most common and offer consistent power. Battery-powered sprayers provide mobility, while compressed air sprayers require an air compressor.

    III. Pressure and Flow Rate

    A paint sprayer’s pressure and flow rate determine its coverage and speed. Consider the required pressure for your projects and ensure the sprayer can deliver a reasonable flow rate to achieve your desired results efficiently.

    IV. Nozzle Size

    Nozzle size affects the spray pattern and paint flow. Larger nozzle sizes are suitable for broader coverage, while smaller sizes provide finer control for detailed work. Choose a sprayer with interchangeable nozzles for versatility.

    V. Portability

    Evaluate the portability of the sprayer, especially if you’ll be working on multiple projects or need to reach different areas. Consider the sprayer’s weight, cord length, and maneuverability to ensure ease of use.

    VI. Ease of Use

    Look for user-friendly features like adjustable settings, ergonomic design, and intuitive controls. A sprayer that is easy to set up, clean, and maintain will enhance your overall painting experience.

    VII. Price Range

    Determine your budget and find a paint sprayer that offers good value for your investment. Consider the durability, features, and warranty different models provide within your price range.

    4. Tips for Selecting the Right Paint Sprayer

    To help you make an informed decision when choosing a paint sprayer, consider the following tips:

    I. Assess Your Project Needs

    Determine the size, complexity, and surface type of your painting projects. This will guide you in selecting a sprayer with the appropriate features and capabilities.

    II. Research Different Brands and Models

    Explore various paint sprayer brands and models available on the market. Please read product descriptions, customer reviews, and comparisons to understand their performance and reliability.

    III. Read Customer Reviews

    Customer reviews provide valuable feedback on the pros and cons of different paint sprayers. Consider both positive and negative reviews to make an unbiased assessment.

    IV. Consider the Power Source

    Evaluate the advantages and limitations of varying power sources based on your requirements. Choose a power source that aligns with the nature of your projects and offers convenience during operation.

    V. Test the Sprayer Before Purchase

    Whenever possible, try out the paint sprayer before making a final decision. This lets you gauge its performance, handling, and compatibility with your painting style.

    5. Best Paint Sprayers for Different Projects

    Now, let’s explore the best paint sprayers suited for various types of projects:

    I. Interior Walls and Ceilings

    Identify the paint sprayer(s) ideal for painting interior walls and ceilings, considering factors such as coverage, ease of use, control, and compatibility with different paints.

    II. Furniture and Cabinets

    Recommend paint sprayers that excel in refinishing furniture and cabinets, focusing on features like precision, smooth finish, versatility in handling different coatings, and suitability for intricate details.

    III. Exterior Surfaces

    Highlight paint sprayers that are well-suited for outdoor painting projects, considering power, coverage, durability, and resistance to weather conditions.

    6. Frequently Asked Questions

    I. What is the best type of paint sprayer for a beginner?

    As a beginner, an HVLP paint sprayer is often a good choice. It offers easier control, reduced overspray, and is suitable for smaller projects.

    II. Can I use any paint with a paint sprayer?

    Most paint sprayers can handle various paint types, including latex, oil-based, and acrylic. However, always check the manufacturer’s guidelines to ensure compatibility.

    III. Do I need an air compressor for a compressed air paint sprayer?

    Compressed air paint sprayers require an air compressor to provide the necessary air pressure for atomizing the paint.

    IV. How often should I clean my paint sprayer?

    It is recommended to clean your paint sprayer thoroughly after each use to prevent clogs and ensure optimal performance.

    V. Can I rent a paint sprayer instead of buying one?

    Yes, many home improvement stores offer paint sprayer rentals.

    7. Conclusion

    Choosing a suitable paint sprayer is essential to achieve professional-quality results and streamline painting projects. You can make an informed decision by understanding the types of paint sprayers available, considering critical features, and following practical tips for selection. Additionally, comparing paint sprayer brands and exploring the best options for different project types will further assist you in finding the perfect paint sprayer for your needs.

    8. You may also like this posts!

  • How to Choose the Right Impact Wrench: Bolt Like a Pro

    How to Choose the Right Impact Wrench: Bolt Like a Pro

    Tightening and loosening nuts and bolts can be a frustrating and time-consuming task. However, with the right tool, the job becomes effortless. An impact wrench is a powerful tool that utilizes mechanized torque to remove or tighten nuts and bolts quickly. This article will guide you on how to choose the right impact wrench that suits your needs and budget.

    How to Choose the Right Impact Wrench

    1. Understanding the Different Types of Impact Wrenches

    Impact wrenches come in various types, each with unique features and advantages. The two common types are:

    I. Inline Impact Wrenches

    These impact wrenches resemble a screwdriver with motorized handle. They offer portability and are ideal for everyday projects.

    II. Pistol Impact Wrenches

    Resembling a handgun, pistol impact wrenches provide more reliability and power. They are commonly used in industrial settings and heavy-duty applications.

    2. How to Choose the Right Impact Wrench?

    I. Determining the Socket Size

    The socket size of an impact wrench is crucial, as it should match the size of your nuts and bolts. The socket size corresponds to the type of impact wrench you choose. Inline or pistol impact wrenches with a ¼” socket size are suitable for everyday projects. For larger tasks, such as automotive repairs or industrial applications, impact wrenches with socket sizes of ⅜”, ½,” or ¾” are recommended.

    II. Choosing the Right Power Source

    Impact wrenches are available in different power sources, including corded-electric, cordless-electric, and pneumatic (air-powered). Consider your specific needs and the availability of power sources when choosing an impact wrench. Cordless impact wrenches offer portability but may have limited battery life. In contrast, corded-electric impact wrenches provide consistent power but require a nearby power source. Pneumatic impact wrenches are powerful but require an air compressor for operation.

    III. Evaluating Torque, Speed, and RPM

    Torque is a crucial factor to consider when selecting an impact wrench. It determines the wrench’s ability to loosen or tighten fasteners effectively. Higher torque values are suitable for heavy-duty applications, while lower torque values are sufficient for lighter tasks. Additionally, consider the speed and revolutions per minute (RPM) of the impact wrench, as they affect the efficiency and speed of the tool.

    IV. Considering Size, Weight, and Portability

    An impact wrench’s size, weight, and portability are important, especially if you plan to use it for extended periods or in tight spaces. A compact and lightweight impact wrench offers better maneuverability and reduces user fatigue. Consider the tool’s dimensions and weight to ensure it is comfortable to handle during prolonged use.

    V. Assessing Grip and Comfort

    Ergonomics play a vital role in the usability and comfort of an impact wrench. Look for models with comfortable grips and ergonomic designs that reduce strain on your hand and arm. A well-designed handle with anti-slip features will provide a secure grip and enhance overall control.

    VI. Noise Level and Vibration

    Impact wrenches can produce significant noise and vibration during operation. Consider models with features like noise reduction technology or built-in dampening systems to minimize noise levels. Reduced vibration levels will enhance user comfort and reduce the risk of hand fatigue.

    VII. Setting a Budget

    Impact wrenches are available in a wide price range. Determine your budget based on the intended use and frequency of use. It’s essential to strike a balance between quality and affordability. Consider the warranty offered by the manufacturer to ensure long-term reliability and support.

    VIII. Maintenance and Durability

    Evaluate the maintenance requirements of the impact wrench before making a purchase. Look for models that are easy to clean and maintain. Additionally, consider the tool’s durability and the availability of replacement parts. A reliable and durable impact wrench will save you money in the long run.

    3. Frequently Asked Questions (FAQs)

    QI: Can I use an impact wrench for everyday tasks?

    A: Impact wrenches are versatile tools for everyday tasks and heavy-duty applications. Choose the appropriate size and torque for your specific needs.

    QII: Are cordless impact wrenches powerful enough?

    A: Cordless impact wrenches have significantly improved in power and performance. High-quality cordless models can provide ample power for a wide range of applications.

    QIII: How often should I maintain my impact wrench?

    A: Regular maintenance is essential to ensure optimal performance and longevity. Refer to the manufacturer’s guidelines for specific maintenance intervals and procedures.

    QIV: Can I use an impact wrench with different socket sizes?

    A: Impact wrenches are designed to accommodate specific socket sizes. Matching the socket size to the nuts and bolts you are working with is crucial for safe and efficient operation.

    QV: Are impact wrenches suitable for automotive repairs?

    A: Impact wrenches are commonly used in automotive repairs because they quickly loosen or tighten lug nuts. Ensure you choose an impact wrench with the appropriate torque for automotive applications.

    4. Conclusion

    Choosing the right impact wrench requires careful consideration of factors such as type, socket size, power source, torque, speed, size, grip, noise level, and budget. By assessing your specific needs and comparing different models, you can find an impact wrench that meets your requirements and makes your tasks more efficient and effortless.

    5. You may also like these posts!

  • How to Remove Bit from Dewalt Impact Driver

    How to Remove Bit from Dewalt Impact Driver

    Dewalt impact drivers are powerful tools that provide efficient and effective fastening capabilities. Whether you’re a professional tradesperson or a DIY enthusiast, it’s essential to properly maintain your Dewalt impact driver to ensure its longevity and optimal performance. One common task that users often encounter is removing a bit from their impact clamp or driver. This article will explore How to Remove Bit from Dewalt Impact Driver and the necessary maintenance steps for Dewalt impact drivers and various techniques for safely and efficiently removing a bit from the driver.

    How to Remove Bit from Dewalt Impact Driver

    1. Dewalt Impact Driver Maintenance

    Maintaining your Dewalt impact driver is crucial for its longevity and optimal functionality. By following these maintenance steps, you can ensure that your impact driver operates smoothly and reliably.

    I. Regular Cleaning and Inspection

    To begin the maintenance process, cleaning your impact driver regularly is important. Start by removing any dust, dirt, or debris that may have accumulated on the driver’s exterior and internal components.

    Use a soft brush or compressed air to clean these areas gently. Additionally, inspect the impact driver for loose or damaged parts, such as screws, bolts, or housing screws. Tighten any loose screws or components and replace any damaged screws or parts to prevent further issues.

    II. Lubrication and Oiling

    Lubrication is essential for maintaining the performance and longevity of your impact driver. Select a high-quality lubricant that is compatible with your impact driver’s components. Apply a small amount of lubricant to the necessary areas, such as the chuck, collet, and moving parts. This will help reduce friction and ensure smooth operation.

    III. Battery Care

    Proper care is essential for maximizing lifespan if your Dewalt impact driver utilizes a rechargeable battery. Follow the manufacturer’s recommendations for charging and storage. Avoid overcharging the battery, as this can diminish performance and reduce its lifespan. Additionally, periodically check the battery’s health and replace it if necessary.

    Dewalt Impact Driver

    2. How To Remove Bit From Dewalt Impact Driver

    When it comes to removing a bit from your Dewalt impact driver, there are several techniques you can employ. The choice of technique may depend on the specific model of your impact driver and personal preference. Here are some commonly used methods for bit removal:

    I. Manual Bit Removal

    Most Dewalt impact drivers feature a manual bit release mechanism.

    • Locate the manual release button or collar on the driver near the chuck.
    • Press or rotate the release mechanism to disengage the bit from the driver.
    • Once released, you can easily remove the bit by pulling it out.

    You can use a screwdriver, wrench, pair of pliers, or a bit removal tool to aid in the process. These tools provide a better grip on the tip of the bit, making removing it easier. Grasp the bit with the pliers, screwdriver, wrench, or tool and pull it out.

    II. Using Pliers for Bit Extraction

    Pliers can provide the extra push, grab, pull, and leverage needed if the drill bit is stuck or difficult to remove. Follow these steps for safe and effective drill bit extraction:

    • Ensure the impact driver is turned off and disconnected from any power source.
    • Identify the exposed part of the bit that is visible in the chuck.
    • Firmly grasp the exposed part of the bit with a pair of pliers.
    • While holding the pliers securely, rotate and pull the bit straight out.
    • If the bit is still stubborn, gently wiggle it back and forth while applying steady pulling force.
    • Once the bit starts to move, continue pulling until it is fully removed.

    Remember to exercise caution while using pliers to tighten to avoid damaging the impact driver or injuring yourself. Apply steady and controlled force to tighten to avoid slippage, slip, or excessive pressure.

    III. Magnetic Bit Holders

    Magnetic drill bit holders are a convenient accessory that can simplify removing a bit from your impact driver. These drill bit holders have a built-in magnet that securely holds the bit in place. To remove the drill chuck from the bit flat-head screwdriver, follow these steps:

    • Ensure the impact driver is turned off and disconnected from any power source.
    • Grasp the magnetic bit holder firmly with one hand.
    • With your other hand, firmly grasp the exposed part of the bit.
    • Pull the bit straight out while maintaining a steady grip on the magnetic bit holder.
    • The magnet will release the bit as you pull it away.

    Magnetic drill bit holders are particularly useful when dealing with small or hard-to-reach, tight spaces. They provide a reliable grip on the drill bit and reduce the risk of dropping or losing it.

    IV. Impact Bit Removal

    In certain situations, the bit may become jammed or stuck in the keyless chuck of your Dewalt impact driver. Many impact drivers have a specific mechanism for impact bit removal to address this issue. This mechanism helps dislodge the chuck collar from the stuck bit keyed chuck and allows for easy chuck removal. Consult your impact driver’s manual for instructions on engaging the impact bit removal mechanism and follow the steps to remove the bit safely.

    3. Additional Tips and Best Practices

    In addition to the specific techniques mentioned above, here are some additional tips and best practices for maintaining your Dewalt impact driver:

    • Properly store your impact driver and bits in a clean, dry environment to prevent damage and corrosion.
    • Regularly inspect the condition of your bits. Replace any worn or damaged bits to ensure efficient and safe operation.
    • Use the right bit for the job. Different projects require different types of bits. Using the correct bit will improve performance and prevent damage to the driver and workpiece.
    • Always prioritize safety when working with your impact driver. Follow the manufacturer’s guidelines and wear appropriate personal protective equipment.

    If you’re also interested in removing a drill bit from a Dewalt drill, check out our video guide on our website “How To Remove A Drill Bit From A Dewalt Drill” for step-by-step instructions.

    4. FAQs

    I. How often should I clean my Dewalt impact driver?

    It’s a good practice to clean your impact driver after each use or when you notice dust and debris buildup. Regular cleaning will help maintain its performance and prevent potential issues.

    II. Can I use any lubricant for my impact driver?

    No, using a lubricant specifically designed for power tools is important. Consult your impact driver’s manual or contact the manufacturer for recommendations on suitable lubricants.

    III. Are magnetic bit holders compatible with all impact drivers?

    Magnetic bit holders are generally compatible with the most common type of impact driver. However, it’s always a good idea to check the specifications and compatibility of the bit holder with your specific impact driver model.

    IV. Can I remove a stuck bit using pliers?

    Yes, pliers can provide extra leverage to the hammer to remove or loosen a stuck drill bit. However, exercise caution to avoid damaging the hammer, impact driver, or the bit during removal.

    V. Should I wear protective gear when using an impact driver?

    When using an impact driver, it’s important to wear appropriate personal protective equipment, such tools such as safety glasses and work gloves. This will help prevent potential injuries from flying debris or accidental contact.

    5. Conclusion

    Maintaining your Dewalt impact driver is crucial for its longevity and optimal performance. By following the maintenance steps outlined in this article and utilizing the various techniques for bit removal, you can ensure that your impact driver continues to deliver reliable results.

    Regular cleaning, lubrication, and proper battery care will improve its longevity. At the same time, the different bit removal techniques will assist you in efficiently changing bits to suit your project needs. Remember to exercise caution and prioritize safety during the maintenance and bit removal and switching process.


  • How to Permanently Color Stainless Steel: Shades of Steel

    How to Permanently Color Stainless Steel: Shades of Steel

    Stainless color stainless steel is a versatile and popular material due to its durability, corrosion resistance, and sleek appearance. While stainless steel is commonly found in its natural silver color, there may be instances where coloring can add a unique touch to a project or design. This article explores different techniques and methods of how to permanently color stainless steel, giving you the knowledge to transform its appearance according to your needs.

    How To Permanently Color Stainless Steel

    1. Understanding Stainless Steel Coloring

    Before delving into the coloring methods, it is essential to understand the basics of stainless steel coloring. Stainless steel is an alloy primarily composed of iron, chromium, and nickel, which gives it its characteristic corrosion resistance.

    When stainless steel is exposed to different coloring techniques, the surface transforms, resulting in a visually appealing and colored finish. Surface preparation plays a crucial role in achieving a successful coloration.

    The stainless steel surface needs to be free from contaminants, such as oils, grease, or dirt, to ensure proper adhesion of the coloring agents or treatments. Surface cleaning and mechanical abrasion are often necessary to create a suitable surface for coloring.

    2. Stainless Steel Coloring Techniques

    Several techniques can be employed to add color to stainless steel. Each method offers its advantages and produces unique results. Here are some commonly used techniques:

    I. Physical Vapor Deposition (PVD)

    PVD is a popular technique that utilizes vacuum deposition to create a thin film of colored material on the stainless steel surface. This process allows for precise control over the color and provides excellent durability.

    II. Electrochemical Coloring

    Electrochemical gold the coloring process involves immersing stainless steel in an electrolytic bath solution and applying an electric current. This heating process then forms and coats a layer of metal oxides on the surface, which can be colored by controlling the voltage and duration of the treatment.

    III. Powder Coating

    Powder coating is a method of coating where a solution of a dry powder solution is electrostatically applied to the stainless steel surface and then cured under heat. It provides a wide range of color options and excellent durability.

    IV. Paint

    Painting stainless steel is a common method for adding color to stainless steel. It involves applying a suitable paint or coating directly onto the surface. However, spray paint may provide a different level of durability than other techniques.

    V. Anodizing

    Anodizing is commonly used on aluminum but can also be applied to stainless steel. The process involves creating an oxide layer on the surface of the metal, which can then be colored through dyeing. Anodized stainless steel offers excellent durability and color stability.

    3. How to Permanently Color Stainless Steel

    When coloring stainless steel, achieving a permanent coloration is crucial to ensure long-lasting results. Several methods can be employed to achieve a permanent red color, in stainless steel coloring:

    I. Heat Treatment

    Heat treatment involves subjecting stainless steel to high temperatures to create an oxide layer on the surface. This heat and process can produce vibrant and durable colors, especially on specific grades of stainless steel.

    II. Chemical Treatments

    Chemical treatments involve applying different chemical solutions or agents to the stainless steel surface to induce coloration. These treatments can alter the surface composition and create a range of colors. However, the durability of the paint and the color may vary based on the treatment and environmental factors.

    III. Laser Marking

    Laser marking is a precise method that uses lasers to etch the stainless steel surface and create permanent color changes. This technique is often employed for decorative purposes or to add intricate designs to stainless steel items.

    4. Methods for Coloring Stainless Steel

    When coloring stainless steel, several methods can transform its appearance and add a touch of uniqueness to your projects. These methods offer different techniques and effects to achieve the desired colors and finishes. Here are some popular methods for coloring stainless steel:

    I. Heat Coloring

    Heat coloring is achieved by subjecting stainless steel or copper, or gold to controlled heating, which produces a thin layer of oxides on the surface. The colors formed depend on the temperature and duration of the heat treatment. This method is commonly used for artistic applications and can create a beautiful range of colors.

    II. Patination

    Patination involves the controlled application of chemicals to the stainless steel surface to induce specific colors and changes. This method of coating is often used in the metal industry for artistic and architectural applications to achieve unique and aesthetically pleasing finishes.

    III. Chemical Staining

    Chemical staining utilizes different chemical solutions or agents to permanently stain the stainless steel surface. This method offers a wide range of popular choices of colors and is commonly used for decorative purposes on appliances.

    IV. Electropolishing

    Electropolishing is a method that combines metal surface polishing and electrochemical coloring. It involves immersing stainless steel in an electrolyte bath and applying an electric current to remove a thin surface layer while inducing color changes. Electropolishing provides both aesthetic and functional benefits.

    V. Ceramic Coatings

    Ceramic coatings can be applied to stainless steel surfaces to achieve both color and enhanced durability. These very resistant coatings offer excellent resistance to wear, corrosion, and high temperatures, making them suitable for various applications.

    5. Factors to Consider

    When coloring stainless steel, several factors should be taken into account to achieve the desired results:

    I. Type of stainless steel

    Different grades of stainless steel may respond differently to certain temperatures and coloring techniques. Choosing the appropriate method is based on the specific grade of stainless steel you are working with.

    II. Surface finish

    The surface finish of titanium and stainless steel, whether it’s polished, brushed, or textured, can affect the appearance of the coat and color. Consider how the coat and the paint or coloring technique will interact with the metal and surface finish to achieve the desired outcome.

    III. Environmental conditions

    The environment in which the colored stainless steel will be exposed can impact the durability and longevity of the color. Consider factors such as chemicals such as UV exposure, dust, humidity, and temperature variations when selecting a coloring method.

    IV. Durability expectations

    Depending on the intended application, the durability of the color stainless steel gold, the color may be a crucial factor. Consider whether the color of stainless steel black or gold color will be subjected to abrasion, chemical exposure, or other forms of wear, and choose a coloring method accordingly.

    6. Challenges and Limitations:

    Coloring stainless steel presents challenges such as surface preparation, achieving color consistency, and ensuring durability and fade resistance. Additionally, limitations include a limited color range, the influence of surface finish, and material compatibility.

    Overcoming these issues requires testing and sample and water solution creation, optimizing surface preparation, and seeking expert consultation.

    7. Safety Precautions and Best Practices

    To ensure safety during the oil colorization process, it is important to use protective gear, maintain proper ventilation, provide safety training, and comply with environmental regulations.

    8. Cost Considerations

    When considering the cost of colored stainless steel, factors such as the chosen method, surface preparation, labor and expertise, and the size and quantity of the project should be taken into account.

    Evaluating these factors helps strike a balance between cost-effectiveness and achieving the desired results. When considering the cost of colored stainless steel, factors such as the chosen method, surface preparation, labor and expertise, and the size and quantity of the project should be taken into account.

    9. FAQs (Frequently Asked Questions)

    QI: Is it possible to color stainless steel without compromising its corrosion resistance?

    Yes, coloring stainless steel without compromising its corrosion resistance is possible. Many coloring methods, such as physical vapor deposition and anodizing, provide a protective layer that enhances metal corrosion resistance while adding color.

    QII: Can stainless steel be painted black finish, like other metals?

    Yes, stainless steel items and appliances can be painted. However, it is important to choose a paint specifically designed for stainless steel appliances and follow proper surface preparation techniques to ensure adhesion and durability.

    QIII: What is the lifespan of colored stainless steel?

    The lifespan of colored stainless steel depends on various factors, including the coloring technique used, environmental conditions, and surface preparation. Properly executed and maintained colorations can last for many years or even decades.

    QIV: Can I change the color of an already-colored stainless steel surface?

    In some cases, changing the color of an already-colored stainless steel surface is possible. However, the existing coloration may need to be removed or altered before applying a new paint shade or coloration method.

    QV: Are there any limitations to the colors that can be achieved on stainless steel?

    Stainless steel can be colored in various colors, from metallic shades to vibrant hues. However, the chosen coloring method, surface finish, and type of stainless steel may limit the achievable color palette.

    9. Conclusion

    Coloring stainless steel enhances its aesthetics and creates unique visual effects. You can achieve permanent and durable coloration by utilizing techniques like physical vapor deposition, electrochemical coloring, and heat treatment.

    Consider factors such as durability, surface preparation, and environmental conditions when choosing a coloring method. These considerations ensure successful and visually pleasing stainless steel coloring project results.

  • How To Cut 1/4 Inch Steel Plate: Cutting with Confidence

    How To Cut 1/4 Inch Steel Plate: Cutting with Confidence

    If you plan to work with a 1/4-inch steel plate, one of the most important things you need to know is how to cut it. Cutting steel plates can be a daunting task, especially for beginners. However, with the right tools and techniques, it can be done with ease. This comprehensive guide will show you how to cut 1/4 inch steel plate step by step.

    How To Cut 14 Inch Steel Plate

    1: Tools Required for Cutting 1/4 Inch Steel Plate

    Before you begin cutting a 1/4-inch steel plate, it is important to have the right tools. You can use several tools to cut steel plates, but some are more effective than others. Below are the most common tools used for cutting 1/4-inch steel plates.

    I. Plasma Cutter

    A plasma cutter is a tool that uses an electric arc to cut through steel. A small nozzle creates the arc by passing gas, such as nitrogen or argon. This creates a hot plasma to melt and cut through steel. Plasma cutters are the most efficient way to cut steel plates, and they produce clean, precise cuts.

    II. Angle Grinder

    An angle grinder is a handheld tool that uses a rotating disc to cut through steel. Angle grinders are versatile and can be used for various cutting tasks. They are ideal for cutting small steel plate sections and making quick cuts.

    III. Circular Saw

    A circular saw is a handheld tool that uses a circular blade to cut through steel. Circular saws are easy to use and are ideal for making straight cuts in steel plates. They are less precise than plasma cutters but more affordable and can be used for various cutting tasks.

    IV. Cutting Torch

    A cutting torch is a tool that uses a flame to cut through steel. Cutting torches are ideal for cutting thick steel plate sections but are less precise than plasma cutters. They also produce a lot of heat, which can cause warping and distortion in the steel.

    2: Choosing the Right Tool for the Job

    Each of the tools listed above has its advantages and disadvantages. Choosing the right tool for the job depends on several factors, including the thickness of the steel plate, the complexity of the cut, and the desired level of precision.

    I. Plasma Cutter

    Plasma cutters are the most efficient way to cut 1/4-inch steel plates. They produce clean, precise cuts and can be used to cut complex shapes and patterns. A plasma cutter is the best tool if you need to make precise cuts or are working with a thick steel plate.

    II. Angle Grinder

    Angle grinders are ideal for quick cuts in 1/4-inch steel plates, especially if you only need to make small cuts. They are easy to use and more affordable than plasma cutters. However, they are less precise than plasma cutters and may produce rough edges on the cut.

    III. Circular Saw

    Circular saws are a good option for making straight cuts in a 1/4-inch steel plate. They are easy to use and are more affordable than plasma cutters. However, they are less precise than plasma cutters and may produce rough edges on the cut.

    IV. Cutting Torch

    Cutting torches are ideal for cutting thick sections of steel plate. They are less precise than plasma cutters and may produce rough edges on the cut. They also produce a lot of heat, which can cause warping and distortion in the steel.

    3. Cutting 1/4 Inch Steel Plate with Plasma Cutter

    A plasma cutter is a powerful tool that utilizes a high-velocity jet of ionized gas to cut through various types of metals, including steel. When cutting 1/4-inch steel plates, a plasma cutter provides precise and efficient results. This article will provide a step-by-step guide on using a plasma cutter to cut a 1/4-inch steel plate effectively.

    I: Gather the Necessary Tools and Safety Equipment

    Before you begin, gather the following tools and safety equipment:

    • Plasma cutter
    • Compressed air source
    • Personal protective equipment (PPE) – Safety goggles, face shield, gloves, and protective clothing
    • Fire extinguisher
    • Clamps or magnets (optional)
    • Marking tool (such as a marker or chalk)
    • Straight edge or guide

    Ensure that your plasma cutter is in good working condition and that the consumables (nozzle, electrode, and shield) are suitable for cutting metal. Personal protective equipment, including safety goggles, a face shield, gloves, and protective clothing, is crucial to safeguard yourself from sparks, UV radiation, and fumes during cutting.

    II: Prepare the Work Area

    Clear your work area of flammable materials or debris that could pose a fire hazard. Place the steel plate on a stable surface and ensure it is securely positioned. Use clamps or magnets to hold the plate in place and prevent movement during cutting.

    III: Mark the Cutting Line

    Using a marking tool, such as a marker or chalk, mark the cutting line on the steel plate. Ensure the line is visible and accurately represents the desired cut. If precision is crucial, you can use a straight edge or guide to create a straight line.

    IV: Connect and Set Up the Plasma Cutter

    Connect the plasma cutter to a suitable compressed air source, following the manufacturer’s instructions. Adjust the cutting parameters on the plasma cutter according to the thickness of the steel plate. This may include selecting the appropriate amperage, gas flow rate, and torch height.

    V: Position the Plasma Cutter

    Position the plasma cutter torch at the starting point of the cut line. Hold it steady and adjust the angle of the nozzle to approximately 45 degrees from the surface of the steel plate. Ensure the torch is perpendicular to the plate for a clean and precise cut.

    VI: Start the Cut

    With all safety precautions in place, activate the plasma cutter by following the manufacturer’s instructions. Typically, this involves pressing the trigger or activating the torch switch. Once activated, move the plasma cutter along the cut line steadily. The intense heat of the plasma arc will melt through the steel plate, creating a clean and precise cut.

    VII: Finish the Cut

    Once you have cut through the steel plate, release the trigger or deactivate the torch to stop the plasma arc. Move the plasma cutter away from the cut area, ensuring that the torch is clear of the plate. Allow the steel plate to cool down before handling it.

    VIII: Post-Cutting Steps

    Inspect the cut for rough edges or dross (residual molten metal). Use a grinder or file to smooth out the cut edges and remove any dross if necessary. It’s essential to ensure the cut is clean and free from obstructions.

    IX. Safety Tips to Keep in Mind

    When using a plasma cutter to cut a 1/4-inch steel plate, it is crucial to prioritize safety. Here are some essential safety tips to keep in mind:

    • Always wear the appropriate personal protective equipment (PPE),
      Including safety goggles, a face shield, gloves, and protective clothing, to safeguard yourself from sparks, UV radiation, and fumes.
    • Keep a fire extinguisher nearby in case of any accidental fires.
    • Ensure that the work area is well-ventilated to minimize the buildup of fumes from the cutting process.
    • Maintain a safe distance from the cutting area to prevent accidental contact with the plasma arc.
    • Regularly inspect your plasma cutter and consumables for any signs of damage or wear, and replace them as necessary.

    4: Cutting 1/4 Inch Steel Plate with an Angle Grinder

    An angle grinder is a powerful and versatile tool commonly used for cutting and grinding various materials. An angle grinder can effectively cut 1/4-inch steel plates with the right blade and technique. Here, we will provide a step-by-step guide on cutting a 1/4-inch steel plate using an angle grinder.

    I: Gather the Necessary Tools and Safety Equipment

    Before you begin, gather the following tools and safety equipment:

    • Angle grinder
    • Cutting wheel or abrasive disc suitable for metal cutting
    • Safety goggles
    • Hearing protection
    • Gloves
    • Clamps (optional)
    • Marking tool (such as a marker or chalk)
    • Straight edge or guide

    Ensure that your angle grinder is in good working condition and that the cutting wheel or abrasive disc is suitable for cutting metal. Safety goggles and hearing protection are essential to protect your eyes and ears from sparks and noise during cutting.

    II: Prepare the Work Area

    Clear your work area of any debris or obstacles that could interfere with the cutting process. Place the steel plate on a stable surface and ensure it is securely positioned. Use clamps to hold the plate in place and prevent movement during cutting if necessary.

    III: Mark the Cutting Line

    Using a marking tool, such as a marker or chalk, mark the cutting line on the steel plate. Ensure the line is visible and accurately represents the desired cut. If precision is crucial, you can use a straight edge or guide to create a straight line.

    IV: Attach the Cutting Wheel or Abrasive Disc

    Ensure that your angle grinder is turned off and unplugged. Depending on your angle grinder model, follow the manufacturer’s instructions to attach the appropriate cutting wheel or abrasive disc for metal cutting. Make sure the wheel or disc is securely fastened before proceeding.

    V: Position the Grinder and Make the Cut

    Position the angle grinder so the cutting wheel or abrasive disc aligns with the marked cutting line on the steel plate. Hold the grinder firmly, placing one hand on the main handle and the other on the auxiliary handle (if available). Position yourself in a comfortable stance, ensuring stability and balance.

    Start the angle grinder and allow it to reach full speed before initiating the cut. Slowly and steadily guide the cutting wheel or abrasive disc along the marked cutting line, applying gentle pressure. Let the tool do the work and avoid excessive force or pushing.

    VI: Finish the Cut

    Once you have completed the cut, release the power switch and wait for the cutting wheel or abrasive disc to come to a complete stop before setting the angle grinder down. Carefully remove the grinder from the steel plate, ensuring that the cutting wheel or abrasive disc is clear of the material.

    VII: Post-Cutting Steps

    Inspect the cut for any rough edges or burrs. Use a file or deburring tool to smooth out the cut edges and remove any sharp points if necessary. It’s essential to ensure the cut is clean and free from obstructions.

    VIII. Safety Tips to Keep in Mind

    When cutting steel with an angle grinder, it is crucial to prioritize safety. Here are some essential safety tips to keep in mind:

    • Always wear safety goggles, hearing protection, and gloves to protect yourself from sparks, debris, and noise.
    • Ensure the work area is well-ventilated to minimize exposure to fumes or smoke generated during cutting.
    • Keep your hands and fingers away from the cutting area and the path of the cutting wheel or abrasive disc.
    • Use clamps or other methods to secure the steel plate and prevent it from moving during cutting.
    • Follow the manufacturer’s instructions for operating the angle grinder, changing blades or discs, and maintaining the tool.
    • Regularly inspect your tools for damage or wear, and replace worn-out or damaged parts.

    5: Cutting 1/4 Inch Steel Plate with a Circular Saw

    A circular saw is a versatile power tool commonly used to cut various materials, including wood, plastic, and even steel. While it is primarily known for woodworking applications, it can also cut through 1/4-inch steel plates with the right blade and technique. Here will provide a step-by-step guide on using a circular saw to effectively cut a 1/4-inch steel plate.

    I: Gather the Necessary Tools and Safety Equipment

    Before you begin, gather the following tools and safety equipment:

    • Circular saw
    • Appropriate metal-cutting blade (such as a carbide-tipped or abrasive blade)
    • Safety goggles
    • Hearing protection
    • Gloves
    • Clamps (optional)
    • Marking tool (such as a marker or chalk)
    • Straight edge or guide

    Ensure your circular saw is in good working condition, and the blade is suitable for cutting metal. Safety goggles and hearing protection are essential to protect your eyes and ears from sparks and noise during cutting.

    II: Prepare the Work Area

    Clear your work area of any debris or obstacles that could interfere with the cutting process. Place the steel plate on a stable surface and ensure it is securely positioned. Use clamps to hold the plate in place and prevent movement during cutting if necessary.

    III: Mark the Cutting Line

    Using a marking tool, such as a marker or chalk, mark the cutting line on the steel plate. Ensure the line is visible and accurately represents the desired cut. If precision is crucial, you can use a straight edge or guide to create a straight line.

    IV: Set the Cutting Depth and Angle

    Adjust the cutting depth of your circular saw to match the thickness of the 1/4-inch steel plate. Most circular saws have a depth adjustment lever or knob that allows you to set the desired cutting depth. Additionally, if you need to make bevel cuts, adjust the saw’s base plate to the desired angle using the bevel adjustment mechanism.

    V: Position the Saw and Make the Cut

    Position the circular saw so the blade aligns with the marked cutting line on the steel plate. Hold the saw firmly with both hands, placing one hand on the front handle and the other on the rear handle. Align the blade with the cutting line and ensure that the base plate is in full contact with the surface of the steel plate.

    Start the circular saw and allow it to reach full speed before initiating the cut. Apply gentle pressure and guide the saw steadily along the marked cutting line. Let the blade work, allowing it to cut through the steel plate gradually. Avoid forcing the saw or pushing it too hard, which can cause the blade to bind or kick back.

    VI: Finish the Cut

    Once you have completed the cut, release the power trigger and wait for the blade to come to a complete stop. Carefully remove the saw from the steel plate, ensuring that the blade is clear of the material. Allow the steel plate to cool down before handling it.

    VII: Post-Cutting Steps

    Inspect the cut for any rough edges or burrs. Use a deburring tool or a file to smooth out the cut edges and remove any sharp points if necessary. It’s essential to ensure the cut is clean and free from obstructions.

    VIII. Safety Tips to Keep in Mind

    When cutting steel with a circular saw, it is crucial to prioritize safety. Here are some essential safety tips to keep in mind:

    • Always wear safety goggles, hearing protection, and gloves to protect yourself from sparks and debris.
    • Ensure the work area is well-ventilated to minimize exposure to fumes or smoke generated during cutting.
    • Keep your hands and fingers away from the cutting line and the blade’s path.
    • Use clamps or other methods to secure the steel plate and prevent it from moving during cutting.
    • Follow the manufacturer’s instructions for operating the circular saw and changing blades.
    • Regularly inspect your tools for damage or wear, and replace worn-out or damaged parts.

    6: Cutting 1/4 Inch Steel Plate with a Cutting Torch

    A cutting torch is a versatile tool commonly used for cutting through various types of metals, including steel. When cutting 1/4-inch steel plates, a cutting torch provides an effective and efficient method. This article will provide a step-by-step guide on using a cutting torch to cut a 1/4-inch steel plate.

    I: Gather the Necessary Tools and Safety Equipment

    Before you begin, gather the following tools and safety equipment:

    • Cutting torch
    • Oxygen and acetylene cylinders
    • Pressure regulators
    • Cutting tips suitable for steel cutting
    • Safety goggles
    • Gloves
    • Fire extinguisher
    • Clamps or magnets (optional)
    • Marking tool (such as a marker or chalk)
    • Straight edge or guide

    Ensure your cutting torch is in good working condition, and the cutting tips are appropriate for steel cutting. Safety goggles and gloves are essential to protect your eyes and hands from sparks, UV radiation, and heat during cutting. It’s also necessary to have a fire extinguisher nearby in case of any accidental fires.

    II: Prepare the Work Area

    Clear your work area of flammable materials or debris that could pose a fire hazard. Place the steel plate on a stable surface and ensure it is securely positioned. If necessary, use clamps or magnets to hold the plate in place and prevent movement during cutting.

    III: Mark the Cutting Line

    Using a marking tool, such as a marker or chalk, mark the cutting line on the steel plate. Ensure the line is visible and accurately represents the desired cut. If precision is crucial, you can use a straight edge or guide to create a straight line.

    IV: Set Up the Cutting Torch

    Connect the oxygen and acetylene cylinders to the cutting torch, following the manufacturer’s instructions. Adjust the pressure regulators to the recommended settings for cutting a 1/4-inch steel plate. Having the proper gas flow rates is essential to achieve a clean and efficient cut.

    V: Ignite the Torch and Adjust the Flame

    Ignite the torch using a flint striker or a suitable ignition method. Adjust the flame to achieve a neutral flame, characterized by a light blue inner cone surrounded by a darker outer cone. The neutral flame provides the ideal balance of oxygen and acetylene for cutting steel.

    VI: Position the Cutting Torch

    Position the cutting torch at the starting point of the cut line, holding it at approximately a 45-degree angle to the steel plate. Ensure the torch is perpendicular to the plate for a clean and precise cut.

    VII: Start the Cut

    With all safety precautions in place, slowly open the oxygen valve to introduce the oxygen stream into the neutral flame. Then, gradually open the acetylene valve to introduce the acetylene stream into the flame. The flame will heat the steel plate, allowing it to oxidize and form a molten pool. Slowly move the cutting torch along the marked cutting line, allowing the molten pool to sever the steel plate.

    VIII: Finish the Cut

    Once you have completed the cut, close the acetylene valve first, followed by the oxygen valve. Allow the steel plate to cool down before handling it.

    IX: Post-Cutting Steps

    Inspect the cut for rough edges or slag (residual molten metal). Use a grinder or file to smooth out the cut edges and remove any slag if necessary. It’s essential to ensure the cut is clean and free from obstructions.

    X. Safety Tips to Keep in Mind

    When using a cutting torch to cut a 1/4-inch steel plate is crucial to prioritize safety. Here are some essential safety tips to keep in mind:

    • Always wear safety goggles and gloves to protect yourself from sparks, UV radiation, and heat.
    • Ensure that the work area is well-ventilated to minimize the buildup of fumes from the cutting process.
    • Keep a fire extinguisher nearby in case of any accidental fires.
    • Maintain a safe distance from the cutting area to prevent accidental contact with the flame.
    • Regularly inspect your cutting torch and equipment for any signs of damage or wear, and replace them as necessary.

    7: FAQs

    I. Can I use a jigsaw to cut 1/4 inch steel plate?

    Jigsaws are not recommended for cutting steel plates, especially at this thickness. They are designed for cutting wood and other softer materials.

    II. Can I use a hacksaw to cut 1/4 inch steel plate?

    Hacksaws can be used to cut steel plates, but they are not recommended for plates of this thickness. They are more suited for cutting thinner materials.

    III. How long does it take to cut 1/4 inch steel plate with a plasma cutter?

    The time it takes to cut a 1/4-inch steel plate with a plasma cutter will depend on the size and complexity of the cut. It can range from a few seconds to several minutes.

    IV. Can I cut 1/4 inch steel plate without any safety gear?

    No, cutting steel plates without wearing personal protective equipment (PPE) is unsafe. Always wear eye protection, ear protection, and gloves when cutting steel plates.

    V. Can I cut 1/4 inch steel plate with a handsaw?

    Handsaws are not recommended for cutting steel plates, especially at this thickness. They are designed for cutting wood and other softer materials.

    8: Conclusion

    Cutting a 1/4-inch steel plate can be a challenging task, but with the right tools and safety precautions, it can be done safely and efficiently. Plasma cutters are the most precise option, but they can be expensive. Angle grinders, circular saws, and cutting torches are more affordable options, but they may produce rough edges on the cut. Always take safety precautions when cutting steel plates, and remember to finish the edges afterward.

  • How To Stop Losing The Remote: The Search is Over!

    How To Stop Losing The Remote: The Search is Over!

    We’ve all experienced the frustration of searching for the remote control when it mysteriously goes missing. It has a knack for disappearing at inconvenient times, causing unnecessary stress, and disrupting our leisurely activities. However, there are effective strategies to help us end this maddening game of hide-and-seek. This article will explore How To Stop Losing The Remote and various methods to stop losing the remote and regain control over our entertainment experience.

    How To Stop Losing The Remote

    1: Introduction

    We’ve all been there – you settle in for a night of TV watching, only to realize that your remote is nowhere to be found. It’s a frustrating problem that can quickly ruin your plans for the evening. A remote is a vital tool for controlling your TV. Without it, you’re left with limited options for adjusting the volume, changing the channel, or navigating menus.

    But losing your remote doesn’t have to be a permanent problem. Several solutions are available to prevent remote loss, and finding the right strategy can save you from the frustration of searching for a lost remote. This article will explore some of the best tips and tricks for keeping track of your remote and controlling your TV, even when the remote is missing.

    2: Identify the Common Problem Areas

    To effectively tackle the issue of a missing remote, it’s essential to identify the common problem areas where it tends to get lost. These areas include the crevices of couch cushions, the abyss under furniture, and the gaps between seat cushions. Additionally, remotes may often be carried away unintentionally in other rooms. By understanding these problem areas, we can proactively prevent future losses.

    I. Forget where they put it

    The most common reason people lose their remote is to remember where to put it. This can happen when watching TV while doing something else, like working on your laptop or reading a book. You might have placed it somewhere and forgot about it later on.

    II. Misplacing it in the clutter

    Another reason why people lose their remote is that they need to place it in clutter. It is easy to lose track of your remote if you have a cluttered coffee table or a messy living room. It can blend in with other items or get buried under piles of magazines and newspapers.

    III. Accidentally leaving it in another room

    Sometimes, people lose their remote because they accidentally leave it in another room. For example, you brought it to the kitchen to grab a snack and forgot to return it to the living room. Alternatively, you used it in your bedroom and left it on your nightstand.

    IV. Children or pets playing with it

    Lastly, children or pets playing with the remote are also common reasons people lose it. Kids and pets love to play with gadgets, and the remote control is no exception. They might hide it somewhere, throw it under the couch, or chew on it.

    3: Strategies for Preventing Remote Loss

    I. Organizational Tips

    a. Organizational Tips for Managing Your Remote Controls

    Do you ever find yourself frantically searching for your TV remote or struggling to navigate multiple remote controls for various devices in your home? Managing remote controls can be a hassle, but with a few simple organizational tips, you can streamline the process and eliminate the stress. Here will cover several practical organizational tips to help you keep track of your remote controls and enjoy a more seamless entertainment experience.

    b. Designating a Specific Spot for the Remote

    Designating a specific spot is one of the most basic organizational tips for managing your remote controls. This could be a small tray or basket on your coffee table, a dedicated drawer in your entertainment center, or even a decorative box on your shelf. By having a designated spot for your remote controls, you’ll always know where they are and won’t waste time searching for them.

    c. Using a Remote Holder or Caddy

    Consider investing in a remote holder or caddy if you have multiple remote controls for different devices. These handy organizational tools come in various sizes and designs, from simple acrylic holders to more elaborate wooden caddies with compartments for each remote. Not only do remote holders and caddies keep your remotes neatly organized and in one place, but they can also add a stylish touch to your living room décor.

    d. Investing in a Smart Remote that Can Be Located with an App

    If you frequently misplace your remote control, investing in a smart remote that can be located with an app might be the perfect solution for you. Many smart remotes on the market, such as the Logitech Harmony Elite or the Sevenhugs Smart Remote, can be tracked using your smartphone or tablet. With these devices, you can use the app to locate your remote control, eliminating the need for a frantic search.

    II. Mindful Practices for Managing Your Remote Controls

    In addition to the organizational tips we covered in the previous section, there are also some mindful practices you can adopt to help you manage your remote controls more effectively. By being more present and mindful when handling your remotes, you can reduce the likelihood of misplacing them or becoming overwhelmed by clutter. Let’s explore some of these practices in more detail.

    a. Developing a Habit of Always Putting the Remote in Its Designated Spot

    One of the simplest but most effective mindful practices for managing your remote controls is always to put the remote in its designated spot when you’re finished using it. This may require some conscious effort at first, but it will become second nature over time. You’ll never have to waste time searching for it or dealing with clutter by always putting the remote back in its place.

    b. Being More Present and Mindful When Handling the Remote

    Another mindful practice for managing your remote controls is to be more present and mindful when handling them. This means focusing on the task and being fully aware of your actions. For example, when you pick up the remote to change the channel or adjust the volume, take a moment to focus on the buttons you’re pressing and the actions you’re taking. Being more present and mindful will make you less likely to lose track of your remotes or misplace them.

    c. Setting Reminders to Ensure the Remote is Not Left Behind

    If you frequently need to remember things, setting reminders can be a helpful way to ensure you keep your remote controls. You can set reminders on your phone or computer to remind you to grab your remote before you leave the room or to check that it’s in its designated spot before you go to bed at night. You can develop a more mindful and intentional relationship with your remote controls by using reminders to keep yourself accountable.

    III. Technology Solutions for Managing Your Remote Controls

    In addition to mindful practices and organizational tips, there are also some technology solutions you can consider to help you manage your remote controls more effectively. Let’s take a look at some of these solutions in more detail.

    a. Using Voice-Activated Assistants to Control the TV

    One of the most convenient technology solutions for managing your remote controls is to use a voice-activated assistant to control your TV. Devices like Amazon Echo and Google Home allow you to use voice commands to change channels, adjust the volume, and even launch streaming apps like Netflix and Hulu. This can be particularly helpful if you need help finding the right buttons on your remote or if you have mobility issues that make it difficult to hold and operate the remote.

    b. Utilizing Universal Remotes or Apps That Can Control Multiple Devices

    Another technology solution for managing your remote controls is to use a universal remote or an app that can control multiple devices. These devices allow you to control your TV, cable box, sound system, and other devices with a single remote or app, eliminating the need to juggle multiple remotes. Some universal remotes even allow you to customize buttons and program macros, making it easier to perform everyday tasks with a single button press.

    c. Using “Find My Remote” Features on Some Smart TVs

    If you have a smart TV, you can use “find my remote” features to help you locate a misplaced remote. Some smart TVs have built-in sensors that can detect the remote’s location, while others allow you to use a smartphone app to ping the remote and make it emit a sound. This can be particularly helpful if you’re prone to losing your remote in the couch cushions or under the bed.

    IV. Identify the Common Problem Areas

    To effectively tackle the issue of a missing remote, it’s essential to identify the common problem areas where it tends to get lost. These areas include the crevices of couch cushions, the abyss under furniture, and the gaps between seat cushions. Additionally, remotes may often be carried away unintentionally in other rooms. By understanding these problem areas, we can proactively prevent future losses.

    V. Create a Designated Spot for the Remote

    One of the simplest yet most effective solutions is to create a designated spot for the remote. Investing in a remote control holder or organizer allows you to establish a consistent location where the remote should always be placed. Choose

    A spot that is convenient and easily accessible, such as a coffee table or a nearby shelf. By assigning a specific place for the remote, you reduce the chances of misplacing it.

    VI. Implement Good Habits

    Developing good habits is critical to preventing the loss of your remote control. Always make it a point to return the remote to its designated spot after use rather than leaving it on the couch or any random surface. By instilling this habit, you establish a routine that reduces the likelihood of misplacing the remote.

    VII. Use Technology

    Take advantage of technological advancements in remote control systems. Voice control remotes, such as those integrated with virtual assistants like Alexa or Google Assistant, provide a hands-free experience and minimize the need for physical interaction with the remote. Additionally, smartphone apps can transform your phone into a remote, ensuring you always have a backup control method at hand.

    VIII. Create Visual Reminders

    Visual reminders can be effective cues to help you remember where the remote should be placed. Consider placing sticky notes near the TV or entertainment center with prompts like “Don’t forget the remote!” or “Put the remote here!” Another helpful technique is to use colored tape or markers to draw attention to the designated spot, making it more visually distinct and memorable.

    IX. Establish a Routine

    Incorporating finding the remote into your daily routine can be an effective way to prevent it from going missing. Make it a habit to check the remote’s location before leaving the room or turning off the TV. Integrating this action into your routine increases the chances of catching any potential misplacements early on.

    X. Involve the Whole Household

    If you live with family or roommates, educating them about the importance of keeping track of the remote is crucial. Explain the inconveniences caused by losing it and encourage their cooperation and responsibility. By involving the whole household in the quest to stop losing the remote, you create a team effort that minimizes the occurrence of misplacement.

    XI. Keep a Spare Remote

    Sometimes, despite our best efforts, remotes can still elude us. In such cases, having a spare remote can save the day. Keep a backup remote control readily available, whether a spare one from a previous device or a purposefully purchased duplicate. Store it conveniently where it can be easily accessed when needed.

    XII. Check Inside Unusual Places

    When searching for a lost remote, thinking outside the box and checking unusual spots is essential. Besides the typical problem areas, consider looking in unconventional places where the remote might have fallen or been misplaced. Check under furniture, behind cushions, or between books or magazines. Sometimes, the remote might have found its way to unexpected locations.

    XIII. Retrace Your Steps

    When all else fails, retracing your steps can be a helpful strategy. Remember your activities and movements since the last time you used the remote. Visualize the rooms you visited, the surfaces you interacted with, and the objects you handled. You might trigger a memory or discover a clue leading to the remote’s whereabouts by mentally retracing your actions.

    4. Troubleshooting Tips When Your Remote Is Lost

    Losing your remote can be a frustrating experience. However, there are some troubleshooting tips you can try before rushing out to buy a replacement. Let’s take a look at some of these tips in more detail.

    I. Using a Phone or Tablet as a Remote

    If you have a smartphone or tablet, you can use it as a remote for your TV. Many TVs now have apps that allow you to control the TV with your phone or tablet, either over Wi-Fi or Bluetooth. These apps can replicate most of the functions of a traditional remote, including changing channels, adjusting the volume, and launching streaming apps.

    II. Manually Operating the TV Without the Remote

    Sometimes, you can manually operate your TV without the remote. Most TVs have buttons on the side or back that allows you to change channels, adjust the volume, and access other functions. While this may not be as convenient as using a remote, it can be a temporary solution if you need to watch something immediately and need help finding your remote.

    III. Purchasing a Replacement Remote

    Suppose you’ve tried using your phone or manually operating the TV and still can’t find your remote. In that case, you may need to purchase a replacement. Replacement remotes are typically found online or at electronics stores; many are reasonably priced. Before buying a replacement, check that it’s compatible with your TV model and has all the features you need.

    5: FAQs

    I. Can I use my phone as a TV remote?

    Yes, in many cases, you can use your phone as a TV remote. Many TVs have apps that allow you to control the TV with your phone, either over Wi-Fi or Bluetooth. These apps can replicate most of the functions of a traditional remote, including changing channels, adjusting the volume, and launching streaming apps.

    II. How can I control my TV without a remote?

    Sometimes, you can manually operate your TV without the remote. Most TVs have buttons on the side or back that allows you to change channels, adjust the volume, and access other functions. While this may not be as convenient as using a remote, it can be a temporary solution if you need to watch something immediately and can’t find your remote.

    III. How can I find a lost remote?

    If you’ve lost your remote, there are several things you can try. First, try retracing your steps and looking at all the places you’ve been recently. You can also try using some smart TVs’ “find my remote” feature. If all else fails, you may need to purchase a replacement remote.

    IV. What is the best way to organize my remotes?

    One of the best ways to organize your remotes is to designate a specific spot for each remote and always put it back in that spot. You can also invest in a remote holder or caddy to keep all your remotes in one place.

    V. Are there any apps to help me find a lost remote?

    Some smart TVs have a “find my remote” feature to help you locate your lost remote. Additionally, there are apps available for some phones and tablets that can help you locate a lost remote if it’s within Bluetooth range.

    6: Conclusion

    Losing your TV remote can be frustrating, but there are several strategies you can use to prevent it from happening. Designating a specific spot for your remote, using a remote holder or caddy, and investing in a smart remote that can be located with an app are all practical solutions. You can also develop mindful practices, such as always putting the remote in its designated spot, being more present and mindful when handling it, and setting reminders to ensure the remote is not left behind.

    If you lose your remote, there are still ways to control your TV, such as using your phone or manually operating the TV. And if all else fails, you can always purchase a replacement remote.

    Finding a solution to prevent remote loss is essential because it can save you from frustration and make your TV viewing experience more enjoyable. Feel free to try different techniques to see what works best for you. With a little effort and organization, you can ensure your remote is always within reach when needed.

  • How to Maintain Your Impact Wrenches: 13 Tips for Longevity

    How to Maintain Your Impact Wrenches: 13 Tips for Longevity

    Impact wrenches are powerful tools widely used in mechanical and industrial settings. These versatile tools are designed to loosen and tighten bolts and nuts quickly and efficiently, making them a must-have for many industries. Whether you use an electric, pneumatic, or cordless impact wrench, proper maintenance is essential to ensure its performance, longevity, and safety. Neglecting to maintain your impact wrench can lead to decreased efficiency, damaged parts, and even accidents. This article includes How to Maintain Your Impact Wrenches, and aims to provide comprehensive information on impact wrench maintenance, including cleaning, lubrication, troubleshooting, and storage. By following these maintenance tips, you can extend the life of your impact wrench and save yourself from costly repairs or replacements.

    1: Understanding Your Impact Wrenches

    Impact wrenches are powerful tools commonly used in automotive and construction industries to tighten or loosen bolts and nuts. There are various types of impact wrenches, each designed for specific applications.

    Types of Impact Wrenches

    1. Cordless Impact Wrench – Powered by batteries and provides mobility.
    2. Electric Impact Wrench – More robust than cordless models and suitable for heavy-duty applications.
    3. Pneumatic Impact Wrench – Connected to an air compressor, these are the most powerful and commonly used in industrial settings.

    How Impact Wrenches Work: Impact wrenches apply a sudden rotational force, torque, to a fastener. The tool delivers this torque through a hammering mechanism that uses compressed air or an electric motor to generate high-speed rotation. The rotational force is transferred to a square drive socket attached to the fastener.

    The hammering mechanism comprises two parts – an anvil and a hammer. The anvil is the stationary part, and the hammer is the moving part. As the hammer rotates, it strikes the anvil, creating a sudden impact force that transfers the torque to the fastener.

    Parts of an Impact Wrench

    1. Anvil – The part that holds the socket and delivers the torque to the fastener.
    2. Hammer – The part that delivers the hammering force to the anvil.
    3. Motor – The part that drives the hammer and generates the torque.
    4. Trigger – The part that controls the speed of the wrench.
    5. Forward/Reverse Switch – The part that changes the tool’s rotation direction.
    6. Battery (in cordless models) – The power source for the tool.
    7. Air Inlet (in pneumatic models) – The part that connects the tool to an air compressor.

    2: Signs That Your Impact Wrench Needs Maintenance

    Impact wrenches are potent tools that require regular maintenance to ensure they operate at their best. Ignoring signs of wear and tear can lead to decreased performance and even damage to the tool. Here are some signs that your impact wrench may need maintenance:

    1. Drop in performance: If your impact wrench is not working as efficiently as it used to, it may be time for maintenance. A drop in performance can manifest as reduced torque output, slower speeds, or longer operation times to complete a job.
    2. Strange noises: If your impact wrench makes unusual noises, such as grinding, rattling, or whining, it could indicate a problem with the tool. These noises may be due to worn or damaged parts, loose connections, or debris inside the tool.
    3. Difficulty switching between forward and reverse: If you have trouble switching the direction of the wrench, it could indicate a problem with the switch mechanism. This could be due to wear and tear on the switch or damage to the internal parts that control the direction of rotation.

    In general, if you notice anything unusual about the performance or operation of your impact wrench, it is best to have it inspected by a qualified technician. Routine maintenance, such as cleaning, lubrication, and inspection of critical parts, can help ensure your tool’s longevity and optimal performance.

    3: Cleaning Your Impact Wrenches

    Cleaning your impact wrench is essential to maintaining its performance and extending its lifespan. Here is a step-by-step guide on how to clean your impact wrench, along with the necessary tools and precautions to take.

    Necessary tools for cleaning:

    1. Compressed air
    2. Cleaning solution or degreaser
    3. Soft-bristled brush or toothbrush
    4. Microfiber cloth or rag

    Step-by-step guide on cleaning:

    1. Disconnect the impact wrench from the power source.
    2. Remove any sockets or accessories attached to the anvil.
    3. Blow out any dust or debris from the tool’s vents, housing, and moving parts using compressed air. This will prevent any foreign objects from getting inside the tool.
    4. Spray cleaning solution or degreaser onto a soft-bristled brush or toothbrush.
    5. Use the brush to scrub the exterior surfaces of the tool, including the anvil, housing, and grip. Pay particular attention to any areas with built-up dirt or grime.
    6. Use a microfiber cloth or rag to remove any excess cleaning solution or degreaser from the tool’s surface.
    7. Inspect the anvil and internal parts of the tool for any signs of damage, wear, or debris buildup. Use compressed air to blow out any debris from the internal parts of the tool.
    8. Reattach any sockets or accessories to the anvil.

    Precautions to take during cleaning:

    1. Always disconnect the impact wrench from the power source before cleaning.
    2. Wear protective gloves and safety glasses to prevent any cleaning solution or debris from coming into contact with your skin or eyes.
    3. Do not immerse the tool in water or any other liquid, which can damage the electrical or mechanical components.
    4. Do not use harsh chemicals or abrasives when cleaning the tool, as this can damage the surface or internal parts.
    5. Allow the tool to dry entirely before reconnecting to or using the power source.

    4: Lubricating Your Impact Wrenches

    Lubricating your impact wrench is an essential maintenance task that can help ensure its optimal performance and longevity. Here is a guide on the types of lubricants, a step-by-step guide on how to lubricate your impact wrench, and how often to do it.

    Types of lubricants:

    1. Lithium-based grease: This grease is commonly used for general-purpose lubrication and can withstand high temperatures and heavy loads.
    2. Silicone spray: This lubricant is suitable for plastic and rubber components and can be used as a general-purpose lubricant.
    3. Teflon-based lubricant: This type of lubricant is suitable for reducing friction in high-speed and high-temperature applications.

    Step-by-step guide on lubrication:

    1. Disconnect the impact wrench from the power source.
    2. Wipe down the exterior of the tool to remove any dirt or debris.
    3. Locate the oil inlet on the impact wrench near the air inlet.
    4. Use a dropper or oil dispenser to apply a few drops of lubricant into the oil inlet.
    5. Reconnect the impact wrench to the power source and run it briefly to distribute the lubricant throughout the internal parts.
    6. Wipe away any excess lubricant from the exterior of the tool.

    How often to lubricate impact wrenches: The frequency of lubrication depends on how often you use your impact wrench. A general rule of thumb is to lubricate the tool every 500 to 1000 uses or every six months, whichever comes first. If you use your impact wrench more frequently or in harsh environments, such as dusty or humid conditions, you may need to lubricate it more frequently. Always refer to the manufacturer’s recommendations for specific lubrication intervals and types of lubricants to use.

    5: Regular Maintenance Schedule for Your Impact Wrenches

    A regular maintenance schedule for your impact wrench is essential to keep it in good working condition and extend its lifespan. Here is a guide on the importance of having a maintenance schedule, how often to perform maintenance tasks, and the tools required for maintenance.

    Importance of having a maintenance schedule: A maintenance schedule helps you keep track of the maintenance tasks required for your impact wrench and ensures that they are performed at the appropriate intervals. Regular maintenance can help prevent breakdowns, reduce the risk of accidents, and extend the life of your tool.

    How often to perform maintenance tasks

    The frequency of maintenance tasks depends on the frequency and intensity of use. Here are some general guidelines for maintenance tasks:

    1. Cleaning: Clean the tool after every use or at least once a week if used frequently.
    2. Lubrication: Lubricate the tool every 500 to 1000 uses or every six months, whichever comes first.
    3. Inspection: Inspect the tool for damage, wear, or debris buildup after every use or at least once a week if used frequently.
    4. Replacement: Replace worn or damaged parts, such as air filters, O-rings, or anvils, as needed or at least once a year.

    Tools required for maintenance:

    1. Compressed air
    2. Cleaning solution or degreaser
    3. Soft-bristled brush or toothbrush
    4. Microfiber cloth or rag
    5. Lubricant
    6. Dropper or oil dispenser
    7. Replacement parts, if needed

    Following a regular maintenance schedule and using the appropriate tools and techniques ensures that your impact wrench remains in optimal working condition for years.

    6: Impact Wrench Storage Tips

    Proper storage of your impact wrench is essential to ensure that it remains in good condition and is ready for use when needed. Here are some tips on properly storing your impact wrench, preparing it for storage, and the best places to store it.

    Proper storage techniques:

    1. Store your impact wrench in a dry and clean location to prevent rust or other damage.
    2. Keep your impact wrench in a case or toolbox to protect it from dust, moisture, and other elements.
    3. Store your impact wrench upright to prevent oil or other fluids from leaking.
    4. Keep your impact wrench away from extreme temperatures or humidity, which can cause damage or affect performance.

    How to prepare your impact wrench for storage:

    1. Disconnect the impact wrench from the power source.
    2. Clean the tool thoroughly to remove dirt, debris, or oil buildup.
    3. Lubricate the tool to prevent rust and corrosion during storage.
    4. Check the impact wrench for any signs of damage or wear, and replace any worn or damaged parts if necessary.
    5. Store the impact wrench in a case or toolbox.

    Best places to store your impact wrench:

    1. In a climate-controlled garage or workshop
    2. In a clean and dry storage room or closet
    3. In a toolbox or tool chest with a lock to prevent theft or unauthorized access
    4. On a pegboard or wall-mounted rack for easy access and organization

    By properly preparing and storing your impact wrench, you can protect it from damage, maintain its performance, and extend its lifespan.

    7: Impact Wrench Troubleshooting

    Impact wrenches are reliable and powerful tools, but they may encounter issues from time to time. Here are some common problems and solutions, how to diagnose issues with your impact wrench, and when to seek professional help.

    Common problems and solutions:

    1. Impact wrench not working: Check the power source, the air compressor, or the battery to ensure they are working correctly. If the power source is not the issue, check the switch, motor, or trigger to see if they need cleaning or replacement.
    2. Loss of power: Check the air supply or battery charge, or clean the motor or trigger. You may also need to replace the anvil or the hammer mechanism.
    3. Overheating: Give the tool time to cool down and check the air supply or battery. You may need to clean or lubricate the tool to reduce friction and heat buildup.
    4. Strange noises: Check for loose or damaged parts, debris buildup, or worn components such as bearings or gears. Lubrication also helps reduce noise.

    How to diagnose issues with your impact wrench:

    1. Check the power source: Ensure that the air compressor or battery works correctly and delivers sufficient power to the tool.
    2. Inspect the tool: Look for signs of damage or wear, such as cracked housing, loose components, or debris buildup.
    3. Listen for unusual sounds: Strange noises may indicate a problem with the motor, trigger, anvil, or other components.
    4. Test the performance: Check the tool’s power, torque, and speed to see if they are within the manufacturer’s specifications.

    When to seek professional help

    If you cannot diagnose or fix the issue with your impact wrench, it may be time to seek professional help. A qualified technician can diagnose and repair any problems with your tool, ensuring it is safe and reliable.

    By understanding common problems and solutions, knowing how to diagnose issues, and seeking professional help, you can keep your impact wrench working effectively and efficiently for years.

    8: Impact Wrench Safety Tips

    Impact wrenches are potent tools that require proper safety precautions to avoid accidents and injuries. Here are some general safety tips, the required safety equipment, and how to avoid accidents using impact wrenches.

    General safety precautions when using impact wrenches:

    1. Read the manufacturer’s instructions and safety guidelines before using the tool.
    2. Wear appropriate clothing, including safety glasses, gloves, and work boots.
    3. Keep your work area clean and free of debris and clutter.
    4. Never use the tool near flammable or explosive materials.
    5. Do not use the tool in wet or damp conditions.
    6. Use the tool only for its intended purpose and within its capacity.
    7. Keep your hands and fingers away from the moving parts of the tool.
    8. Make sure to leave the tool running properly.

    Safety equipment required:

    1. Safety glasses or goggles to protect your eyes from debris or sparks.
    2. Heavy-duty work gloves protect your hands and fingers from pinch points and vibrations.
    3. Work boots with steel toes to protect your feet from falling objects or heavy materials.
    4. Hearing protection if the tool generates a loud noise.

    How to avoid accidents while using impact wrenches:

    1. Always hold the tool securely with both hands and maintain a firm grip.
    2. Refrain from overreaching or using the tool in awkward positions.
    3. Do not use the tool on fasteners or bolts not designed for impact wrenches.
    4. Use the correct socket or attachment size for the task.
    5. Please do not force the tool to operate beyond its capacity.
    6. Keep the tool away from your body and other people while in use.
    7. Do not use the tool while under the influence of drugs or alcohol.

    You can use your impact wrench safely and effectively by following these safety tips, using the required safety equipment, and taking precautions to avoid accidents.

    9: Battery Maintenance for Cordless Impact Wrenches

    Cordless impact wrenches rely on batteries for power. To ensure that your cordless impact wrench lasts longer, it is essential to maintain its battery correctly. Here are some tips on how to prolong the life of your battery, signs that your battery needs replacing, and a step-by-step guide on battery maintenance.

    How to prolong the life of your battery:

    1. Charge the battery fully before using it for the first time.
    2. Store the battery in a cool, dry place away from direct sunlight and heat sources.
    3. Keep the battery clean and free from dirt and debris.
    4. Avoid overcharging or undercharging the battery, which can damage it and shorten its life.
    5. Use the correct charger for your battery and avoid using third-party chargers that may not be compatible.
    6. Charge the battery before it is completely drained, damaging it and shortening its life.
    7. Remove the battery from the impact wrench when not used for an extended period.

    Signs that your battery needs replacing:

    1. The battery takes longer than usual to charge.
    2. The battery does not hold a charge for long.
    3. The battery loses power quickly, even when not in use.
    4. The battery feels hot to the touch when in use or charging.
    5. The battery shows signs of damage, such as cracks, bulges, or leaks.

    Step-by-step guide on battery maintenance:

    1. Clean the battery contacts with a dry, lint-free cloth.
    2. Check the battery for signs of damage, such as cracks, bulges, or leaks.
    3. Charge the battery fully before using it.
    4. Store the battery in a cool, dry place away from direct sunlight and heat sources.
    5. Use the correct charger for your battery and avoid using third-party chargers that may not be compatible.
    6. Avoid overcharging or undercharging the battery.
    7. Remove the battery from the impact wrench when not used for an extended period.

    By following these tips, you can prolong the life of your battery and ensure that your cordless impact wrench works efficiently. If you notice any signs of damage or your battery is not charging, consider replacing the battery.

    10: Air Compressor Maintenance for Pneumatic Impact Wrenches

    Air compressors are essential to pneumatic impact wrenches as they provide the power to operate them. Proper air compressor maintenance is crucial to ensure that your pneumatic impact wrench works efficiently. Here are some tips on air compressor maintenance, including cleaning and maintaining an air compressor and troubleshooting air compressor issues.

    Importance of air compressor maintenance:

    1. Regular air compressor maintenance ensures that it operates efficiently, saving you time and money.
    2. Proper maintenance helps to prevent breakdowns and extends the life of your air compressor.
    3. Regular maintenance helps identify and address potential problems before they become more significant and expensive.

    How to clean and maintain an air compressor:

    1. Follow the manufacturer’s instructions for maintaining and cleaning your air compressor.
    2. Regularly check the oil level and add oil if necessary.
    3. Drain the air compressor regularly to remove moisture and debris.
    4. Check and replace the air filter regularly.
    5. Inspect the belts, hoses, and connections for damage and replace them if necessary.
    6. Clean the outside of the air compressor with a damp cloth and mild soap.

    How to troubleshoot air compressor issues:

    1. Check the power supply and circuit breaker if the air compressor does not start.
    2. If the air compressor is not building pressure, check the intake valve and replace it if necessary.
    3. If the air compressor runs continuously, check the pressure switch and adjust it if necessary.
    4. If the air compressor is making unusual noises, check the belts, pulleys, and bearings for damage and replace them if necessary.
    5. If the air compressor is overheating, check the oil level, and add oil if necessary. Also, check the cooling fins and clean them if necessary.

    11: Common Mistakes to Avoid When Maintaining Your Impact Wrenches

    Maintaining your impact wrenches is crucial to keep them functioning correctly and prolong their lifespan. However, there are some common things people need to correct when maintaining their impact wrenches. Here are some of these mistakes and how to avoid them:

    1. Overlubricating the impact wrench: Overlubricating can lead to clogs and damage to the wrench. Avoid over-lubricating by following the manufacturer’s instructions and only applying the recommended amount of lubricant.
    2. Using the wrong type of lubricant: Using the wrong type of lubricant can cause damage to your impact wrench. Always use the lubricant recommended by the manufacturer.
    3. Failing to clean the impact wrench regularly: Accumulated debris and dust can cause significant damage to your impact wrench, leading to reduced performance or complete failure. Clean your impact wrench regularly as per the manufacturer’s instructions.
    4. Not storing the impact wrench properly: Leaving your impact wrench in damp and dirty environments or without proper storage can lead to corrosion and damage to the wrench. Store your impact wrench in a clean, dry place, preferably in a storage case or bag.
    5. Ignoring warning signs of wear and tear: Ignoring warning signs like strange noises, decreased performance, or difficulty switching between forward and reverse can further damage your impact wrench. Address any warning signs as soon as they appear.

    To rectify any mistakes made when maintaining your impact wrench, it is best to follow the manufacturer’s instructions for maintenance and seek professional help if necessary.

    In conclusion, maintaining your impact wrench is critical to ensure it functions correctly and lasts longer. Avoiding these common mistakes and following the manufacturer’s instructions will help keep your impact wrench in good condition.

    12: Impact Wrench Maintenance Cost

    Impact wrenches are essential tools that require regular maintenance to function correctly and last longer. Here is some information regarding the cost of maintaining and repairing impact wrenches:

    Impact Wrench Maintenance Cost:

    The cost of maintaining an impact wrench can vary depending on the type of wrench, the frequency of use, and the extent of maintenance required. Generally, maintaining an impact wrench includes cleaning and lubricating the wrench, replacing worn-out parts, and replacing batteries (for cordless impact wrenches). Budgeting about 5-10% of the tool’s purchase price annually for maintenance costs is recommended.

    Tips on Reducing Maintenance Costs:

    To reduce the maintenance costs of your impact wrench, you can follow some tips:

    • Clean and lubricate your impact wrench regularly to prevent wear and tear.
    • Store your impact wrench properly in a clean, dry place to avoid corrosion and damage.
    • Replace worn-out parts or batteries as soon as possible to prevent further damage.
    • Use the suitable lubricant recommended by the manufacturer to avoid damage.
    • Follow the manufacturer’s instructions for use and maintenance.

    Is Maintenance Cost-Effective?

    Maintaining your impact wrench is generally cost-effective as it prolongs the tool’s life and ensures optimal performance. Regular maintenance can prevent costly repairs or replacements and save you money in the long run.

    13: Impact Wrench Maintenance vs. Repair

    Maintenance involves regular upkeep, cleaning, and lubrication of the impact wrench to prevent wear and tear and keep it functioning correctly. Repair, on the other hand, involves fixing a broken or damaged impact wrench.

    When to Repair Your Impact Wrench:

    It would be best to repair your impact wrench when you notice warning signs like strange noises, reduced performance, or difficulty switching between forward and reverse. If you have tried troubleshooting the issue and the wrench is still malfunctioning, it may require repair.

    The Cost of Repairing Your Impact Wrench:

    The cost of repairing an impact wrench depends on the damage’s extent and replacement parts cost. If the repair cost is higher than the cost of a new impact wrench, replacing the wrench may be more cost-effective than repairing it.

    Summary

    Impact wrenches are potent tools that require regular maintenance to ensure optimal performance and longevity. Some key points to consider include:

    • Types of impact wrenches include electric, pneumatic, and cordless, each with maintenance requirements.
    • Signs that your impact wrench needs maintenance include reduced performance, strange noises, and difficulty switching between forward and reverse.
    • Proper cleaning and lubrication are essential for maintaining your impact wrench. It’s important to use the right tools and follow precautions to avoid damage.
    • Regular maintenance is crucial for ensuring the longevity of your impact wrench. It’s recommended to have a maintenance schedule and regularly perform tasks such as cleaning, lubrication, and battery maintenance.
    • Properly storing your impact wrenches is essential to avoid damage and prolong their lifespan.
    • Safety should always be a top priority when using impact wrenches, including wearing the appropriate safety equipment and following general safety precautions.
    • Battery maintenance is essential for cordless impact wrenches, and air compressor maintenance is crucial for pneumatic impact wrenches.
    • It’s essential to avoid common mistakes when maintaining your impact wrenches, such as using the wrong lubricant or over-tightening bolts.
    • The cost of maintaining your impact wrench can vary. However, it’s generally cost-effective in the long run to ensure the tool’s optimal performance and longevity.

    Regularly maintaining your impact wrench ensures optimal performance, longevity, and safety.

  • How to Use a Screw Extractor without a Drill: Breaking Free

    How to Use a Screw Extractor without a Drill: Breaking Free

    This article will provide valuable information on how to use a screw extractor without a drill. It can be incredibly frustrating to deal with a stuck screw, but knowing the right tools and techniques can save you time, money, and stress. Read on to learn about the different types of screw extractors, the step-by-step process for using them, common problems and solutions, and tips for avoiding issues.

    How To Use A Screw Extractor Without A Drill

    1: Introduction

    Dealing with a stuck screw can be one of the most frustrating experiences in any DIY project or repair job. No matter how hard you try, it won’t budge, leaving you feeling defeated and helpless. However, learning how to remove a stuck screw can save you time, money, and many headaches. In this article, we’ll discuss one of the most effective tools for removing a stuck screw: the screw extractor. We’ll cover the different types of screw extractors, how to select the correct one, and the step-by-step process for using a screw extractor without a drill. We’ll also discuss common problems and solutions, tips for avoiding problems, and what to do after extraction. By the end of this article, you’ll understand how to effectively remove a stuck screw using a screw extractor, allowing you to tackle any DIY project or repair job confidently.

    2: Types of Screws

    I. Wood Screws

    Wood screws are designed to hold two pieces of wood together and come in various sizes and lengths. They have a tapered shank and a pointed tip, making them easier to insert into the wood. Wood screws also have different types of heads, such as flat, oval, round, and pan heads, to suit other applications.

    II. Machine Screws

    Machine screws are used to fasten metal parts together and come in different sizes and thread pitches. They have a straight shank and a flat or rounded head, which allows them to be used in countersunk or non-countersunk holes.

    II. Sheet Metal Screws

    Sheet metal screws are used to fasten thin sheets of metal to each other or other materials. They have a sharp point that allows them to penetrate the metal without drilling a hole first. Sheet metal screws also come in different head types, such as pan, flat, and hex heads, to suit various applications.

    IV. Self-Tapping Screws

    Self-tapping screws are similar to sheet metal screws. However, they have a sharper point and a unique thread design that allows them to create their threads while being screwed into the material. They are commonly used in plastics and other materials that do not require pre-drilling.

    V. Lag Screws

    Lag screws are large, heavy-duty screws that secure heavy objects to wood or other materials. They have a hexagonal head and a sharp point that allows them to penetrate the wood easily.

    VI. Concrete Screws

    Concrete screws are designed to fasten materials to concrete, brick, or other masonry materials. Their unique tread design allows them to grip the material tightly and prevent them from loosening over time.

    2. The Importance of Selecting the Correct Screw Extractor

    Selecting a suitable screw extractor is crucial in preventing damage to screws and workpieces, saving time and effort, and enhancing safety.

    I. Prevents Damage to Screws and Workpieces

    Using the wrong screw extractor can damage the screw and the workpiece, making it challenging to remove the screw without causing further damage. A suitable screw extractor is designed to grip the screw firmly and remove it without damaging the surrounding material.

    II. Saves Time and Effort

    Removing a stripped or broken screw without the proper tool can be time-consuming and frustrating. A screw extractor makes the process quick and effortless, allowing you to remove the screw and return it to your project.

    III. Enhances

    Using the wrong tool to remove a screw can be dangerous and lead to injury. A screw extractor is designed to provide a secure grip on the screw, reducing the risk of the tool slipping and causing damage.

    3: When to Use a Screw Extractor

    Screw extractors are essential tools for removing stripped or broken screws. They are helpful when other methods, such as pliers or a screwdriver, have failed to remove the screw. Here are some everyday situations where a screw extractor is necessary:

    I. Stripped Screw Heads

    A stripped screw head is one of the most common reasons for using a screw extractor. When a screwdriver or drill bit slips, it can strip the head of the screw, making it difficult to remove. A screw extractor can grip the screw securely and remove it without damaging the surrounding material.

    II. Broken Screws

    A broken screw is another situation where a screw extractor is necessary. When a screw breaks off in the material, it can be difficult to remove using traditional methods. A screw extractor can grip the remaining part of the screw and remove it from the material.

    III. Corroded Screws

    Corroded screws can be challenging to remove using traditional methods. The corrosion can cause the screw to become stuck, making it difficult to turn. A screw extractor can grip the screw and provide the torque needed to remove it from the material.

    4: When Not to Use a Screw Extractor

    While screw extractors are valuable tools, there are situations where they should not be used. Here are some cases where a screw extractor is not recommended:

    I. Soft Materials

    Screw extractors can cause damage to soft materials such as plastic or thin metal. In these situations, using other methods to remove the screw is best.

    II. Small Screws

    Screw extractors are not suitable for removing small screws. The extractor may damage the screw or surrounding material, making it difficult to remove the screw.

    III. Improper Use

    Misusing a screw extractor can cause damage to the material or the extractor itself. It is essential to follow the instructions for the extractor carefully to avoid damaging the material or injuring yourself.

    4: How To Use a Screw Extractor Without a Drill

    Using a screw extractor without a drill can be more challenging, but it is possible with the right tools and technique. Here’s how to do it:

    I. Materials Needed

    To use a screw extractor without a drill, you will need the following:

    • A pair of pliers
    • A hammer
    • A screw extractor
    • A wrench (optional)

    II. Step-by-Step Instructions

    • Choose a suitable screw extractor: Look for a screw extractor that is small enough to fit into the screw hole but large enough to grip the screw firmly. You can use a screw extractor set with multiple sizes to find the best one for your screw.
    • Position the screw extractor: Place the screw extractor into the screw hole and use your pliers to grip the top of the extractor. Make sure the extractor is centered and secure in the screw hole.
    • Turn the extractor: Use the pliers to turn the extractor counterclockwise. The extractor should grip the screw and turn it as you turn the extractor. If the screw is very tight, you can use a wrench to apply more torque.
    • Tap the extractor: If the extractor starts to slip or the screw won’t budge, tap the end of the extractor gently with a hammer to help it grip the screw more firmly. Be careful not to hit the extractor too hard, as this can damage it.
    • Continue turning: Keep turning the extractor counterclockwise until the screw comes out. If the screw is very tight, you may need to tap the extractor and apply more torque with the pliers or wrench several times to loosen it.

    III. Tips and Tricks

    • Choose the right size extractor for the screw you are trying to remove. Using an extractor that is too large or too small can damage the screw or the workpiece.
    • If the screw is very tight or rusted, try applying penetrating oil or a rust dissolver to help loosen it before using the extractor.
    • If the extractor slips or strips the screw, stop and try another method to remove the screw, such as drilling it out with a drill bit.
    • Be patient and take your time using a screw extractor without a drill. It can be a slow process, but avoiding damaging the workpiece is worth it.

    5: How To Use a Screw Extractor With a Drill

    Removing a stripped or broken screw can be frustrating, but with the right tools and technique, it’s possible to do it yourself. Here are the steps to use a screw extractor to remove a stubborn screw:

    Step 1: Preparation

    Before you begin, gather the following tools:

    • Drill
    • Screw extractor
    • A drill bit is slightly smaller than the screw
    • Pliers
    • Safety glasses

    And follow these safety precautions:

    • Wear safety glasses to protect your eyes from flying debris.
    • Ensure the workpiece is secured to prevent it from moving around while you work.

    Step 2: Positioning

    • Identify the center of the screw: Use a straightedge or ruler to locate the center of the screw head.
    • Make a guide hole: Use a drill bit slightly smaller than the screw to make a pilot hole in the center of the screw head. The pilot hole will help guide the screw extractor into place.

    Step 3: Extracting the Screw

    • Install the screw extractor: Choose a screw extractor the right size for the screw and insert it into the pilot hole you created. Use pliers to twist the extractor counterclockwise to engage it into the screw.
    • Turn the screw extractor: Use pliers to turn the screw extractor counterclockwise. This will cause the extractor to dig into the screw and start to loosen it.
    • Remove the screw: Continue turning the extractor until the screw comes out. If the screw is very tight, you may need to apply more pressure with the pliers or gently tap the extractor’s end with a hammer to help it grip the screw.

    6: Troubleshooting

    Using a screw extractor without a drill can effectively remove stubborn screws, but sometimes things can go wrong. Here are some common problems and solutions when using a screw extractor without a drill, as well as tips for avoiding these problems:

    I. Problem: The screw won’t budge

    • Solution: Apply penetrating oil to the screw and let it sit for a few hours to help loosen it. Use a hammer to gently tap the end of the screwdriver to help loosen the screw before attempting to use the screw extractor.

    II. Problem: Screw extractor breaks off

    • Solution: Use a pair of pliers or a wrench to grip the end of the extractor and turn it counterclockwise to remove it. If that doesn’t work, try using a tiny drill bit to drill a hole into the center of the extractor and use a screwdriver to turn it counterclockwise.

    III. Problem: Screw extractor slips

    • Solution: Make sure the screw extractor is the right size for the screw. Apply pressure with pliers to keep the extractor in place, and turn it slowly and carefully.

    IV. Problem: Screw breaks

    • Solution: If the screw breaks off while using the screw extractor, use a drill bit to drill around the screw and remove it carefully. If the screw is stuck and won’t come out, use a tap and die set to re-thread the hole and install a new screw.

    V. Tips for Avoiding Problems

    • Use the suitable size screw extractor for the screw you are removing.
    • Apply a penetrating oil to the screw to help loosen it before attempting to use the screw extractor.
    • Use pliers to apply pressure to the extractor and turn it slowly and carefully.
    • If the screw is stubborn, try tapping the end of the screwdriver with a hammer to help loosen it before using the screw extractor.

    6: After Extraction

    After successfully removing the stubborn screw with the screw extractor, it’s essential to inspect the extracted screw to make sure it is still in good condition. Here are the steps for inspecting the extracted screw and repairing the damaged area:

    I. Inspecting the Extracted Screw

    • Clean the screw with a wire brush to remove any debris or rust.
    • Check the threads on the screw to ensure they are still in good condition.
    • Check the head of the screw to ensure it is not stripped or damaged.

    It must be replaced if the screw is damaged or has stripped threads. Additionally, suppose the area around the screw is damaged. In that case, you may need to repair it with wood filler or another suitable material before installing a new screw.

    II. Repairing the Damaged Area

    1. Remove loose wood or debris from the damaged area with a chisel or scraper.
    2. Fill the damaged area with wood filler, epoxy, or another suitable material, following the manufacturer’s instructions.
    3. Sand the repaired area smoothly with sandpaper.
    4. If necessary, drill a new pilot hole for the screw.
    5. Install a new screw, ensuring the material and application are the correct size and length.

    By following these steps, you can ensure that the repaired area is solid and secure and that the new screw can hold the weight and stress of the application.

    7: Frequently Asked Questions (FAQs)

    I. What is a screw extractor? 

    A screw extractor is designed to remove stripped or broken screws from wood, metal, or plastic materials.

    II. Can you use a screwdriver instead of a screw extractor? 

    A screwdriver is often insufficient for removing a stripped or broken screw. A screw extractor is specifically designed to grip the remaining screw threads and remove them from the material.

    III. How can I prevent a screw from becoming stuck? 

    To prevent a screw from becoming stuck, it’s essential to use the correct size and type of screw for the material and a pilot hole to guide the screw into it.

    IV. Can a screw extractor damage the surface? 

    If misused, a screw extractor can potentially damage the surface surrounding the screw. It’s essential to follow the instructions carefully and to apply gentle, steady pressure to avoid damaging the surrounding material.

    V. How do I know if a screw is stripped? 

    A stripped screw will not tighten or loosen and may spin in place without gripping the surrounding material. It may also have visible damage to the head or threads.

    VI. Is it possible to reuse the extracted screw? 

    It depends on the condition of the extracted screw. It could be reused with entire threads if it is still in good condition.

    VII. Can I use a screw extractor on any type of screw? 

    No, screw extractors are designed for specific styles and sizes of screws. Choosing the correct size and type of screw extractor for the screw you are trying to remove is essential.

    VIII. What should I do if I encounter a stubborn screw? 

    Suppose a screw is stubborn and difficult to remove. In that case, it may be necessary to use additional tools or techniques, such as heat or lubricant, to loosen it.

    IX. How long should I expect the screw extraction process to take? 

    The length of time it takes to remove a screw with a screw extractor can vary depending on the size and condition of the screw, as well as the skill of the person using the tool. Generally, it can take anywhere from a few minutes to several hours.

    X. Do I need a specific type of screw extractor for different types of screws? 

    Yes, there are different types and sizes of screw extractors designed for use on particular types and sizes of screws. Choosing the correct type and size of screw extractor for the screw you are trying to remove is essential.

    7: Conclusion

    In conclusion, understanding the different types of screws and the importance of selecting the correct screw extractor can save you time, money, and frustration. It’s important to remember that not all screws are the same. Using the wrong type of screw extractor can damage the screw and its embedded material.

    When using a screw extractor without a drill, following the proper steps and using the correct tools are essential to ensure success. Always take safety precautions, identify the center of the screw, and make a guide hole to ensure proper positioning.

    Common problems when using a screw extractor without a drill include the extractor breaking or becoming stuck, which can be avoided by applying even pressure and using penetrating oil to loosen the screw.

    After extraction, inspect the extracted screw for damage and repair the damaged area as necessary.

    Remember, it’s always better to take the time to correctly identify the type of screw and select the correct screw extractor rather than risking damage to both the screw and the material it is embedded in. Removing a stubborn screw can be much more manageable and successful with the right tools and technique.

    So next time you encounter a problematic screw, remember the importance of using the correct tools and following the proper steps. You can successfully extract the screw and move on with your project with patience and effort.

  • How to choose the best impact wrench: Wrench it Right

    How to choose the best impact wrench: Wrench it Right

    An impact wrench is a powerful tool to tighten or loosen nuts, bolts, and other fasteners quickly and efficiently. Choosing the correct impact wrench is essential to achieve the desired results without causing damage or injury. With so many types, sizes, and features available, it can be overwhelming to know where to start. This article will discuss How to choose the best impact wrench and the most critical factors to consider when choosing an impact wrench, including the power source, torque, speed, size and weight, grip and comfort, noise, price, and maintenance. By the end of this article, you’ll better understand how to select the proper impact wrench for your needs and preferences.

    1: Introduction

    An impact wrench is a powerful tool to tighten or loosen nuts, bolts, and other fasteners with minimal effort. It applies sudden, high-torque rotational force to the fastener, allowing it to be tightened or loosened quickly and efficiently. Impact wrenches are commonly used in automotive repair, construction, and industrial settings but can also be helpful for DIY projects and home repairs.

    Choosing the proper impact wrench is crucial for achieving the desired results and avoiding damage or injury. With so many different types, sizes, and features available, it can be challenging to know where to start. This article will explore the most important factors to consider when choosing an impact wrench, including the power source, torque, speed, size and weight, grip and comfort, noise, price, and maintenance. By the end of this article, you’ll better understand what to look for in an impact wrench and how to make an informed decision that meets your needs and preferences.

    2: Types of Impact Wrenches

    Impact wrenches are powerful tools that make work easier and faster. They are commonly used in automotive repair, construction, and other heavy-duty industries. Impact wrenches come in different types, each with unique features and advantages. In this article, we will discuss the five types of impact wrenches that are widely used today.

    Corded impact wrenches are powered by electricity and are ideal for heavy-duty applications that require high torque output. They are connected to a power source through a power cord and are suitable for use in a workshop or garage. They are unsuitable for outdoor use, as they require a power source.

    Cordless impact wrenches are battery-powered and are ideal for use in outdoor settings where a power source is not readily available. They are portable and can be used anywhere, making them ideal for automotive repair and construction. They come in different sizes and power outputs, depending on the application.

    Pneumatic impact wrenches are powered by compressed air and are ideal for heavy-duty applications that require high torque output. They are commonly used in automotive repair and industrial settings. They come in different sizes and power outputs, depending on the application. They require an air compressor to function.

    Hydraulic impact wrenches are powered by hydraulic fluid and are ideal for heavy-duty applications that require high torque output. They are commonly used in construction and can deliver high torque output with minimal effort. They require a hydraulic power source to function.

    • Electric impact wrenches

    Electric impact wrenches are powered by electricity and are ideal for light-duty applications that require moderate torque output. They are portable and can be used anywhere, making them ideal for DIY projects and home repair. They come in different sizes and power outputs, depending on the application.

    3: Factors to Consider when Choosing an Impact Wrench

    • Torque

    Torque is the rotational force generated by an impact wrench. It is the force that rotates an object around an axis or a pivot point. In an impact wrench, torque is generated by the hammering mechanism, which delivers quick, powerful bursts of rotational force to the nut or bolt being tightened or loosened.

    The importance of torque in impact wrenches cannot be overstated. It determines the power and efficiency of the tool, as well as its ability to handle different applications. Too little torque and the impact wrench may be unable to tighten or loosen a bolt or nut effectively. Too much torque and the tool may damage the bolt or nut or even break it.

    When choosing an impact wrench, it is essential to consider the torque rating. This is the maximum amount of torque the tool can generate. Higher torque ratings are ideal for heavy-duty applications, while lower ones are suitable for light-duty applications.

    To choose the correct torque, you should consider the following factors:

    1. Application: The application type you will use the impact wrench for will determine the torque you need. Heavy-duty applications such as automotive and industrial repair require higher torque ratings. Light-duty applications such as home repair and DIY projects require lower torque ratings.
    2. Bolt or nut size: The size of the bolt or nut you will be working on also determines the torque you need. Larger bolts and nuts require higher torque ratings, while smaller ones require lower torque ratings.
    3. Material: The material of the bolt or nut being worked on also affects the torque required. More rigid materials like steel and iron require higher torque ratings. In contrast, softer materials like aluminum and plastic require lower torque ratings.
    4. User comfort: The torque rating of an impact wrench also affects user comfort. Higher torque ratings may require more effort, while lower torque ratings may be easier to use. However, they may need to provide more power for specific applications.

    In summary, torque is an essential factor to consider when choosing an impact wrench. It determines the tool’s power, efficiency, and ability to handle different applications. You should consider the application, bolt or nut size, material, and user comfort to choose the proper torque.

    • Speed

    Speed is the rate at which the hammering mechanism of an impact wrench rotates the nut or bolt being tightened or loosened. It is measured in rotations per minute (RPM). Speed is directly related to the tool’s torque in an impact wrench.

    The importance of speed in impact wrenches is significant. It determines the speed at which the tool can complete a job, as well as the efficiency of the tool in handling different applications. Higher speeds allow the tool to complete tasks faster but may sacrifice torque. Lower speeds provide more torque but may take longer to complete tasks.

    When choosing an impact wrench, it is vital to consider the speed rating. This is the maximum speed the tool can achieve. Higher speed ratings are ideal for tasks that require speed, such as tire changing or light-duty applications. In comparison, lower speed ratings are suitable for tasks that require more torque, such as heavy-duty applications.

    To choose the right speed, you should consider the following factors:

    1. Application: The application type you will use the impact wrench for will determine the speed you need. Tasks that require speed, such as tire changing or light-duty applications, require higher speed ratings. In contrast, tasks that require more torque, such as heavy-duty applications, require lower speed ratings.
    2. Bolt or nut size: The size of the bolt or nut you will be working on also determines the speed you need. Larger bolts and nuts require higher speed ratings, while smaller bolts and nuts require lower speed ratings.
    3. Material: The material of the bolt or nut being worked on also affects the speed required. More rigid materials like steel and iron require higher speed ratings. In contrast, softer materials like aluminum and plastic require lower speed ratings.
    4. User comfort: The speed rating of an impact wrench also affects user comfort. Higher speed ratings may require more effort, while lower speed ratings may be easier to use but take longer to complete tasks.

    In summary, speed is an essential factor to consider when choosing an impact wrench. It determines the speed at which the tool can complete a job and the efficiency of the tool in handling different applications. Consider the application, bolt or nut size, material, and user comfort to choose the right speed.

    • Power Source

    Regarding impact wrenches, there are various power sources to choose from. Each power source has advantages and disadvantages, and it’s essential to consider which will work best for your specific needs.

    1. Corded Impact Wrenches: Corded impact wrenches are powered by electricity and are designed to be plugged into an electrical outlet. They are generally more potent than cordless impact wrenches and suitable for heavy-duty applications requiring high torque output. However, the cord limits mobility and can be challenging to maneuver in tight spaces.
    2. Cordless Impact Wrenches: Cordless impact wrenches are powered by rechargeable batteries, providing greater mobility and flexibility. They are ideal for working in tight spaces and remote locations without electricity. However, the battery life can be limiting, and the torque output may be lower than corded or pneumatic impact wrenches.
    3. Pneumatic Impact Wrenches: Pneumatic impact wrenches are powered by compressed air, making them very powerful and ideal for heavy-duty applications. They are often used in industrial and automotive settings where large bolts must be tightened or loosened. However, they require a separate air compressor, which can be expensive and bulky.
    4. Hydraulic Impact Wrenches: Hydraulic impact wrenches are powered by hydraulic fluid, making them ideal for heavy-duty industrial applications. They can generate high torque output and are often used in the construction and mining industries. However, they are expensive and require special equipment to operate.
    5. Electric Impact Wrenches: Electric impact wrenches are powered by electricity and a battery. They are more versatile than corded impact wrenches, as they can be used without a cord and provide a high torque output. They are also relatively inexpensive compared to other types of impact wrenches. However, they may not be as powerful as corded or pneumatic impact wrenches.

    In summary, the power source of an impact wrench plays a vital role in determining its performance and versatility. Corded impact wrenches are robust and suitable for heavy-duty applications, while cordless impact wrenches offer greater mobility and flexibility. Pneumatic and hydraulic impact wrenches are ideal for industrial and heavy-duty applications, while electric impact wrenches are more versatile and affordable.

    • Size and Weight

    When it comes to impact wrenches, size, and weight are important considerations. The size and weight of an impact wrench can affect its performance, comfort, and usability. Here are some factors to consider when choosing the right size and weight for your needs.

    1. Importance of Size and Weight: The size and weight of an impact wrench can affect its portability, maneuverability, and ease of use. A heavier impact wrench may provide more power, but it can also be more challenging to handle for extended periods. A larger impact wrench may be more suitable for heavy-duty applications but must be more maneuverable in tight spaces.
    2. How to Choose the Right Size and Weight: When choosing the right size and weight for your impact wrench, consider the work you will be doing. If you work in tight spaces or awkward positions, a lighter and more compact impact wrench may be more suitable. A larger and heavier impact wrench may be necessary if you are working on heavy-duty applications.

    It’s also important to consider your physical capabilities when choosing the size and weight of your impact wrench. A lighter and more compact impact wrench may be easier to handle if you have a smaller frame or limited strength. A heavier and more powerful impact wrench may be more suitable if you have a larger frame or greater strength.

    In addition, consider the grip and ergonomic design of the impact wrench. Look for an impact wrench with a comfortable grip that fits well in your hand. This can help reduce fatigue and improve control during use.

    In summary, the size and weight of an impact wrench can affect its performance and usability. Consider the type of work you will be doing and your physical capabilities when choosing the right size and weight for your needs. Look for an impact wrench with a comfortable grip and ergonomic design to improve control and reduce fatigue.

    • Grip and Comfort

    The grip and comfort of an impact wrench are essential factors to consider when selecting the right tool for your needs. A comfortable grip can help reduce fatigue and improve control during use. Here are some factors to consider when choosing the proper grip and comfort for your impact wrench.

    1. Importance of Grip and Comfort: A comfortable grip can help reduce hand fatigue during extended periods of use. This is particularly important when working on large or complex projects. An ergonomic grip design can also help improve control and accuracy during use, reducing the risk of accidents and injuries.
    2. How to Choose the Right Grip and Comfort: When choosing an impact wrench, look for a model with an ergonomic grip design that fits comfortably in your hand. The grip should be made from a non-slip material that provides a secure hold during use, even when hands are sweaty or oily. Some impact wrenches also feature vibration-dampening technology to reduce hand fatigue during use.

    In addition to the grip, consider the overall comfort of the impact wrench. Look for a model with a well-balanced design that is easy to maneuver and use for extended periods. Consider the weight and size of the tool, as well as the placement of the controls and switches, to ensure maximum comfort and ease of use.

    In summary, the grip and comfort of an impact wrench are essential factors to consider when selecting the right tool for your needs. Look for an impact wrench with an ergonomic grip design and vibration-dampening technology to reduce hand fatigue. Consider the overall comfort of the tool, including its weight, size, and control placement, to ensure ease of use for extended periods.

    • Noise

    Noise is essential when choosing an impact wrench, especially if you plan to use it for extended periods or in areas where noise levels may be a concern. Here are some factors to consider when selecting an impact wrench based on its noise level.

    1. Explanation of Noise: Noise is the sound produced by an impact wrench during use. This sound is measured in decibels (dB) and can range from a quiet hum to a loud, ear-piercing noise, depending on the tool’s power and design.
    2. Importance of Noise in Impact Wrenches: The noise produced by an impact wrench can be a concern for both the user and those around them. Extended exposure to high noise levels can cause hearing damage or loss. At the same time, loud noises can be a distraction and may be prohibited in certain areas, such as residential neighborhoods or office buildings.
    3. How to Choose the Right Noise Level: When selecting an impact wrench, consider the acceptable noise level for your needs. Look for models with a lower decibel rating to reduce noise levels during use. You can also consider purchasing an impact wrench with a noise-reducing feature, such as a muffler or noise-dampening technology.

    It’s also essential to wear appropriate hearing protection when using an impact wrench, especially for extended periods or when working in noisy environments. This can include earplugs or earmuffs designed to reduce noise exposure and protect your hearing.

    In summary, noise is an essential factor to consider when selecting an impact wrench. Look for models with a lower decibel rating or noise-reducing features to reduce noise levels during use. Wear appropriate hearing protection to protect your hearing from extended exposure to high noise levels.

    • Price

    Price is a significant consideration when choosing an impact wrench, and the cost can vary greatly depending on several factors. Here are some factors to consider when selecting an impact wrench based on price.

    1. Factors that Affect Price: The cost of an impact wrench can vary based on several factors, including the brand, quality, features, and power source. Generally, corded impact wrenches are less expensive than cordless or pneumatic impact wrenches. Additionally, higher-quality impact wrenches with more features and greater power tend to be more expensive than their essential counterparts.
    2. How to Choose the Right Impact Wrench for Your Budget: When selecting an impact wrench, consider your budget and essential features. If you use the impact wrench frequently and require a lot of power, it may be worth investing in a higher-quality model with more features, even if it means spending more upfront.

    If you have a smaller budget, consider a basic model with fewer features or a corded impact wrench instead of a cordless or pneumatic one. It’s essential to balance the cost of the impact wrench with its performance and reliability to ensure that you get the most value for your money.

    It’s also a good idea to shop around and compare prices from different retailers and brands to find the best deal. Many retailers offer sales or discounts on impact wrenches, so watch for these opportunities to save money on your purchase.

    In summary, price is an essential factor to consider when selecting an impact wrench. Consider your budget and the essential features for your needs, and shop for the best deal on a high-quality impact wrench.

    • Maintenance

    Maintenance is an essential aspect of owning an impact wrench. Proper maintenance ensures that your impact wrench remains in good condition and performs optimally for years. Here are some reasons why maintenance is essential and some tips for maintaining your impact wrench.

    1. Importance of Maintenance: Regular maintenance is crucial for keeping your impact wrench functioning correctly. Neglecting to maintain your impact wrench can decrease performance, damage, and even safety hazards. Regular maintenance can also extend the lifespan of your impact wrench and save you money on repairs and replacements.
    2. Tips for Maintaining Your Impact Wrench: To ensure that your impact wrench stays in top condition, it’s essential to follow these maintenance tips:
    • Clean the impact wrench after every use to remove debris and dirt that can damage the tool’s components.
    • Regularly check the air filter if you have a pneumatic impact wrench and replace it if it’s dirty.
    • Lubricate the impact wrench regularly to ensure smooth operation and prevent rust.
    • Check the torque settings regularly and adjust them as needed.
    • Store the impact wrench in a dry, secure place to protect it from damage and theft.

    It’s also important to read the manufacturer’s instructions and follow their recommended maintenance procedures. Some manufacturers may recommend specific lubricants or cleaning agents for their impact wrenches, so follow these guidelines to avoid damaging the tool.

    Maintenance is crucial for keeping your impact wrench in top condition and ensuring optimal performance. Follow these tips and the manufacturer’s instructions for maintaining your impact wrench to extend its lifespan and prevent damage or safety hazards.

    5: FAQs

    • What is an impact wrench?

    An impact wrench is a power tool for tightening or loosening nuts, bolts, and other fasteners. It uses torque generated by a motor to rotate a hammer and anvil, which delivers sudden impacts to the fastener, allowing it to be tightened or loosened quickly.

    • What is the difference between a cordless and corded impact wrench?

    An electrical outlet powers corded impact wrenches and provide consistent power, while cordless impact wrenches are battery-powered and offer greater mobility and convenience. However, cordless impact wrenches may have lower torque and battery life than corded models.

    • What is the best type of impact wrench for automotive work?

    Pneumatic impact wrenches are popular in automotive work due to their high torque output and durability. However, cordless impact wrenches are also becoming popular due to their convenience and mobility.

    • How vital is torque when choosing an impact wrench?

    Torque is a crucial factor in choosing an impact wrench, as it determines the maximum force that can be applied to a fastener. The higher the torque, the more influential the impact wrench, but higher torque also means a heavier and more expensive tool.

    • Can I use an impact wrench on any fastener?

    While impact wrenches are designed for nuts, bolts, and other fasteners, using the correct size and type of socket or adapter for the specific fastener is essential. Using the wrong size or type of tool can damage the fastener or the impact wrench itself.

    6: Conclusion

    In conclusion, impact wrenches are potent tools that can significantly improve the efficiency and speed of various tasks that involve tightening or loosening fasteners. When choosing an impact wrench, it’s essential to consider factors such as power source, torque, speed, size and weight, grip and comfort, noise, and price. Each factor has advantages and disadvantages, and the right choice depends on the specific application and user preferences.

    Ultimately, choosing the correct impact wrench cannot be overstated. Investing in a high-quality tool that meets your needs and preferences can save you time, effort, and money in the long run while also ensuring safe and efficient work. So, take the time to research and compare different models, consider your needs and preferences, and make an informed decision that will benefit you for years to come.

    You may also like these posts!