Category: How-To Mastery

Unlock the art of power tool usage and beyond. From mastering the intricacies of various power tools to exploring advanced techniques, our comprehensive guides empower you to become a true master. Whether you’re a beginner or looking to refine your skills, embark on a journey of mastery with How-To Mastery and unleash your potential in the world of power tools and beyond.

  • How to Oil Impact Wrench: Prolong Your Tool’s Life

    How to Oil Impact Wrench: Prolong Your Tool’s Life

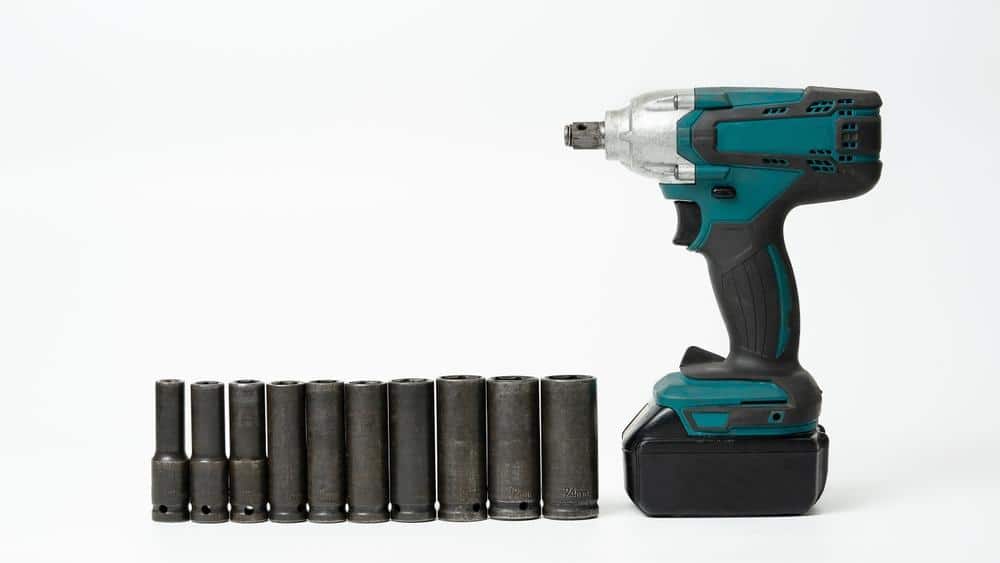
    Impact wrenches are indispensable tools in many sectors, notably the automotive industry. They are known for their ability to fasten and remove tough nuts and bolts effortlessly. However, regular maintenance is essential for your impact wrench to function optimally, including proper oiling. This guide will show you how to oil impact wrench to ensure its durability and reliable performance.

    The Importance of Oiling an Impact Wrench

    Oiling an impact wrench aids in preventing the lubricant from drying up, which guarantees smooth operation. Regular oiling helps eliminate moisture, prevents rust, and ensures your tool doesn’t jam.

    How to Oil Impact Wrench?

    Tools and Materials Needed

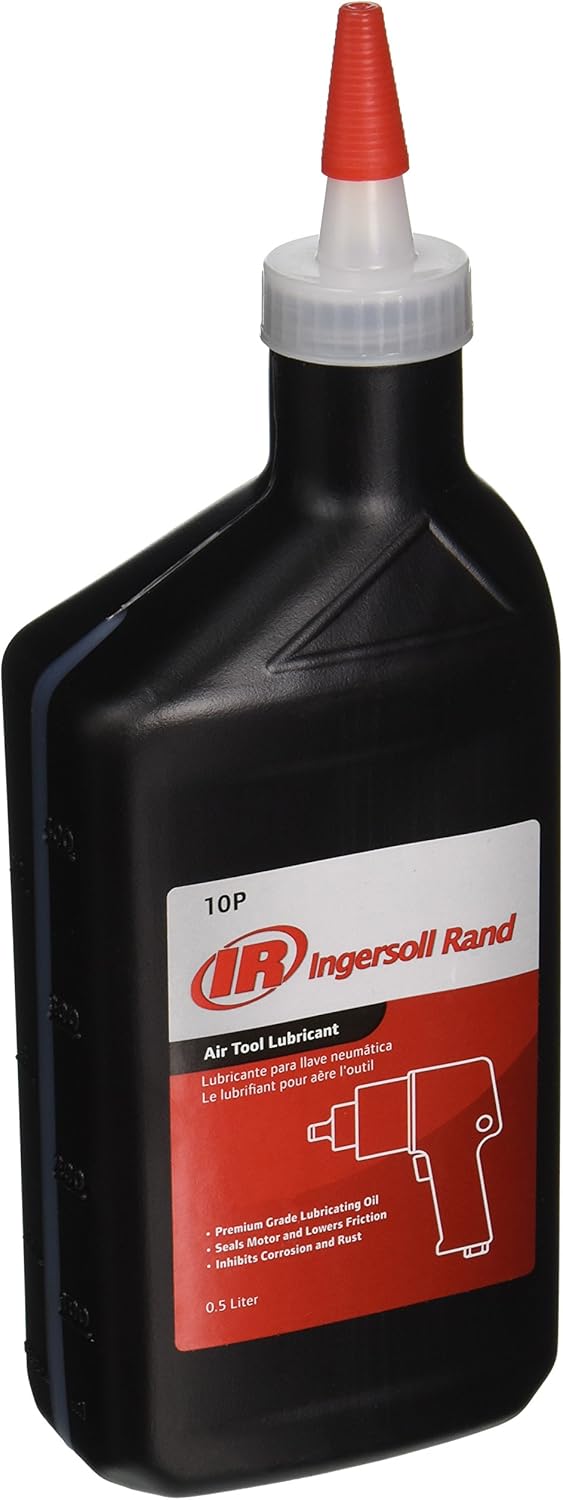
    Before starting the oiling process, you will need the following:

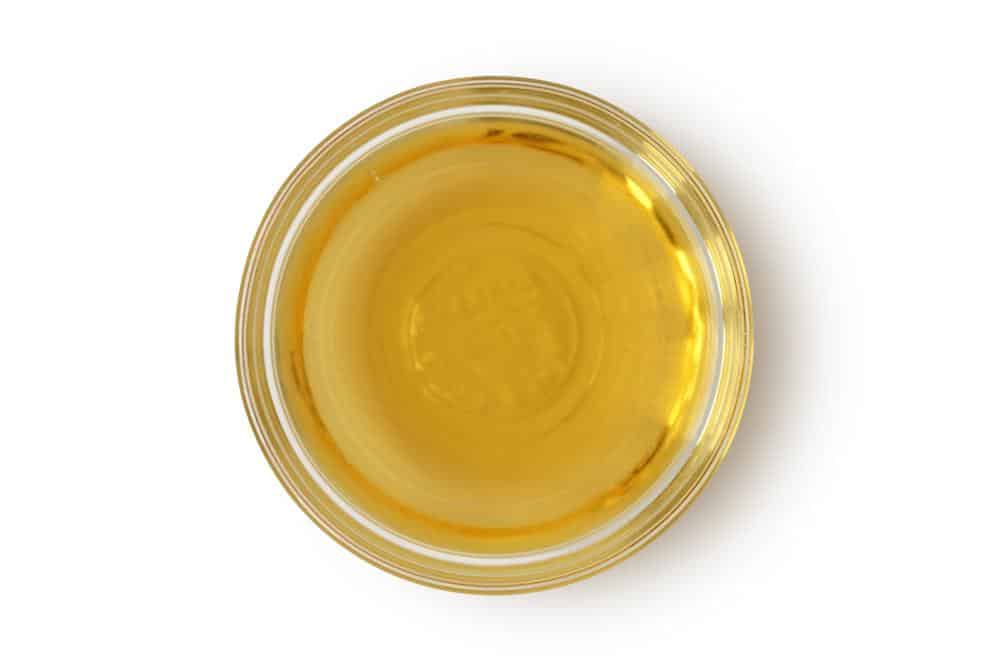
    • high-quality air tool oil/grease
    • a clean cloth
    • a funnel or dropper
    • protective gloves
    • possibly a syringe for precise application

    Disassembling the Impact Wrench

    It would be best if you started by disconnecting your impact wrench. Then remove the rubber jacket, backplate, rod, bearing, and air motor. Ensure you carefully handle each part to avoid any potential damage.

    How to Disassemble

    Each part of the impact wrench should be removed in the following order: rubber jacket, back plating, rod, bearing, and air motor. Remember, the process requires careful handling to avoid losing or damaging components.

    Cleaning the Parts

    Next, it’s essential to clean each part before oiling. This step will remove any dust, rust, or old lubricant that could inhibit the performance of your tool.
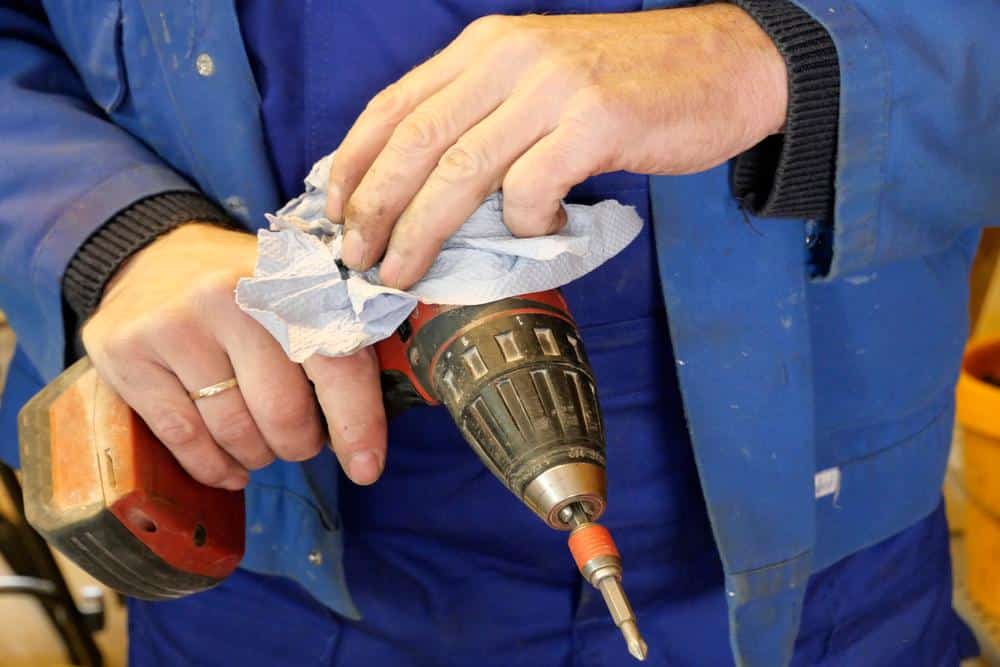
    How to Clean

    Use a clean cloth to wipe each component, ensuring they are entirely free of dirt and old oil. Take extra care with the smaller parts, as they can be delicate.

    Oiling the Impact Wrench

    Now comes the crucial part: oiling the impact wrench. This process involves applying the right amount of oil to the tool’s key components.

    Step-by-Step Oiling

    Locate the oil inlet and add the recommended amount of oil. Use a dropper or syringe for precision. Once the oiling is done, wipe off excess oil with a clean cloth. If you’re greasing, apply a small amount of grease to the hammer mechanism and anvil. Remember to test the wrench after oiling to ensure its smooth operation.

    Reassembling the Impact Wrench

    Once you’ve finished oiling, it’s time to assemble the parts.

    How to Assemble

    Reassemble the wrench in reverse order from how you disassembled it. Start with the air motor, then the bearing, the rod, the back plating, and finally, the rubber jacket.

    Impact Wrench Maintenance for Longevity

    Choosing the Right Lubricants

    It’s essential to use high-quality grease designed for air tools. This ensures heat resistance and prolongs the durability of your impact wrench.

    Frequency of Oiling

    The frequency of oiling depends on factors such as tool type, age, and frequency of use. Regular users are recommended to use oil after every eight hours of use.

    Considerations for Oiling

    Consider weather conditions and refer to the owner’s manual for specific oil recommendations. Avoid excessive oiling and keep your wrench clean for optimal performance.

    If you’re eager to learn more about Impact Wrench Maintenance, don’t miss our other article, “Maintenance Tips for Air Impact Wrench: Longevity Secrets!” Dive deeper into expert strategies and secrets that can enhance the lifespan of your tool.

    FAQ (Frequently Asked Questions)

    Where do you put oil in an impact wrench?

    Oil is generally added to an impact wrench through the oil inlet. First, prepare your workspace and disconnect the air supply. Then, locate the oil inlet on your wrench, usually found in the tool’s base. Once located, carefully add the oil using a funnel or dropper. After oiling, wipe off any excess oil and reconnect the air supply.

    What kind of oil do you use in an impact wrench?

    It’s recommended to use high-quality air tool oil or grease for oiling an impact wrench. These are designed for air tools like impact wrenches and can provide optimal lubrication, ensuring smooth operation and extended lifespan. The choice between oil or grease may depend on the specific wrench, so it’s essential to consult the owner’s manual for any particular recommendations.

    How much oil do I put in my impact wrench?

    The amount of oil to add to your impact wrench can depend on several factors, including the specific model of your tool and how frequently it is used. Adding a few drops of oil daily or a larger quantity monthly can be beneficial. However, remember to avoid over-oiling, as this can lead to issues such as leaks or reduced tool performance. Again, consulting your owner’s manual can provide more precise instructions.

    How often do you oil an air impact wrench?

    The frequency of oiling an air impact wrench depends on the tool’s usage, age, and performance. Generally, it is recommended to oil your wrench daily or monthly, depending on how regularly you use it. Regular oiling can prevent jamming, ensure optimal functionality, and protect the tool against rust and moisture. More frequent oiling might be necessary for continuous or heavy-duty use.

    How many drops of air tool oil to use?

    Typically, a few drops of air tool oil are sufficient for the daily oiling of your impact wrench. This can keep the tool well-lubricated and functioning optimally. However, adjust this amount depending on the specific tool, its usage frequency, and the manufacturer’s recommendations. Over-oiling can be as detrimental as under-oiling, so finding a balance that works best for your tool is essential.

    Can I use engine oil for air tools?

    While using readily available engine oil for your air tools might be tempting, it’s generally not recommended. Engine oil is typically thicker than air tool oil, which can result in suboptimal lubrication and potential jamming. Air tool oil is specially formulated to provide air tools with the proper viscosity and lubrication. It also often includes additives to prevent rust and reduce wear. Therefore, it’s best to use high-quality air tool oil or grease for oiling your impact wrench.

    Conclusion

    In conclusion, regular oiling is a necessary maintenance procedure that guarantees your impact wrench’s optimal performance and prolonged lifespan. This guide provides a comprehensive step-by-step process of oiling your tool. With the correct tools and a little patience, you can maximize the lifespan and performance of your impact wrench.

  • How to Put a Socket on an Impact Wrench: Socket Success

    How to Put a Socket on an Impact Wrench: Socket Success

    Understanding how to put a socket on an impact wrench is crucial for effective and safe operation. This guide offers step-by-step instructions on selecting the correct socket, securing it to your impact wrench, and removing it safely. By following these guidelines, you can enhance the tool’s performance and longevity, ensuring the successful completion of your tasks.

    Overview

    An impact wrench is an invaluable tool in many professional settings and home garages, known for its ability to deliver high torque output with minimal effort by the user. It’s a boon for car mechanics, construction workers, and DIY enthusiasts, helping them tighten or loosen nuts and bolts quickly and efficiently. The magic of an impact wrench lies in its sockets, the component that interfaces with the nuts and bolts.

    Introduction to Impact Wrenches

    What is an Impact Wrench?

    An impact wrench, also known as an impactor or impact gun, is a powerful tool commonly used to deliver high torque with minimal physical effort from the user. This is especially useful in automotive repair and construction industries, where fastening and unfastening bolts are frequently necessary.

    Why Use an Impact Wrench?

    Impact wrenches significantly reduce the time and energy required to drive in or loosen bolts and nuts. The fast, impactful rotational movement allows users to handle hefty tasks effortlessly, making it an indispensable tool for many professionals.

    For guidance on choosing the perfect impact wrench, don’t miss our dedicated article, “How to Choose the Right Impact Wrench: Bolt Like a Pro.” It’s a must-read for anyone looking to choose the perfect impact wrench.

    Impact Wrench Sockets

    Understanding Impact Wrench Sockets

    What is a Socket?

    A socket is a type of tool that attaches to the impact wrench to fit over the head of a fastener, such as a nut or a bolt, enabling it to turn the fastener without damaging it.

    How Sockets Work with Impact Wrenches

    Sockets are an essential accessory for impact wrenches. They fit onto the wrench’s drive square and then over the fastener. The rotational power from the wrench is transferred to the fastener through the socket, resulting in the tightening or loosening of the fastener.

    Safety Precautions While Using an Impact Wrench

    Safety is paramount while using any power tool, including an impact wrench. Always wear safety glasses, maintain a secure grip on the tool, and keep your work area tidy to avoid accidents.

    Suppose you want to learn more about operating your impact wrench safely. In that case, our article “Impact Wrench Safety Tips: Mastering Impact Wrench Safety” is a comprehensive guide that will help you use your tool confidently and safely.

    How to Put a Socket on an Impact Wrench?

    Step-by-Step Guide to Putting a Socket on an Impact Wrench:

    Selecting the Right Socket

    Identifying the Size of the Bolt or Nut

    To select the correct socket, you first need to identify the size of the bolt or nut you will be working with. This can typically be done using a ruler or caliper to measure the fastener across its flat sides. Remember that bolt and nut sizes can be specified in metric or SAE units, so ensure you’re using the correct system.

    Checking the Drive Size of Your Impact Wrench

    Your impact wrench’s drive size will determine the socket size you can use. Typical drive sizes include 1/4″, 3/8″, 1/2″, 3/4″, and 1″. Ensure the socket you choose has a compatible drive size.

    Attaching the Socket

    Aligning the Socket

    Once you have the correct socket, align it with the drive of your impact wrench. This involves aligning the socket’s square hole with the wrench’s square drive.

    Ensuring a Secure Fit

    Push the socket onto the wrench drive. For impact wrenches with a detent pin, ensure the hole in the socket’s side aligns with the wrench’s detent pin. The socket will click into place for those with a ring retainer. Ensure the socket is securely attached before use.

    Removing the Socket

    To remove the socket, pull it straight off the wrench. If the wrench has a detent pin, you may need to press down on the pin as you pull the socket off. If it has a ring retainer, you may need to pull the ring back as you remove the socket. Always switch the tool off before changing sockets.

    Common Mistakes to Avoid

    Wrong Socket Size

    Using the wrong socket size can damage both the tool and the fastener. Always ensure you’re using the right size for the job.

    Forcing the Socket

    Never force a socket onto a wrench. It’s likely not the proper size if it doesn’t fit easily.

    Maintaining Your Impact Wrench and Sockets

    Regular Cleaning

    Keep your impact wrench and sockets clean to ensure their longevity. Dirt and debris can affect their performance over time.

    Proper Storage

    Always store your tools in a dry, clean place to prevent rust and other damage.

    To ensure the longevity of your impact wrench, we recommend reading our article “How to Maintain Your Impact Wrenches: 13 Tips for Longevity“. This guide offers valuable insights into keeping your tool in optimal condition.

    Frequently Asked Questions

    What size socket do I need for my impact wrench?

     The socket size depends on the size of the bolt or nut you’re working with and the drive size of your impact wrench.

    Can I use regular sockets with an impact wrench?

     While you can, it’s not recommended as regular sockets are not designed to withstand the torque of an impact wrench and may break.

    How often should I clean my impact wrench and sockets?

    It’s best to clean them after each use to prevent debris build-up and ensure optimal performance.

    Why is my socket not fitting onto my impact wrench?

    Your socket might not fit due to an incompatible drive size, or the socket or wrench’s square drive might be damaged or excessively worn out.

    Can I use regular sockets on an impact wrench?

    While regular sockets can technically be used with an impact wrench, it’s generally not recommended due to the risk of damage and safety concerns. Instead, use impact-rated sockets.

    Can you use a socket adapter in an impact driver?

    Yes, you can use a socket adapter with an impact driver. This transforms the impact driver into a powerful tool, allowing it to drive hex-headed lag bolts and other fasteners efficiently.

    Conclusion

    Understanding how to put a socket on an impact wrench correctly is crucial for efficient and safe operation. By following these steps, you can ensure a secure fit and a successful project, whether you’re a professional mechanic or a DIY enthusiast.

  • How to Use a Jigsaw Safely: For Novice to Expert!

    How to Use a Jigsaw Safely: For Novice to Expert!

    When it comes to woodworking and remodeling projects, a jigsaw is an invaluable tool. However, like any power tool, it can also be a source of potential hazards if not used correctly. This article will guide you through how to use a jigsaw safely to ensure your projects go smoothly without any accidents.

    How to Use a Jigsaw Safely

    1. Importance of Jigsaw Safety

    Jigsaw safety is not a luxury; it’s a necessity. Failure to use a jigsaw correctly can lead to serious injuries or fatal accidents. Hence, operators must receive proper training and review the operator’s manual for correct operation.

    2. Jigsaw Basics

    I. What is a Jigsaw?

    A jigsaw is a powerful cutting tool used in various applications, including woodworking, metal cutting, and tile cutting. It’s known for its versatility, allowing users to make straight, curved, or circular cuts easily.

    II. Types of Jigsaw Blades

    Understanding the different types of jigsaw blades is also essential to jigsaw safety. Different blades are designed for various materials, and using the wrong blade can lead to damage or even accidents. Thus, always ensure you choose the appropriate blade for your specific task.

    3. Pre-Use Inspection

    Before starting any cutting, you must inspect your equipment thoroughly. This includes ensuring the blade is suitable for the material you’re cutting and sharp enough for smooth operation.

    right jigsaw blade

    4. Setting Up Your Jigsaw

    I. Securing Your Work Area

    First and foremost, secure your work area. This means ensuring the area is free of potential hazards and that your workpiece is securely clamped or fastened to prevent movement during cutting.

    II. Selecting and Installing the Blade

    As previously mentioned, different blades are designed for other materials. Select the appropriate blade for your task, and ensure the jigsaw is unplugged before changing blades to avoid accidental startups.

    III. Positioning the Shoe

    The jigsaw shoe should rest flat against the material you’re cutting. This helps maintain stability and control while you’re cutting.

    Operational Safety

    5. Operational Safety

    I. Using the Switch and Adjusting Keys

    Safety also involves correct usage of the switch and adjusting keys. Check the switch position before starting the jigsaw and ensure changing keys are removed before operation.

    II. Maintaining Balance and Force Application

    When using a jigsaw, maintain balance to avoid tipping or slipping, which could lead to injury. Also, apply reasonable force – not too much, not too little.

    III. Proper Hand Placement

    Hold the jigsaw with two hands, and keep them away from the blade. Most importantly, never place your hands underneath the work surface.

    Interested in learning how to use a jigsaw to cut curves? Delve into the art of curve cutting with our detailed guide! Don’t hesitate to explore and enhance your skillset.

    6. Post-Use Safety

    After completing your cutting task, ensure the blade has stopped entirely before removing the saw from the workpiece. Additionally, always disconnect the power source before performing any maintenance or blade replacement.

    Advanced Safety Tips

    Advanced Safety Tips

    I. Using Guides and Relief Cuts

    For precise and straight cuts, consider using guides. If you plan to make tight curves, relief cuts can be beneficial.

    II. Using Protective Material like Masking Tape

    Masking tape can protect the surface of the material you’re cutting, mainly when dealing with delicate materials. Similarly, clamping thin sheet metal when cutting can prevent damage.

    FAQ (Frequently Asked Questions)

    I. Can I use any jigsaw blade for all materials?

    No, different blades are designed for other materials. Always choose a blade suitable for the material you’re cutting.

    II. What safety gear should I wear when using a jigsaw?

    Safety glasses, hearing protection, dust mask, and safety shoes are recommended.

    III. Is it necessary to use two hands when operating a jigsaw?

    Yes, holding the jigsaw with two hands ensures better control and stability.

    IV. Can I remove the jigsaw from the workpiece immediately after cutting?

    Only remove the saw from the workpiece once the blade has completely stopped.

    V. Why is it important to unplug the jigsaw before changing blades?

    Unplugging the jigsaw before changing the blades prevents accidental startups, reducing the risk of injury.

    Conclusion

    In conclusion, using a jigsaw safely and effectively requires understanding the tool’s functionalities, wearing the appropriate personal protective equipment, and adhering to the correct operating procedures. Taking precautions such as unplugging the tool when changing blades, maintaining balance while operating, and never removing the saw from the workpiece until the blade has entirely stopped can drastically reduce the risk of accidents. Advanced safety practices like guides, relief cuts, and masking tape for delicate surfaces also contribute to a safer cutting experience. By adhering to these safety practices, you can make the most of your jigsaw securely and efficiently.

  • How to Use a Jigsaw to Cut Curves: The Art of Curve Cutting!

    How to Use a Jigsaw to Cut Curves: The Art of Curve Cutting!

    Using a jigsaw for cutting curves is a valuable skill for DIY enthusiasts and professionals. Achieving precise and even curved cuts is essential for the aesthetics and functionality of various projects. This article will provide an overview of how to use a jigsaw to cut curves, emphasizing the importance of accurate results and critical tips for achieving them.

    1. Introduction

    A jigsaw, also known as a saber saw, is a versatile power tool that allows you to make intricate cuts in various materials. When it comes to cutting curves, a jigsaw is an indispensable tool due to its maneuverability and ability to follow precise lines. Whether working on woodworking projects, installing countertops, or creating decorative designs, mastering a jigsaw is essential for achieving accurate and clean curved cuts.

    2. Importance of precise and even curved cuts

    Precise and even curved cuts are crucial for both your projects’ visual appeal and functionality. Whether you are cutting curves to fit pieces together seamlessly, creating decorative patterns, or achieving smooth edges, accuracy is vital. Uneven cuts can compromise the project’s integrity and result in a poor finish. By learning the proper techniques and using the right tools, such as a jigsaw, you can ensure that your curved cuts are accurate, visually pleasing, and meet your project requirements.

    right jigsaw blade

    3. Critical tips for achieving accurate results

    To achieve precise curved cuts with a jigsaw, follow these essential tips:

    1. Choose the right jigsaw: Consider the power, stroke length, variable speed control, orbital cutting action, blade compatibility, and blade changing mechanism when selecting a jigsaw that suits your needs and the materials you’ll be working with.
    2. Select the appropriate blade: Different materials require specific blades for optimal results. Woodcutting blades, laminate cutting blades, metal cutting blades, and ceramic tile cutting blades are designed for particular applications.
    3. Mark and prepare the workpiece: Accurately mark the desired curve on the material you’ll be cutting. Secure the workpiece using clamps, a workbench, or sawhorses to ensure stability during cutting.
    4. Use proper cutting techniques: Start the cut by drilling a starter hole or plunging the blade directly into the workpiece. Follow the marked curve by guiding the jigsaw smoothly along the line, making slow and steady cuts. Rotate the workpiece if necessary to maintain a comfortable cutting angle. Utilize the jigsaw’s orbital cutting action to achieve faster and smoother cuts.
    5. Navigate tight curves: For intricate curves, consider using a scrolling head jigsaw that allows for more precise maneuverability. Use relief cuts for sharper turns, and sand or file the cut edges for a smooth finish.

    4. Understanding the Jigsaw Tool

    What is a jigsaw?

    A jigsaw, a saber saw, is a handheld power tool for making curved and intricate cuts in various materials.

    Components and features of a jigsaw

    A jigsaw typically includes variable speed control, orbital cutting action, blade compatibility, power and stroke length, and a blade changing mechanism. These features enhance the tool’s versatility and performance.

    1. Variable speed control: This allows you to adjust the cutting speed based on the material and desired precision.
    2. Orbital cutting action: Provides a back-and-forth motion to the blade, allowing for faster cutting in wood and other materials.
    3. Blade compatibility: Jigsaws accept different blades designed for specific materials and cutting applications.
    4. Power and stroke length: The power rating determines the tool’s cutting capability, while stroke length refers to the distance the blade travels in one stroke.
    5. Blade changing mechanism: Enables easy and quick blade changes, ensuring efficiency during projects.

    5. Choosing the Right Blade

    Importance of selecting the appropriate blade

    Using the correct blade for your project is crucial for achieving clean and efficient cuts. Each blade type is designed for specific materials and cutting applications.

    Blade types for different materials

    • Woodcutting blades: Designed with more prominent teeth and wider gullets to clear sawdust efficiently. They are suitable for cutting various types of wood and plywood.
    • Laminate cutting blades: Feature fine teeth and reduced tooth set to prevent chipping and splintering. Ideal for cutting laminates, veneers, and other delicate materials.
    • Metal cutting blades: Made from high-speed steel (HSS) or bi-metal, these blades have smaller teeth and are designed to cut through metal, including aluminum and steel.
    • Ceramic tile cutting blades: Equipped with diamond grit for cutting ceramic tiles and other hard materials. They provide clean and precise cuts without damaging the tile surface.

    6. Marking and Preparing the Workpiece

    Accurately marking the desired curve

    Use a pencil or a suitable marking tool to draw the curve you want to cut on the workpiece. Ensure the line is clear and visible.

    Securing the workpiece for stability

    To prevent movement or vibrations during cutting, secure the workpiece using clamps, a workbench, or sawhorses. This ensures stability and reduces the risk of inaccurate cuts or accidents.

    • Clamping techniques: Position clamps strategically to secure the workpiece without obstructing the cutting path. Use additional supports if necessary, especially for larger or heavier materials.
    • Using a workbench or sawhorses: Utilize a sturdy workbench or sawhorses to elevate the workpiece to a comfortable cutting height and provide a stable surface.

    7. Cutting Techniques for Curves

    1. Starting the cut: Start by drilling a starter hole or plunging the blade directly into the workpiece. The chosen method depends on the material and the desired cutting technique.
    2. Drilling a starter hole: For delicate materials or tight curves, drilling a small hole at the start point allows you to insert the jigsaw blade and begin cutting smoothly.
    3. Plunging the blade into the workpiece: Suitable for materials where a starter hole is not required. Lower the jigsaw’s shoe onto the workpiece, engage the blade in the material, and then power on the tool.
    4. Following the marked curve: Guide the jigsaw along the marked curve, keeping the jigsaw’s shoe flat against the workpiece. Maintain a steady hand and move the tool consistently to ensure a smooth and accurate cut.
    5. Making slow and steady cuts: Avoid rushing the cut. Slow and steady movements help maintain control and accuracy. Let the blade cut, applying gentle pressure to guide the jigsaw along the curve.
    6. Rotating the workpiece if necessary: When cutting larger curves or tight angles, it may be required to rotate the workpiece to maintain a comfortable cutting angle. This allows you to follow the curve smoothly without straining or compromising accuracy.
    7. Utilizing the jigsaw’s orbital cutting action: If your jigsaw has orbital settings, experiment with different levels of orbital action to find the one that suits your cutting needs. Orbital motion enhances cutting efficiency and can be especially useful for woodcutting applications.
    8. Navigating tight curves: For intricate curves, a scrolling head jigsaw is recommended. Its blade moves up and down, providing better maneuverability and control in tight spaces.
    9. Using relief cuts for sharper turns: Relief cuts involve making small straight cuts perpendicular to the curve at regular intervals. These cuts create space for the jigsaw blade to turn more quickly, allowing you to achieve sharper and more precise turns.
    10. Sanding or filing the cut edges for a smooth finish: After completing the curved cuts, use sandpaper or a file to smooth any rough edges or imperfections. This step improves the overall finish of your project and ensures safety by eliminating sharp edges.

    8. Safety Precautions

    When using a jigsaw, it is essential to prioritize safety. Follow these precautions to minimize the risk of accidents and injuries:

    1. Wear appropriate safety gear: Protect yourself by wearing safety glasses, gloves, hearing protection, a dust mask, and safety shoes. These items protect your eyes, ears, lungs, and feet from hazards.
    2. Use clamps and secure the workpiece: Properly secure the workpiece using clamps or other suitable methods to prevent movement or vibrations during cutting. This ensures stability and reduces the risk of inaccurate cuts or accidents.
    3. Keep hands clear of the blade: Always maintain a safe distance between your hands and the moving blade. Avoid placing your hands directly before or behind the blade’s path.
    4. Unplug the jigsaw when not in use: When taking breaks or changing blades, unplug the jigsaw from the power source to prevent accidental activation and potential injuries.
    5. Follow safe operating procedures: Adhere to the manufacturer’s instructions and safe operating procedures outlined in the jigsaw manual. These guidelines provide specific information on handling the tool safely.
    6. Maintain balance and proper footing: Stand in a stable position with a balanced posture while operating the jigsaw. Ensure a firm footing to maintain control and stability throughout the cutting process.
    7. Avoid putting hands under the work surface: Never place your hands beneath the work surface or reach under the material while the jigsaw is running. This minimizes the risk of accidental contact with the blade.
    8. Never clean the jigsaw table with your hands while it’s running: Do not attempt to remove debris or clean it while the tool is powered on. Wait until the jigsaw is turned off and unplugged before performing maintenance or cleaning tasks.
    9. Release the switch if the blade binds: If the blade becomes stuck or binds during the cut, release the switch to turn off the jigsaw and address the issue. Trying to force the blade can lead to kickback or damage to the workpiece.
    10. Clean waste around the blade: Periodically clean the material that accumulates around the blade. This helps maintain visibility and prevents the buildup of debris that could interfere with the cutting process.
    11. Wait for the blade to stop before removing it from the workpiece: After completing a cut, wait for the blade to come to a complete stop before removing it from the workpiece. This minimizes the risk of accidental contact and ensures safer blade handling.
    12. Disconnect the power source before conducting maintenance or adjustments: When performing maintenance or adjusting the jigsaw, always disconnect it from the power source to eliminate the risk of accidental activation.

    Use these safety precautions as general guidelines, but always refer to the specific safety recommendations provided by the jigsaw manufacturer and consult the tool’s manual for comprehensive safety information.

    9. Conclusion

    Mastering the use of a jigsaw for cutting curves is an invaluable skill for a variety of projects. You can achieve accurate and clean curved cuts by selecting the suitable jigsaw, using the appropriate blade, marking and preparing the workpiece accurately, employing proper cutting techniques, and prioritizing safety precautions. Remember to practice and be patient; experience will enhance your cutting proficiency. Enjoy the versatility and creative possibilities that a jigsaw offers for cutting curves.

  • How to Convert Cordless Drill to Corded: 3 Step Magic!

    How to Convert Cordless Drill to Corded: 3 Step Magic!

    Converting a cordless drill into a corded one is a practical solution for those facing battery issues or needing more power. With basic electrical knowledge and the right tools, you can easily modify your drill to operate using a power cord instead. This article provides a step-by-step guide on how to convert cordless drill to corded one, along with insights on the advantages and limitations of each type of drill.

    1. Introduction

    Converting a cordless drill into a corded one is a simple solution when faced with a dying or insufficient battery. Whether you need more power for a specific project or want to revive an old drill, this conversion process can be a game-changer. You can transform your cordless drill into a corded one by following a few steps and using some essential tools. This article will guide you through the process, providing step-by-step instructions and important insights about corded and cordless drills.

    2. Tools and Materials Needed

    Before starting the conversion process, gather the following tools and materials:

    • Soldering iron
    • Wire cutter
    • Screwdriver
    • Sandpaper
    • Wire stripper
    • Power cord
    • Electrical tape
    Corded Drill

    3. Unleash the Power: DIY Guide to Converting Your Cordless Drill into a Corded Beast

    Step 1: Preparing the Drill

    1. Gathering the Necessary Tools

    First, ensure you have all the tools and materials mentioned earlier. Having them within reach will make the process smoother and more efficient.

    2. Removing the Battery

    Start by removing the battery from your cordless drill. This step is essential to ensure your safety and prevent accidental electrical discharge. Locate the battery compartment and carefully remove the battery pack according to the manufacturer’s instructions.

    Step 2: Disconnecting Power Sources

    1. Opening the Drill Casing

    Next, you need to open the casing of the drill. Use a screwdriver to remove the screws that hold the casing together. Once the screws are removed, gently separate the casing halves, exposing the internal components.

    2. Identifying the Power Supply Wires

    Inside the drill, you’ll find a set of wires connected to the battery terminals. Identify the wires that supply power to the drill. They are typically attached to a battery clip or a circuit board.

    3. Disconnecting the Battery Clip

    Carefully detach the wires from the battery clip using a wire cutter or similar tool. Ensure that the wires are completely disconnected to avoid any electrical current flow.

    Step 3: Connecting the Power Cord

    1. Soldering the Wire

    Take the power cord and strip off a small section of the outer insulation to expose the wires inside. Use sandpaper to remove any protective coating on the cables, allowing for better soldering.

    2. Connecting the Power Cord Wire to the Drill Wire

    It’s time to establish a direct connection between the power cord and the drill. Solder the exposed end of the power cord wire to the wire previously connected to the battery clip. Make sure the connection is secure and the wires are correctly joined.

    After soldering, insulate the connection using electrical tape to prevent short circuits or exposed wires.

    4. Corded vs. Cordless Drills

    At this point, you have successfully converted your cordless drill into a corded one. Understanding the differences between corded and cordless drills is essential to make an informed decision about their usage.

    Corded drills offer higher power ratings and are suitable for heavy-duty projects. They provide a constant power supply, eliminating the need to recharge or replace batteries. However, corded drills require an electrical outlet nearby and limit mobility due to the power cord.

    On the other hand, cordless drills provide convenience and portability. They are ideal for projects that require mobility or working in areas without easy access to power outlets. Cordless drills rely on batteries for power, which may need recharging or replacing periodically.

    5. Using a Plugged-in Cordless Drill

    If you decide to convert your cordless drill to corded, you can still use it as a corded drill when necessary. Connect the power cord and use it like a traditional corded drill. This flexibility allows you to switch between corded and cordless operations based on your needs.

    Corded Hammer Drills

    6. Corded Hammer Drills

    Some cordless drills have a hammer function for drilling into masonry or concrete. You also retain the hammer function when you convert a cordless hammer drill to a corded one. The conversion process remains the same, with the addition of a power cord.

    7. Purpose of Four Terminals on Drill Batteries

    Drill batteries typically have four terminals. Two terminals provide power to the drill, while the other two are used for communication and safety features. When converting a cordless drill to a corded one, you only need to connect the power cord to the terminals supplying power.

    8. Benefits and Limitations of a Corded Drill

    Converting a cordless drill to corded offers several benefits, such as a constant power supply and increased performance for demanding tasks. However, it also comes with limitations. The power cord restricts mobility, and you need an electrical outlet nearby to operate the drill.

    Safety Tips

    9. Safety Precautions

    When working with power tools and electrical components, it’s crucial to prioritize safety. Follow these precautions to ensure secure drill usage:

    • Wear safety goggles and gloves to protect your eyes and hands.
    • Disconnect the power source before opening the drill casing.
    • Avoid touching exposed wires or components while the drill is connected to a power source.
    • Double-check all connections and insulation before using the converted drill.

    If you need clarification on any aspect of the conversion process, consult a professional or an experienced individual.

    10. FAQs(Frequently Asked Questions)

    1. Can I convert any cordless drill to a corded?

    The conversion process may vary slightly depending on the make and model of the cordless drill. However, the general steps provided in this article should apply to most drills. It’s always recommended to consult the manufacturer’s instructions or seek professional advice if you need clarification on your drill’s compatibility or specific requirements.

    2. Is it safe to convert a cordless drill to corded?

    Converting a cordless drill to a corded can be safe if done correctly and with proper precautions. However, it involves working with electrical components, which carries some inherent risks. Follow the outlined steps carefully, prioritize safety, and ensure all connections are secure and well-insulated before using the converted drill.

    3. Are corded drills more powerful than cordless drills?

    Generally, corded drills offer higher power ratings than cordless drills. They can provide a continuous power supply, making them suitable for heavy-duty projects that require sustained power. Cordless drills, on the other hand, offer convenience and portability but may have limitations in terms of power and runtime.

    4. Can I still use my cordless drill after converting it to corded?

    Yes, after converting your cordless drill to corded, you can still use it as a cordless drill when needed. Detach the power cord and reinstall the battery pack, allowing you to switch between corded and cordless operation based on your requirements.

    5. What are the advantages of using a corded drill?

    A corded drill provides a constant power supply, eliminating the need to recharge or replace batteries. This can be beneficial for tasks that require sustained power or when working on projects without easy access to power outlets. Corded drills also offer higher power ratings, making them suitable for heavy-duty applications.

    11. Conclusion

    Converting a cordless drill to a corded one can extend its lifespan and give you the power you need for various projects. By following the steps outlined in this article, you can efficiently perform the conversion with essential tools and electrical knowledge. Remember to prioritize safety and double-check your work before using the converted drill. Enjoy the benefits of a corded drill while understanding its limitations and choosing the right tool for each task.

  • How to Remove Rust from Drill Bits: 5 Proven Ways Explained

    How to Remove Rust from Drill Bits: 5 Proven Ways Explained

    Drill bits are essential tools for various tasks but are susceptible to rust over time. Rust formation not only affects their performance but also shortens their lifespan. Therefore, knowing how to remove rust from drill bits effectively is crucial. This comprehensive guide will explore the reasons behind drill bit rust, discuss preventive measures to keep them rust-free and provide step-by-step instructions on various methods for removing rust from drill bits.

    How to Remove Rust from Drill Bits

    1. Why Do Drill Bits Rust?

    Drill bits can rust due to moisture, humidity, air exposure, and improper cleaning and storage practices. Additionally, acidic solutions, excessive heat or pressure, saltwater, and neglecting proper maintenance can contribute to rust formation.

    2. Preventing Rust on Drill Bits

    To keep your drill bits rust-free, follow these preventive measures:

    1. Proper Cleaning: Clean your drill bits after each use to remove any debris, moisture, or residue that may contribute to rust formation.
    2. Dry Storage: Store your drill bits in a dry place to minimize exposure to moisture and humidity.
    3. Lubrication: Apply a specific lubricant designed for drill bits to protect them from rust. This helps create a barrier between the metal surface and moisture.
    4. Cover During Extended Storage: If you plan to store your drill bits for an extended period, consider covering them with a protective case or using storage solutions that prevent air and moisture from reaching them.
    Wheel Brushes

    3. Method 1: Scrubbing with Wire Wheel Brushes

    One effective method to remove rust from drill bits is by scrubbing them with wire wheel brushes. Follow these steps:

    1. Step 1: Wear safety equipment such as gloves, goggles, masks, and protective clothing to protect yourself.
    2. Step 2: Attach a wire wheel brush to a power drill.
    3. Step 3: Gently scrub the rusted areas of the drill bit using the wire wheel brush. Apply moderate pressure to remove the rust effectively.
    4. Step 4: After scrubbing, clean the drill bit with a cloth to remove any loose rust particles.
    Sandpaper

    4. Method 2: Using Sandpaper

    Sandpaper is another effective tool for rust removal from drill bits. Here’s how to use it:

    1. Step 1: Put on your safety equipment, including gloves and goggles.
    2. Step 2: Take a piece of sandpaper with medium or fine grit.
    3. Step 3: Hold the sandpaper firmly and start rubbing it against the rusted areas of the drill bit. Move the sandpaper back and forth to remove the rust effectively.
    4. Step 4: Wipe the drill bit clean with a cloth once the rust is removed.
    Vinegar Soaking

    5. Method 3: Vinegar Soaking

    Vinegar is a household item known for its rust-removal properties. Follow these steps to remove rust from drill bits using vinegar:

    1. Step 1: Fill a container with enough white vinegar to fully submerge the drill bits.
    2. Step 2: Place the rusted drill bits in the container, ensuring they are fully immersed in vinegar.
    3. Step 3: Allow the drill bits to soak in vinegar for approximately 24 hours. The acidity of vinegar helps dissolve the rust.
    4. Step 4: Remove the drill bits from the vinegar and rinse them with water after soaking.
    5. Step 5: Dry the drill bits thoroughly before storing or using them again.

    6. Method 4: Baking Soda Paste

    Baking soda is another household ingredient that effectively removes rust from drill bits. Follow these steps:

    1. Step 1: Create a paste by mixing baking soda with water. Aim for a consistency similar to toothpaste.
    2. Step 2: Apply the baking soda paste to the rusted areas of the drill bit.
    3. Step 3: Gently scrub the rusted areas using a cloth or a soft-bristle brush.
    4. Step 4: Rinse the drill bit with water to remove any residue.
    5. Step 5: Dry the drill bit completely before using or storing it.

    7. Method 5: Metal Polish

    Using a metal polish is an excellent option for removing rust and restoring the shine of your drill bits. Follow these steps:

    1. Step 1: Apply a small amount of metal polish to a clean cloth.
    2. Step 2: Rub the metal polish onto the rusted areas of the drill bit in a circular motion.
    3. Step 3: Continue rubbing until the rust is removed and the drill bit appears clean and shiny.
    4. Step 4: Wipe any excess metal polish with a clean cloth.
    5. Step 5: Inspect the drill bit to ensure all rust has been successfully removed.

    8. Restoring Heavily Corroded Drill Bits

    For heavily corroded drill bits, more intensive cleaning methods may be necessary. Consider the following steps:

    1. Step 1: Remove loose rust particles using a wire brush or sandpaper.
    2. Step 2: Prepare a rust-removing solution by following the instructions on a commercial rust-remover product.
    3. Step 3: Submerge the heavily corroded drill bits in the rust-removing solution and let them soak for the recommended time.
    4. Step 4: After washing, remove the drill bits from the solution and rinse them thoroughly with water.
    5. Step 5: Dry the drill bits completely before applying a thin layer of oil to protect them from future rust formation.

    9. Proper Cleaning and Storage

    To prevent rust formation on your drill bits, it’s essential to establish a regular cleaning and storage routine. Here are some tips:

    1. After Each Use: Clean the drill bits thoroughly using a cloth or brush to remove debris or moisture.
    2. Dry Storage: Store the drill bits in a dry place away from moisture and humidity. Consider using a designated case or container for organized storage.
    3. Lubrication: Apply a thin layer of a specific lubricant designed for drill bits to protect them from rust and corrosion.
    4. Cover During Extended Storage: If you plan to store your drill bits for an extended period, cover them with a protective case or container to minimize exposure to air and moisture.

    9. Frequently Asked Questions

    I. How often should I clean my drill bits to prevent rust?

    It is recommended to clean your drill bits after each use to prevent rust formation and maintain their effectiveness. Regular cleaning helps remove any debris or moisture that could lead to rust.

    II. Can I use WD-40 as a rust inhibitor for drill bits?

    Yes, WD-40 can be used as a rust inhibitor for drill bits. It helps displace moisture and protect the metal surface from rust. After cleaning your drill bits, apply a thin layer of WD-40 to provide additional rust protection.

    III. Are there any commercial rust removers available for drill bits?

    Yes, various commercial rust removers are available in the market, specifically formulated to remove rust from metal surfaces, including drill bits. Follow the instructions provided with the product for effective rust removal.

    10. Conclusion

    Proper maintenance and regular cleaning are essential for preventing rust formation on drill bits. By following the preventive measures mentioned in this guide, such as good cleaning, dry storage, lubrication, and using rust inhibitors, you can minimize the risk of rust and extend the lifespan of your drill bits. If rust develops, methods like scrubbing with wire wheel brushes, using sandpaper, vinegar soaking, baking soda paste, or metal polish can effectively remove rust from drill bits. Remember to wear appropriate safety equipment when performing rust removal procedures. With the right care and maintenance, your drill bits will remain rust-free and ready for optimal performance.

  • How to Repair Cordless Drill: Say Goodbye to Drill Dilemmas

    How to Repair Cordless Drill: Say Goodbye to Drill Dilemmas

    Cordless drills have become an essential tool for DIY enthusiasts and professionals alike. These versatile devices provide the convenience of mobility without the hassle of cords. However, over time, they may encounter various problems that require repair. In this article, we will provide a step-by-step guide on how to repair cordless drill and troubleshooting common issues.

    Safety Precautions

    Before diving into the repair process, it’s crucial to prioritize your safety. Here are some essential safety precautions to follow:

    • Disconnect the drill from the power source or remove the battery.
    • Wear protective gear such as safety goggles and gloves.
    • Work in a well-ventilated area to avoid inhaling dust or fumes.
    • Read the drill’s user manual for specific safety instructions.

    Tools Required

    To repair your cordless drill, you’ll need the following tools:

    • Screwdriver set (flathead and Phillips)
    • Pliers
    • Wire cutters/strippers
    • Multimeter
    • Replacement parts (if necessary)
    • Lubricating oil
    • Cleaning cloth
    • Safety gear (gloves, safety goggles)

    Save Money and Get Handy: DIY Cordless Drill Repair Demystified

    How to Repair Cordless Drill

    Step 1: Understanding the Drill’s Components

    Before attempting any repairs, it’s important to familiarize yourself with the different parts of a cordless drill. The main components include the battery pack, motor, chuck, trigger switch, and gears. Understanding how these parts work together will help you diagnose and fix issues effectively.

    Step 2: Disassembling the Cordless Drill

    To access the internal components of the drill, you’ll need to disassemble it. Follow these general steps:

    1. Remove the battery pack or disconnect the power source.
    2. Locate and remove the screws that hold the drill housing together.
    3. Gently separate the housing to expose the internal components.

    Refer to the drill’s user manual or specific repair guides for detailed instructions on disassembling your model.

    Step 3: Analyzing and Identifying the Problem

    Once you disassemble the drill, carefully inspect each component for any visible damage or signs of wear. Use the information provided in the troubleshooting section of the drill’s user manual or refer to online resources for common issues and their solutions. This analysis will help you pinpoint the problem area.

    Step 4: Replacing Faulty Parts

    If you have identified a faulty component, you may need to replace it. Some common parts that may require replacement include the chuck, trigger switch, or motor. Follow these general steps:

    1. Order the replacement part from a reputable supplier or the drill manufacturer.
    2. Carefully remove the faulty part, taking note of its position and orientation.
    3. Install the new part in the correct position and secure it firmly.

    Refer to the specific repair guides or instructional videos available online for detailed instructions on replacing particular parts.

    Step 5: Reassembling the Drill

    After replacing any faulty components, it’s time to reassemble the drill. Follow these general steps:

    1. Place the internal components back into the housing, ensuring they fit properly.
    2. Align the housing correctly and secure it with the screws.
    3. Double-check that all parts are securely fastened and in their correct positions.

    9. Step 6: Testing the Repaired Drill

    Before putting the drill to use, it’s crucial to test its functionality. Follow these steps:

    1. Reconnect the battery pack or power source.
    2. Turn on the drill and check if it runs smoothly without any unusual sounds or vibrations.
    3. Test the drill’s various functions, such as speed control and reverse mode.
    4. If the drill performs as expected, congratulations! Your repair was successful.

    Common Cordless Drill Issues and Their Solutions

    Here are some common issues that cordless drills may encounter and their possible solutions:

    Issue 1: Grinding Sound

    If your drill produces a grinding sound while operating, it may indicate a problem with the gears. In such cases, you may need to lubricate or replace the gears.

    Issue 2: Lack of Variable Speed

    If the drill’s speed control isn’t functioning correctly, it could be due to a faulty trigger switch. Consider replacing the trigger switch to restore variable speed control.

    Issue 3: Motor-Chuck Problems

    If the motor isn’t engaging with the chuck or the chuck is not gripping the drill bit properly, you may need to inspect and adjust the motor and chuck alignment. Refer to the drill’s user manual or specific repair guides for detailed instructions.

    Tips for Preventing Drill Issues

    To avoid frequent drill repairs and ensure its longevity, keep the following tips in mind:

    • Regularly clean and lubricate the drill to prevent dust buildup and maintain smooth operation.
    • Use the appropriate drill bits for different materials to avoid unnecessary strain on the motor.
    • Store the drill in a dry, dust-free environment to prevent corrosion and damage.

    FAQs (Frequently Asked Questions)

    FAQ 1: How often should I clean my cordless drill?

    It’s a good practice to clean your cordless drill after every use or whenever you notice dust or debris buildup. Regular cleaning helps maintain its performance and prevents potential issues.

    FAQ 2: Can I use any replacement parts for my cordless drill?

    Using genuine replacement parts from the drill manufacturer or reputable suppliers is recommended. Using compatible parts ensures proper fitment and compatibility with your specific model.

    FAQ 3: Should I repair the drill myself or seek professional help?

    If you have the necessary knowledge and skills, repairing a cordless drill can be a DIY project. However, it’s best to seek professional assistance for complex issues or clarification on the repair process.

    FAQ 4: What should I do if my drill still doesn’t work after repairs?

    Double-check that all components are properly connected and secured if your drill doesn’t work after repairs. If the problem persists, it’s advisable to consult a professional for further diagnosis and repair.

    FAQ 5: How can I extend the battery life of my cordless drill?

    To maximize the battery life of your cordless drill, fully charge it before each use, avoid overcharging, and store it in a cool and dry place. Using the drill at optimal speed settings can also help conserve battery power.

    In this article, we have provided a comprehensive guide on how to repair a cordless drill. You can effectively troubleshoot and fix common issues by following the outlined steps and safety precautions. Remember to refer to specific repair guides or consult professionals when needed. Keep your cordless drill in good condition, and it will continue to serve you well for your various projects.

    Conclusion

    Repairing a cordless drill can save you money and extend the lifespan of your valuable tool. By following the steps outlined in this article, you can effectively diagnose and fix common issues that may arise with your cordless drill. Remember to prioritize safety and refer to specific repair guides or expert advice.

  • How to Tell If You Drilled Into a Stud: Stud or Mirage?

    How to Tell If You Drilled Into a Stud: Stud or Mirage?

    Suppose you’ve ever undertaken a DIY project that involved hanging heavy objects on your walls, such as shelves, cabinets, or artwork. In that case, you know how crucial it is to find a stud. Drilling into a stud provides a sturdy anchor point, ensuring your fixtures remain securely in place. But how do you identify the location of studs hidden behind drywall or other wall coverings? In this guide, we’ll walk you through on how to tell if you drilled into a stud, allowing you to tackle your home improvement projects with confidence.

    How to Tell If You Drilled Into a Stud

    1. What is Stud?

    A stud refers to a vertical framing member within the walls of a building, typically made of wood or metal. It serves as a primary support structure, providing stability and strength to the wall. Studs play a crucial role in wall construction. They are anchor points for attaching fixtures and distributing the structure’s weight.

    2. Stud Detection Mastery: How to Know If You Hit the Mark

    I. Understanding the Importance of Studs

    Before we delve into locating studs, let’s understand why they are essential for wall-mounting projects. Studs are vertical framing members within the walls of a building, typically made of wood or metal. They serve as the primary support structure for the wall, bearing the structure’s weight above and distributing it to the foundation below.

    II. Using a Stud Finder

    A stud finder is one of the most reliable and efficient tools for locating studs. This handheld device uses electronic sensors to detect changes in wall density, indicating the presence of a stud. To use a stud finder:

    • Step 1: Place the stud finder flat against the wall, ensuring it is calibrated and free from obstructions.
    • Step 2: Press the button to activate the device and slowly slide it horizontally across the wall.
    • Step 3: When the stud finder signals a change in density, it indicates the edge of a stud.
    • Step 4: Mark the detected edges and locate the center of the stud between the marks for accurate drilling.

    III. The Knocking Method

    The knocking method can be a handy alternative for those without a stud finder. When you knock on a wall, the sound changes depending on whether you hit a stud or hollow space.

    • Step 1: Stand close to the wall and tap with your knuckles or a small hammer.
    • Step 2: Pay attention to the sound. You’ve likely found a stud if you hear a solid and firm thud.
    • Step 3: Mark the area and repeat the process to locate the center of the stud.

    IV. Observing Wall Outlets and Switches

    Electrical outlets and switches are often mounted on the sides of studs for stability. By removing the cover plate of an outlet or switch, you can peek inside the wall and identify nearby studs. However, exercise caution and turn off the power before attempting this method.

    V. Measuring from Corners and Edges

    In many houses, studs are placed regularly, typically 16 or 24 inches apart. You can estimate where the studs are likely located by measuring from corners or edges. Use a tape measure and mark potential stud positions based on the standard intervals.

    VI. Locating Nail Pops and Drywall Screws

    Nail pops and drywall screws are signs of the underlying studs. When nails or screws are driven into studs during construction, they may cause the drywall to bulge slightly. Look for small dimples or protruding spots on the wall’s surface, as they can indicate the presence of a stud beneath.

    VII. Using Magnets

    Rare earth magnets can be surprisingly effective in locating studs, especially in walls with metal studs. Move the magnet along the wall, attracting the screws or nails that attach the drywall to the metal studs.

    VIII. Verifying with Pilot Holes

    Once you’ve determined the likely location of a stud using one or more methods, it’s essential to verify your findings. Drill a small pilot hole at the marked spot, careful not to drill too deep. You have likely hit a stud if you encounter solid resistance and the drill bit doesn’t penetrate easily.

    How to Drill Into a Stud

    3. How to Drill Into a Stud

    When drilling into a stud, follow these steps for success:

    1. Gather the necessary tools: drill, appropriate drill bit, measuring tape, pencil, and safety goggles.
    2. Use a stud finder to locate the stud’s edges, marking them with a pencil.
    3. Measure and mark the desired drilling spot on the stud.
    4. Attach the correct drill bit to your drill.
    5. Put on safety goggles to protect your eyes from debris.
    6. Position the drill perpendicular to the wall, aligning it with the marked spot.
    7. Apply gentle pressure and start drilling slowly.
    8. Maintain a steady hand and drill at a moderate speed to prevent overheating.
    9. Stop drilling when you feel resistance, indicating the drill has reached the stud.
    10. Remove the drill and wipe away any excess debris.
    11. Proceed with your wall-mounting project, using appropriate screws or anchors to secure your fixture.

    Remember to exercise caution and double-check for electrical wires or plumbing pipes before drilling.

    4. Frequently Asked Questions

    QI: Can I use a magnet to find studs in all types of walls? 

    Yes, interests are effective in locating metal studs or nails/screws used in attaching drywall to wood studs. However, they may not work on walls made of materials like concrete or plaster.

    QII: How deep should I drill a pilot hole to verify a stud? 

    A pilot hole should be drilled to a depth slightly greater than the length of the screw or anchor you plan to use. This ensures a secure attachment without damaging the stud.

    QIII: Can I rely solely on the knocking method to find studs? 

    While the knocking method can be useful, it’s recommended to use it in combination with other techniques, as the sound produced can vary depending on wall construction and the presence of insulation.

    QIV: Are there any precautions I should take when drilling into a stud? 

    Before drilling, it’s essential to check for electrical wires or plumbing pipes using a stud finder or electronic wire detector. Additionally, wear protective goggles and gloves to prevent injury from flying debris.

    QV: How can I patch a hole if I accidentally drill into the wrong spot? 

    If you drill into the wrong spot, you can fill the hole with spackling compound or putty, let it dry, sand it smoothly, and then repaint the area to match the surrounding wall.

    5. Conclusion

    Finding a stud is a critical step in any wall-mounting project. Using a combination of methods such as stud finders, knocking, observing wall outlets, measuring from corners, identifying nail pops, using magnets, and verifying with pilot holes, you can confidently locate studs and drill into them precisely. Remember to exercise caution when drilling and use appropriate anchors or screws to ensure a secure attachment.

    6. You may also like theses posts!

  • How to Use a Cordless Drill Safely: Harnessing the Power!

    How to Use a Cordless Drill Safely: Harnessing the Power!

    Using a cordless drill can greatly simplify your work and save time. However, it’s crucial to prioritize safety when operating this versatile power tool. In this article, we will provide a comprehensive guide on how to use a cordless drill safely. From understanding its components to choosing the right drill bit and implementing proper drilling techniques, we will cover all the necessary steps to ensure a safe and efficient experience. Whether you’re a DIY enthusiast or a professional tradesperson, this article will equip you with the knowledge to handle a cordless drill confidently and reduce the risk of accidents or injuries.

    How to Use a Cordless Drill Safely

    1. The Ultimate Guide to Using Cordless Drills Safely

    I. Understanding the Cordless Drill

    A cordless drill is a handheld power tool that operates using rechargeable batteries. It consists of a motor, a chuck for holding drill bits, a trigger for controlling the speed, and various settings for drilling, driving screws, and other tasks.

    II. Preparing for Drill Operation

    Before using a cordless drill:

    1. Ensure a suitable work area.
    2. Clear any clutter or obstacles that may impede your movement or cause accidents.
    3. Inspect the drill for any visible damage or loose parts.

    III. Choosing the Right Drill Bit

    Selecting the appropriate drill bit for your specific task is essential. Different materials require different drill bits, such as wood, metal, masonry, or spade bits. Using the wrong drill bit can result in poor performance and potential damage.

    IV. Inserting and Adjusting the Drill Bit

    To insert a drill bit:

    1. Loosen the chuck by rotating it counterclockwise.
    2. Insert the drill bit into the chuck, ensuring that it sits securely.
    3. Tighten the chuck by rotating it clockwise, using your hand or a chuck key if required.
    4. Avoid overtightening, as it may damage the drill bit.

    To ensure smooth and efficient drilling, knowing how to remove a bit from your Dewalt impact driver after use is essential. You can also learn more about this in our article on How to Remove Bit from Dewalt Impact Driver.

    V. Powering On the Drill

    Most cordless drills have a power trigger that controls the speed. To start the drill:

    1. Firmly grip the handle and place your index finger on the trigger.
    2. Apply gradual pressure to the trigger to increase the speed.
    3. Release the trigger to stop the drill.

    VI. Drilling Techniques

    When drilling, maintain a steady grip on the drill and apply gentle and consistent pressure. Start drilling at a slow speed and gradually increase it as needed. Use the drill in short bursts rather than continuously to prevent overheating.

    VII. Handling the Drill Correctly

    Proper handling of the cordless drill is crucial for your safety. Always hold the drill with both hands, one on the handle and the other supporting the battery pack. Maintain a firm grip to ensure control and stability during operation.

    VIII. Dealing with Battery Issues

    To ensure uninterrupted work, it’s important to monitor the battery level. Keep spare batteries charged and readily available. If the drill loses power, replace the battery with a fully charged one. Avoid using damaged or defective batteries.

    Safety Tips

    2. Safety Measures and Best Practices

    • Always wear appropriate personal protective equipment (PPE) such as safety glasses, gloves, and ear protection.
    • Keep your work area well-lit and free from clutter.
    • Avoid wearing loose clothing, jewelry, or long hair that may get entangled in the drill.
    • Never force the drill into the material you are working on. Let the drill bit do the work.
    • Disconnect the battery when changing drill bits or making adjustments.
    • Store the drill and batteries in a cool, dry place when not in use.

    3. Cleaning and Maintenance

    Regular cleaning and maintenance will prolong the lifespan of your cordless drill and ensure its optimal performance. After each use, wipe down the drill to remove any debris or dust. Periodically check the chuck and other moving parts for signs of wear and lubricate if necessary.

    Troubleshooting Common Problems

    4. Troubleshooting Common Problems

    I. Issue: Drill not turning on.

    Solution: Check the battery connection and ensure it is fully charged. If the battery is functioning correctly, contact the manufacturer for further assistance.

    II. Issue: The drill bit gets stuck.

    Solution: Release the trigger and gently reverse the drill to free the bit. If the bit is still stuck, try using pliers or a wrench to remove it.

    III. Issue: Overheating drill.

    Solution: Allow the drill to cool down and avoid prolonged continuous use. Clean any debris that may be blocking the ventilation holes.

    IV. Issue: Battery not holding a charge.

    Solution: Replace the battery with a new one. If the problem persists, contact the manufacturer for support.

    V. Issue: Excessive vibration during operation.

    Solution: Check the drill bit for damage or wear. Replace the bit if necessary. Ensure the material is properly secured before drilling.

    5. FAQs (Frequently Asked Questions)

    QI: How long does the battery of a cordless drill last?

    AI: The battery life of a cordless drill varies depending on factors such as the battery capacity, the tasks performed, and the power settings. Higher-capacity batteries generally provide longer runtime.

    QII: Can I use a cordless drill for driving screws?

    AII: Yes, cordless drills can be used for driving screws. They often have adjustable torque settings to control the amount of force applied.

    QIII: Should I wear safety goggles when using a cordless drill?

    AIII: Safety goggles are highly recommended to protect your eyes from debris or flying particles during drilling.

    QIV: Can I use a cordless drill for drilling into concrete?

    AIV: While cordless drills can be used for light masonry work, such as drilling into concrete or brick, for more demanding tasks, it’s advisable to use a hammer drill or a dedicated rotary hammer.

    QV: How often should I replace the drill bits?

    AV: The lifespan of drill bits depends on factors such as the materials drilled and the frequency of use. Replace drill bits when they become dull or damaged to maintain optimal performance.

    6. Conclusion

    Using a cordless drill safely is essential for both your well-being and the successful completion of your projects. Following this article’s guidelines and best practices, you can confidently and efficiently use a cordless drill for various applications.

  • How to Use Drill Machine for Screws: Screw with Confidence

    How to Use Drill Machine for Screws: Screw with Confidence

    In this article, we will guide you on how to use drill machine for screws. Whether you’re a DIY enthusiast or a professional, knowing how to use a drill machine for driving screws effectively is essential for various projects. We’ll cover the advantages of using a drill machine over a manual screwdriver, the different types of drills suitable for screw driving, and provide a step-by-step guide on.

    How to Use Drill Machine for Screws

    1. Why Use a Drill Machine for Screws?

    Before we dive into the details of using a drill machine for screws, let’s understand why it’s advantageous to use a drill machine instead of a manual screwdriver. While manual screwdrivers have their place in certain precise tasks, a drill machine offers several benefits:

    I. Speed

    A drilling machine rotates much faster than what can be achieved manually, allowing you to drive screws quickly and efficiently.

    II. Grunt

    Drills generate substantial torque, making it easier to drive screws into dense materials without straining your hand or risking screwhead shearing.

    III. Accuracy

    Many quality drills come with a torque clutch that disengages the driving head when it encounters resistance. This feature ensures accurate and even screwing, reducing the likelihood of splitting the target material.

    IV. Effortless

    Using a power tool like a drill machine significantly reduces the strain on your body compared to using a manual screwdriver, which can cause wrist pain, arm fatigue, and blisters.

    V. Space Saving

    With a drill machine, you only need one tool and a small box of driving bits to tackle screws of various sizes and head types. This saves space and minimizes the need for multiple handheld tools.

    VI. Fun

    Using a drill machine can turn the task of driving screws into an enjoyable experience, giving you the feeling of being a DIY ninja.

    Drill Driver

    2. Types of Drills for Driving Screws

    I. Drill Driver

    A drill driver is the most common type of drill for DIYers. It can be used for both drilling holes and driving fasteners like screws. It rotates the drill bit at high speeds for drilling and has a driver function for tightening or loosening fasteners. Drill drivers are versatile and suitable for wood, plastic, and thin metals. They come in corded electric, battery-powered, or pneumatic models.

    II. Hammer Drill

    A hammer drill is designed for drilling through masonry materials. It combines rotational force with a hammering mechanism to drill into tough materials like brick and mortar. Hammer drills can also be standard or drivers for various tasks. When using a hammer drill for masonry, it’s important to use a masonry drill bit.

    III. Rotary Hammer Drill

    A rotary hammer drill is a heavy-duty drill used for drilling through brick and concrete. It provides even more power and impact than a standard hammer drill. Rotary hammer drills are commonly used in construction and other heavy-duty applications.

    IV. Impact Driver

    An impact driver is specifically designed for driving screws. It provides high torque and a hammering action, making it easier to drive long screws and work with hard materials. Impact drivers are excellent for tasks that require extra power and torque.

    Drilling Screws

    3. How to Use a Drill Machine for Screws

    Step I: Gather the Necessary Tools and Materials

    Collect your project’s required tools and materials, including the drill machine, suitable drill bits, screws, safety glasses, and other necessary equipment.

    Step II: Prepare the Screwdriver Bit

    Insert the appropriate screwdriver bit into the chuck of the drill machine. Make sure it is securely tightened.

    Step III: Adjust the Drill Speed and Torque

    Set the drill machine to the desired speed and torque settings based on the type of material you are working with and the size of the screws. Refer to the drill machine’s manual for instructions on adjusting these settings.

    Step IV: Align the Drill Correctly

    Position the drill machine perpendicular to the surface where you want to drive the screw. Ensure a firm grip on the drill machine and maintain stability throughout the process.

    Step V: Start the Screw with a Pilot Hole

    For harder materials or when using larger screws, creating a pilot hole with a smaller drill bit is helpful before driving the screw. This pilot hole will guide the screw and prevent the material from splitting.

    Step VI: Drive the Screw into the Material

    Place the tip of the screw on the pilot hole or the desired location. Apply gentle pressure and squeeze the drill machine’s trigger to drive the screw into the material. Maintain control and avoid excessive force to prevent damage.

    Step VII: Repeat the Process for Additional Screws

    If you have multiple screws to drive, repeat steps 4 to 6 for each screw, ensuring proper alignment and control.

    Using a drill machine for screws is a versatile and efficient method to secure materials together. However, if you prefer a more compact and portable option, you can also explore using a cordless drill as a screwdriver. In our previous article on ‘How To Use Cordless Drill As Screwdriver: Drill Or Drive‘ we discussed the various techniques and considerations for utilizing a cordless drill effectively for screwing tasks. Now, let’s delve into the specific steps for using a drill machine for screws.

    Safety Tips

    4. Safety Tips for Using a Drill Machine

    I. Wear Safety Gear

    Always wear safety goggles or glasses that cover the sides of your eyes to protect them from flying debris. If drilling regularly or using impact drills, consider wearing ear protection to prevent hearing damage. Additionally, use respiratory protection, such as a dust mask or respirator, when drilling in dusty environments.

    II. Choose the Right Drill Bit

    The correct drill bit is crucial for safe and efficient drilling. Different materials require different drill bits to avoid breakage. Use general-purpose bits for wood, masonry bits for stone or concrete, high-speed steel (HSS) bits for most metals, and carbide or diamond-tipped bits for hard and brittle surfaces. Consult the drill manual or bit manufacturer if you need help deciding which bit to use.

    III. Secure Workpiece and Tighten Chuck

    1. Before drilling, ensure your workpiece is securely clamped to prevent movement.
    2. Ensure the drill chuck is tightened firmly to hold the drill bit in place while spinning.
    3. Insert the bit into the chuck and pull it until it clicks securely.

    IV. Use Proper Technique

    1. When drilling, apply light and steady pressure on the machine.
    2. Avoid using excessive force or leaning over the drill, as it may cause loss of control or injury.
    3. Allow the motor to do most of the work, and adjust the speed and pressure based on the material you’re drilling.

    V. Maintain a Stable Position

    Stand in a stable and balanced position while drilling. Keep a firm grip on the drill machine and maintain control throughout the drilling process.

    VI. Mindful Clothing and Jewelry

    Avoid wearing loose clothing or dangling jewelry that could get caught in the drill. Wear appropriate clothing that doesn’t interfere with the operation and maintain a safe distance from the drill bit.

    VII. Familiarize Yourself with the Drill Manual

    Read the drill machine’s manual to understand its specific safety instructions and guidelines. If you have any safety-related questions that need to be addressed in this guide, refer to the manual for further information.

    Remember, these safety tips provide general guidance, but it’s essential to consult the specific instructions provided by the manufacturer of your drill machine for any additional safety precautions or recommendations.

    5. FAQs(Frequently Asked Questions)

    I. What type of drill should I use for screws?

    To drive screws, you can use a cordless drill/driver or an electric drill/driver. These drills provide the necessary power and torque to insert screws effectively. Use the appropriate screwdriver bit that matches the screw head type.

    II. What drill speed should I use for driving screws?

    When using a drill machine for screws, it’s recommended to set the drill in a low-speed or variable-speed setting. This helps prevent the screw from stripping or going too deep into the material. Start at a low speed and gradually increase if necessary.

    III. How do I choose the right screwdriver bit for my screws?

    Selecting the correct screwdriver bit ensures a secure and efficient drive. Match the bit type to the screw head shape, such as Phillips, flathead, square, or Torx. Using the wrong bit may damage the screw head or cause the bit to slip.

    IV. Should I use a pilot hole when driving screws?

    In most cases, using a pilot hole when driving screws into wood or soft materials is unnecessary. However, it’s advisable to drill a pilot hole slightly smaller than the screw diameter for harder or denser materials, such as hardwood or metal. This helps prevent the fabric from splitting or the screw from breaking.

    V. How do I prevent the screw from going too deep?

    To prevent screws from going too deep into the material, you can use a depth stop feature if available on your drill machine. Alternatively, you can mark the desired depth on the screwdriver bit using tape as a visual guide. This allows you to control the depth of the screw insertion accurately.

    6. Conclusion

    In conclusion, using a drill machine for screws requires proper knowledge and techniques to ensure safe and effective results. Here are the key points to remember when using a drill machine for screws:

    I. Select the appropriate drill

    Choose a cordless or electric drill/driver with enough power and torque to drive screws effectively.

    II. Use the right screwdriver bit

    Match the bit type to the screw head shape (e.g., Phillips, flathead, square, Torx) to ensure a secure drive and prevent damage to the screw head.

    III. Set the drill speed

    Use a low-speed or variable-speed setting on the drill to prevent stripping or overdriving the screws. Start at a low speed and adjust as needed.

    IV. Consider pilot holes

    While not always necessary, pilot holes can be useful for harder or denser materials. Drill a pilot hole slightly smaller than the screw diameter to prevent splitting or breakage.

    V. Prevent overdriving

    Utilize features like depth stops or mark the desired depth on the screwdriver bit with tape to control the depth of screw insertion and avoid going too deep.

    Always refer to the manufacturer’s instructions and guidelines for your specific drill machine model for proper usage and safety precautions. These tips help you use a drill machine effectively and securely when working with screws.