If you are searching for the best method of getting a hole in your metal without a drill, you need to read this article. This article covers techniques for how to make a hole in metal without a drill. Drilling metal without the help of a drill is difficult.
A hacksaw, Hammer, hitting it with a chisel, or even taking a center punch can be used to make a hole in metal. Note you can’t drill without a drill. But you can make a hole without a drill. Although it will not be perfect, hopefully, that will be enough to do your job.
Introduction: Why Consider Alternatives?
In the world of metalwork, innovation and versatility go hand in hand. Metal, a robust and resistant material, often demands specialized tools for manipulation and alteration. Drilling holes in metal is a common practice, integral to various professional and DIY projects alike. However, there are times when using a drill is challenging, whether due to lack of access, specific project requirements, or the desire for a unique finish that alternative methods can offer.
Safety should always be a top priority in any metalworking project. Protective attire like a thick apron is crucial to shield the body during the process, as working with metal can sometimes be unpredictable. Moreover, alternative methods can offer enhanced control and precision, reducing the risk of accidents and ensuring a cleaner, more defined outcome.
The richness in the variety of tools and techniques available today is another reason to explore alternatives. From punches and chisels to advanced cutting tools, metalworkers have a plethora of options at their disposal. These tools not only broaden the horizons of creativity but also cater to specific needs and finishes that a drill might not achieve.
Cost-effectiveness and efficiency are additional factors. Drills and their bits can be expensive, and wear and tear are common. Alternative tools can often be more economical and durable, offering long-lasting solutions and reducing the need for frequent replacements.
In the following sections, we will delve into the myriad of ways to make holes in metal without a drill, ensuring that your creativity remains unhindered and your projects continue to shine with excellence and precision.
How to make a hole in metal without a drill
Be patient and take your time. When punching holes in metal, people’s most common mistake is to hurry through the process. It will end up costing you more time and money if you rush things. Take your time and work slowly.
In many ways, you can make a hole in metal plates without a drill. This article will use Hacksaw, Hammer, and Punch Pliers Method to punch holes in the metal.

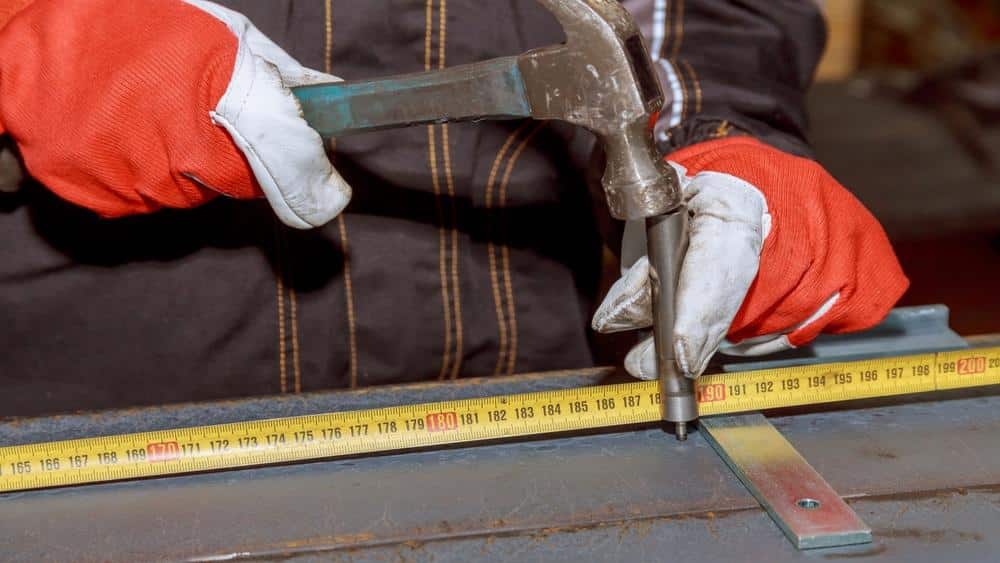
Punch and Hammer
The Punch and Hammer method is a classic and widely used technique in metalworking, renowned for its simplicity, precision, and the ability to create clean holes without the need for powered drilling equipment. Here is a step-by-step guide on how to effectively use the punch and hammer technique:
Tools Required:
- Metal Punch/Center Punches
- Hammer
- Metal Surface to be punched
- Protective Eyewear and Gloves (for safety)
Step 1 — Safety First
Always begin with ensuring safety. Wear protective eyewear and gloves to protect yourself from metal splinters or sharp edges.
Step 2 — Mark the Spot
Identify the exact location where you want to make a hole on the metal surface. Use a marker or scribing tool to mark this spot clearly. This ensures precision and avoids errors during the punching process.
Step 3 — Position the Punch
Place the pointed end of the metal punch precisely on the marked spot. Ensure the punch is perpendicular to the metal surface for a clean, round hole.
Step 4 — Strike with the Hammer
Hold the punch firmly and strike its top end with a hammer. It might require a few firm and well-aimed blows to drive the punch through the metal, depending on the material’s thickness.
Step 5 — Inspect the Hole
After the punch has penetrated the metal, inspect the hole. If necessary, use files or sandpaper to smooth out any rough edges to get the desired finish.
Step 6 — Clean the Work Area
Always clean the work area after the process to remove any metal filings or debris, ensuring a safe environment for the next phase of your project.
Applications and Considerations
The Punch and Hammer method is especially useful for thin sheets of metal where precision and cleanliness of the hole are crucial. It allows for significant control over the size and shape of the hole. It is often used in detailed work, including jewelry making, crafting, and certain types of metal repairs. Always consider the type and thickness of the metal to choose the appropriate punch and hammer to get the job done effectively.

Burning Through Metal Using a Torch
Creating holes in metal or cutting through it isn’t limited to mechanical methods. Heat, especially in the form of a torch, offers an effective way to burn through metal, producing quick results. In this guide, we provide a comprehensive look at the process of burning through metal using a torch.
Benefits of Using a Torch
- Speed: A torch can rapidly heat and cut through metal, especially thin sheets.
- Flexibility: It can be used to make intricate designs or straight cuts.
- Portability: Many torches are portable and can be used in locations without power.
Required Tools and Materials
- Oxy-acetylene torch or plasma torch.
- Safety goggles to protect eyes from sparks and bright light.
- Heat-resistant gloves.
- Leather apron or protective clothing.
- Fire extinguisher for safety.
- Chalk or marker for marking the cutting path.
Steps to Burn Through Metal with a Torch
Step 1 — Safety First
Before starting, ensure you’re in a well-ventilated space. Wear safety goggles, heat-resistant gloves, and protective clothing. Ensure a fire extinguisher is close by.
Step 2 — Prepare the Metal
Clean the metal surface. Remove any rust, paint, or debris. This ensures a smooth and consistent burn. Mark the desired area or path where you intend to cut or make a hole using chalk or a marker.
Step 3 — Set Up the Torch
For an oxy-acetylene torch, ensure both the oxygen and acetylene tanks are open and adjusted to the correct pressures. Light the torch using a spark striker.
For a plasma torch, connect it to a power source and ensure the ground clamp is attached to the metal piece.
Step 4 — Begin the Burn
Hold the torch at a slight angle to the metal surface. Start by heating the metal until it’s red-hot. Once it’s adequately heated, increase the oxygen flow (for the oxy-acetylene torch) to initiate the cutting flame. Move the torch steadily along the marked path.
For a plasma torch, once the arc is established, move it along the marked path to cut.
Step 5 — Quench and Clean
After cutting, allow the metal to cool for a moment, then quench it in water to cool it rapidly. Clean off any slag or residues from the cut.
Tips for a Clean Cut
- Ensure a steady hand while moving the torch.
- Maintain a consistent speed to avoid uneven cuts.
- Adjust the flame size for thicker or thinner metals.
In Conclusion
Using a torch to burn through metal is an effective method, especially when precision and speed are required. However, always prioritize safety and use the right protective gear to prevent any accidents or injuries.
Nail and Hammer
When a drill isn’t within reach, or you’re looking to employ a method as old as metalworking itself, the nail and hammer technique proves it’s worth time and again. This traditional approach is straightforward, requiring minimal tools while offering the raw precision that comes with manual labor.
Tools Required:
- Nail
- Hammer
- Metal Surface
- Safety Goggles and Gloves
Step 1 — Prioritize Safety
Before embarking on this metal piercing journey, safeguarding personal well-being is paramount. Equip yourself with safety goggles to shield the eyes from metal splinters, and wear gloves to mitigate the risk of cuts or abrasions.
Step 2 — Marking the Target
With the safety gears in place, the next step is marking the metal surface. Identify the spot where the hole is intended and mark it with precision. A clear and visible mark ensures that the nail is driven at the exact location, reducing the margin for error.
Step 3 — Position the Nail
Hold the nail firmly against the marked spot. The steadiness of your hand will play a significant role in ensuring that the nail is driven straight through the metal.
Step 4 — Hammering Down
With the nail in position, take the hammer and deliver firm, controlled strikes. The first few hits should be measured, ensuring the nail is set and doesn’t veer off course. Once set, proceed to drive the nail through the metal with steady hits.
Step 5 — Assess the Hole
After the nail has penetrated through, take a moment to inspect the hole. Depending on the project, additional steps like filing to smoothen the edges or widening the hole may be necessary.
Step 6 — Clean-Up
In the aftermath of the hammering, ensure to clean the workspace, clearing away any metal filings or debris making it ready for subsequent tasks.
Practical Insights
The nail and hammer technique is particularly handy for thin to medium-thickness metal sheets. The size of the hole is contingent on the nail’s diameter, offering an array of sizes to fit specific needs. Though simplistic, this method provides a direct and controlled means to create holes in metal, a testament to the adage that sometimes, the old ways are not just golden but enduringly efficient.
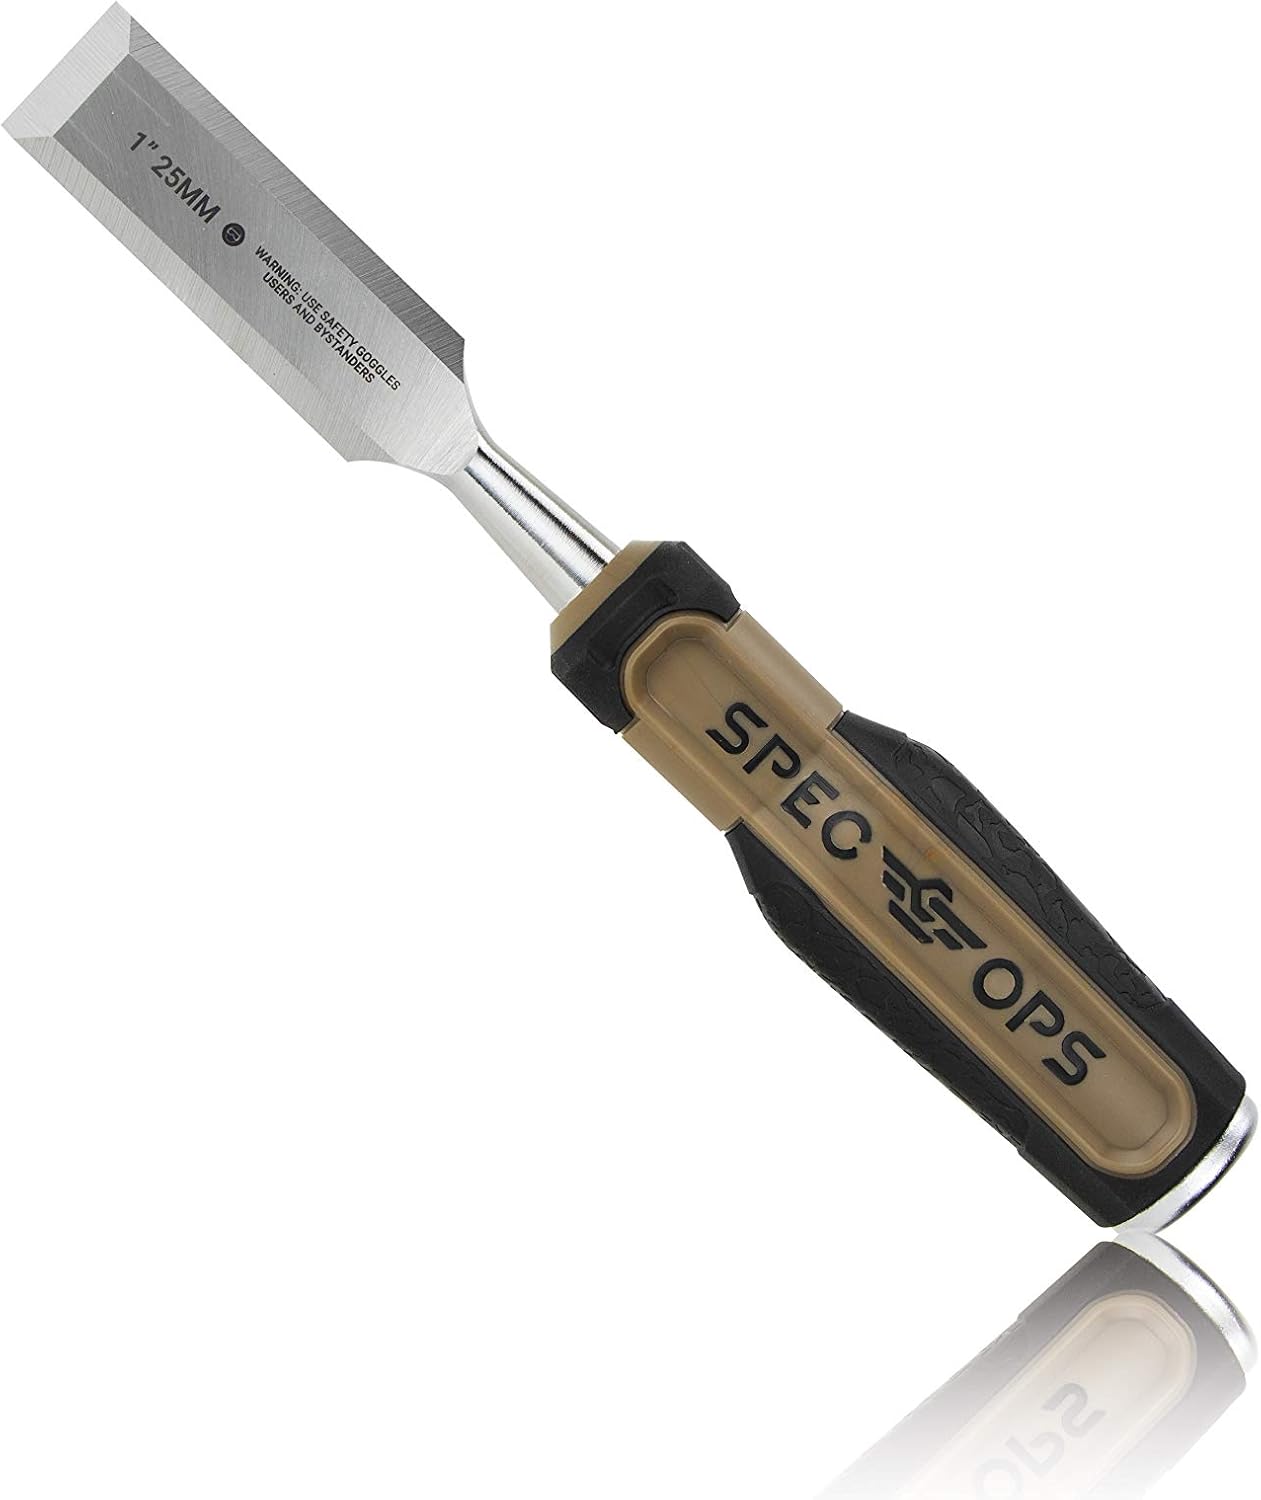
Chisels
In the realm of metalworking, chisels carve out their niche as indispensable tools for cutting and shaping metal, especially when creating holes without a drill is the task at hand. Chisels offer accuracy, power, and tactile feedback that many artisans and workers appreciate. Here’s a detailed exploration of using chisels to make holes in metal.
Tools Required:
- Chisel
- Hammer
- Metal Surface
- Safety Gear (goggles, gloves)
Step 1 — Safety Precautions
Safety is a cornerstone in metalworking. Equip yourself with safety goggles to protect your eyes from metal fragments and gloves to guard your hands against cuts or injuries.
Step 2 — Mark the Metal
Precision begins with accurate marking. Use a marker or scribing tool to indicate precisely where you want to create the hole on the metal surface.
Step 3 — Position the Chisel
Hold the chisel against the marked area. The angle at which you hold the chisel can impact the shape and cleanliness of the cut, so position it with care.
Step 4 — Strike with Precision
Using a hammer, strike the top of the chisel with controlled force. The chisel will cut into the metal, and with repeated strikes, it will penetrate through, creating a hole.
Step 5 — Inspect and Refine
Examine the hole and the surrounding area. Use files or additional chiseling to refine the hole, ensuring it meets the desired size and shape specifications.
Step 6 — Clean the Work Area
Post-operation cleanliness ensures a safe and efficient workspace for future tasks. Clear away metal filings and inspect your tools for any needed maintenance.
Key Takeaways
Chisels stand as a testament to the blend of simplicity and effectiveness. The type of chisel and the manner of its use can be adapted to fit various metal types and thicknesses, offering a versatile solution for those looking to create holes without the use of a drill. It’s a method steeped in skill and craftsmanship, where the tactile connection between the worker, tool, and material brings about results that are both functional and artistically inclined.
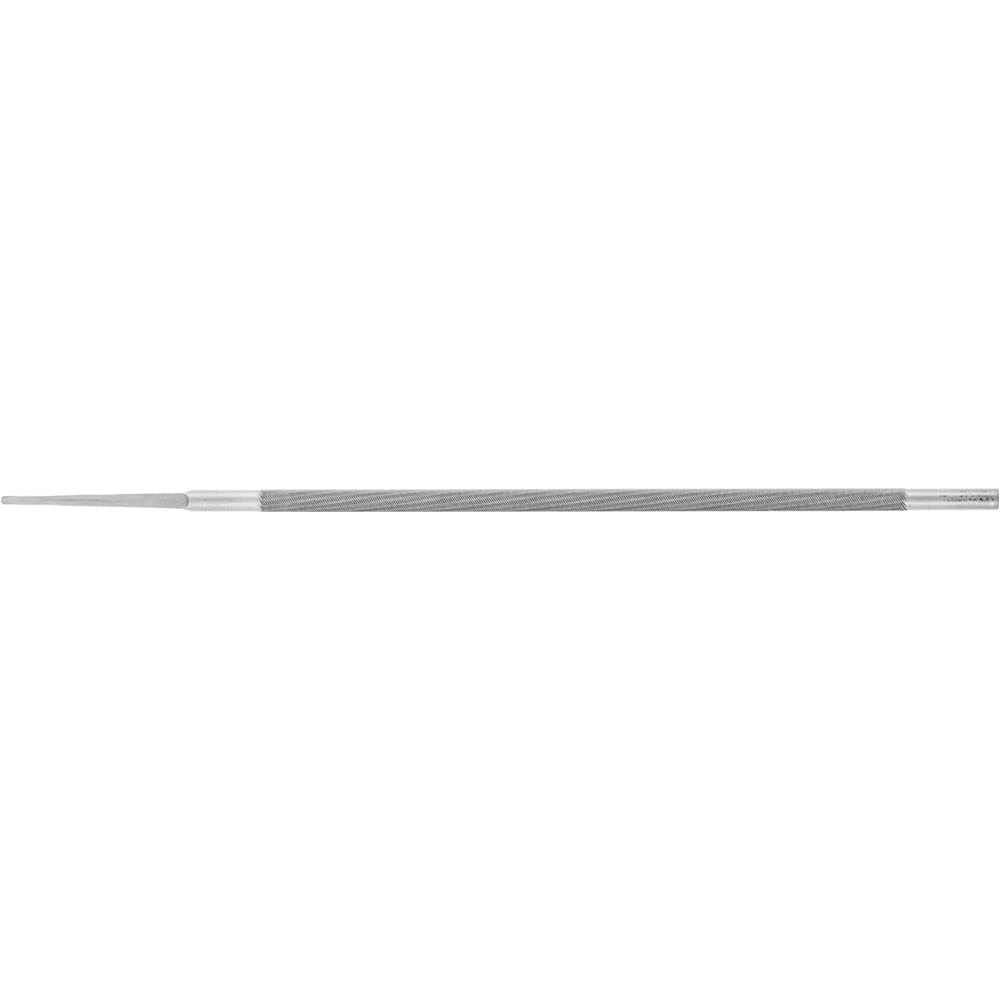
Files and Rasps
In scenarios where precision, detail, and finesse are paramount, files and rasps emerge as the unsung heroes. These tools are intrinsic for refining holes in metal, ensuring they not only serve their functional purpose but also adhere to the aesthetic expectations attached to finely crafted metalwork.
Tools Required:
- Files or Rasps
- Metal Surface
- Safety Equipment (gloves, goggles)
Step 1 — Safety First
Kickstart the process by gearing up with appropriate safety equipment. A pair of safety goggles and gloves are essential to safeguard against metal shavings and sharp edges.
Step 2 — Identification and Marking
Identify the exact location for the hole or the area that needs refining. If creating a new hole, mark the boundaries to ensure precision in the subsequent steps.
Step 3 — Choose the Right Tool
Select the appropriate file or rasp based on the metal’s thickness and the required hole size. Each tool offers a different grade of coarseness suited for specific tasks.
Step 4 — Filing or Rasping
Hold the file or rasp firmly and apply it to the metal surface with even pressure. Use consistent, linear strokes to wear away the metal gradually. Keep checking the progress to ensure that you achieve the desired size and shape.
Step 5 — Inspection and Adjustment
Inspect the hole regularly during the filing process. Make necessary adjustments to your technique to ensure that the hole is both functional and aesthetically pleasing.
Step 6 — Clean-Up
Conclude by cleaning the work area, ensuring all metal shavings are safely disposed of, and tools are stored appropriately for future use.
Insightful Considerations
Files and rasps are instrumental for tasks that require a meticulous touch. They’re not just tools but extensions of the artisan’s hands, offering a level of control and precision that’s rarely matched. When the objective is to create or refine holes in metal without a drill, turning to these timeless tools can yield results that are as functional as they are artistically appealing. Each stroke is a step towards perfection, making files and rasps a cherished asset in the toolbox of those who seek excellence in metalworking.
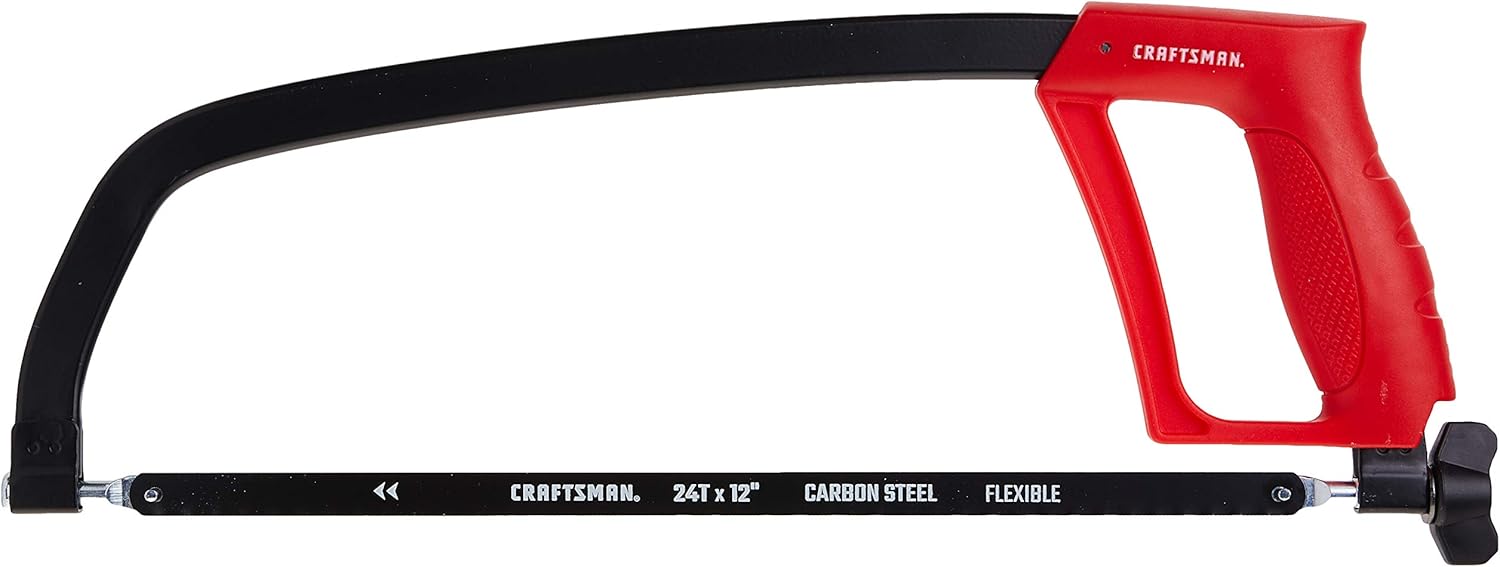
Hacksaw or Jeweler’s saw
Creating holes or intricate shapes in metal doesn’t always demand the mighty roar of a power drill. At times, the silent, steadfast strokes of a hacksaw or jeweler’s saw, guided by skilled hands, carve pathways into the metal with equal precision and grace.
Tools Required:
- Hacksaw or Jeweler’s Saw
- Center Punch
- Metal Pieces or Steel Block
- Safety Gear (goggles, gloves)
Step 1 — Embrace Safety
Adorn safety goggles and gloves to shield yourself from potential flying metal pieces or sharp edges, ensuring a safe working experience.
Step 2 — Mark the Design
Precision starts with perfect marking. Either mark manually or use design paper attached with double-sided sticky tape to the metal, ensuring that the design is steadfast and clear for cutting.
Step 3 — Create a Center Point
With the metal placed firmly on a steel block, use a center punch and hammer to create an initial indentation or a small hole within the marked design. This acts as a guiding star for the subsequent cutting process.
Step 4 — Prep the Saw
Detach the blade from the hacksaw or jeweler’s saw and thread it through the initial hole or indentation. Reattach the blade, ensuring it is taut and secure.
Step 5 — The Art of Cutting
Begin the cutting process with slow, steady strokes. Patience is a virtue here; start slowly to ensure the blade follows the intended path. The motion should be fluid, with the frame of the saw parallel to the workbench, ensuring even pressure and precision.
Step 6 — Inspection and Refinement
A meticulous inspection should follow every cut. Assess the edges and the overall shape. If needed, refine using files to achieve the perfect finish, ensuring the hole or cut is both functional and aesthetically aligned with the project’s demands.
“If you’re looking to learn more about cutting metal sheets by hand, be sure to check out our guide on How To Cut Metal Sheet By Hand: Techniques and Tools. It covers essential techniques and the necessary tools for precise metal cutting.”
Safety Precautions
When it comes to using power tools, safety should always be a top priority. Here are some essential safety precautions to keep in mind:
Protective Gear
- Eye Protection: Always wear safety goggles or a face shield to protect your eyes from flying debris, sparks, or dust that power tools can generate.
- Hearing Protection: Power tools can produce loud noises that may damage your hearing over time. Use earplugs or earmuffs to safeguard your ears.
- Respiratory Protection: If you’re working with materials that produce dust or fumes, wear a respirator to prevent inhaling harmful particles or chemicals.
- Gloves: Utilize appropriate gloves to protect your hands from sharp edges, hot surfaces, or chemicals. Ensure the gloves fit well for dexterity.
- Dust Masks: When working in dusty environments, particularly with sanders or saws, a dust mask can prevent inhalation of harmful particles.
Work in a Well-Ventilated Space
Proper ventilation is crucial when using power tools, especially those that produce dust or fumes. Here’s why:
- Health Benefits: Adequate ventilation helps in maintaining good indoor air quality, reducing the risk of respiratory issues.
- Dust Removal: Proper ventilation can assist in removing airborne dust and particles, improving visibility and overall safety.
- Fume Dissipation: For tools that generate fumes, like welding equipment, good ventilation ensures that toxic gases are promptly removed from the workspace.
To achieve proper ventilation:
- Work near open windows or doors if possible.
- Use exhaust fans or air purifiers to help with air circulation.
- Consider wearing a respirator if ventilation is inadequate.
Secure Metal Piece Properly
When working with metal pieces using power tools, it’s essential to ensure that the material is securely fixed in place. Here’s how to do it safely:
- Clamps or Vises: Use clamps or a bench vise to secure the metal piece firmly. This prevents it from moving or shifting during the operation.
- Proper Support: If working with long or heavy metal pieces, use appropriate supports or workbenches to prevent sagging or instability.
- Stable Work Surface: Ensure that the work surface, such as a workbench or sawhorse, is stable and level to prevent accidents.
- Correct Positioning: Position the metal piece so that you can work on it comfortably without straining or contorting your body.
By adhering to these safety precautions, you can significantly reduce the risk of accidents and injuries while using power tools. Always prioritize safety in your workshop to ensure a productive and hazard-free working environment.
Pros and Cons of Each Method
When it comes to working with power tools, different methods can be employed to achieve similar results. Let’s explore the advantages and disadvantages of some common methods compared to using drills:
Punch and Hammer vs. Drill
Punch and Hammer
Pros:
- Precision: This method allows for the precise placement of holes or fasteners, which can be essential in some applications.
- Quiet: It is generally quieter than using a drill, making it suitable for situations where noise is a concern.
Cons:
- Labor-Intensive: Requires more physical effort compared to using a drill, which can be tiring over extended periods.
- Slower: Punching and hammering can be slower than drilling, especially for larger holes or multiple fasteners.
Drill
Pros:
- Speed: Drills are typically faster in creating holes or driving fasteners, saving time and effort.
- Versatility: It can be used for a wide range of tasks with various attachments, making it a versatile tool.
Cons:
- Noise: Drills can be noisy, which may not be suitable for noise-sensitive environments.
- Less Precision: Achieving high precision may be challenging with a drill, especially for intricate tasks.
H3 Nail and Hammer vs. Drill
Nail and Hammer
Pros:
- Low Cost: Requires minimal investment in tools and equipment.
- No Power Required: Ideal for situations where power sources are limited or unavailable.
Cons:
- Labor-Intensive: Similar to punch and hammer, this method can be physically demanding and time-consuming.
- Limited Precision: Achieving precise results can be challenging, particularly for delicate tasks.
Drill
Pros:
- Efficiency: Drills can drive nails quickly and with precision, making them more efficient.
- Versatility: Like with drilling, a drill can be used for various tasks, including nail driving, with the right attachments.
Cons:
- Cost: The initial investment in drill and nail driving attachments may be higher than a basic hammer and nails.
- Noise and Power Requirement: Drills can be noisy and require a power source, which may only be suitable for some situations.
Chisels vs. Drill
Chisels:
Pros:
- Control: Chisels offer precise control for shaping and carving tasks.
- Quiet: They are quieter than drills, making them suitable for delicate or noise-sensitive work.
Cons:
- Laborious: Chiseling can be physically demanding and time-consuming, especially for larger projects.
- Skill-Dependent: Achieving the desired results with a chisel often requires a high level of skill and experience.
Drill:
Pros:
- Efficiency: Drills with appropriate attachments can make chiseling tasks faster and more accessible.
- Consistency: Drills can provide consistent results, which can be challenging with manual chiseling.
Cons:
- Skill Required: Effective use of a drill for chiseling may still require some skill and practice.
Best Scenarios for Each Method
The choice between these methods often depends on the specific task and your individual preferences. Here are some scenarios where each method might shine:
Punch and Hammer or Nail and Hammer:
- Small, precise tasks where control is paramount.
- Noise-sensitive environments.
- When budget constraints are a concern.
Drill:
- Tasks that require speed and efficiency.
- Versatile applications where various attachments can be used.
- When precision can be sacrificed for speed.
Chisels:
- Fine woodworking and carving projects.
- Delicate tasks where precision is crucial.
- When a quieter option is required for shaping or carving.
In conclusion, the choice of method depends on the specific project requirements, your skill level, and the tools you have available. Each method has its own set of pros and cons, so it’s essential to assess your needs and select the most suitable approach accordingly.
Conclusion
The elegance of using a hacksaw or jeweler’s saw lies in the intimate connection between the artisan and the material. Each stroke is a dance of precision, offering a level of control that is both tangible and nuanced. In a world where the hum of power tools is often synonymous with metalworking, the silent, rhythmic strokes of these hand tools remind us of the artistry that lies at the heart of shaping metal. Each cut, each hole, is not just a physical alteration but an artistic expression molded with precision and skill.
Final word
Getting a hole in a metal can be difficult and time-consuming. Metal cans are sturdy and not easy to puncture. Hopefully, the number of ways we have shown will give your an answer on how to make a hole in metal without a drill.
![How to Use a Cordless Drill: Pro Tips and Tricks[Updated]](https://drill-guy.com/wp-content/uploads/2023/09/How-to-Use-a-Cordless-Drill-768x432.jpeg)