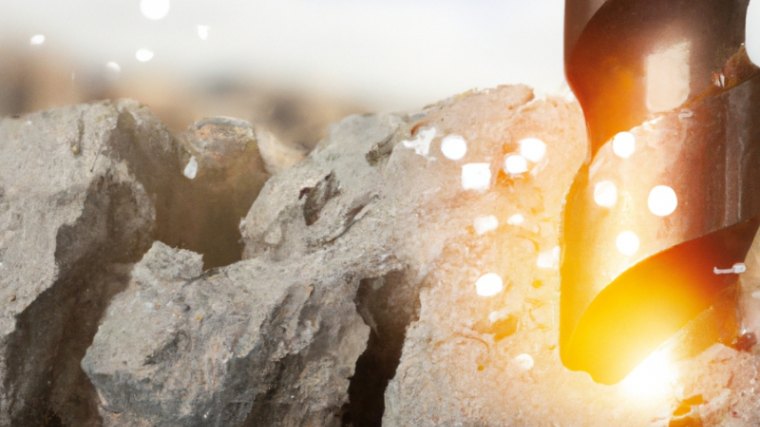
When faced with the formidable task of drilling into a large rock, it’s not merely a physical challenge but a journey that requires precision, knowledge, and the right tools. This “How To Drill a Hole In a Large Rock” article serves as your trusted guide, offering insights into the essential power tools you’ll need, the drilling techniques that can make the process more manageable, and the critical decision of choosing the right method for different types of rocks. But safety is paramount, so we’ll also delve into the precautions you should take to ensure a secure drilling experience.
To steer clear of common pitfalls, we’ll explore the mistakes you should avoid when handling power tools and rocks. As we venture into the world of drilling, we’ll focus on the intricate art of drilling into giant stones using power tools. By the time you conclude, you’ll be well-equipped with the knowledge and confidence to conquer the challenge of drilling into large rocks and turning them into canvases for your creative endeavors. So, let’s embark on this rock-solid journey together!
Essential Power Tools
When you think of making a hole in a big rock, you might wonder, “What tools do I need?” Good news! With the right tools, it’s simpler than you think. Let’s talk about two must-have tools that will make the job easier.
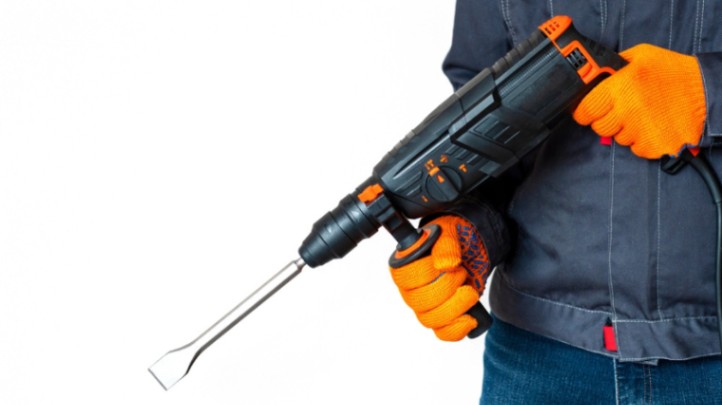
Hammer Drills
Have you ever seen a tool that looks like a drill but sounds like it’s tapping while it spins? That’s a hammer drill. It’s like a regular drill, but it also does a “tap-tap-tap” motion. This tapping helps the drill get through tough stuff like rocks. If you’re drilling into a big rock, this tool is your best friend.
Carbide-tipped Masonry Bits
Now, let’s chat about drill bits. A regular drill bit might get dull super fast if you use it on a rock. But there’s a special kind called “carbide-tipped masonry bits.” These are strong and can drill into rocks without wearing out quickly. It’s like using a superhero drill bit for tough jobs!
So, remember, if you’re trying to drill into a large rock, having the right tools makes everything easier. With a hammer drill and a carbide-tipped bit, you’ll be set to go!
Drilling Techniques
Drilling into a big rock might seem hard, but with the right steps, it becomes easier. Let’s go on an adventure to learn the best ways to drill into a rock!
Drilling Basics
Before starting, it’s super important to pick a spot on the rock where you want the hole. Once you choose, make a small mark there. Always start by drilling a tiny hole first. Think of it as a guide. This little hole will help the bigger drill bit stay in the right spot and not slide around. So, make a baby hole, and then you can make it bigger with a bigger drill bit!
Precision Rock Excavation
Now, sometimes, you need a hole to be super exact. Imagine drawing a straight line on a paper without a ruler. Tough, right? Precision rock excavation is like using a ruler for drilling. By drilling a row of small holes really close to each other, you make sure the rock will break just where you want it to. It’s all about being neat and tidy!
Line Drilling
Line Drilling is a fun one! Line drilling is like making a dotted line on the rock. You drill a bunch of holes side by side. When they’re close together, it makes a line on the rock. Later, if you want, you can break the rock along this line. It’s like folding paper along a crease. The rock will split in a straight line right where you drilled the holes!
So there you have it! Drilling into a rock might seem like a big job, but with the right techniques, it’s a piece of cake. Happy drilling, and always remember to be safe and have fun!
Choosing the Right Method
Every rock is unique, just like snowflakes! So, when you want to drill into one, you’ve got to choose the best way. Let’s jump into a rock journey to learn more.
Soft Rocks vs. Hard Rocks
Did you know that all rocks aren’t the same? Yep! Some rocks feel softer, like chalk, while others are super tough, like diamonds. If you’re dealing with a softer rock, a regular drill can do the job. But for the hard ones, you’ll need a stronger drill bit. Think of it like cutting butter with a knife versus cutting a carrot. Different tasks need different tools!
Historical Drilling Methods
Long ago, before there were cool electric drills, people still needed to make holes in rocks. They had some clever ways! One way was to use a big, heavy stick and hit the rock until a hole appeared. Another method was to twist a sharp tool into the rock by hand, turning it again and again. It took a lot of time and muscle, but it worked. It’s neat to think about how people from the past solved problems, isn’t it?
So, the next time you look at a rock and wonder how to drill into it, think about the rock’s type and the best tools for the job. Whether using modern gadgets or old-school methods, drilling into a rock is a journey filled with discovery! Safe drilling!
Safety Precautions
When it comes to drilling into big rocks, doing it safely is super important. Just like how we wear helmets when riding bikes, there are ways to stay safe when working with rocks and tools. Ready to learn? Let’s dive in!
Protective Gear
Safety starts with what you wear! Think of it like putting on armor before a big adventure. Here’s what you’ll need:
Safe Drilling Practices
Once you’re all geared up, it’s time to drill! But first, remember these tips:
So, whether you’re a newbie or have drilled a hundred times, always remember safety first! With the right gear and smart practices, you can make awesome holes in rocks without any oops moments. Happy and safe drilling!
Common Drilling Mistakes
So, you want to drill a hole in a big rock? Great! But wait a minute. Do you know there are some common mistakes people make when drilling? These mistakes can break tools or even hurt you. Let’s learn what they are and how to avoid them!
Overheating the Drill Bit
Imagine running super-fast in the hot sun. You’d get tired and thirsty, right? Drill bits feel the same way when they get too hot! Overheating happens when we drill for too long without a break. This can dull or even break the bit.
Tip: Take short breaks when drilling. And if you can, splash a little water on the rock. This helps to cool the bit down.
Applying Excessive Pressure
Have you ever tried to open a stubborn jar lid and use all your strength? Sometimes, it might work, but other times, the lid stays shut, or worse, the jar breaks. The same thing happens with rocks. Pushing too hard can break the drill bit or the rock itself.
Tip: Let the drill do the work! Apply steady, gentle pressure. If you feel it’s too hard, it might be time to sharpen your bit or use a different one.
Ignoring Rock Grain
Rocks have lines and patterns, just like wood. These lines are called ‘grain’. Drilling against this grain can be super tricky and make the hole uneven.
Tip: Always check the rock’s grain before starting. If possible, try drilling in the direction of the grain, just like how you’d pet a cat in the direction of its fur!
Remember, everyone makes mistakes, even pros. But by knowing these common ones, you can avoid them and become a rock-drilling champ in no time! Go on and show that rock who’s boss!
Drilling into Giant Stones With Power-tools
Before you embark on the journey of drilling into large rocks, it’s crucial to gather the necessary tools and materials. Here’s a comprehensive guide to help you navigate the world of rock drilling.
Choosing the Right Tools
Drill: Selecting the appropriate drill is the first step. Two common options are:
Safety First: Precautions to Take
Step-by-Step Procedure
Common Mistakes to Avoid
Finishing Touches
Post-Drilling Activities
By following these guidelines, you’ll be well-prepared to tackle drilling into large rocks efficiently and safely.
Conclusion
Congratulations! You’ve now learned the ins and outs of drilling a hole in a large rock. Before you embark on your rock-drilling adventure, here are some final tips to keep in mind:
With these concluding tips, you’re well-equipped to tackle your rock drilling project successfully. So go ahead, grab your tools, stay safe, and have a blast creating holes in those large rocks!