If you’re looking for how to drill accurate holes in wood and can’t seem to find one, we have a new approach to get you what you need. You’ve been drilling for a long time, but there’s a whole lot more to learn. Making holes in wood seems easy but neither easy nor tough.
You need to know the approach to make it. In this blog, what you’ll learn will have you drill straight holes like a pro in no time. In this lesson, I am using an electric cordless drill to drill clean holes in a piece of wood. You can use a drill press with the help of the same tips.
In this post, we’ll walk you through the process of drilling precise holes in wood. We will cover frequent problems that individuals encounter when drilling and propose solutions to them. In addition, we will discuss the best drill bits for wood and how to choose the ideal one for your unique needs.
Get it Right the First Time: Wood Drilling for Accurate Holes
Preparation
Gather Your Tools
All right, let’s get the ball rolling. You wouldn’t go into a boxing ring without your gloves, would you? In the same vein, you need to have all your tools ready before drilling into that piece of wood. Here’s a quick checklist to make sure you’re all set:
- Drill: This could be a power drill or a hand drill.
- Drill Bits: Various sizes to match the holes you need.
- Measuring Tape: Precision is the name of the game!
- Pencil or Chalk: For marking your drilling spots.
- Clamps: To hold the wood securely in place.
- Safety Gear: More on this later, but you’ll definitely need some.
Types of Wood Suitable for Drilling
Wood comes in all shapes and sizes—and not to mention types! If you’re looking for accuracy, harder woods like oak and maple are often your best bet. They’re less likely to splinter and provide a cleaner hole. Softwoods like pine and cedar are easier to drill into but might not offer the same level of precision. So, pick your wood wisely!
Tool Selection
Power Drills vs Manual Drills
The age-old debate: power drill or hand drill? Look, if you’re aiming for efficiency and have a bunch of holes to drill, a power drill is your best friend. On the flip side, a manual hand drill offers a level of control that’s hard to achieve with a power drill, especially for delicate jobs. So weigh the pros and cons and choose what fits your needs best.
Types of Drill Bits
The drill bit is like the lead singer in a rock band—front and center! There are several types to choose from:
- Twist Bits: Good for most general-purpose drilling.
- Spade Bits: Ideal for larger holes.
- Forstner Bits: Perfect for clean, precise holes.
- Masonry Bits: Not for wood, but just so you know, these are for, well, masonry.
A craftsman is only as good as their tools. If you’re serious about woodworking, check out our guide on the Best Drill Bits For Woodworking: Reviews, Guide. It’s packed with information that can help you pick the best bits for the job, ensuring you get those pristine, accurate holes every time.
Safety Measures
Personal Protective Equipment (PPE)
Safety should never take a backseat. Here’s what you’ll need:
- Safety Glasses: To protect those peepers.
- Ear Protection: Drilling can get loud!
- Gloves: For a good grip and added protection.
Safe Drilling Practices
So you’re itching to get started? Hold your horses! Make sure your work area is clutter-free and well-lit. Always keep your hands away from the drill bit, and for heaven’s sake, don’t rush. Take it slow, apply consistent pressure, and you’ll be just fine.
The Drilling Process
Step-by-Step Guide
- Mark the Spot: Use your pencil or chalk to mark exactly where you want to drill.
- Secure the Wood: Clamp it down to make sure it doesn’t move during drilling.
- Select the Bit: Choose the appropriate drill bit based on the size and type of hole you want.
- Fit the Bit into the Drill: Make sure it’s tightly secured.
- Align the Drill: Position it so it’s perpendicular to the wood.
- Drill a Pilot Hole: A smaller hole that guides the main one. (Optional but helpful!)
- Drill the Main Hole: Start drilling by applying steady, even pressure.
- Clean the Hole: Remove any wood debris for a clean finish.
Types of Holes
So, you’ve got the basics down pat, but here’s the thing—there’s more than one way to drill a hole in wood. Whether you’re looking to sink a screw or make a decorative impression, the kind of hole you drill can make all the difference. Let’s delve into some of the most common types of holes you might encounter in your woodworking projects.
Pilot Holes
Think of pilot holes as the appetizers before the main course. Small but vital, a pilot hole guides the larger drill bit that will create your actual hole. These are especially useful when working with hardwoods or when you need a high level of precision. Trust me, a pilot hole can be a real game-changer; it reduces the chance of the wood splitting and makes it easier to align multiple holes. It’s like GPS for your drill bit!
Through-Holes
Ah, the classic! A through-hole is exactly what it sounds like—a hole that goes completely through the piece of wood. This is your go-to for most general-purpose drilling tasks. Whether you’re hanging a picture or building a treehouse, through-holes are your bread and butter. They are straightforward to make: keep drilling until you break through the other side of the wood. Be sure you have a backer board underneath to prevent a tear-out at the exit point!
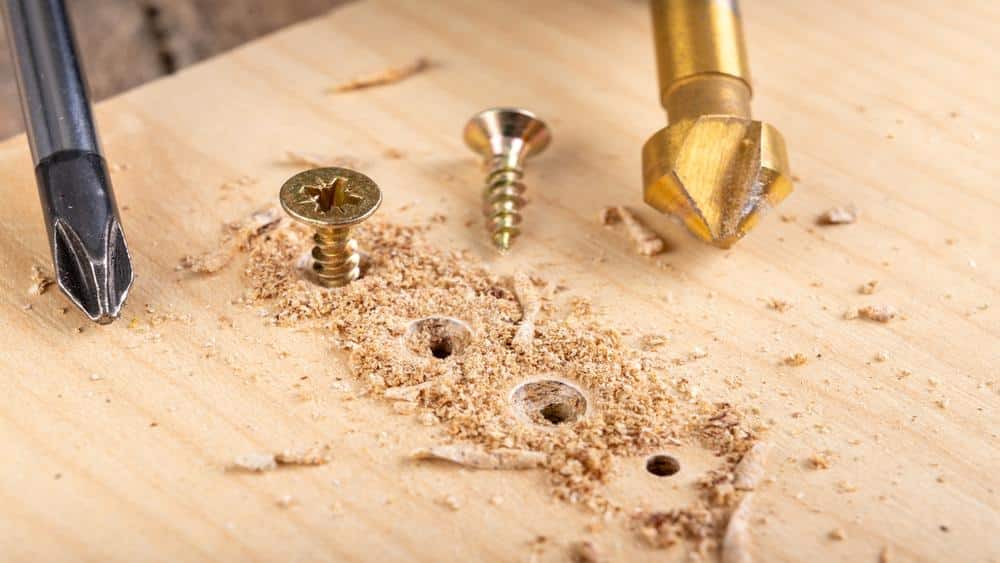
Counterbore
Getting fancy, aren’t we? A counterbore is a hole that has a wider opening at the top and narrows down as it goes deeper. This allows you to sink a screw below the surface of the wood and then cover it with a plug or filler for a sleek, seamless look. A counterbore is really two holes in one: a larger, shallower hole that accommodates the head of the screw and a deeper, narrower hole (basically a pilot hole) for the screw body. It’s like a nesting doll but for holes!
There you have it! Whether you’re laying the groundwork with a pilot hole, going all the way through with a through-hole, or adding a professional touch with a counterbore, knowing your hole types can elevate your woodworking game to the next level.
Advanced Techniques
Let’s delve into some advanced techniques that could make you the talk of the woodworking town—or at least, the hero of your DIY world.
Drilling at Angles
Drilling at angles is a technique that requires both skill and the right set of tools. You should do this when creating joints or when working on a piece that has to fit into an awkward space. Here’s how you can pull it off:
- Make a Jig: A jig will help guide your drill at the desired angle. It’s like training wheels for angle drilling.
- Mark the Angle: Use a protractor or an angle finder to mark the exact angle you want to drill at on your jig.
- Secure the Jig: Use clamps to secure the jig to the piece of wood.
- Align the Drill: Line up your drill bit with the angled path on the jig.
- Slow and Steady: Start the drill at a low speed to ensure you’re staying on the path.
- Increase Speed: Once you’re confident that the drill bit is correctly aligned, you can ramp up the speed to make the hole.
Remember, patience is key when drilling at angles. You’ll need a steady hand and even steadier nerves.
Drilling Large Holes
When it comes to making a big impression, size does matter—at least for holes! Drilling large holes requires a different approach and, of course, different tools. Here’s the lowdown:
- Choose the Right Bit: For large holes, spade bits or hole saws are your go-to choices. The latter is especially useful if you’re looking for a very clean, large hole.
- Slow Down the Drill: Lower speeds are advisable to maintain control.
- Pilot Hole First: You know the drill—start with a smaller pilot hole to guide the larger bit.
- Use a Backer Board: To prevent splintering on the exit side, place a backer board beneath the wood.
- Go Halfway First: Drill from one side until you’re about halfway through.
- Finish from the Other Side: Flip the wood and complete the hole from the other side for a cleaner finish.
When you’re drilling large holes, it’s all about control and finesse, not brute force. So take your time, and you’ll get that perfect hole, large enough to make anyone proud.
Bit Maintenance
A well-maintained drill bit not only lasts longer but also ensures that you get those pristine holes every time you drill. Here are some tips on how to keep your drill bits in tip-top shape.
Cleaning
Over time, drill bits can collect resin, dust, and other debris that may affect their performance. Here’s how you can get them sparkling clean:
- Soak in Soapy Water: A simple soak in warm, soapy water can loosen most of the grime. Let it sit for about 10-15 minutes.
- Brush It Off: Use a wire brush or an old toothbrush to scrub away any stubborn residue.
- Rinse and Dry: Give the bits a good rinse, and then dry them thoroughly to prevent rust.
- Optional: Solvent: For really stubborn grime, consider using a solvent like acetone, but make sure to handle it with care and in a well-ventilated area.
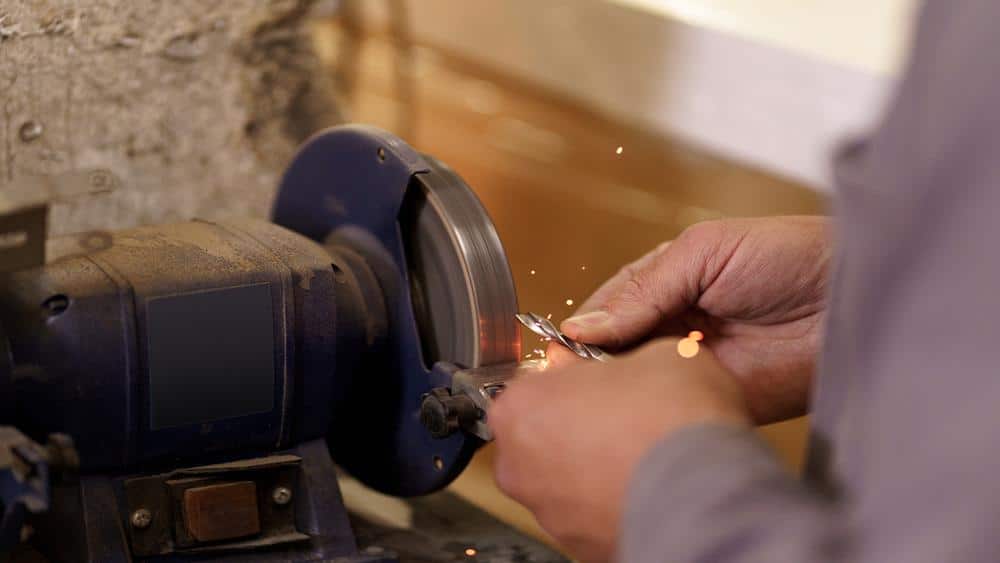
Sharpening
A dull drill bit can even damage your wood. So, here’s how to keep your bits sharp and ready for action:
- Inspect the Bit: Hold it up to the light and check the cutting edges. If they look rounded or have tiny chips, it’s time for some sharpening.
- Use a Sharpening Device: There are specialized drill bit sharpeners that make the job a breeze. If you’re serious about your drilling, investing in one might be a good idea.
- Hand Sharpening: Alternatively, you can also use a bench grinder for the job. The technique requires some practice, though, so only dive in if you’re confident.
- Test the Bit: After sharpening, test it out on a scrap piece of wood. If it sails through like a hot knife through butter, you’ve done it right.
Bit maintenance might not be the most charming part of woodworking, but it’s an essential one. A clean, sharp bit is the secret sauce to perfect holes every single time.
Common Mistakes and How to Avoid Them
But when it comes to drilling holes in wood, some errors can set you back both time and materials. Don’t sweat it, in any case. Even the best of us have been there. Let’s nip those bad habits in the bud and talk about some common mistakes and, more importantly, how to sidestep them.
Rushing the Job
The Mistake: You’re in a hurry, so you press down hard and fast on the drill.
How to Avoid It: Easy there, speedster! Drilling is a game of finesse, not speed. Rushing could lead to splintering or even breaking the bit. The key is consistent, moderate pressure. It’s not a race!
Using the Wrong Bit
The Mistake: You grab the first drill bit you see and go to town.
How to Avoid It: Always choose the right bit for the job. Whether it’s a spade bit for large holes or a twist bit for general-purpose drilling, the correct bit makes all the difference. It’s like using the right knife in the kitchen—each one has its specialty.
Forgetting Safety Gear
The Mistake: You start drilling without putting on any safety gear.
How to Avoid It: Always wear proper Personal Protective Equipment (PPE). Goggles protect your eyes, and ear protection can go a long way. Safety first, folks!
Neglecting to Mark Your Depth
The Mistake: Drilling without knowing how deep you need to go.
How to Avoid It: A piece of painter’s tape around your drill bit can serve as a depth indicator. Alternatively, some drills come with depth stops. That way, you’ll avoid going deeper than you intended. It’s like having training wheels for drilling.
Ignoring Wood Grain
The Mistake: Drilling against the wood grain, causing splintering.
How to Avoid It: Always pay attention to the wood grain. Drilling in the direction of the grain minimizes splintering and makes for a cleaner hole. Think of it as going with the flow, quite literally.
Overlooking Bit Maintenance
The Mistake: You never clean or sharpen your drill bits.
How to Avoid It: A well-maintained bit not only lasts longer but also performs better. So, don’t skimp on the bit maintenance. Remember, a happy bit is a clean, sharp bit!
Look, nobody’s perfect, but being aware of these common pitfalls can save you many headaches down the line. Keep these tips in your toolbox, and you’ll be setting yourself up for drilling success.

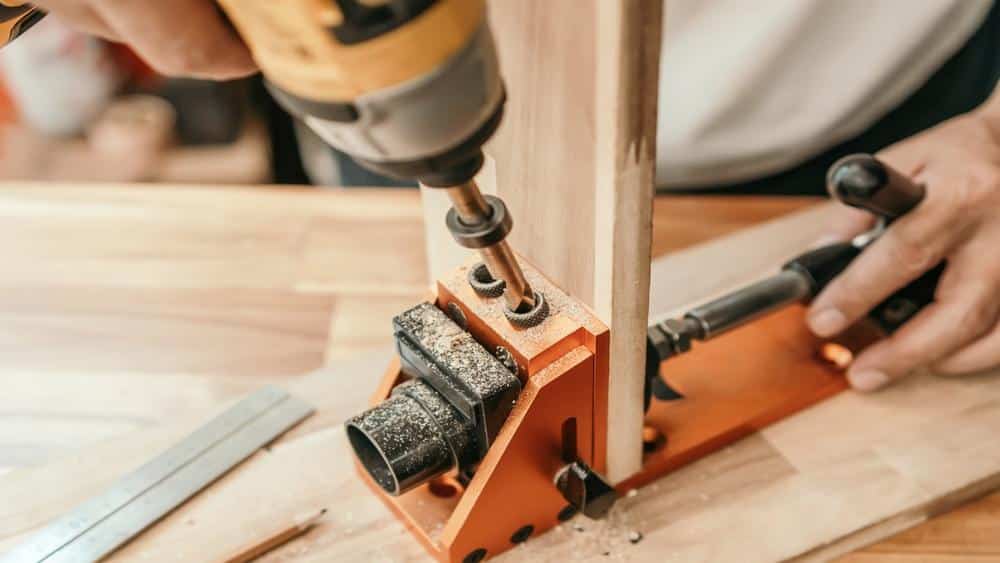
How to use a pocket hole jig kit to drill accurate holes in wood
Drilling accurate pocket holes in wood requires precision and the right tools. Here’s a concise guide:
- Select the Right Jig: Use a pocket hole jig, a tool specifically designed for this purpose. It ensures the drill bit is held at the correct angle and keeps the hole consistent.
- Mark Your Wood: Mark the spot where you want your pocket hole before drilling. Ensure the location won’t interfere with other joinery or structural elements.
- Clamp the Jig: Secure the jig to the wood piece using clamps. This prevents any movement while drilling and guarantees a precise hole.
- Choose the Correct Drill Bit: Pocket hole jigs typically come with specialized drill bits. Ensure the bit is sharp and undamaged.
- Set Drill Bit Depth: Adjust the collar on the drill bit to control the hole’s depth. This ensures the hole doesn’t penetrate through the opposite side of the wood.
- Drill Steadily: Insert the drill bit into the jig guide hole. Using a drill, start slowly and steadily. Maintain a consistent speed, applying even pressure until you reach the desired depth.
- Clear Sawdust: Frequently remove the drill to clear away sawdust. This helps prevent the drill bit from overheating and ensures a clean hole.
- Finish Up: Clean out any remaining debris from the pocket hole once drilled. It’s now ready for screws and joining.
Final Words
After learning how to drill accurate holes in wood, it will be easy for you to drill them in your regular DIY project. Just practice a couple of times, and you will be like a pro.